Wallpaper Engine is a handy app you can use to create your own animated and interactive wallpapers for your Windows desktop. One of the features this program has to offer is the ability to add a sound to a wallpaper of your choice. This entire process should take you less than 10 minutes.
In this article, we’ll show you how to add sound to a wallpaper using Wallpaper Engine.
How to Add Sound in Wallpaper Engine
Wallpaper Engine lets you use live wallpapers on your Windows desktop. You can animate your own images or choose a wallpaper from the program’s library. It’s even possible to add sound to an image and use it for your desktop wallpaper.
This is otherwise called the audio visualizer tool. It’s an advanced feature, so setting it up might take a little bit of work. To make it easier for you, we’ve divided the process into four parts. You’re also going to need to use a third-party website, but we’ll get to that later.
Once you install Wallpaper Engine, it will be automatically pinned to your taskbar. To launch it, this is what you’ll need to do.
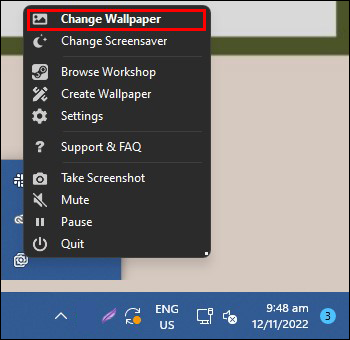
- Right-click on the Wallpaper Engine icon in the bottom-right corner of the screen.

- Choose “Change Wallpaper” from the menu.

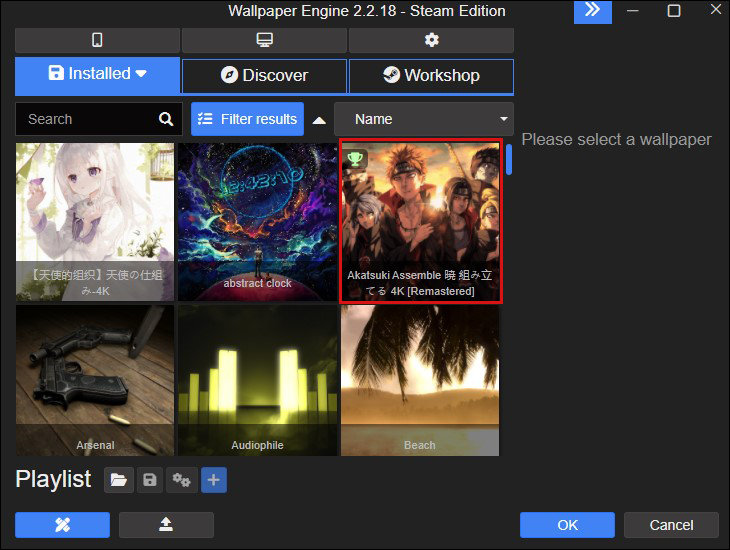
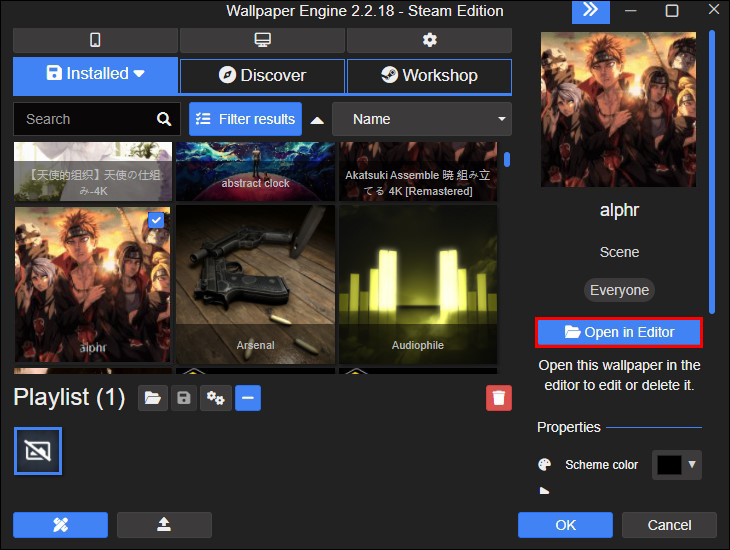
- Click on the “Installed” tab on the Wallpaper Engine window.
- Locate the wallpaper you want to add sound to.
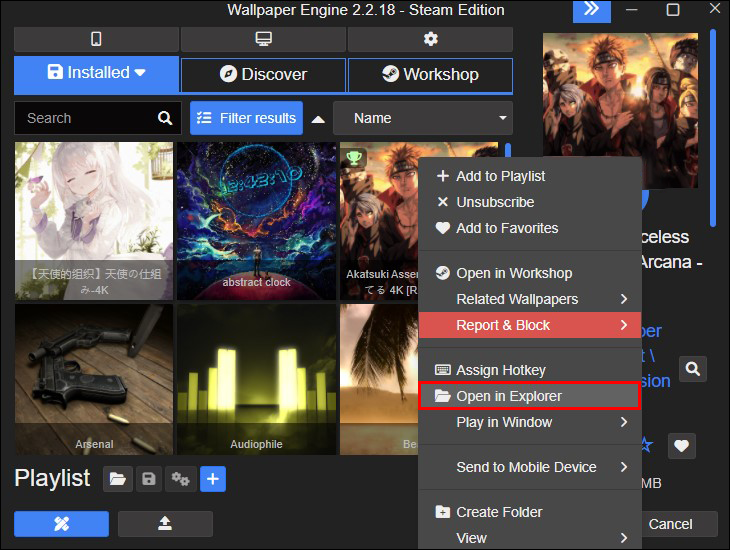
- Right-click on the wallpaper and choose “Open in Explorer.”
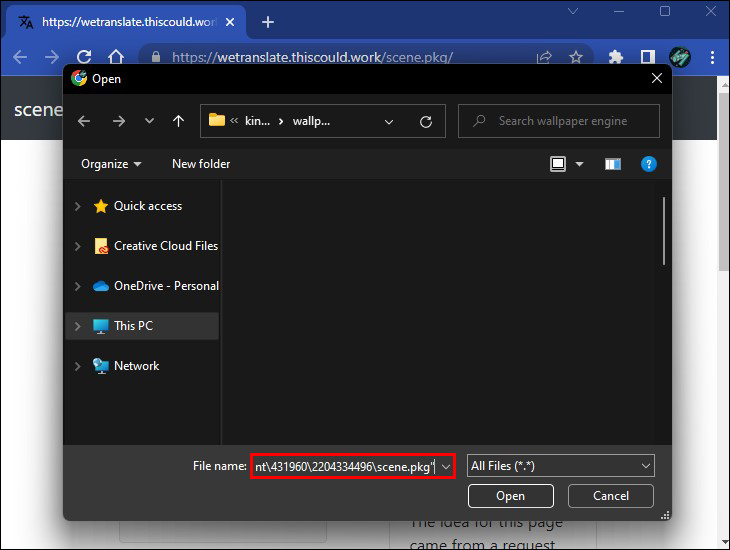
- Copy the location of the file in File Explorer.

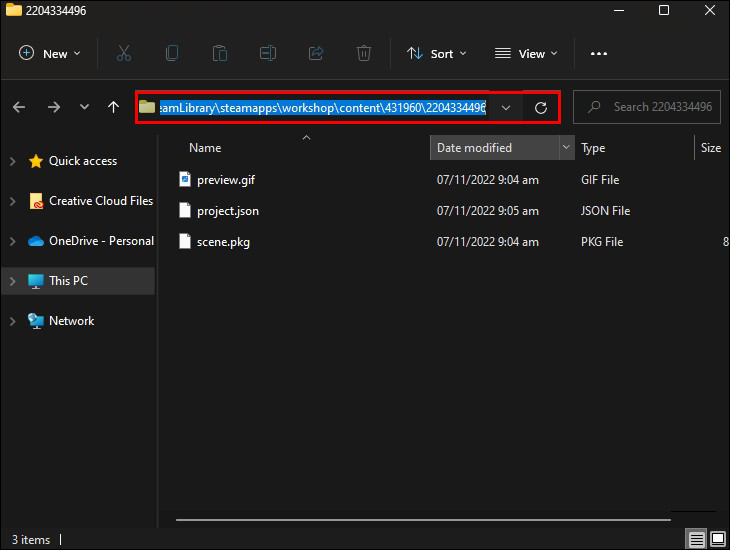
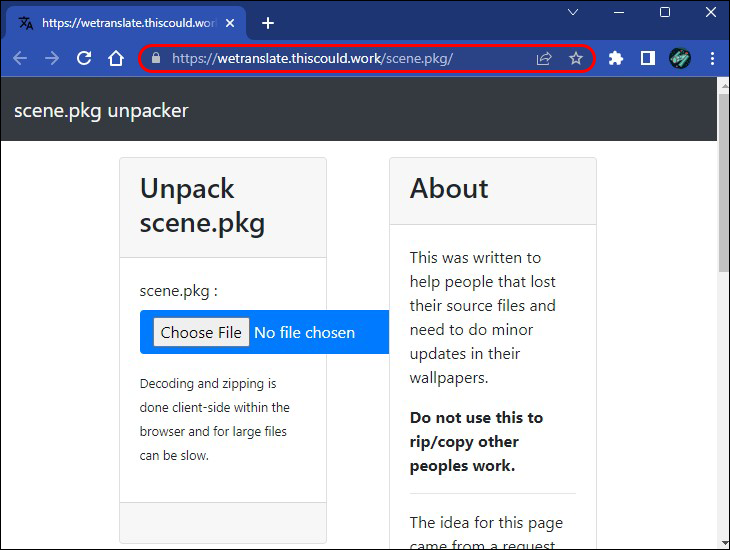
This was the first part of the audio visualizer installation process. Make sure not to turn off the Wallpaper Engine window. The next step is to unpack the “scene.pkg” file, which is at the bottom of the File Explorer. This is what you’re going to do.
- Open this link. This is the third-party website we’ll use to unpack the zipped file.
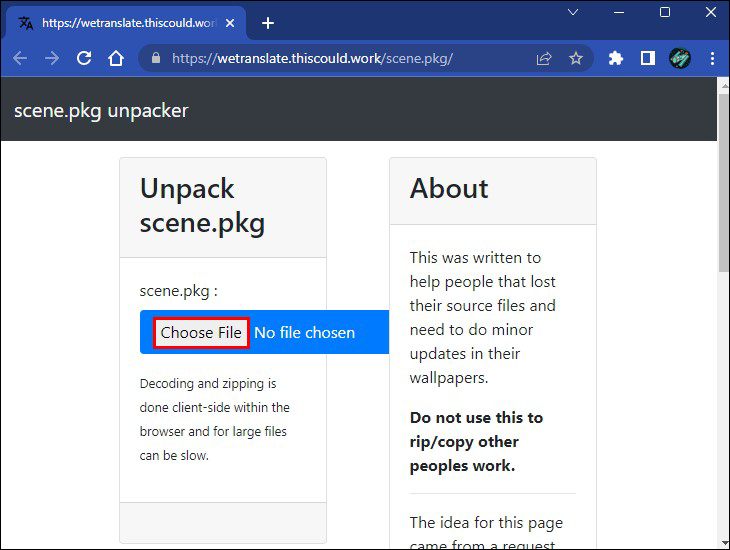
- Click on the “Choose File” button in the upper-left corner.
- Paste the location of the “scene.pkg.” file into the box.
- Go to the “Download” option.
This website will unpack the scene file, which you’ll need in order to add sound to Wallpaper Engine.
Now it’s time to go back to the Wallpaper Engine window. Make sure the wallpaper you want to use is still selected. This is what you should do next.
- Go to the “Wallpaper Editor” icon at the buttom left corner.
- Click on the “Use a Template” button on the new window.
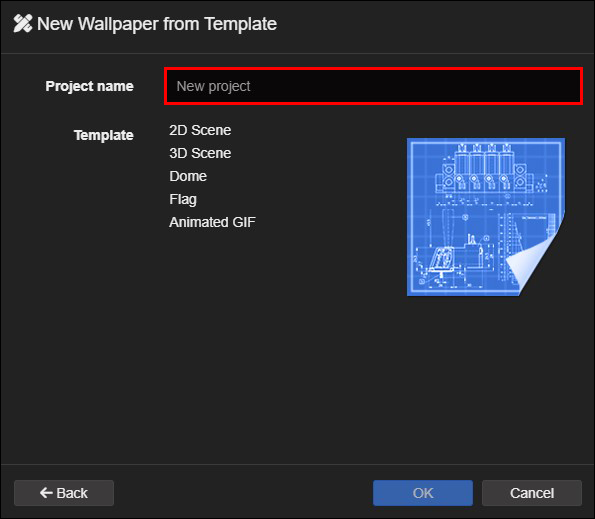
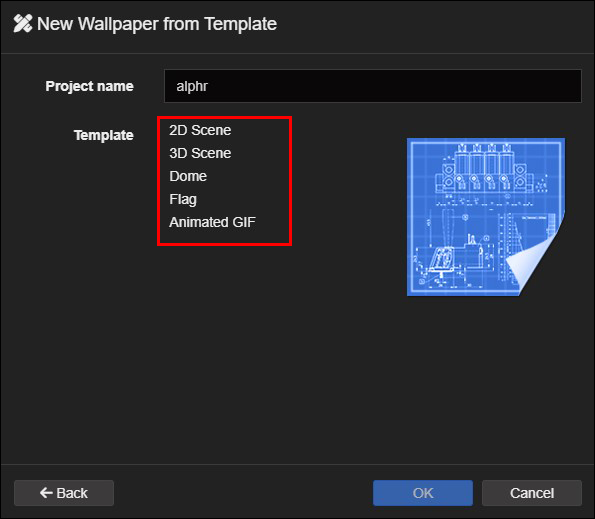
- Type in the name of the new project.
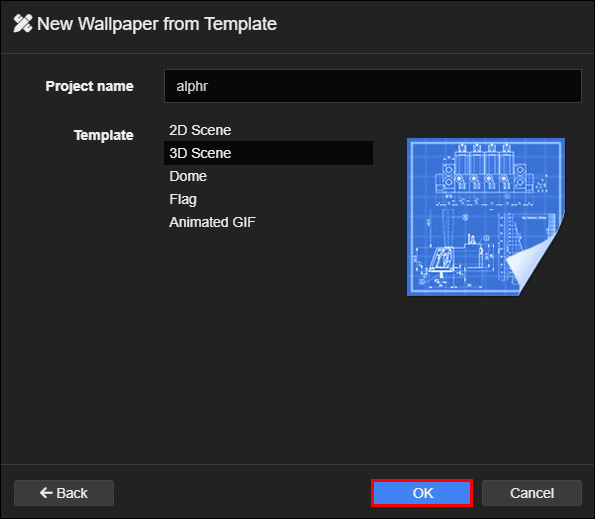
- Choose a template. Your options are “2D scene,” “3D scene,” “Dome,” “Flag,” and “Animated GIF.”
- Click on the “OK” button.
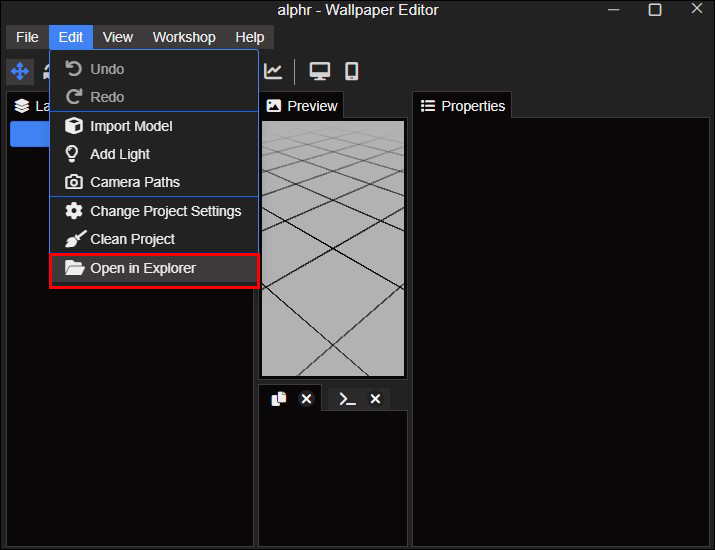
- Navigate to the “Edit” tab in the upper-left corner of the new window.
- Proceed to “Open in Explorer” again.


This next step might sound a bit complicated, but you basically have to delete all the files from the File Explorer folder. These will be new files from the project you’ve just created. The point is to replace them with the original files. This is done by extracting the “Scene.zip” folder you downloaded from that third-party app. Once you do this, copy the extracted files and paste them into the new project folder.
We’re finally getting to the last part of the audio visualizer process. When you go back to the Wallpaper Engine app, you’ll see that there are two copies of the same wallpaper. Follow the steps below to complete the process.
- Click on one of the wallpapers.
- Go to “Open in Editor” on the right pane.
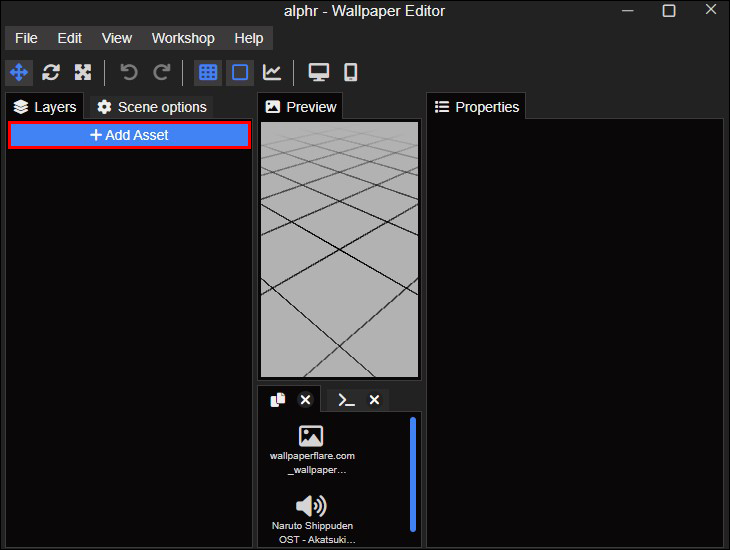
- Navigate to the “Add Asset” option in the top-left corner of the editor.
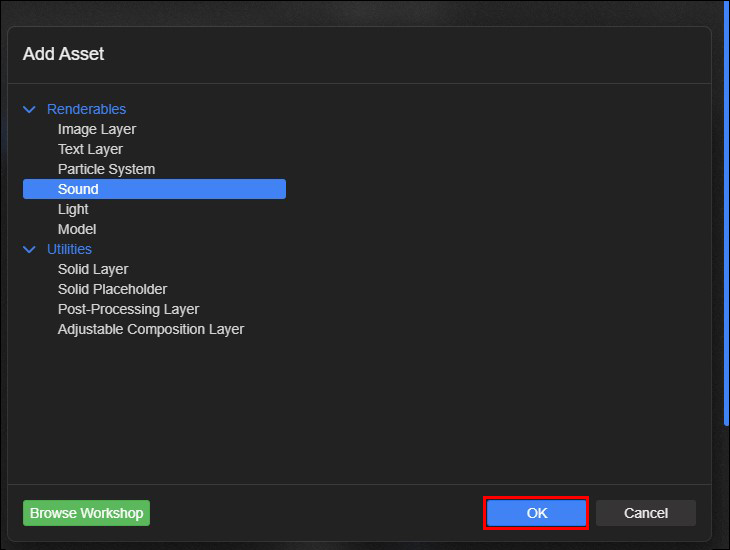
- Choose “Sound” from the list of options and then the “OK” button.
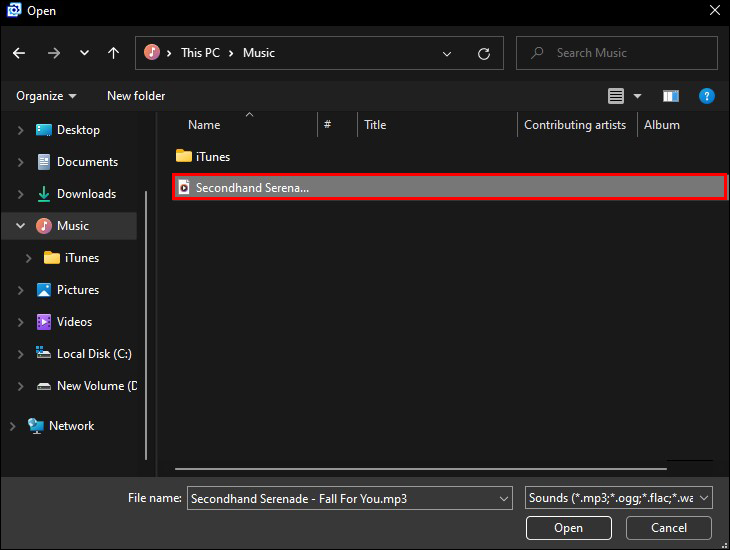
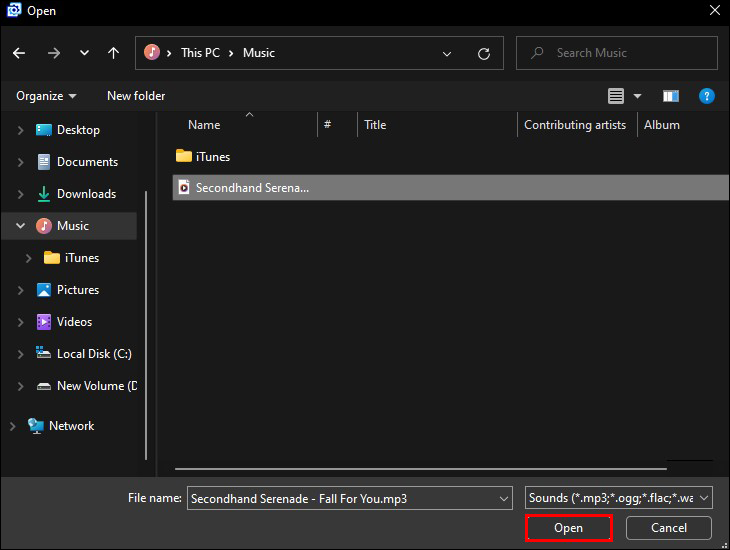
- Find the sound you want to use on your computer.
- Click on “Open.”
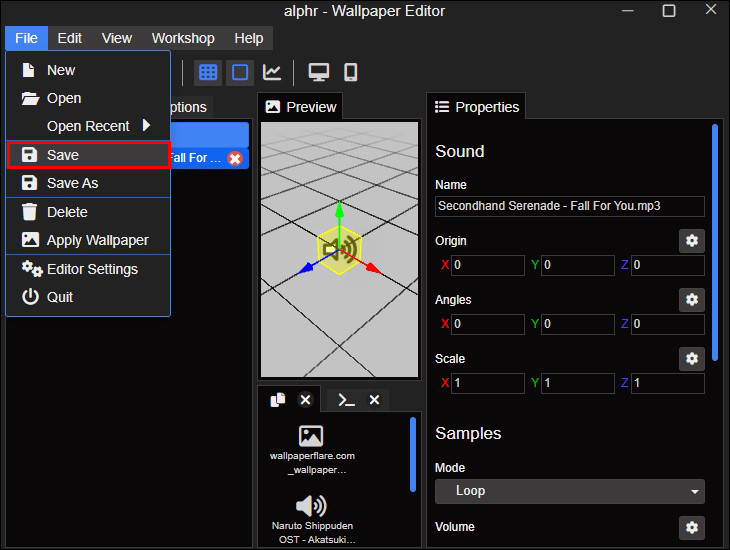
- Select the “File” tab in the editor.
- Choose “Save your project.”

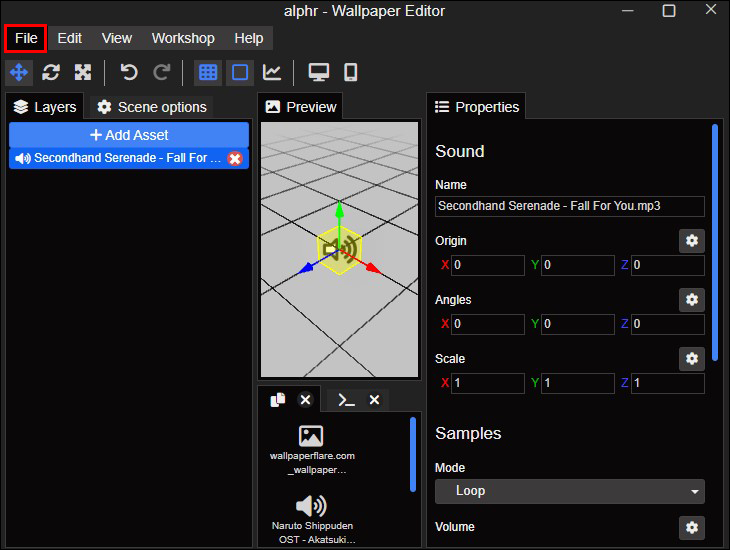
Now that you’ve added sound to a wallpaper, you can edit it if you want. For example, you can adjust the volume, the alignment of the wallpaper, the playback rate, and its position. When you’ve finished editing the wallpaper, choose “Ok.” The wallpaper will immediately be added to your desktop, and you should hear the sound as well.
Become a Wallpaper Engine Pro
The audio visualizer tool seems complicated to use, but once you figure out how it’s done the first time, it will take you half as long next time. You’ll be able to change wallpapers and the music that goes with them whenever you want.
Have you ever tried to add sound to a wallpaper using Wallpaper Engine before? Did you use the same method from this guide, or did you find an alternative way? Let us know in the comments section below.
Disclaimer: Some pages on this site may include an affiliate link. This does not effect our editorial in any way.


