Are you looking to resize your images on a Mac? Maybe you’re struggling because images don’t always come in convenient sizes.
If so, you’ll be relieved to learn that there’s a solution already featured on your device.
In this article, we’re going to batch resize images on a Mac using a variety of tools.
What Is Resizing?
When you resize an image, you alter its size by decreasing or increasing the total number of pixels. However, resizing is synonymous with downsizing an image because resizing to achieve a larger image typically results in an unsightly, blurry-looking image. For instance, you could have an 800 pixels width by 640 images and downsize it to 480 pixels width by 300 height.
The good thing about resizing it is that you don’t cut anything out. In other words, you don’t change the amount of data in the image.
Why Would You Want to Resize Your Images?
Image size matters. And that’s particularly true if you intend to load your images to the internet for display on a website. Larger images take longer to load on a web page. No-one wants to watch as an image slowly, painfully, loads.
Even if you want to use your images in a PowerPoint presentation, you’ll need to ensure that you can fit as many images as you’d like on your slide deck and still not end up with a huge file that will take ages to present.
Resizing also comes in handy when you want to send images via email. On Gmail, for example, you can’t mail a file larger than 25MB. You can only send a file larger than that using Google Drive.
How to Batch Resize Images on a Mac
Resizing hundreds or thousands of images can take hours if you decide to work on one image at a time. Luckily, you can easily batch resize your images on a Mac. And the best thing about it is that you don’t even need a third-party tool to do it.
Mac computers come with two preinstalled image resizing software that are easy to work with: Preview and Automator. Let’s see how each software works.
How to Batch Resize Images on a Mac With Preview
Preview is a powerful yet easy-to-use software that’s designed to resize multiple images in one fell swoop. Here’s how it works:
- In Finder, click on all the images you’d like to resize and then open them with the Preview app. To do so, select all of the images, then right-click, and then select “Open with” and click on “Preview.” At this point, Preview will display all the images selected on the left-hand side thumbnail drawer. You can scroll through the list to view specific items in the main panel. You can even refine your images further by removing any items you may have selected by mistake.

- In Preview, select all the images you’d like to batch resize from the left side thumbnail drawer. To do so, click on “Edit,” and then “Select All.”

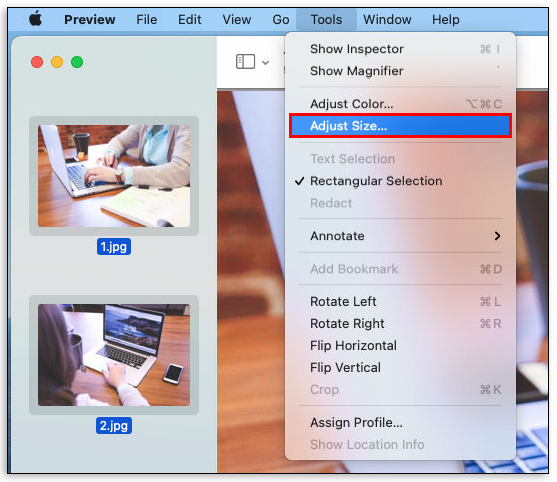
- Click on “Tools” and then click on “Adjust Size.” This will launch a new window where you’ll be prompted to enter various details about the images.
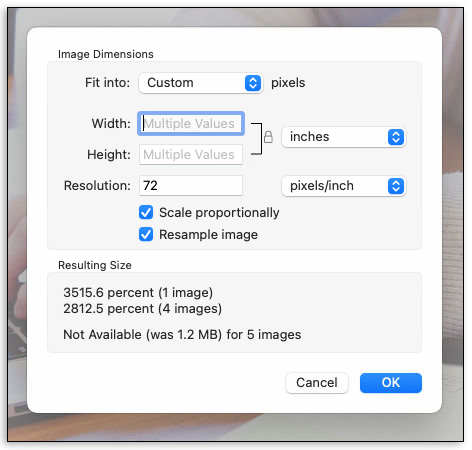
- Proceed to enter your desired width and height values. The app also allows you to select the most common, predetermined dimensions. To use these, click on “Fit into,” and then select the dimensions you want from the dropdown box. If you wish to resize only one dimension, say the height, be sure to select “Scale Proportionally.” Otherwise, you’ll end up with images that are scaled disproportionally.
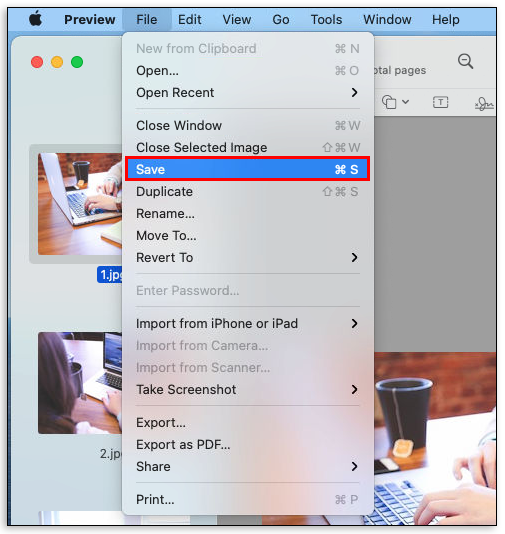
- Click on “File” at the top and select “Save All.” The images in Preview will instantly resize to your desired resolutions. But if you want to retain the original images as they appear on the left thumbnail drawer, choose “Export” or “Save as.”

And voila! You’ve got newly created images that you can share with family and friends or upload to a website.
How to Batch Resize Images on a Mac With Automator
Automator allows you to resize images in just a few clicks even if you don’t have coding skills. If you haven’t used Automator before, don’t worry. We’re going to walk you through the process step by step. Here’s what you need to do:
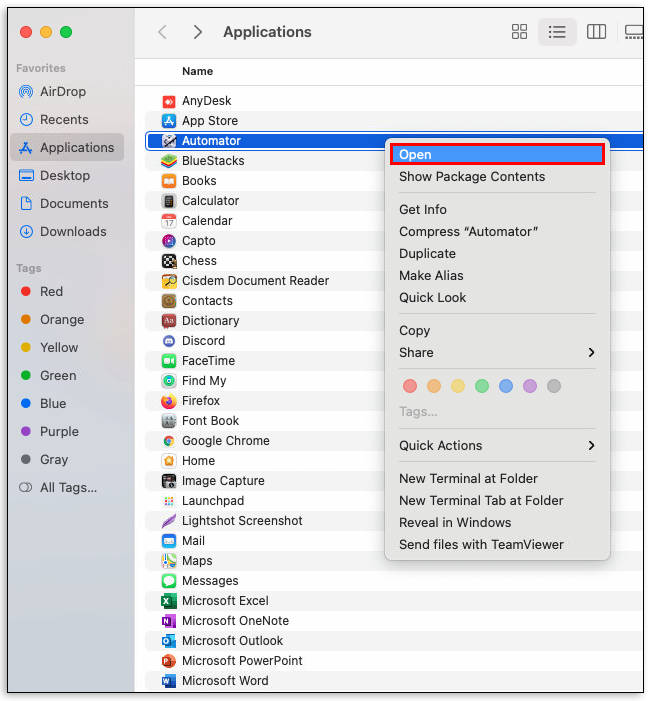
- Open the applications folder and launch Automator.
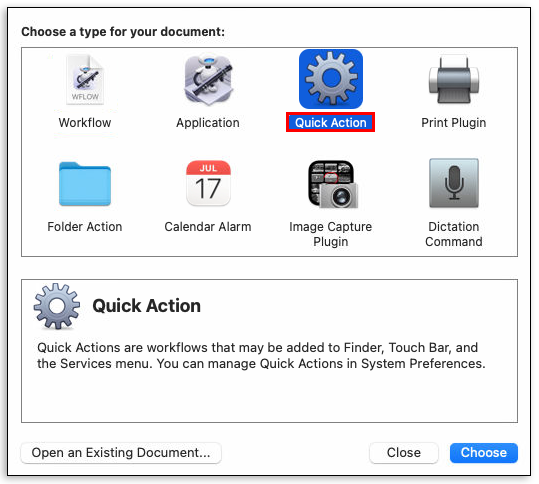
- From the resulting menu, choose “Service/Quick Action” In Automator, services are programs that you can run to do various tasks, including deleting files, setting desktop pictures, and resizing images.
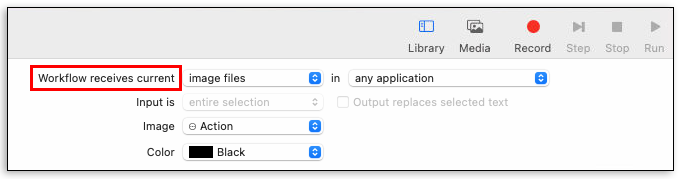
- Click on “Workflow receives current.”
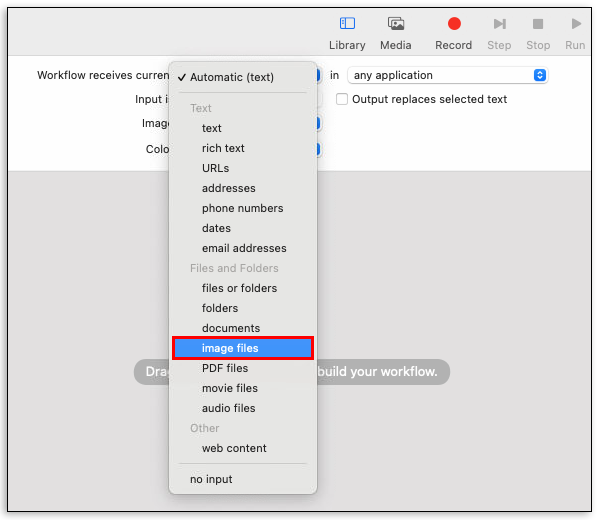
- From the resulting dropdown menu, select “Image Files.”
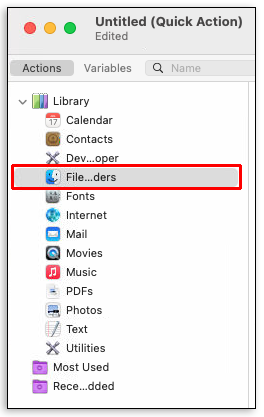
- In the sidebar, click on “Files and Folders.”
- Press and hold on “Get Specified Finder Items” and then drag this to the workflow pane.
- In the sidebar, click on “Photos” and then drag “Scale Images” to the workflow pane.
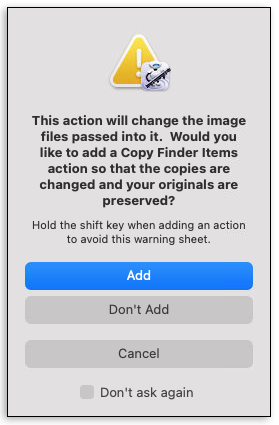
- At this point, the application will ask you if you’d like to save the original files in a separate folder by adding a “Copy Finder Items Action.” If you don’t wish to do that, simply click on “Don’t Add.”
- Enter the desired size value in the scale images action panel.
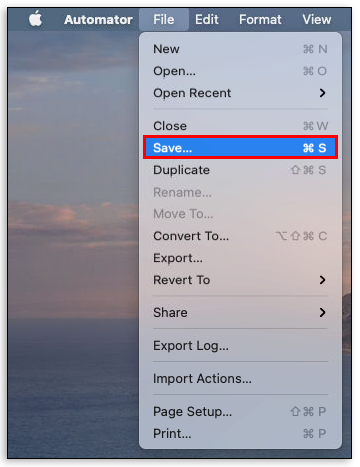
- In the menu bar, click on “File” and then select “Save.” You can come up with any name for your new service. For example, you could name it “Image Resizing.”
- Click on “Save.”


After successfully creating a resizing service, you can use it to resize images as many times as you wish. You only need to click open “Finder” and open the service by clicking on its name.
How to Reduce the Size of Multiple JPEGs on a Mac
If you work with a lot of JPEG images, you may want to resize to a consistent size to make sure that they fit your blog or website. Here’s how you can do it:
- Select all the images you’d like to resize and then open them with the Preview app.
- In Preview, click on “Edit,” and then click on “Select All.”
- Click on “Tools” and then select “Adjust Size.”
- Proceed to enter your desired width and height values.
- Click on “File” at the top and select “Save All.” The images in Preview will instantly resize to your desired resolutions.
How to Batch Resize Photos on Mac Using Lightroom
Lightroom is your go-to software when you need to output multiple images at a fixed size. You’ll find it extremely useful when you have a large shoot coming up and you’d like to create extra space in your camera cards. Here’s how you can batch resize photos on Mac using Lightroom:
- Open the applications folder and Launch Lightroom.
- Import the photos you’d like to resize.
- Within Lightroom, make any other adjustment you’d like to your photos before resizing.
- Select all the photos you’d like to resize.
- Click on “File” in the top menu and then select “Export.”
- Choose a location where you’d like to send your photos.
- Choose a batch name for your exports.
- Limit pixel size by checking the “Resize to Fit” box. Then proceed to enter your desired width and height.
- Click on “Export.”
All your resized photos will then be sent to your chosen location.
Additional FAQs
How Do I Reduce the Size of Multiple Images at Once on Mac?
You can batch resize images on Mac using Preview or Automator. Both applications come preinstalled on your computer, and all you need to do to open them is launch the applications folder.
How Do I Convert Multiple JPEGs on My Mac?
Preview can convert JPEG files into many file types, including PDF, PNG, and PSD.
To do so:
• Select the image you’d like to convert and then open them with the Preview app.
• Click on “File” in the Preview app and then select “Export.”
• Click on “Format” and then choose the desired file type.
• Choose a name or new location for the converted file and then click on “Save.”
If you wish to convert more than one file at once, open Finder, select all the images, and then right-click and select “Open With” and then select “Preview.” From this point, follow the steps above to complete the process.
How Do I Resize Multiple Images on My Mac at Once?
To resize multiple images on Mac at once, you need to open them with Preview and then do the following:
• Click on “Tools” in the top menu and then click on “Adjust Size.”
• Proceed to enter your desired width and height values.
• Click on “File” at the top and then choose “Save All” from the dropdown menu
The Right Tools to Resize
Resizing images comes with many benefits, and if you own a Mac, you’ve got multiple tools to do it. Although using the inbuilt resizing tools may be a bit challenging at first, the entire process is easy to master after a few rounds.
What’s your experience with Preview? Between Preview and Automator, which one are you more comfortable working with?
Let’s engage in the comments section below.
Disclaimer: Some pages on this site may include an affiliate link. This does not effect our editorial in any way.