Image-editing programs are an excellent tool for people to express their creativity. Whether you do this as a hobby, or it’s your job to create spectacular visuals, you may have stumbled upon GIMP.
This free tool caught the attention of many a long time ago. It’s free and provides you with plenty of features to make your ideas come to life. From basic options to more complicated ones, you can do so much with this program.
Why don’t we start with something as simple as changing the background color? Read on to learn how to do this.
Changing the Background Color in GIMP
There are several ways to replace the background color in this program. Which one you’ll choose depends on how complex the background of your image is – if it contains one shade or more. You may need to have a steady hand to follow these instructions, but it’s something you can get done in less than five minutes.
The Alpha Plug-In
The alpha plug-in is an excellent and straightforward way to replace one background color with another. It’s convenient when you’re working with logos or similar simple images. It works well with one-color backgrounds and provides high precision, without any remaining pixels of the previous color.
Here’s what to do:
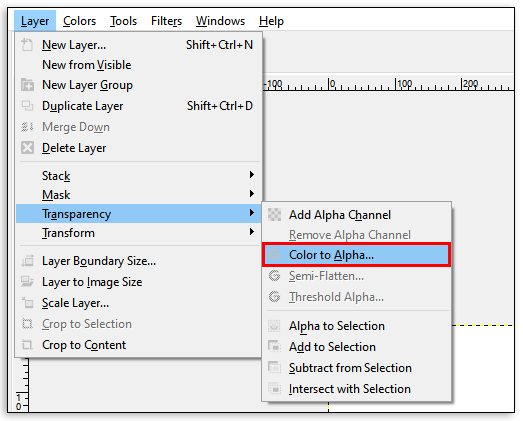
- Navigate to the taskbar at the top and select Filters.
- From the drop-down menu, choose Colors, then Color to Alpha.

- Right-click on the image – it should be grayed out. (If not, try to upgrade your GIMP to a newer version)

- Select the background colors with the Color Picker Tool you’ll choose from the menu on the left.
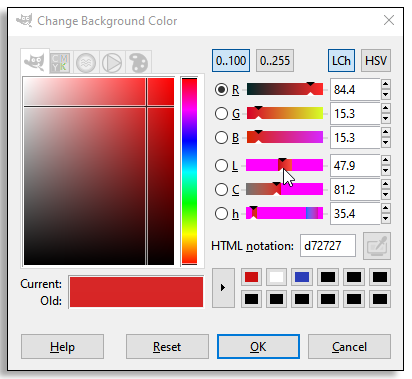
- A window with the selected background colors will pop up. Drag the existing background color from this pop-up window to the Color to Alpha plug-in. If this doesn’t work for you, right-click on the color field in the Color to Alpha window and click on Foreground.
- Once the color in the plug-in is the one you’re trying to replace, select OK. The changes will apply, and you shouldn’t see the old background color anymore.
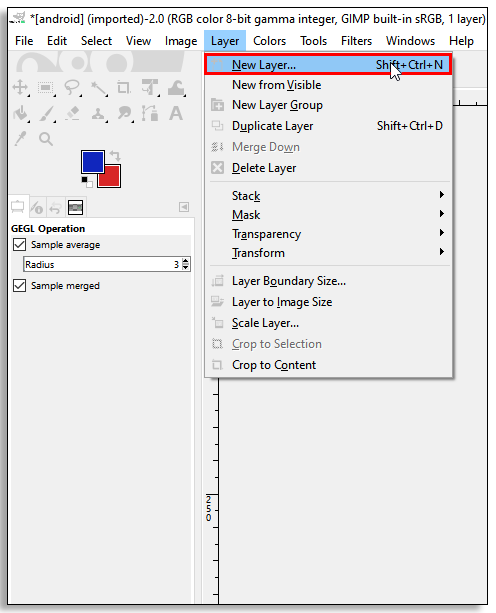
- Select New Layer from the Layer menu in the taskbar and choose a new color.
- Click on Lower Layer, and that’s it! The new background color should be in its place now.


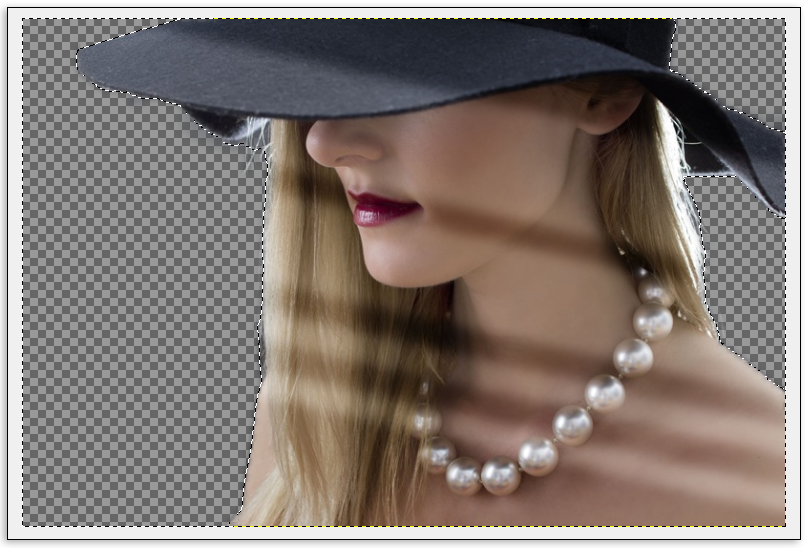
The Foreground Select Tool
The following method works just as well, especially if there’s a clear line between the object and the background.
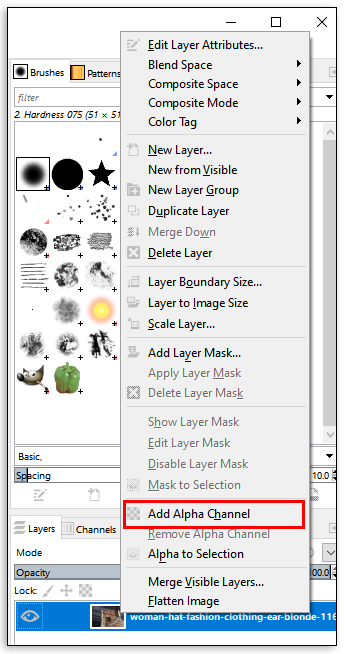
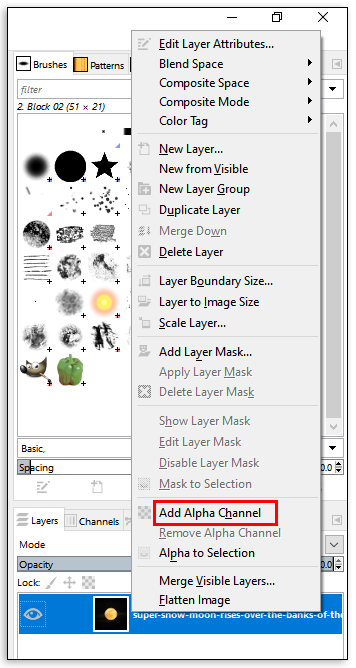
- Open the desired image and then right-click on the layer.
- Choose Add Alpha Channel.
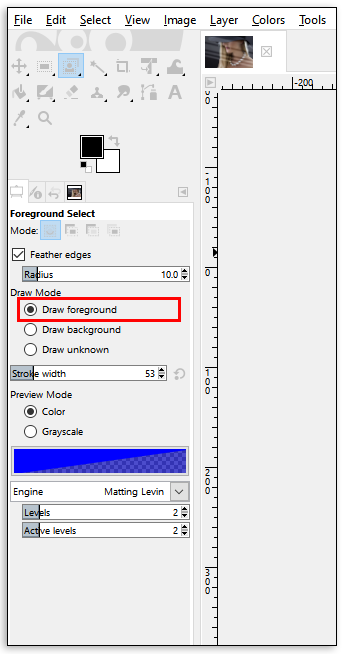
- From this menu, choose the Foreground Select Tool.
- In this step, you don’t need great precision. You only need to roughly outline the foreground object, but make sure you get as close as possible to the borders.
- Press Enter.
- Choose brush size and paint the foreground object, but interrupt the line. Include all the colors and shades contained in the picture.
- Press Enter.
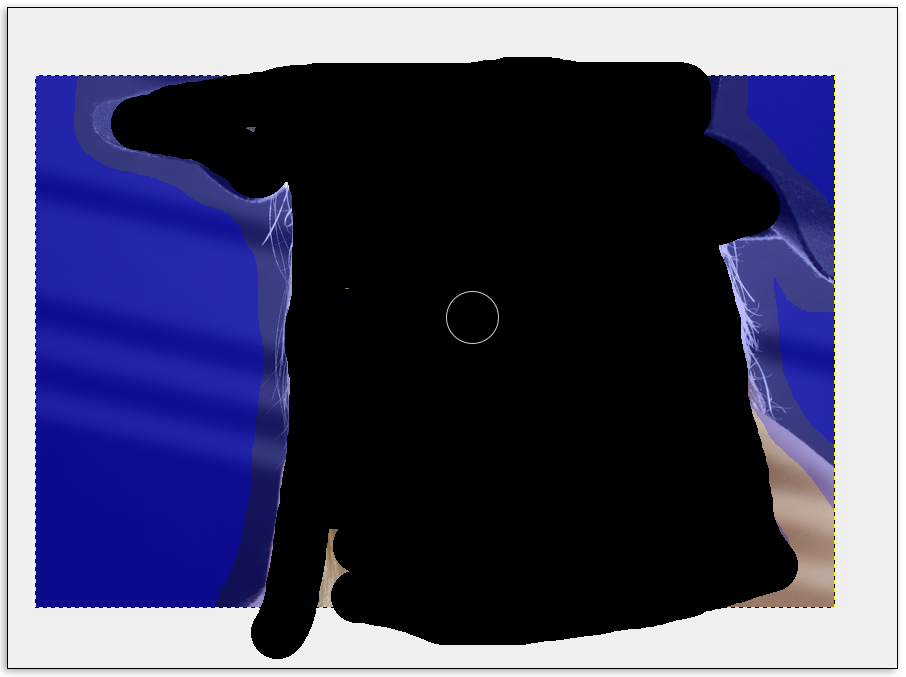
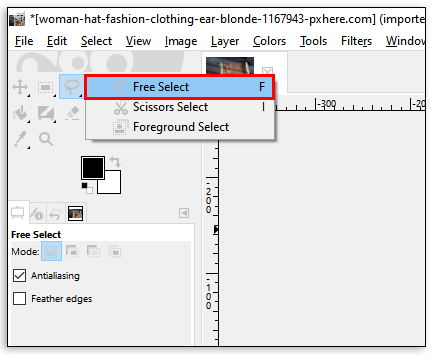
- The program will now select the background part of the image only. Use the Free Select Tool to draw more precise lines around the foreground object. While adding or removing parts of the image, don’t forget to set Mode to Add to or Subtract from the Current Selection. (Your current selection is the background)
- Press Delete to remove the current background.
- Add a new layer and put it under the foreground one.


The Fuzzy Tool
This is another tool that can help you replace a single-colored background with a new color. To do this, just follow the steps we describe below.
- Open the desired image in GIMP and find the Fuzzy tool in the Tools menu on the left.
- You can also opt for Select by color and select the background color by clicking on it.
- Once the background color is selected, press Delete on your keyboard or choose Clear from the taskbar’s Edit menu.
- Your photo will now have a transparent background, and you’ll be free to fill it in with anything you like. This can be a solid color or even another image.
- If you only want to replace the old color with a new one, choose the Bucket Fill tool from the panel and select a new color.
- Color the background with the new shade by clicking on it. Don’t forget to save the new image!


These methods work in all versions of GIMP. If you’re unable to use one, try another. If you have any issues, you might need to upgrade your GIMP version to a newer one – it may eliminate potential bugs.
How to Change the Background Color to Transparent in GIMP
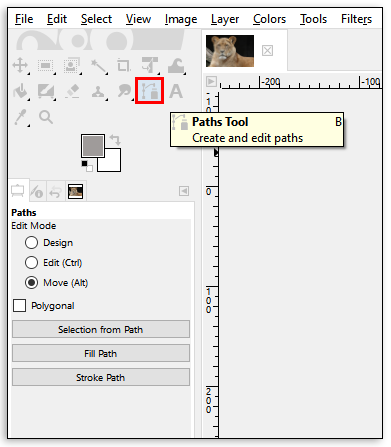
Do you need to make the background transparent? You can also do this with GIMP. Follow these instructions on how to do it with the Path Tool.
- It starts with adding an alpha channel, as seen in the section above: right-click on the layer and then choose Add Alpha Channel.
- Select the Path Tool from the panel on the left.
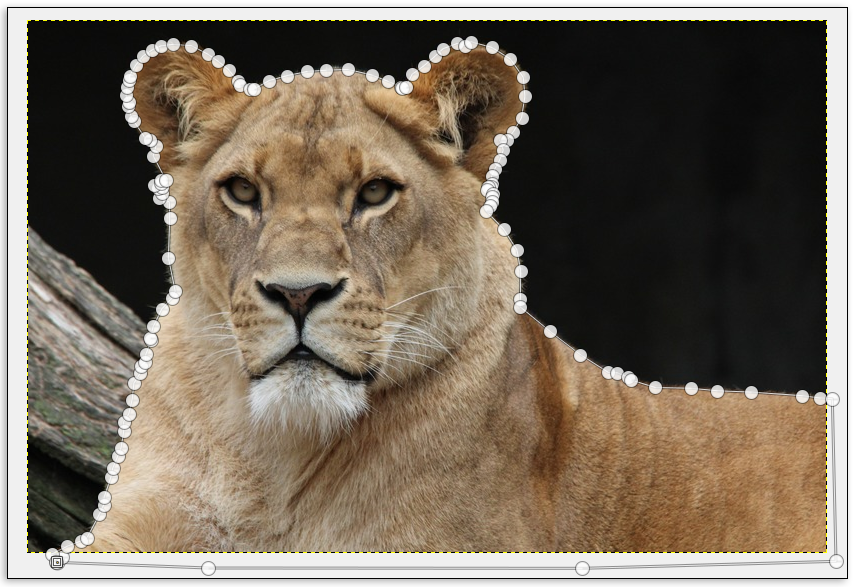
- Manually outline the foreground object you want to keep. Outlining will work best if you keep the line a bit inside the main one.
- If you make a mistake, use CTRL+Z or CMD+Z to undo the last move.
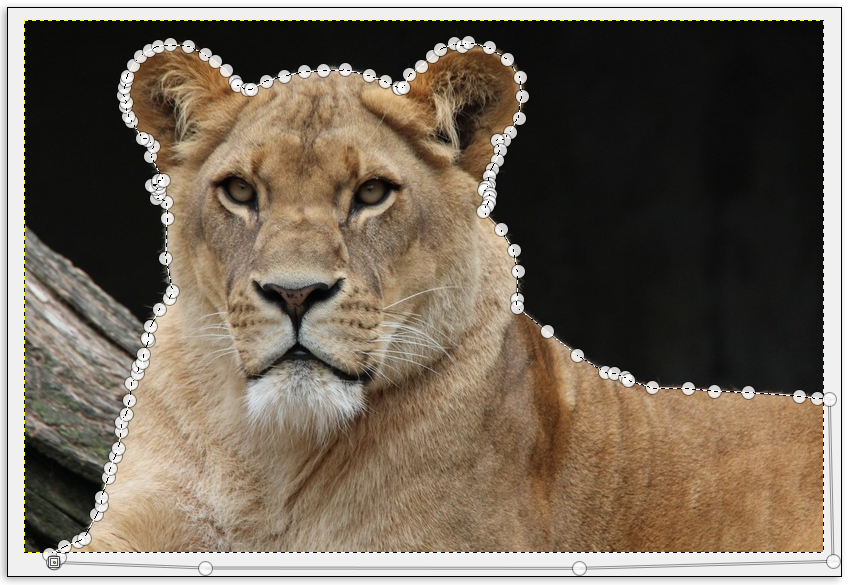
- When you come back to your first point, press Enter. This will select the outlined object.
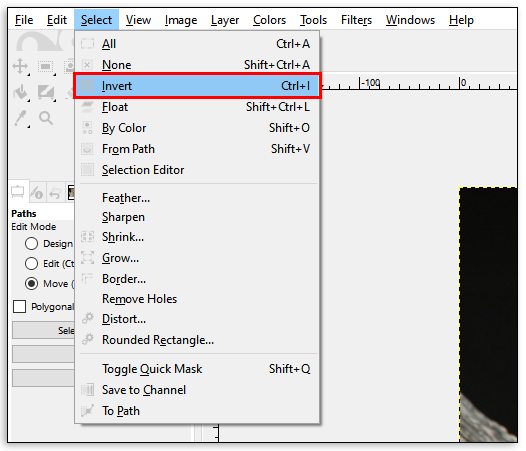
- Navigate to the taskbar and click on Select.
- Choose Invert from the drop-down menu.
- Now your background is selected, press Delete on the keyboard, and it’ll be removed.


In the sections below, you’ll see more ways to change the background color to transparent. It usually comes down to not performing the last step, adding a new layer, and setting it up as background.
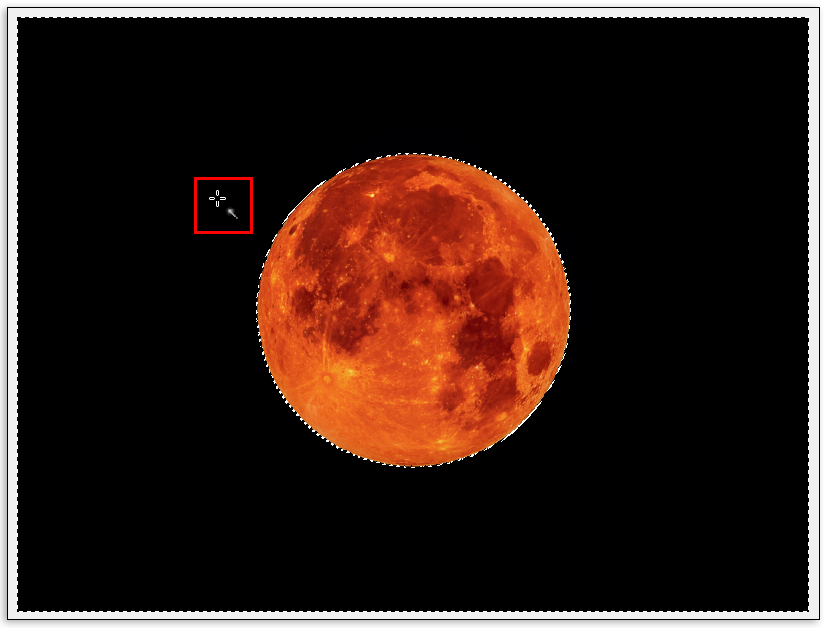
How to Remove the Background Color in GIMP
When you think about it, there are quite a few ways to remove a background in GIMP. It’s up to you to pick what suits you best. You can use one of the previously described methods to eliminate the background color and not replace it with a new one, so we won’t repeat the instructions from above. Instead, we’ll explain the Scissors Select Tool, which you can use for the same purpose.
- By right-clicking on the layer, add an Alpha channel to your photo.
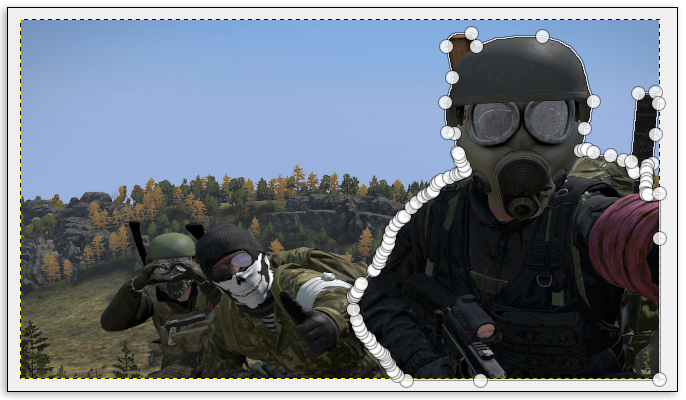
- Choose the Scissors Select tool. From the Tool Options, pick the Interactive boundary.
- Drop anchor points onto your picture by clicking and releasing your mouse. Drop the points on the edge of the foreground object on the image. You’ll do this correctly if you move the mouse along the line between the object and the background. You’ll see a line appear, connecting the points.
- Make sure the line aligns appropriately to the edge of the foreground object. Use as many anchor points as necessary. If you use longer gaps between points, the lines may not align well, so it’s better to keep them short.
- After you select the whole foreground object, press Enter.
- Use the keyboard commands, CTRL + I or CMD + I, to select your image background and press Delete to remove it.


Note: You can use the Pen Tool and do the same thing as with the Scissors.
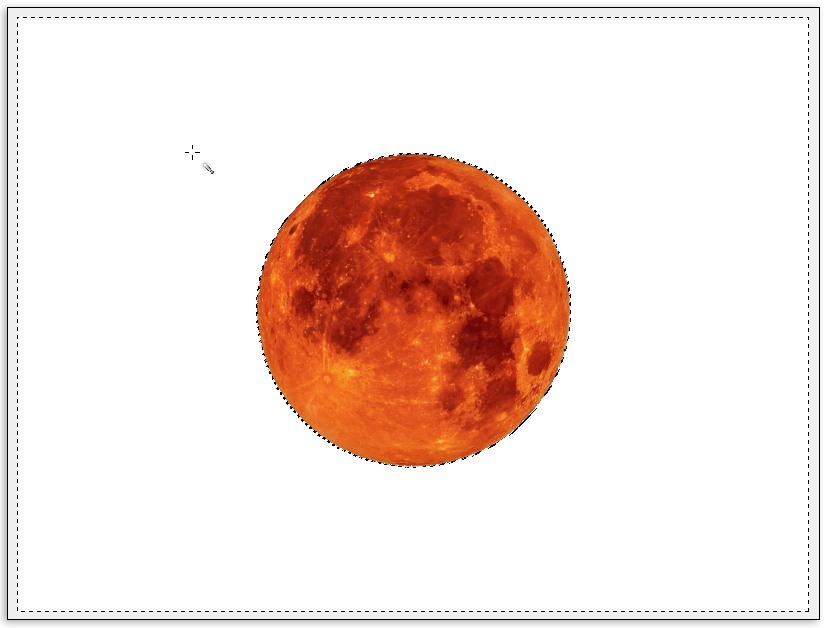
Removing White Background
However, if you want to remove the white background, there’s another way:
- Open an image with a white background.
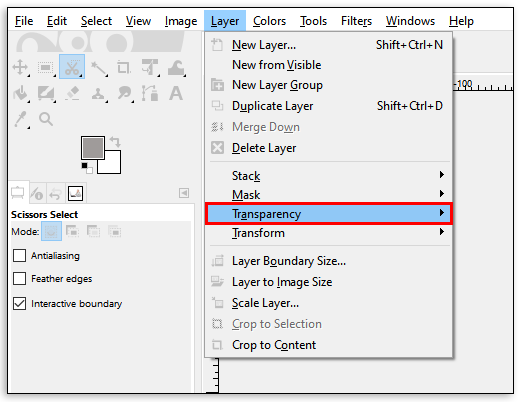
- Click on Layer and then choose Transparency, where you’ll click on Add Alpha Channel.
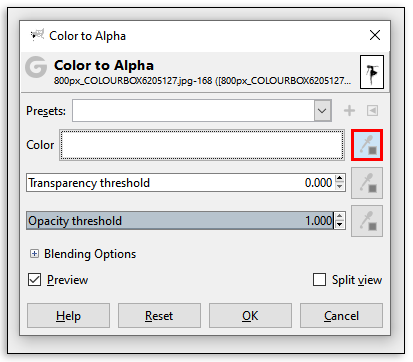
- Now choose Colors and then Colors to Alpha.
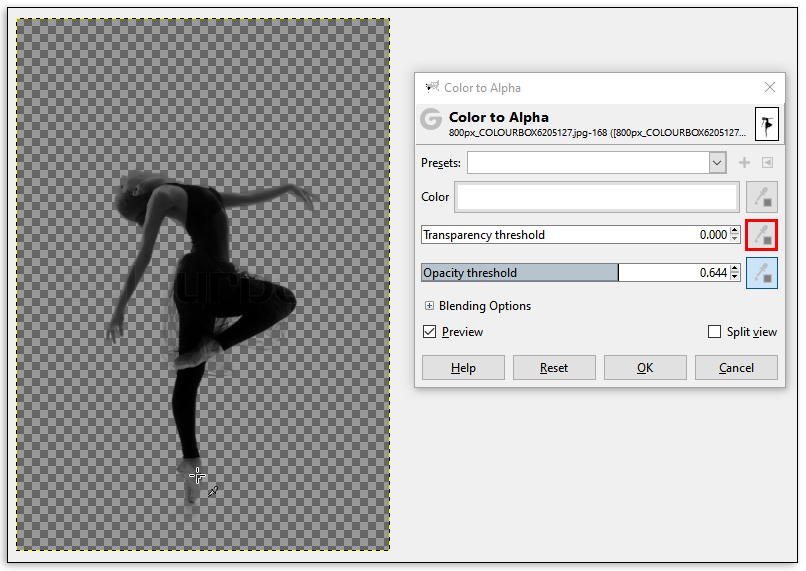
- In the new dialogue window, select the Dropper and then the white background.
- If the border between the object and the background is clear, this step may be enough to make the background transparent.
- If it needs fine-tuning, locate the Transparency Threshold, and click on the dropper next to it.
- Select the darkest spot on the background you want to delete. It’s useful for removing shadows.
- The final step is to find the Opacity Threshold and click on the dropper next to it, after which you should click on the lightest spots on the foreground object. This way, you will make sure you’ll only remove the background.
- When done, select OK.

Be aware that you can use this method to change the background color of the image. After the last step, create a new layer. Click on the Bucket Fill Tool and choose a new color. Make sure you place it below the original color, and that’s it.
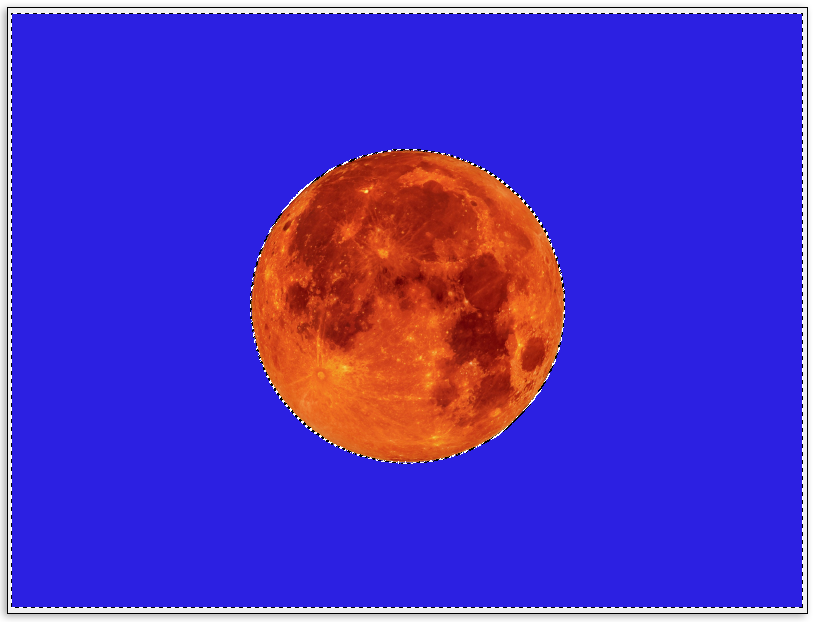
How to Change the Layer Background Color in GIMP
Most images in GIMP have several layers, depending on the number of elements there are on the photo. That’s why you need to perform that one last step when changing the background color – place the background layer underneath the foreground object.
When changing the background color or adding an image as a background, you typically start by adding an alpha channel, which indicates the transparency of a layer. If the alpha value of a pixel is high, the colors below it will be less visible. If it’s low, you’ll be able to see the colors below this layer.
Suppose you wish to change the layer background color in GIMP. In that case, you can use any of the methods described in this article and finish the steps by creating a new layer and choosing a suitable color.
How to Add a Background in GIMP
Adding the background works the same way as changing its color. By creating a new layer, you can choose to make it a solid color or another image.
Here are three ways to create a new layer:
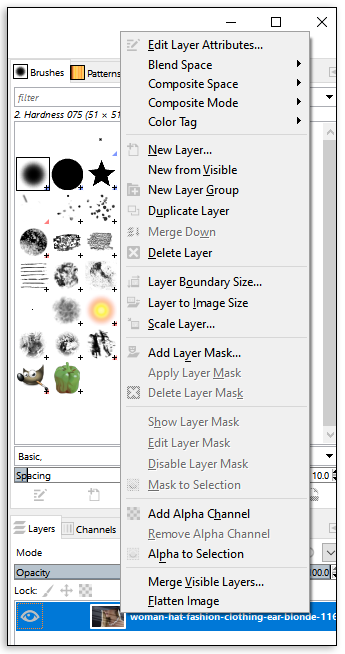
- You can click on the Layer tab in the taskbar at the top. From the drop-down menu, choose New Layer. In the pop-up window, set the parameters for the new layer and save your adjustments.
- Use a shortcut: CTRL + V or click on Edit in the taskbar and then Paste to create a floating selection. This is a temporary layer that you can attach to an existing one or make it a regular layer. If you want to anchor the layer to the one you’ve already got, click on Layer and then Anchor Layer.
- You can also use the Duplicate Layer option in the Layer tab. This will create a copy of the currently selected layer, right above the original.
If you’ve previously removed the background from your image, add a new one by creating a new layer and adding it below the foreground layer. Then, you can choose the Bucket Fill Tool (or Shift + B) to color it.
How to Recolor a Photo in GIMP
The background isn’t the only thing you can modify in GIMP. The program also lets you recolor anything in the photo in various ways. You only need to ensure that you’ve selected the right object and the corresponding layer. After choosing the item you want to recolor, use the Color to Alpha option to make the object transparent first, and then select the desired color.
If the original color isn’t too different from what you want, click on Colors, and modify the Hue, Saturation, or Lightness options to get the desired shade.
Have Fun with GIMP
With so many options, there’s only one thing left to do. Choose the method you find the most suitable for your needs and enjoy creating magic in GIMP. You can quickly test all your ideas and switch colors until you find a perfect one. Not to mention that changing background and object colors is convenient since it can save you time.
Have you already tried any of these methods? Which one works best for you? Let us know in the comments section below.
Disclaimer: Some pages on this site may include an affiliate link. This does not effect our editorial in any way.