Most people have a basic understanding of how the internet works and provides them with webpages to browse. When you input a URL link in the browser, the router sends the appropriate page stored somewhere on a server far away. However, there’s more to it than meets the eye. The DNS server is one of the vital pieces that allows for quick access to the entirety of the internet.
In this article, we’ll explain more about the DNS’s purpose and how to change your DNS server on Windows 10.
What Is DNS?
Unlike humans, computers and browsers operate by interpreting numbers. For them, a URL, such as https://google.com is utterly unreadable, but we can’t imagine typing random numbers whenever we want to access a website. A DNS (Domain Name System) server bridges that gap between man and machine.
It contains a list of websites and their corresponding IP addresses that the browser can use to access webpages. When you type a URL into the address bar, the first thing the browser does is consult the DNS cache and server for the corresponding IP address, then, it fetches the website’s contents for you.
A DNS server comes in a few forms. Most ISPs (Internet Service Providers) will have DNS servers used by default by any of their users. Even your PC will hold a rudimentary DNS cache that stores frequently used and recent addresses for faster access. However, these DNS servers are not infallible, and ISP servers can be prone to faults and bottlenecks that might prompt users to think they don’t have internet access.
Your ISP’s DNS servers will also store all URL requests, holding your complete browsing history for their convenience. You can’t avoid that unless you use a VPN or a VPN-integrated browser, such as DuckDuckGo.
DNS Problems
While DNS servers are a vital part of the internet infrastructure, they can often come under attack by hackers. A phishing attack can use a cache poisoning or DNS hijacking method to divert your DNS server to a server of their choice or provide you with a list of fraudulent IPs for existing URLs. Your browser will then get redirected to fake websites that can cause any number of security breaches of your online accounts and services.
While most of these methods require going through antivirus and ISP security measures, modernization of these attack methods means that hackers and security software are continuously trying to one-up each other. Changing the DNS settings on your device is a step toward increased security but is only useful if the server you intend to use is safer than the original one.
How Do I Find My Alternate DNS Server in Windows 10
However, since ISP DNS servers aren’t entirely safe, and you can never be too sure about what is going on behind the screen, a few alternative options for a DNS server bypass these systems. The two most popular ones are Google’s DNS domain (8.8.8.8 and 8.8.4.4) and Cloudflare’s secure DNS service (at 1.1.1.1 or 1.0.0.1). These two companies have a reputation for focusing on security and speed. Google’s DNS servers are considered to be among the fastest available.
While there are other public DNS services, you can’t go wrong with Google or Cloudflare DNS for your personal use.
Before you go and make changes, you need to figure out how to find your current DNS settings. Here’s how to do this:
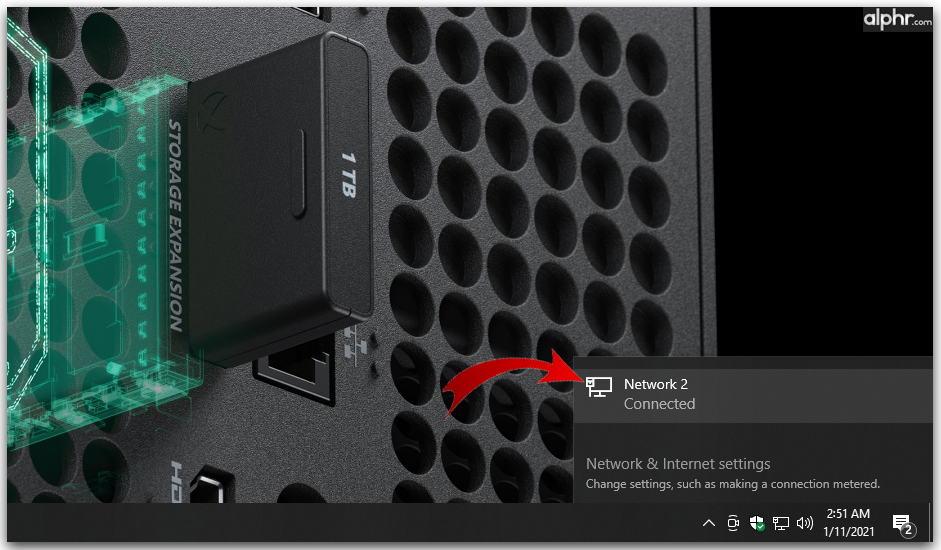
- Click on the Network icon on the toolbar.

- Click on your currently used network.

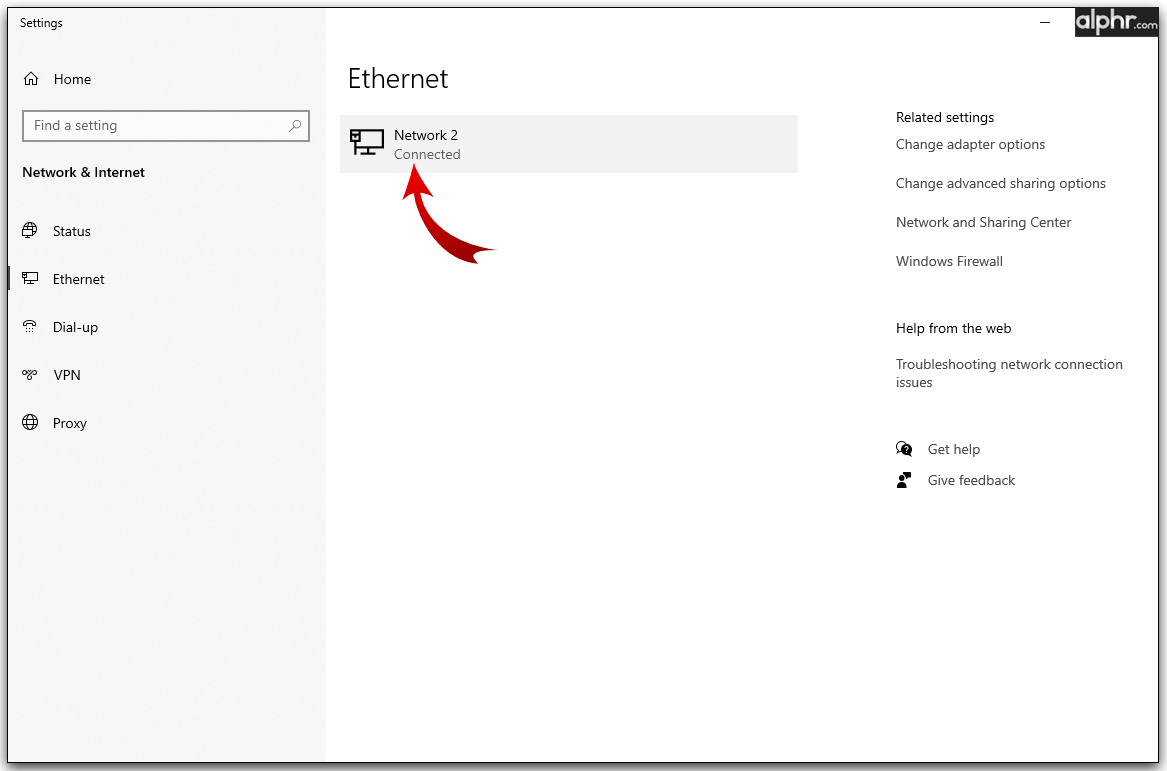
- Click on the current network again to bring up its current settings.
- Your current DNS settings are displayed in the Properties table. Look for “IPv4 DNS servers” and “IPv6 DNS servers” fields.

Once you’ve found the DNS servers you’re using (which are most likely either the router’s or the ISP’s defaults), you can troubleshoot problems and make changes as needed.
How to Change the DNS Server in Windows 10
Now that you know more about the DNS service and how it can impact your browsing experience and security, you still need to learn how to change your device’s settings. A few options are available to do this, all of which can be used to make a quick change that will last. Here is the primary method to change these settings on a Windows PC:
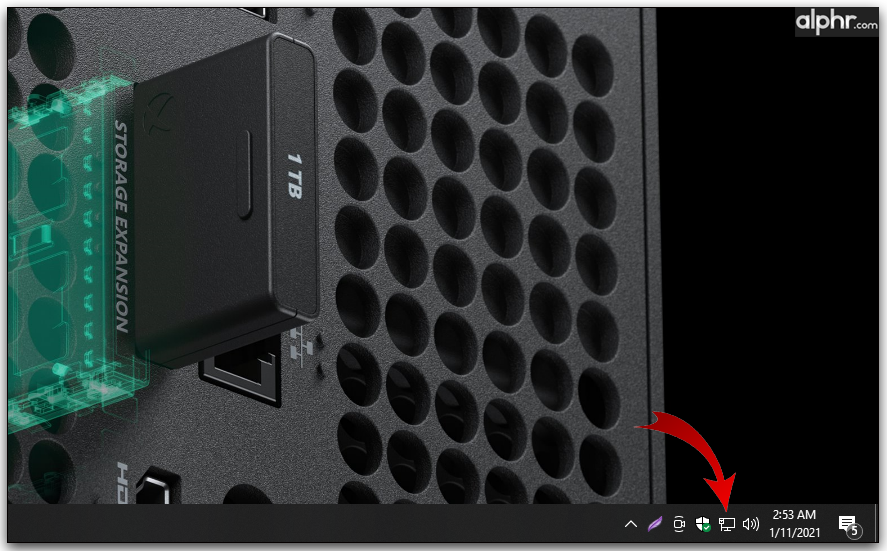
- Click on the Network icon on the right corner of your toolbar.
- Open Network & Internet Settings.
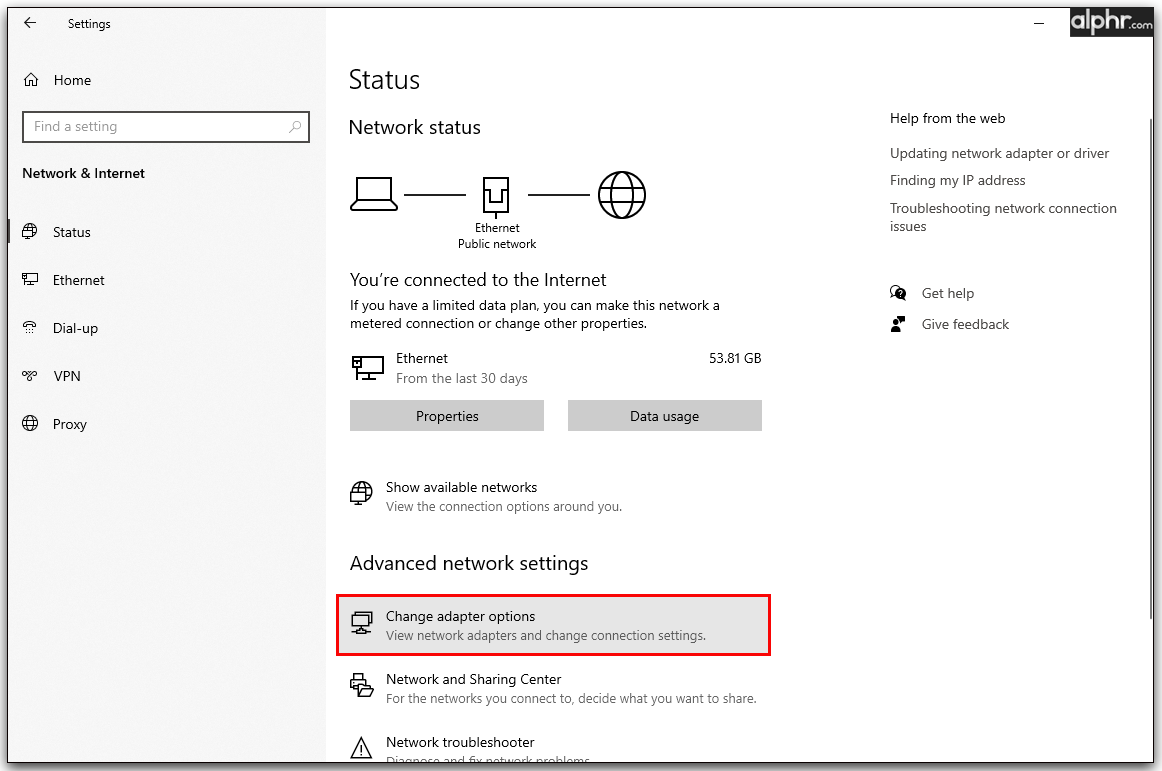
- Click on “Change adapter options.”
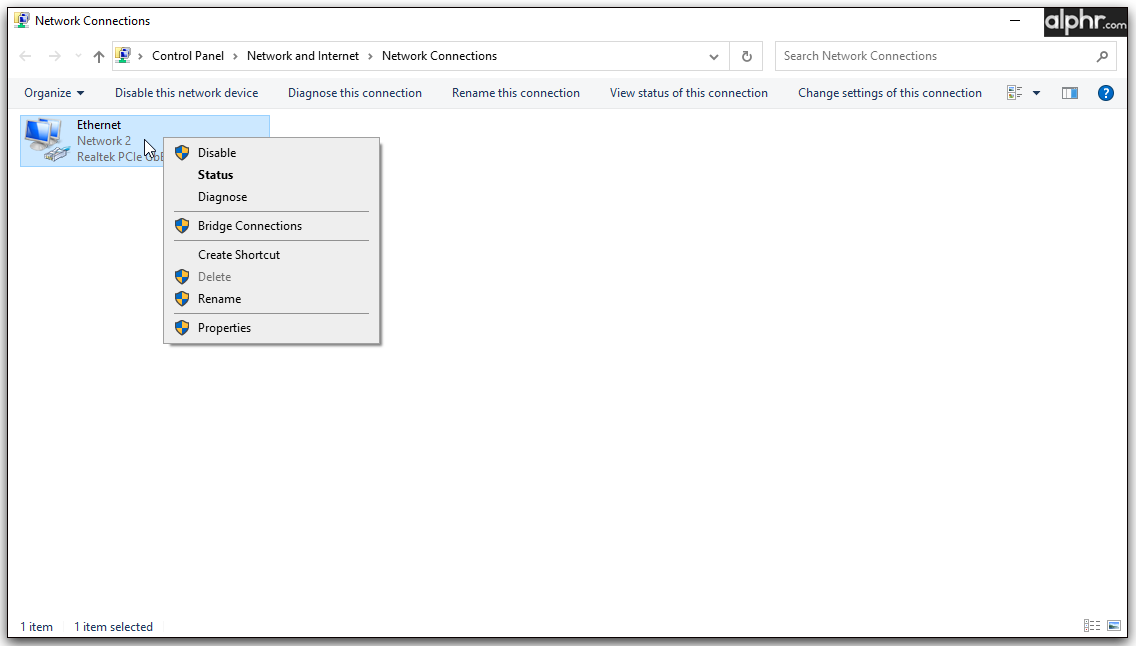
- Right-click on the network you want to change, then press Properties.
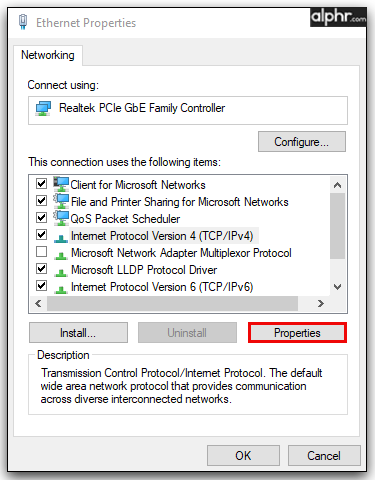
- Select “Internet Protocol Version 4 (TCP/IPv4).”
- Click on Properties.
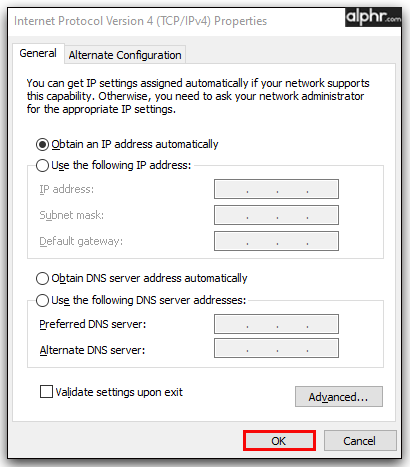
- Click on the “Use the following DNS server addresses” radial button. This will allow you to manually input your preferred DNS servers.
- Enter two Ipv4 addresses in the corresponding field. These usually include the primary DNS server and the secondary DNS server of a DNS service. For example, if you want to use Google’s DNS, put 8.8.8.8 in the first line, and 8.8.4.4 in the second.
- Click on OK, and then close the Properties dialog window.


These settings will only change the Ipv4 settings. Ipv4 is one of the two protocols used, the other being larger IPv6, with its own set of addresses. If you want to change the IPv4 settings, follow the steps above, but select Internet Protocol Version 6 (TCP/IPv6) in Step 5.
The IP addresses you input in the text fields will also be different, and you’ll need to consult your DNS service to provide you with the correct addresses. Since these addresses can be quite long (and use a combination of numbers and letters), make sure to copy them or type them properly, or you won’t be able to use the internet at all.
Suppose your PC uses a number of networks to connect to the internet, for example, a laptop that uses an Ethernet connection and a Wi-Fi connection at different times. In that case, you’ll need to configure both of these appropriately by repeating the steps above.
How to Change Your Windows 10 DNS Settings Using Command Prompt
If you’re more tech-savvy and want to get everything done with a command line, there is an option to change the DNS server in the command prompt. Here’s what you need to do:
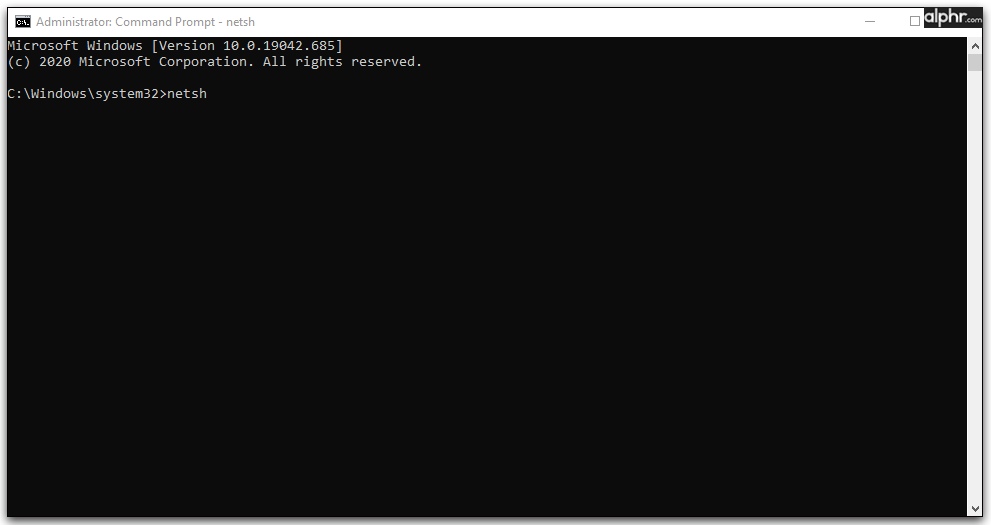
- Open the Command Prompt in Administrator mode.
- Input the following line in the prompt to activate the network settings tool and press Enter:
netsh - Put this line in to provide a list of all network adapters, then press Enter: interface show interface
The prompt will list all available adapters. You need to know which ones to make changes to. Ethernet and Wireless adapters most likely have a ‘Connected’ state that shows they’re currently in use, when fetching this article, for example. - Use the following command to set the primary DNS address on an adapter:
interface ip set dns name=”ADAPTER-NAME” source=”static” address=”X.X.X.X”
The value ADAPTER-NAME is the name of the adapter whose settings you’re changing, and you get this name in Step 3. X.X.X.X is the desired DNS address you’re putting in. - You also need a command to set the secondary DNS address:
interface ip add dns name=”ADAPTER-NAME” addr=”X.X.X.X” index=2
The same logic for values applies as in Step 4. - You can increase the number under ‘index’ to add more secondary addresses after that, but one primary and one secondary will suffice for most users.
- Close the Command Prompt.


Once these settings are adjusted, the PC will automatically start using the new values to resolve hostnames.
How to Reset Your DNS Server in Windows 10
If you want to reset your DNS settings to your ISP’s default values, here’s what you need to do:
- Click on the Network icon on the toolbar.
- Open Network & Internet Settings.
- Click on “Change adapter options.”
- Right-click on the network you want to change and press Properties.
- Select “Internet Protocol Version 4 (TCP/IPv4).”
- Click on Properties.
- Click on the “Obtain DNS server address automatically” radial button.
- Click OK, and then close the Properties dialog window.
This setting will revert the changes made to the adapter and allow you to go back to default DNS servers.
How to Flush Your DNS Cache
After you make any changes to your DNS settings, it’s advisable to clear your PC’s DNS cache. This cache stores frequently used IP addresses or the ones you used recently. If your DNS server has supplied you with an incorrect address and the PC has cached it, the server address changes won’t matter until the PC naturally refreshes the cache. Flushing the DNS cache will force the PC to reuse the correct DNS settings and fetch proper IP addresses for its programs. Here’s what you need to do:
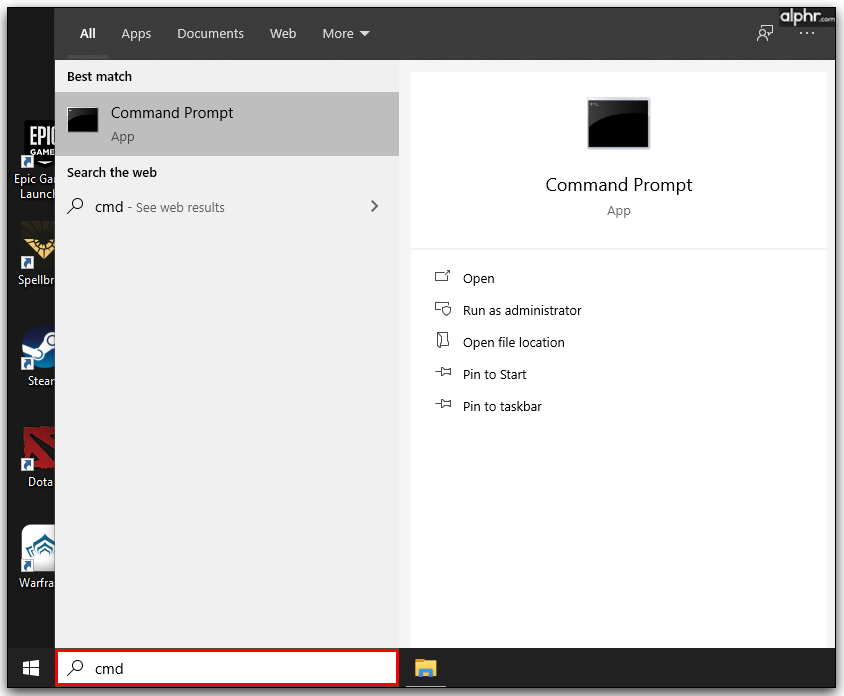
- Open the Command Prompt in Administrator Mode. You can do this by searching for ‘cmd’ in the PC’s search bar, right-clicking the “Command Prompt” result (it’s usually the first one), then selecting “Run as administrator.”
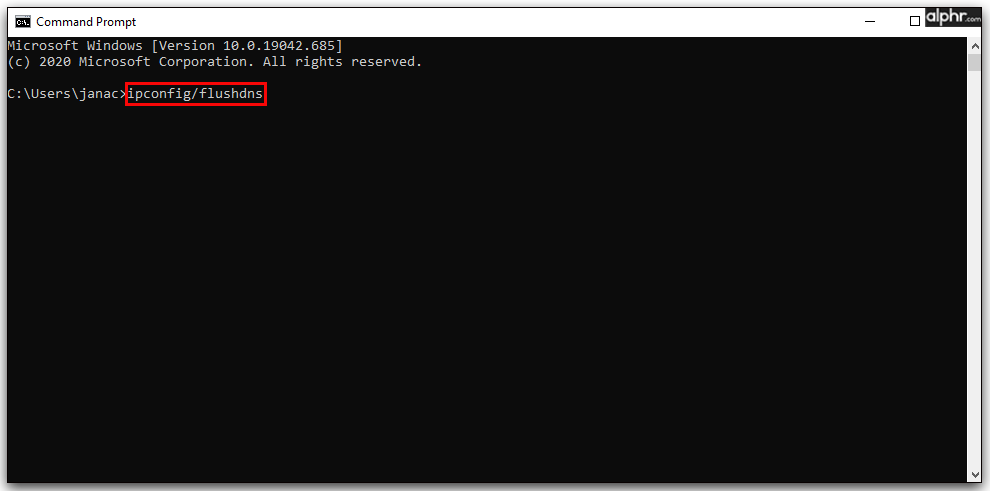
- Type or copy the following line and press Enter:
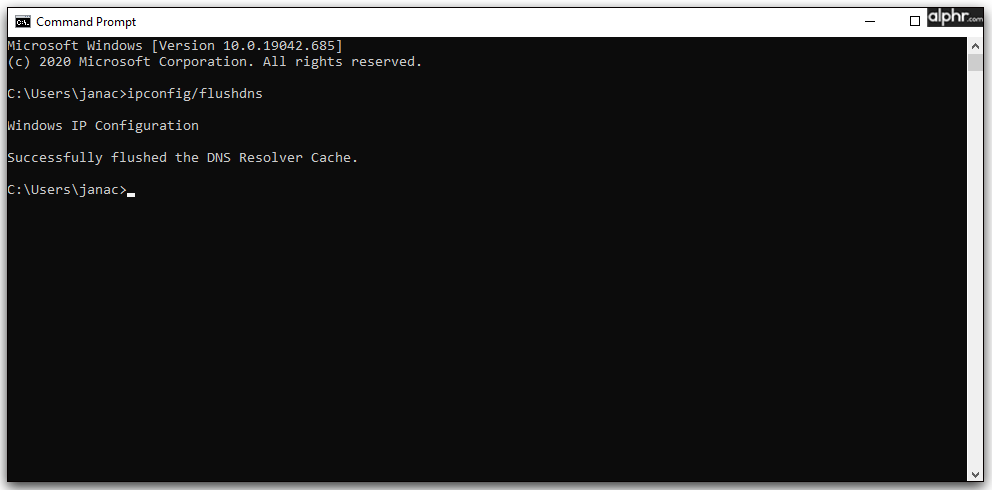
ipconfig /flushdns - You should receive a message confirming the DNS Resolver Cache has been flushed.
- Close the command prompt.

Flushing the DNS can also be the first response for more common internet connection issues before further tinkering is needed.
Make Changes Wisely
Now you know how to change your PC’s DNS settings. Use the provided Google or Cloudflare free DNS servers if you want some of the best publicly available options, or use a different provider that works best for you. Your ISP’s default servers are usually a safe option but can be more difficult to troubleshoot for any errors. The DNS system is a vital piece of networking, and some common issues can be resolved by simply changing its settings.
What DNS settings do you use? Let us know in the comments section below.
Disclaimer: Some pages on this site may include an affiliate link. This does not effect our editorial in any way.


