Gmail can seem as secure as the Mona Lisa. No matter how hard someone tries, you’re confident they’ll hit a brick wall when they try to steal your information.
Unfortunately, the reality is entirely the opposite. Cybercriminals and other malicious actors can utilize advanced methods to access your account and compromise your data. The main question you ask in this situation is: “Who would do such a thing?” Is it even possible to identify the culprit?
The latter might be possible, and this article will discuss potential ways to do so. Here’s a detailed guide on how to find out who hacked your Gmail account.
How Do You Find Out Who Hacked Your Gmail Account
When embarking on your search for who hacked your account, it’s important to have realistic expectations. Chances are, you won’t be able to learn who hacked your account unless they admit it to you.
Still this doesn’t mean you’re helpless. There are a few ways to narrow down the perpetrator, one of which is to figure out their IP address.
Let’s first try to recover your account.
- Open your browser and go to Google’s recovery page.
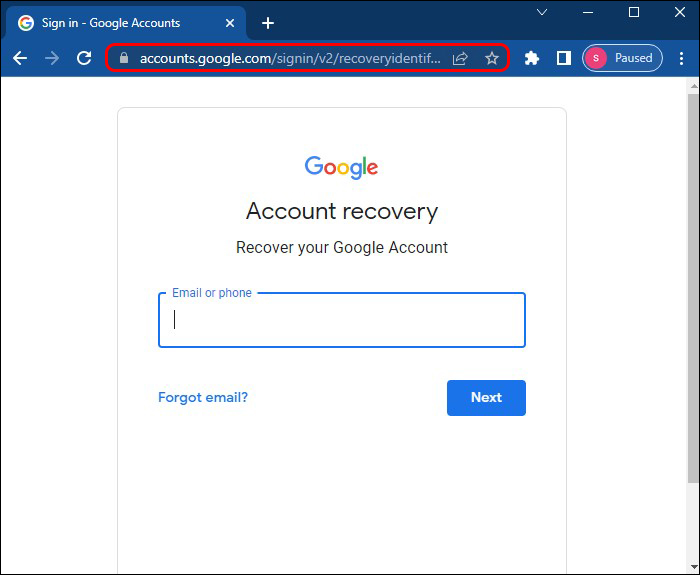
- Follow the on-screen instructions and answer the questions to improve your chances of restoring your hacked account. If Google tells you that your account couldn’t be verified, keep trying until you succeed. Be careful not to skip questions and make sure your answers are 100% accurate. Here are a few more tips on how to get this process right:

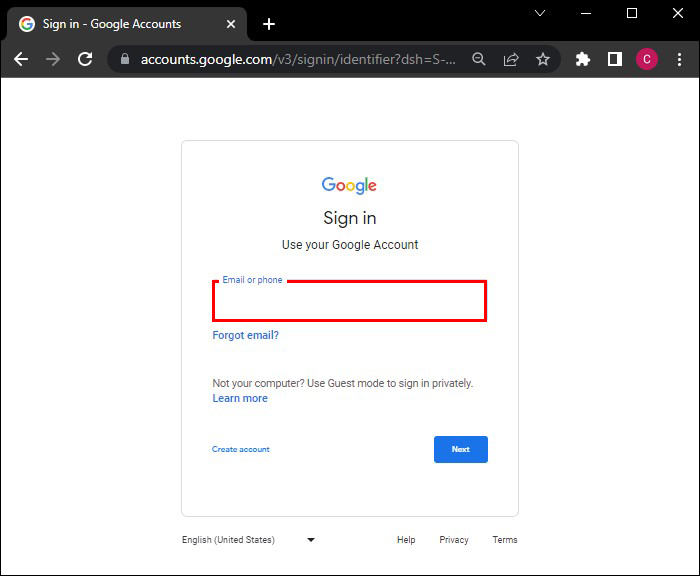
- Enter the password you last remember using. If you can’t remember this code, try another one. You’re more likely to recover your account if you enter one of your recent passwords.
- Use a different email address or recovery phone number.

The next thing you should do is identify the devices associated with your account. If you only access your account from your computer and smartphone, those are only the two gadgets you should see on the list. Anything other than those is a major red flag.
- Navigate to Gmail and enter your login credentials.
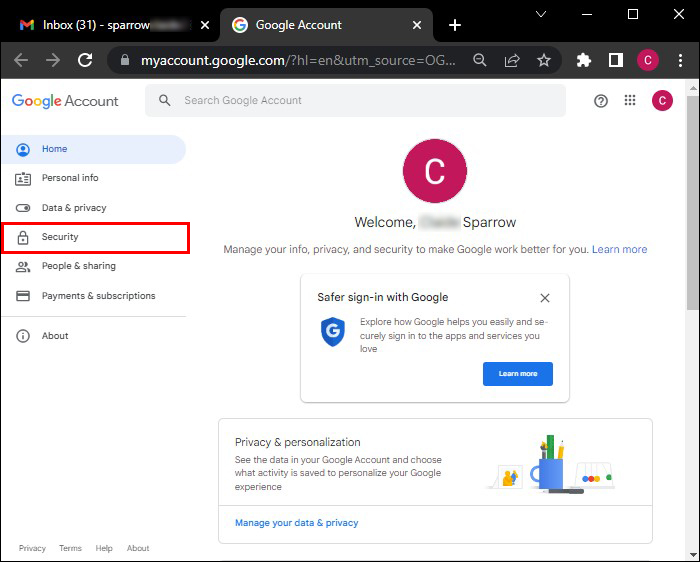
- Head to the Profile icon and click “Manage your Google Account”.
- Tap the “Security” button and choose the prompt that lets you manage your devices. You should now see all the devices that have been used to access your account. Some of them might even be active while you’re checking your Gmail, whereas others might have been last used a few months or weeks ago.
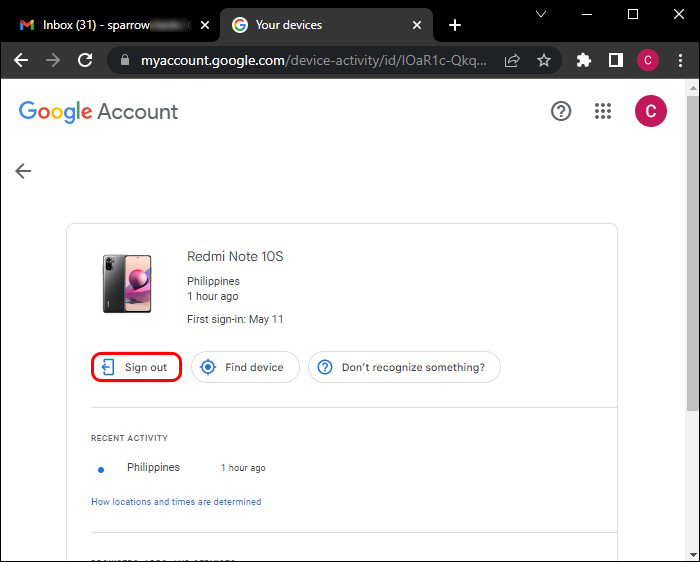
- Click the device you wish to learn more about. If they’re no longer active, they should have a “Signed out” box next to them. However, keep in mind that this doesn’t mean that the user won’t return for another session. They can easily do so if they still have your password.

Now that you have the list of all the devices from which your account was accessed, it’s time to dig a little deeper. The following steps will tell you how to determine the IP address of the gadget you’re worried about.
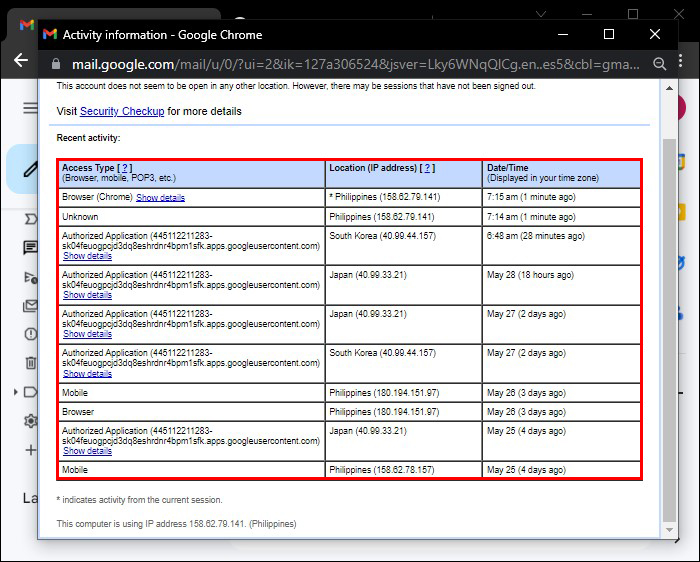
- Go to your Gmail inbox.
- Click the “Details” button in the bottom-right part of the screen. If you’re having trouble finding the option, bring up the search box with the “Ctrl + F” shortcut and type in “Details.” Keep scrolling until you find the section, making sure you’re not mistaking it for one of your emails.
- Explore the list of devices and find the one you suspect belongs to the hacker. You should now see the IP address of the gadget.


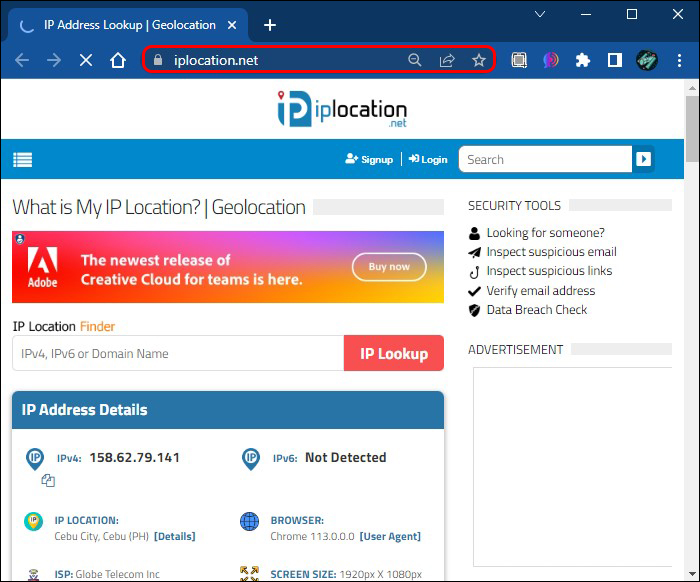
The rest of the work is straightforward. All it takes is to discover the physical location associated with the IP address. Various IP apps can save the day with their simple interfaces and, more importantly, fast results.
- Launch your browser and go to an IP locator tool. Look for a user-friendly website, such as iplocation.net.
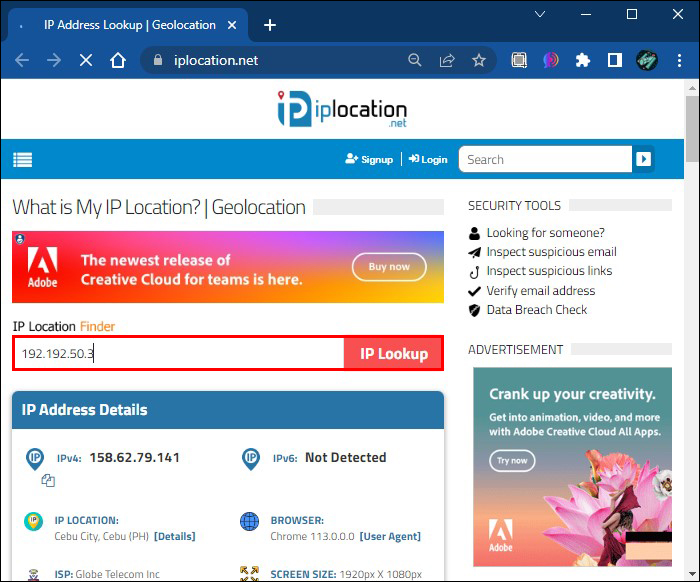
- Copy the IP address of the device you wish to track down and past the address into the “IP Lookup” field.
- Tap enter and voila – the software will reveal the whereabouts of the potential hacker’s device. You can use this information to guess who accessed your account without your permission.

What to Do If Your Gmail Account Is Hacked
Knowing (or guessing) who hacked your Gmail account can be exhilarating, but let’s face it – this shouldn’t be your initial reaction to the hacking. Instead, securing your account to prevent further damage is much more important.
That’s where Google’s two-factor authentication comes in. It lets you sign into your hacked account using not just your password but your phone as well. Here’s how to activate this convenient feature:
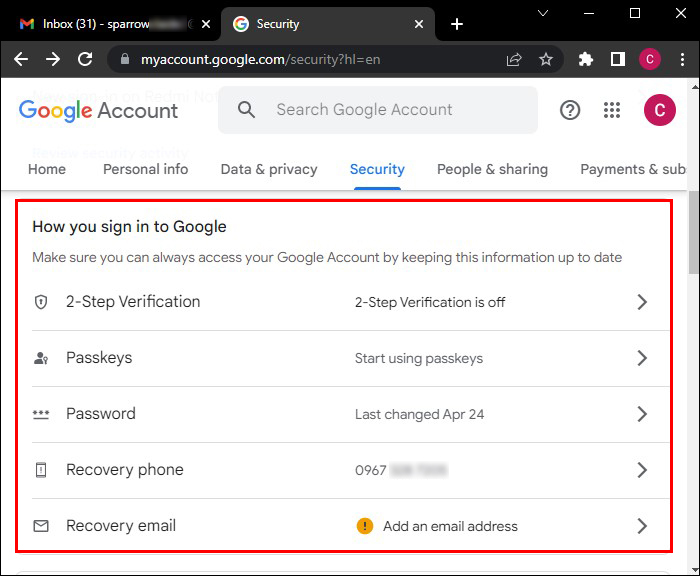
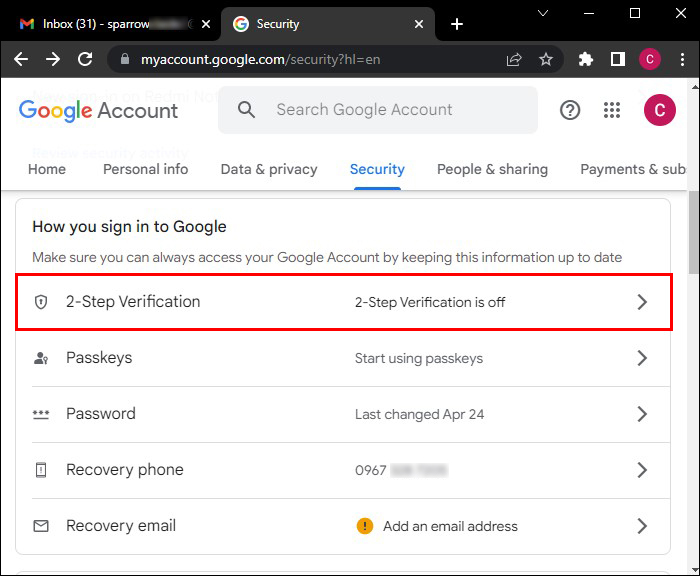
- Head to your “Manage your Google Account” and explore the window.
- Choose “Security.”
- Find the section that contains options for signing into your Google account.
- Press the prompt that lets you enter two-step verification.
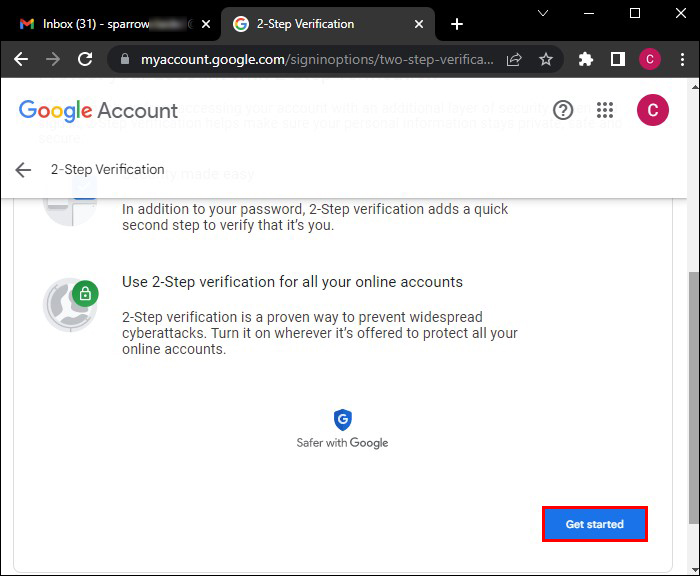
- Tap “Get started” and set up your authentication by following the provided instructions.
Your two-step verification is up and running, but don’t put your feet up just yet. You still need to prove Google you’re the one who wants to sign into your account and not someone else. To do so, Google’s prompts can come in handy. They’re more convenient than verification codes and safeguard against SIM card-related risks.
Basically, Google prompts are nothing more than notifications Google sends to your smartphone. Some of the platforms where you can get these prompts include your Android phone, Smart Lock-enabled iPhones, Google Photos, YouTube, and your Google app.
After getting a prompt, be sure to tap “Yes” if you’re the one who requested the sign-in. If not, the hacker may want to remain on your network, which is why they may send a prompt request of their own. If you don’t recognize the prompt, click “No.”
Although Google prompts are the most effective way to log into your account via two-step authentication, other methods are available:
- Write down a backup code on a piece of paper.
- Save digital backup codes on your PC or smartphone.
- Set up verification codes using text messages, voice calls, and other related methods.
- Rely on the Google Authenticator app.
- Store physical security devices (aka security keys).
How to Prevent Gmail Hacks
The saying “An ounce of prevention is worth a pound of cure” rings truer than ever in this case. Admittedly, no account can be hack-proof, but you can do lots of things to secure your Gmail profile. Here are a few easily applicable suggestions.
- Use strong passwords that combine letters, numbers, symbols, lowercase letters, and uppercase letters.
- Delete unnecessary extensions.
- Updated your PC regularly.
- Avoid opening suspicious messages.
- Consider locking your screen when idle.
Damage Control Is Your Best Friend
In the event of a hacked Gmail account, you don’t want to sit idle and allow the culprit to dig through your information. But even though you may be alarmed, it’s essential to take quick, proper action and stop the perpetrator in their tracks. Knowing their identity helps but doesn’t do much in terms of securing your account. Activating and signing in through two-factor verification is the superior approach, so don’t postpone it.
Have you managed to find out who hacked your Gmail? What method did you use? How did you react to the hacking? Share your experiences in the comment section below.
Disclaimer: Some pages on this site may include an affiliate link. This does not effect our editorial in any way.