Although most organizations collect data to help make decisions, it often ends up in Excel in a disorganized format. As such, it might be hard to understand the relationships, patterns, and trends within the data.
Fortunately, you can do various things like add tables and round up cells in Excel, but how do you sort data? You’re in the right place if you’ve never used Excel for this purpose. This article explains how to sort data in Excel, whether in a group or an entire spreadsheet.
What to Know About Sorting Data in Excel
Sorting data successfully in Excel requires you to prepare the spreadsheet in various ways. First, you should remove blank cells because Excel will sort them, affecting totals and other formulated elements.
Next, the data in the columns should be of the same type. For example, if a column includes dates, no other form of data like text or numbers should be in the cell range, or sorting will fail.
Also, you may want to check for and remove duplicates in Excel before sorting any cells or columns to confirm that nothing goes wrong after sorting.
Finally, it’s crucial to have a data backup in case something goes wrong during the process.
Sorting Data Alphabetically in Excel
If you have a simple column you need to sort alphabetically, you can select the cells and choose your sorting options. However, Excel only sorts the chosen cells, which can mess up an entire spreadsheet.
If the above option works for you, that’s great. If it doesn’t, you have two options:
- For spreadsheets with breaks between rows or several headers in one column, select the column cells you want to sort (within the chosen column), including all associated rows, and then choose your sorting options.

- For large spreadsheets without gaps between rows, you can select the entire spreadsheet (helpful when headers are included), specify the column to sort, and then choose your sorting options.

Both Excel sorting options above move all row data along with the sorted column data to keep all associations in place. Here’s how to do both.
How to Sort a Section of Data Alphabetically in Excel
- To sort a column within a section, highlight all rows and columns that include the column data you want to sort. Don’t select any headers.
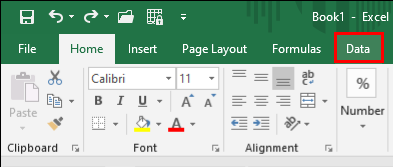
- Select the Data tab in the Menu Bar to open the related Ribbon below it.
- Choose Sort to open the sorting dialogue menu. Do not use “AZ” or “ZA” because they utilize the currently set options from the Sort menu, which could mess everything up.
- Uncheck the My data has headers box if not already done.
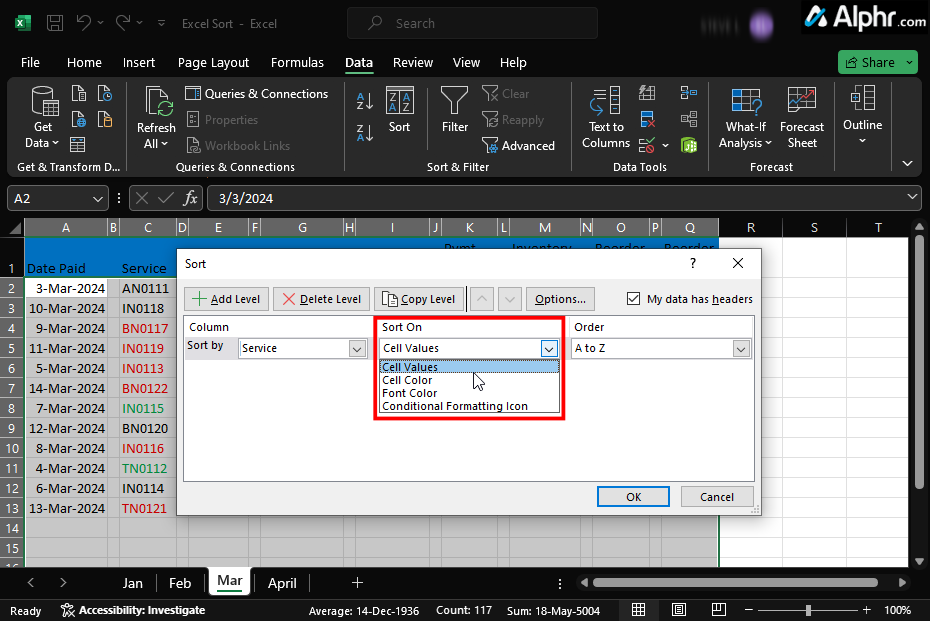
- Pick your sorting column from the Column dropdown list.
- Choose Cell Values from the Sort On dropdown list.
- Click A to Z or Z to A as your sorting method from the “Order” dropdown list. Cells with letters and numbers will be sorted based on left-to-right order.
- Click OK to save your sort settings.
- Excel will now display the alphabetically sorted results. Each column’s row of data also moves with the sorted cells.
How to Sort a Column of Data Alphabetically in Excel
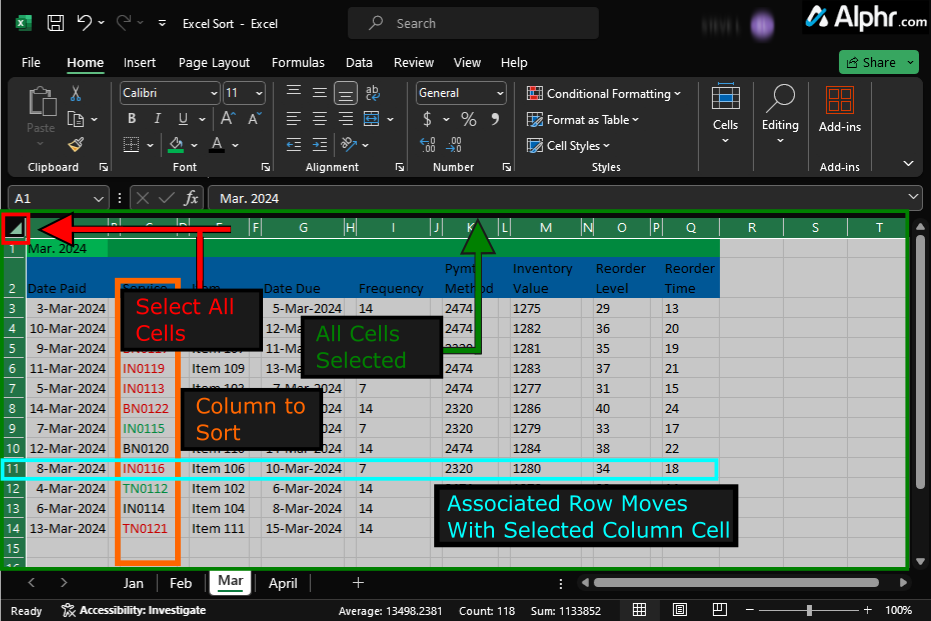
Unlike sorting a section of data, sorting a column requires the entire spreadsheet to be selected. If you select the column, only that data moves, which scrambles the entire spreadsheet. If you have more than one header in a column, you must use the above process that sorts sections. Once the entire sheet is selected, you can choose your column to sort and all other sorting options using the steps below.
- Open your spreadsheet and click the Select All button in the top left corner of the sheet just below the “Name Box.”
- Click the Data tab in the Menu Bar to open the related Ribbon of options underneath it.
- Choose Sort to open the sorting dialogue menu. Do not click “AZ” or “ZA” in the Ribbon since they react based on the current settings found in the Sort menu. That could mess everything up.
- Check the My data has headers box in the Sort dialogue box since all headers were selected. Note that you can only have one header per column. Otherwise, you’ll have to sort based on sections using the process above.
- Choose the sorting column from the Column dropdown list. It should display the header names instead of column letters.
- Select Cell Values from the Sort On dropdown list.
- Choose A to Z or Z to A as your sorting option from the Order dropdown list. Cells with numbers and letters will be sorted using left-to-right ordering, so “IN0119” and “IN0118” will be sorted as “IN0018” followed by “IN0019” when using the “A to Z” option.
- Click OK when finished. The spreadsheet will appear sorted alphabetically based on the selected column. If you messed up or disliked the results, use the Undo option.


What to Know About Sorting Data Numerically or Chronologically in Excel
Sorting data numerically or chronologically is not much different than alphabetically, but you have different sorting options. Excel identifies the data in cells and presents your sorting options based on those criteria. As with all sorting options, delete blank cells and rows in your Excel document, or it will affect the sorted results.
Dates would give you “Oldest to Newest” and “Newest to Oldest” verses “A to Z” and “Z to A.” Numbers would give you “Smallest to Largest” and “Largest” to Smallest.”
Depending on whether you need to sort a section numerically/chronologically or an entire column, check out the processes below.
How to Sort a Section of Data Numerically/Chronologically in Excel
Sorting a section of data chronologically (i.e., dates) or numerically (i.e., numbers) is similar to sorting them alphabetically, except the sort options are different.
- To sort a column section numerically/chronologically within a data section, select the rows that include the column data you want to sort, but don’t select any headers.
- Click on the Data tab found in the Menu Bar. This action opens the corresponding Ribbon of options underneath it.
- Choose Sort to open the sorting dialogue menu. Do not click “AZ” or “ZA” in the Ribbon since they react based on the current settings found in the Sort menu. That could mess everything up.
- Uncheck the My data has headers box if not already done since you did not select any headers in previous steps. It’s a cleaner way to sort.
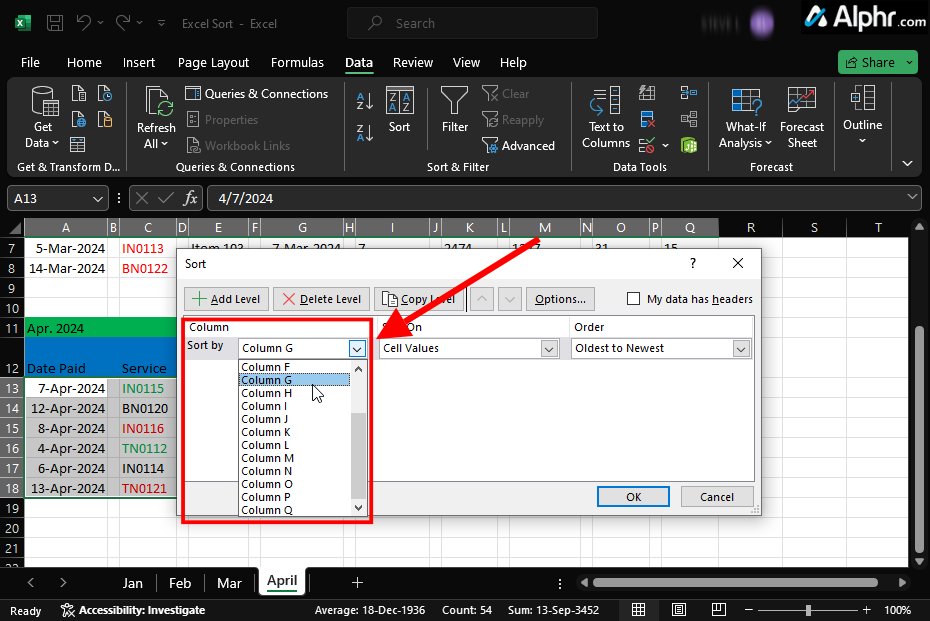
- Choose your sorting column found in the Column dropdown list.
- Select Cell Values from the Sort On dropdown list.
- Choose Oldest to Newest or Newest to Oldest as your sorting option from the Order dropdown list.
- Click OK to save the sort settings. You’ll see the section’s column sorted chronologically or numerically. All rows should appear with the corresponding column cells.


How to Sort Multiple Columns in Excel
Sometimes, you might need multiple sorting criteria to make the data more interpretable. However, sorting multiple columns could rearrange data incorrectly, depending on your spreadsheet layout.
Multiple sorting should be based on a primary sort followed by a precise sorting order, such as “Purchase Date” followed by “Product Category,” followed by “Dept Section.”
The above example means that Excel will sort based on the purchase dates first and then by the product categories within each related purchase date. At this point, you’ll see all product categories of purchased items listed chronologically under each date.
The bottom line is that Excel sorts based on the order you establish, so it sorts the “Purchase Date” column first and then the “Product Categories” column within each date.
In any case, copying the spreadsheet, working on the duplicate for comparison reasons, and protecting the original data from corruption is best.
- Open the relevant spreadsheet and select any cell, then navigate to the menu bar at the top and click the Data tab.
- Select Sort in the menu bar at the top to open the sort dialogue box.
- Go to the Column section in the dialogue box and click the Sort by drop-down menu. Choose the primary sorting column.
- Select the Sort On dropdown and choose Cell Values.
- Click the Order dropdown and select the sorting criteria you want to use.
- Move to the top left corner and select Add level. This adds a new sorting section.
- In the Column section, click the Then by dropdown and choose the next column you want to sort. This will be the secondary sorting function that sorts within the first one.
- Click the Sort by and Order dropdowns and choose your preferred criteria.


Remember, the column you choose first becomes the primary sort key. The second sort filters within the first one, and the third filters within the second one. If sorting the second or the third column interferes with the criteria you set on the first column, it will remain unsorted.
How to Sort Data in Custom Order in Excel
You might want to sort your data using an option not listed in Excel by default, such as sorting by Small, Medium, Large, and X-Large. Alphabetical sorting places them in an incorrect order, and numerical/chronological sorting is not applicable. In this case, you can create a custom sorting order.
- Open the spreadsheet with the data you want to sort.
- Navigate to the toolbar at the top and select Data.
- Choose the Sort option in the menu bar.
- Go to the “Column” section, click the Sort by drop-down, and choose your primary sorting column.
- In the Sort On dropdown, choose Cell Values to sort based on the contents.
- Click the Order dropdown, then choose A to Z or Z to A as your sorting criteria.
- To add secondary sorting, Click the Add Level button.
- Follow the previous sorting steps: Set your Sort by, Sort On, and Order options, then press OK.


How to Sort a Row in Excel
Excel’s primary structure organizes data into columns. However, sometimes your data might have a horizontal layout where each row contains a different attribute of the data set. In this case, the logical way of organizing the data is by sorting the rows.
Here’s how it’s done:
- With the data you want to sort open on your Excel spreadsheet, press the cursor on the first cell of the row you want to sort and drag it to select all the cells with data.
- Go to the navigation bar at the top and tap the Data option.
- Tap the Sort option to open a dialogue box with sorting options.
- Select Options towards the top right of the dialogue box.
- On the Sort options pop-up box, select Sort left to right and hit OK.
- Move to the Sort by section and hit the drop-down menu.
- Select Row 1 or Row 2 or whichever row you want to sort and tap the OK button. This will automatically sort the data.


Sort Your Spreadsheet
Unsorted data never makes sense. Worse still, organizing it manually can take time and lead to human errors. With Excel, you can sort data in whichever format you want and make custom criteria.
Next, you might also want to learn about how to use VLOOKUP in Excel to find the data you need.
Disclaimer: Some pages on this site may include an affiliate link. This does not effect our editorial in any way.


