Newer versions of Windows support the automatic installation of drivers. These drivers are necessary for the smooth running of various PC components like graphics cards, network adapters, keyboards, and so on. However, every once in a while, a glitch may necessitate the manual installation of drivers. It may also be that you’re trying to use a device that isn’t supported by Windows, which would mean that the hardware drivers won’t be loaded automatically. Whatever the case might be, this tutorial walks you through installing drivers on Windows 11.
Drivers are software components that are crucial to a computer’s operation. They enable the hardware and software to work together seamlessly. You can use various methods to install these programs on your Windows 11 PC. Check them out here.
How to Install Drivers in Windows 11 Using Windows Updates
The Windows Update technique is the most common method used to install drivers on your computer. It will automatically install the latest drivers for your device. Windows will run a check for uninstalled drivers and source these programs from their downloaded locations.
If you aren’t sure how to install these drivers after they have been downloaded, worry no more. Windows will also handle this process automatically. For the drivers that require a restart to become operational, the OS will alert you that you should reboot your device to configure the software. Here’s how to use Windows Update to install drivers.
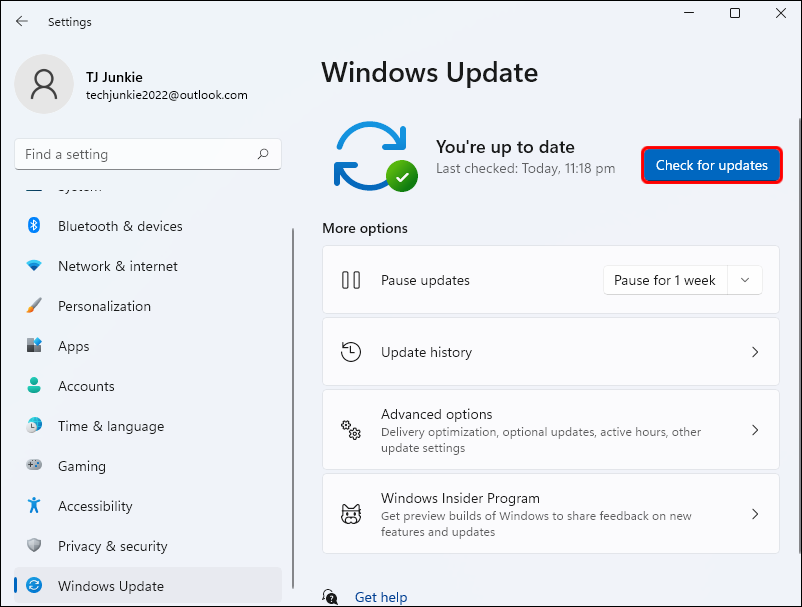
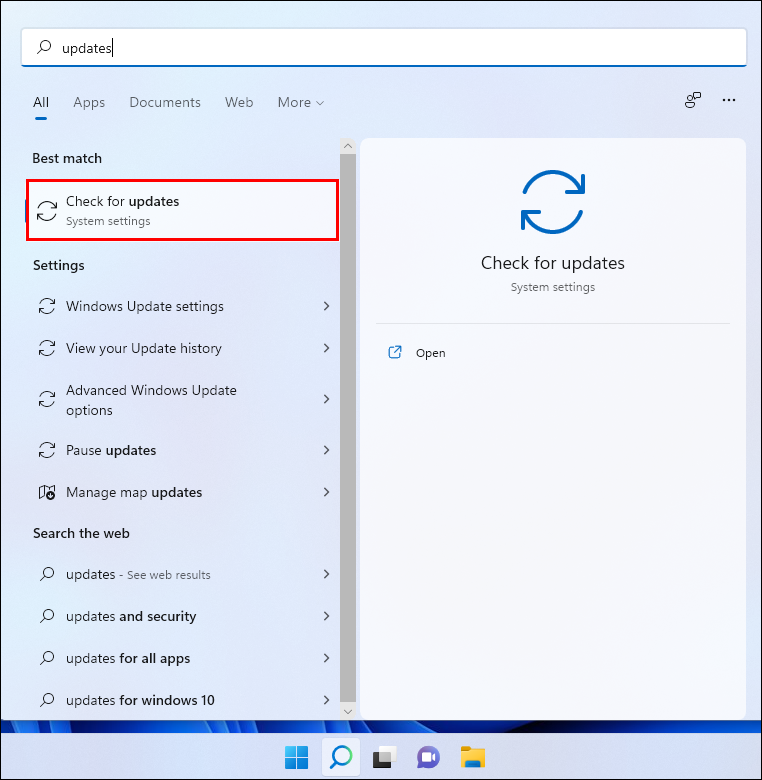
- Open “Settings” and go to “Windows Update.”

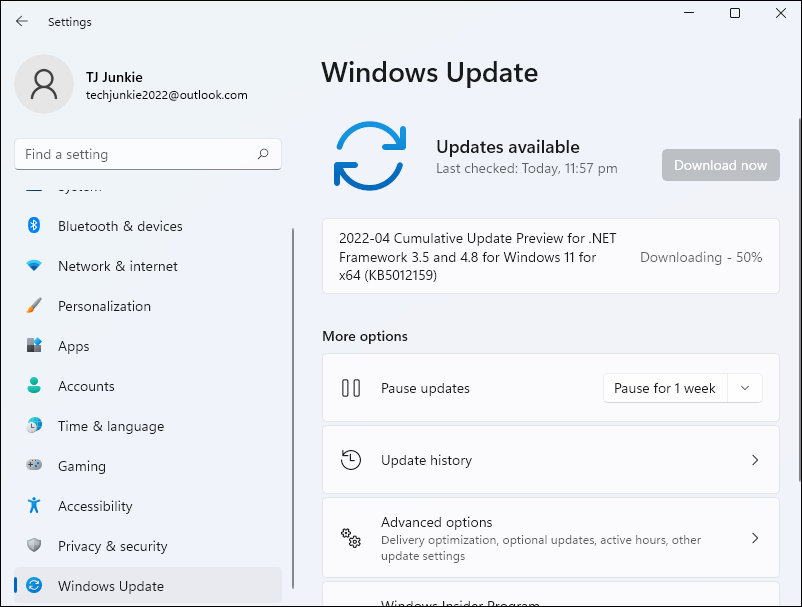
- Tap “Check for Updates” and download the necessary drivers.

- Give Windows a few minutes to install the programs.
You have now installed drivers on Windows 11. To see if you have installed the drivers successfully, follow the steps below.
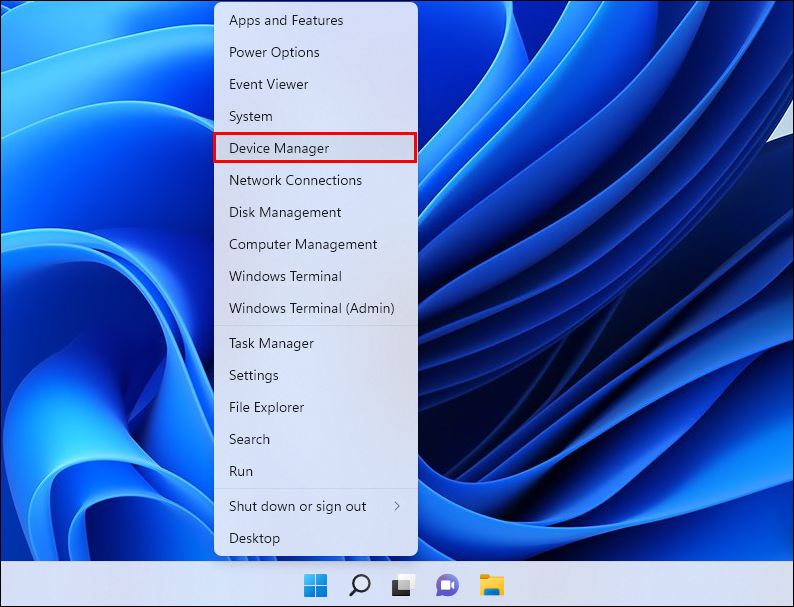
- Right click to “Start” and go to “Device Manager.”
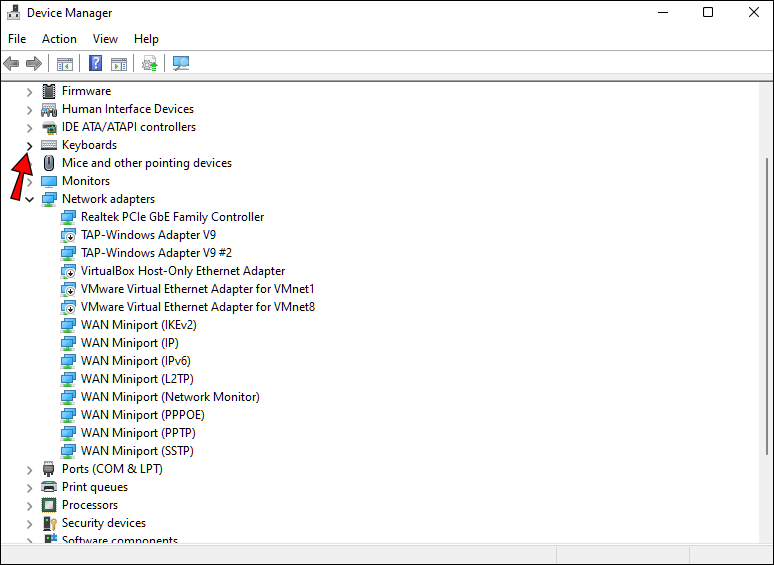
- Scroll to the device you are interested in and click the downward-facing arrow to expand the device category.
- Right-click on the device and tap “Properties.”
- Press the “Driver” tab and check the provided information on when the device was last updated.


If the details provided match what’s on the manufacturer’s website, your driver was installed successfully.
How to Install Drivers in Windows 11 Using Device Manager
Device Manager is, unsurprisingly, the location where drivers are stored and managed. From here, you can quickly scan program details like which drivers are disabled, uninstalled, or in need of an update. A right-click on the driver will display a pop-up menu that you can use to manage the various programs. This is how to install drivers using the device manager.
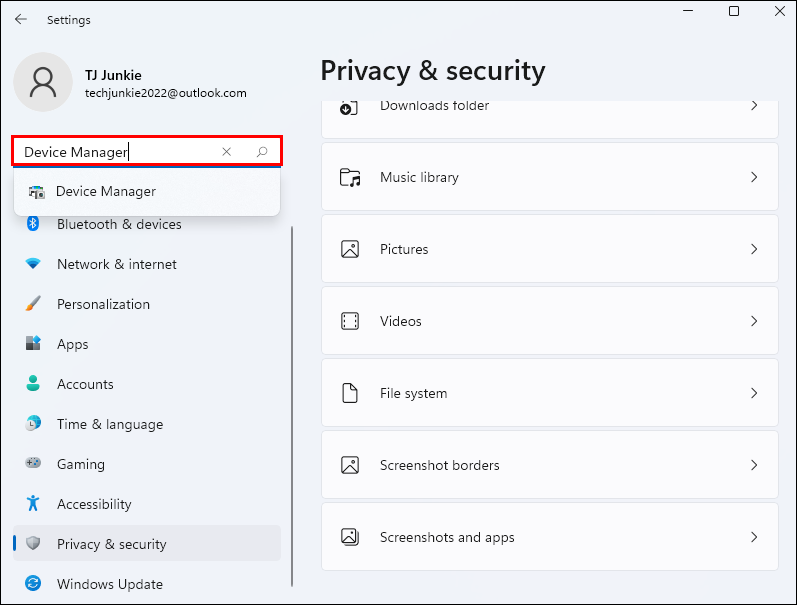
- Go to “Settings” and search for “Device Manager.”
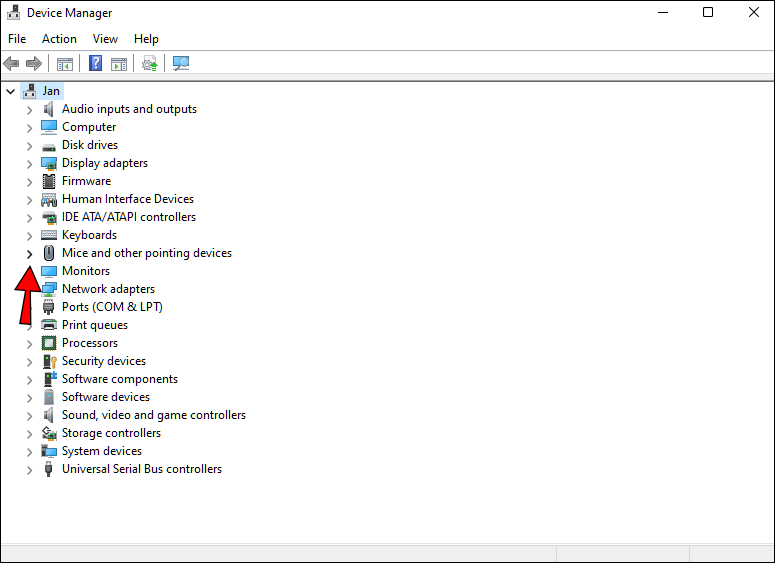
- Tap the downward-facing arrow next to the device you would like to install.
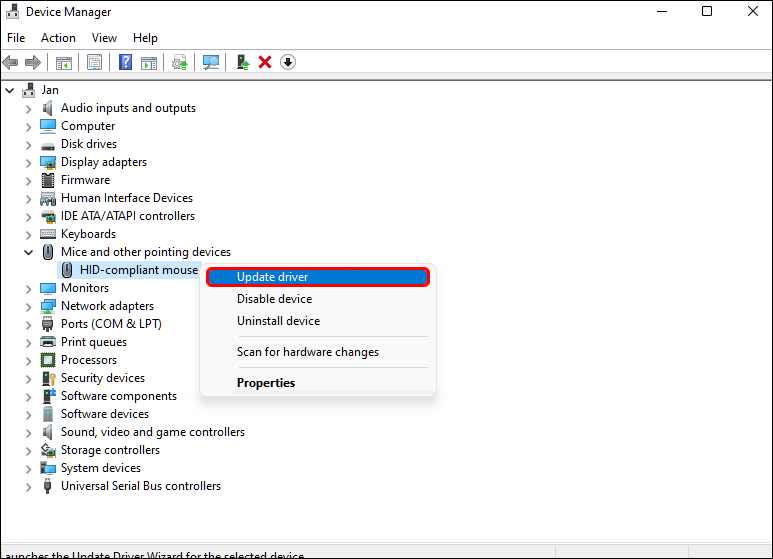
- Right-click on it and click on “Update Driver.”
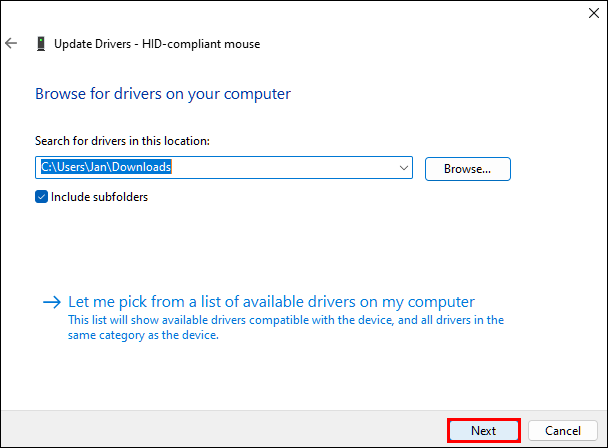
- Select “Browse My Computer” and then “Browse.”
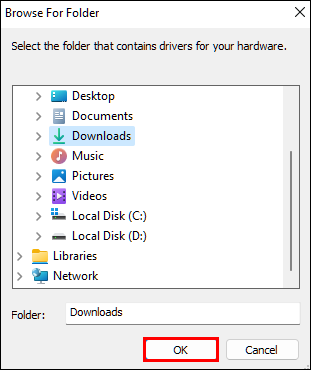
- Scroll to the folder with the installation file and hit “OK.”
- Find the correct subfolder and press “Next” then “Close.”

Windows will begin the process of installing your driver.
If a new driver update isn’t working correctly, right-click on the program and pick the “Rollback Driver” option to go back to the previous version of the driver. This should enable the corresponding hardware to work smoothly while you figure out how to fix the new version of the program.
How to Install Drivers in Windows 11 Using Manufacturer’s Website
Computer manufacturers make it easy to get drivers for your device. By visiting their websites, you can find and download the appropriate programs for your PC. Once you click on “Download,” follow the prompts displayed to complete the installation process.
How to Install Drivers in Windows 11 Using Settings
You can also use the Settings menu to install drivers on Windows 11. Here’s how to do that.
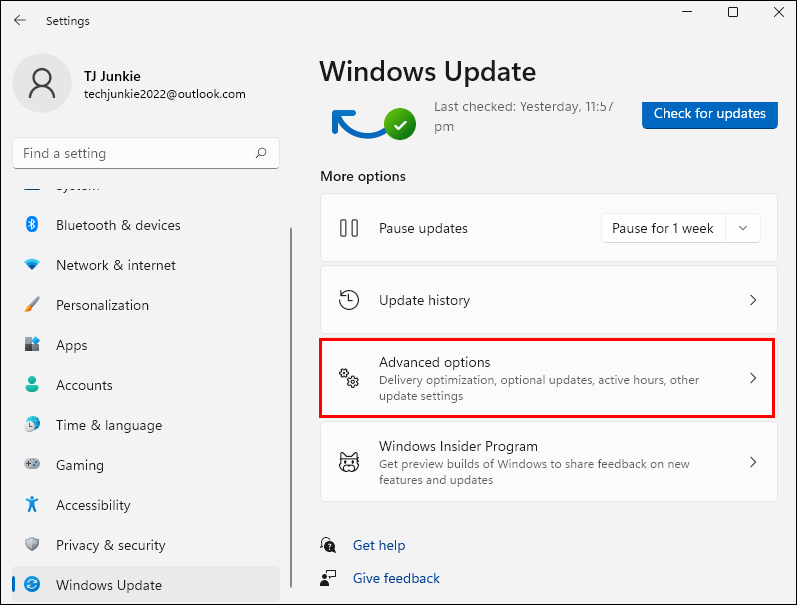
- Open “Settings” and press “Windows Update.”
- Tap the “Advanced Options” button on the right side of the page.
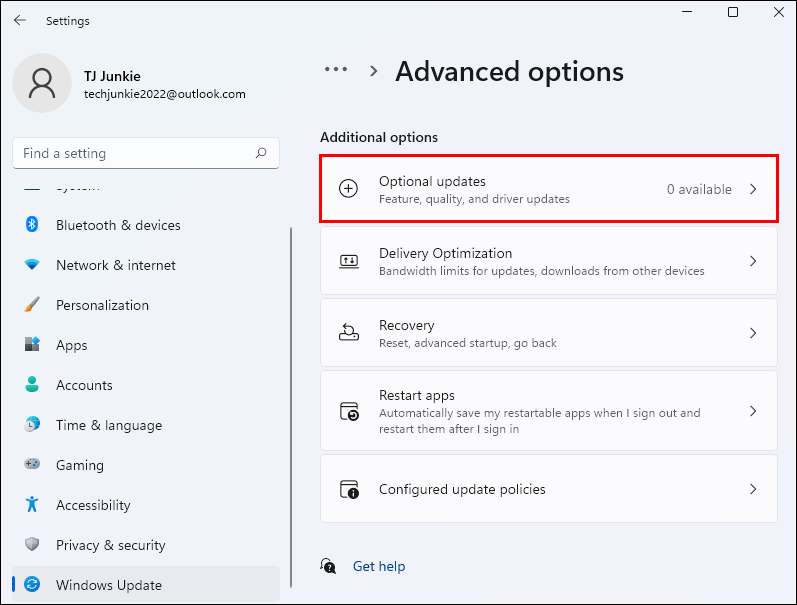
- Click “Optional Updates” and then the “Driver Updates” button.
- Scroll through to see which drivers need to be installed.
- Press “Download and Install” to complete the process.
The relevant drivers will now be installed on your Windows 11 device.
How to Fix Corrupted Drivers
If you are trying to install Windows drivers, but you keep getting an error message, there are several things you can do to fix the issue. Let’s look at some of them here.
Remove External Hardware
If you have issues installing the necessary drivers, you can try unplugging external devices. For instance, you can remove any USB-connected accessories, headphones, or printers. These devices could be interfering with the installation process. Once that’s done, you can attempt the process again.
Run Windows Update
Running a Windows Update could clear the problem with the drivers. The method described below shows you how to do it.
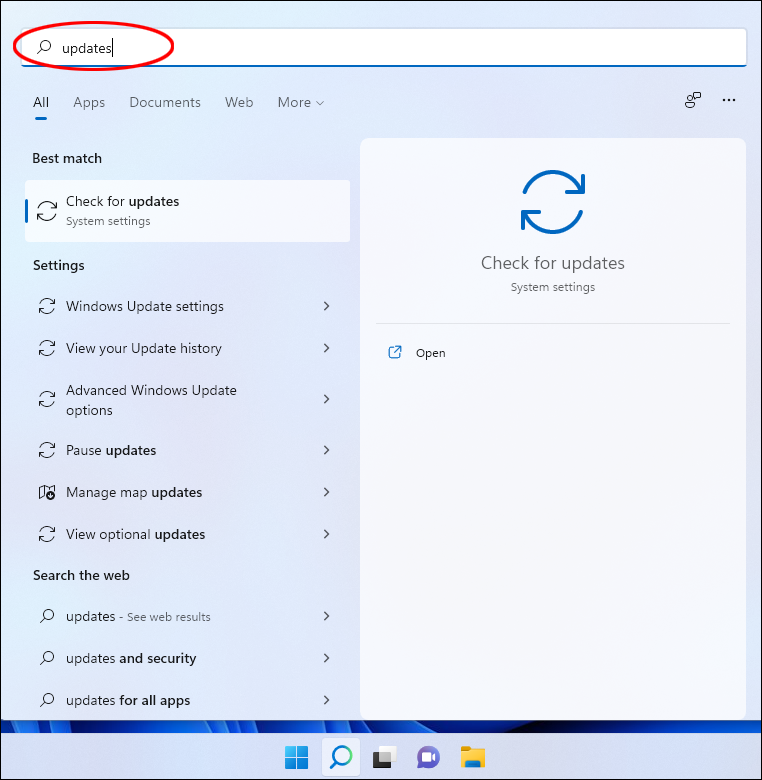
- Go to the Start menu and type “update” in the search bar.
- Tap “Check for Updates” for Windows to begin looking for available updates.
- If updates are available, Windows will now download and install them automatically.
Your installation issues should now be sorted.
Reinstall Drivers
Reinstalling the affected driver could help fix the installation issue. Take a look at how to do that.
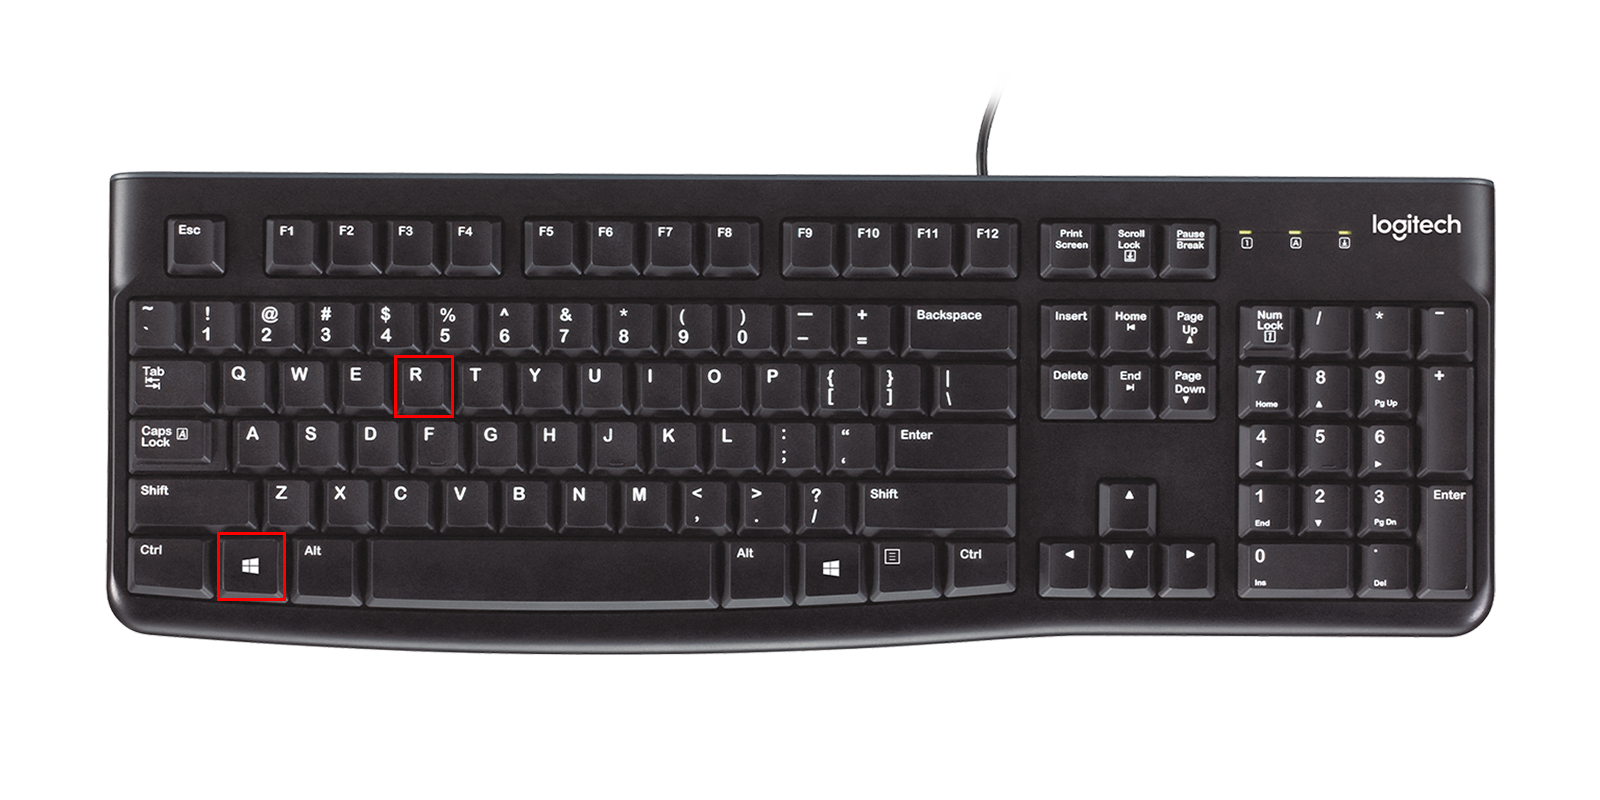
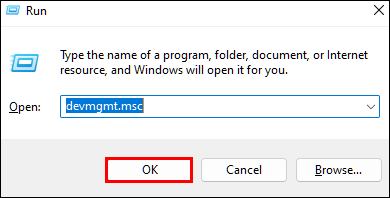
- Tap the “Win + R” keys to open the Run dialogue box.
- Type the following command into the box and then hit “OK.”
devmgmt.msc - In the Device Manager menu that opens, scroll to find the corrupted driver. It should have an alert icon next to it.
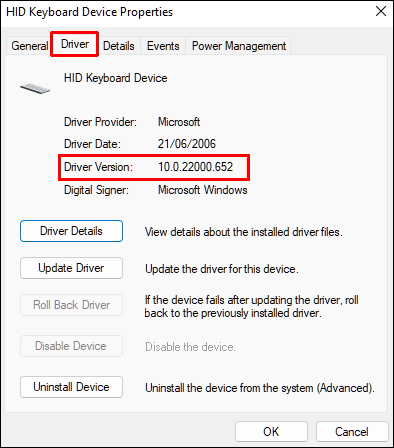
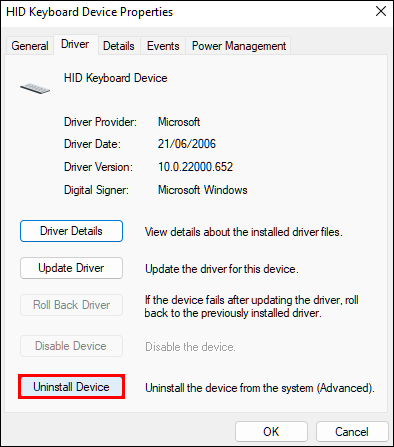
- Right-click on it and pick “Properties” from the pop-up menu.
- Head to the “Drivers” tab and take down the “Driver Version” information for later use.
- Press “Uninstall Device” to remove it from the computer.
- Go to the manufacturer’s website and look for the required driver. It should match the details you made note of earlier.
- Download and install the driver.
Installation glitches should now be resolved.
Use Windows Troubleshooter
If a corrupted driver has you pulling out your hair, the Windows troubleshooter can help you restore your computer’s functionality. Check out how to use it.
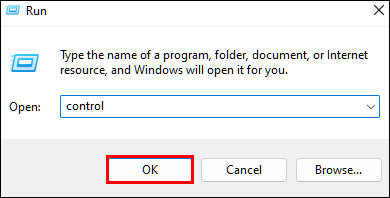
- Open the Run dialogue box by pressing “Win + R.”
- Type “control” into the box and then tap “OK.”
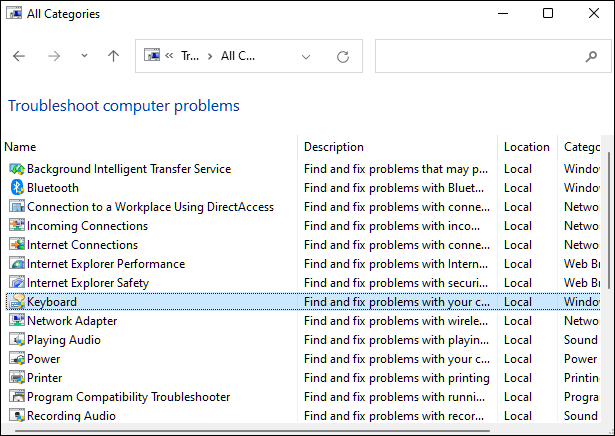
- Click “Large Icons” to change the view in the Control Panel that opens.
- Pick “Troubleshooting” from the menu displayed and then tap “View.”
- Find the corrupted driver and click on it.
- Press “Next” in the pop-up menu for Windows to start the troubleshooting process.


Hopefully, the driver will now be working correctly.
Scan for Viruses
Malware can corrupt the drivers on your PC. Fortunately, this can be an easy fix because Microsoft has security tools to locate and delete corrupted files. Here’s how to use these features to fix malfunctioning drivers.
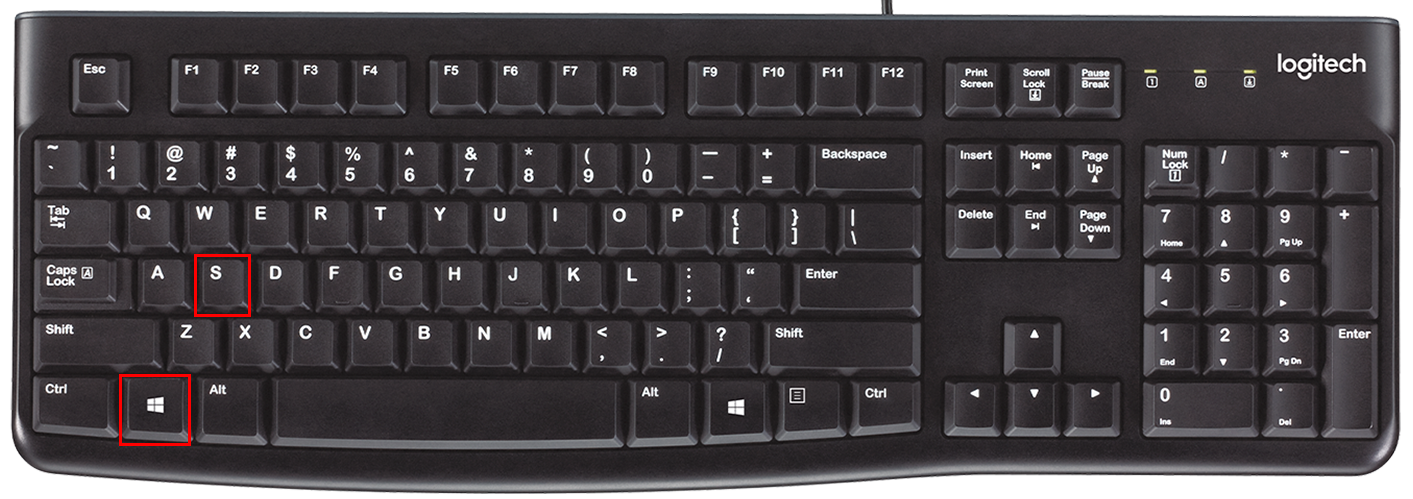
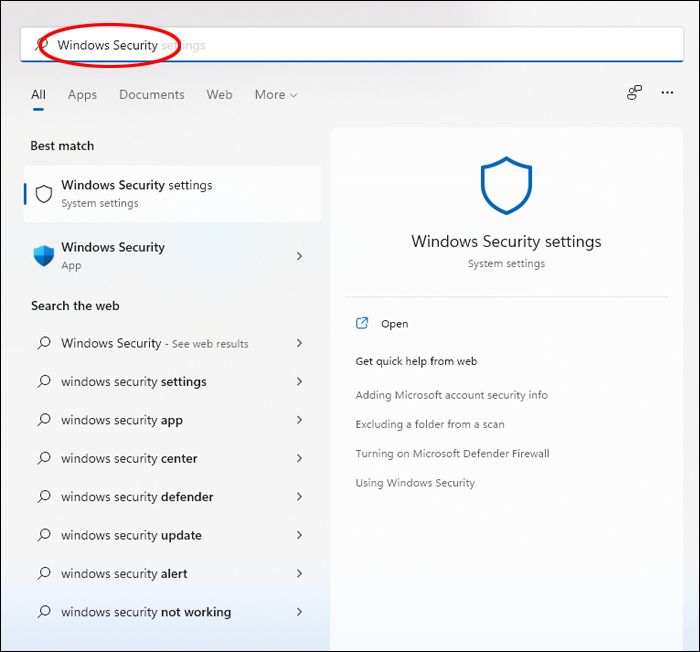
- Tap “Win + S” to open the search feature.
- Type “Windows Security” in the box and hit “Enter.”
- Press “Virus & Threat Protection” and click “Quick Scan.”
- When the scan is complete, update and install the necessary driver.
Your driver problem should now be resolved.
Manual Driver Installation
Drivers are an integral part of your computer. They enable hardware and software components to work together seamlessly. Typically, Windows installs these drivers automatically, but there might be a glitch in the system every once in a while. In that eventuality, thanks to this tutorial, you now know how to install these programs manually.
Have you installed drivers on Windows 11? How did you go about it? Let us know in the comments below.
Disclaimer: Some pages on this site may include an affiliate link. This does not effect our editorial in any way.


