Over time your computer files will accumulate, and you’ll eventually come to a point where your hard drive becomes full. The simplest way to acquire more space for files is to plug in an external device. On the other hand, installing a second SSD is the best way to go if the motherboard can accommodate one. You will have more storage space, your computer will be faster, and it can be used as a backup should the primary drive get corrupted.
Read on to learn how to fit a second SSD and configure it.
How to Install a Second SSD on a Desktop
Installing a second SSD is a two-part process. After fitting the drive, you’ll need to configure the drive via the “Windows Disk Management” utility. This is so your PC can recognize the new drive and use it.
Before you start, be sure to ground yourself on a piece of metal furniture like a furniture leg. This will discharge static electricity and help preserve your computer parts.
Here are the steps to install a second SSD on a PC running Windows 10, 8.1, 8, or 7. For Windows 11, please scroll down to the section “How to install a Second SSD in Windows 11.”
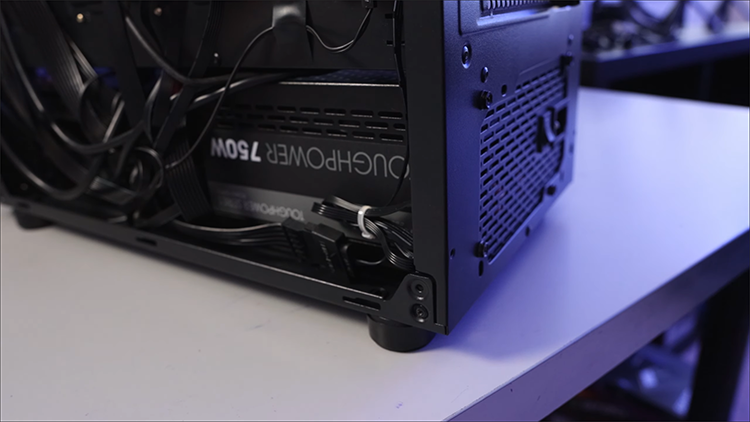
- Disconnect your PC and open the case.

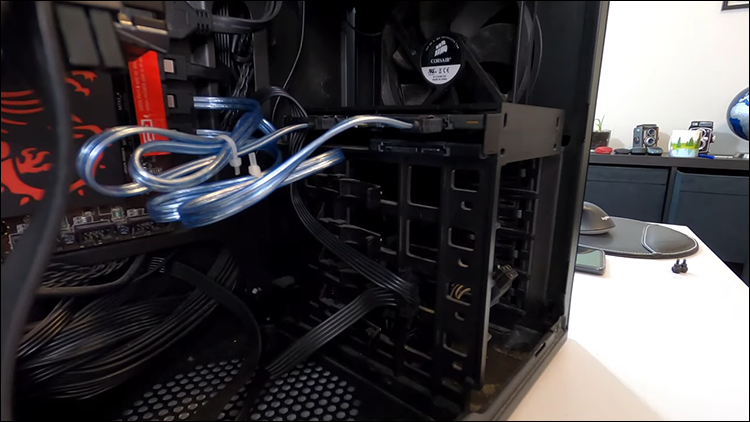
- Find a vacant drive bay.

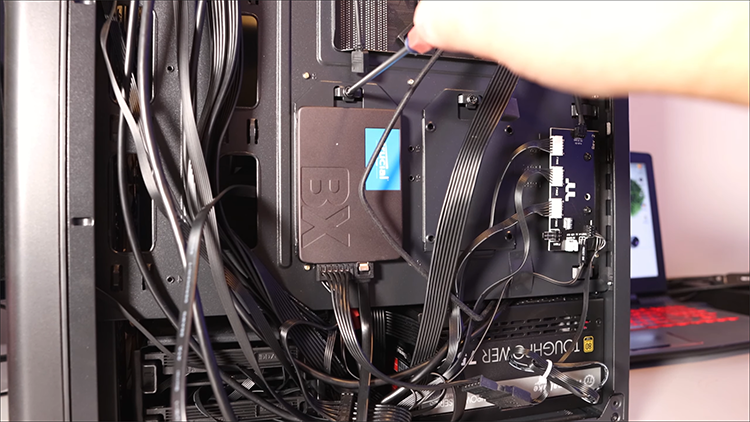
- Detach the drive caddy, then fit the new SSD into it and re-install the caddy.
- If your case doesn’t have a drive caddy, slide the drive straight into the bay, then screw or fasten it in place.
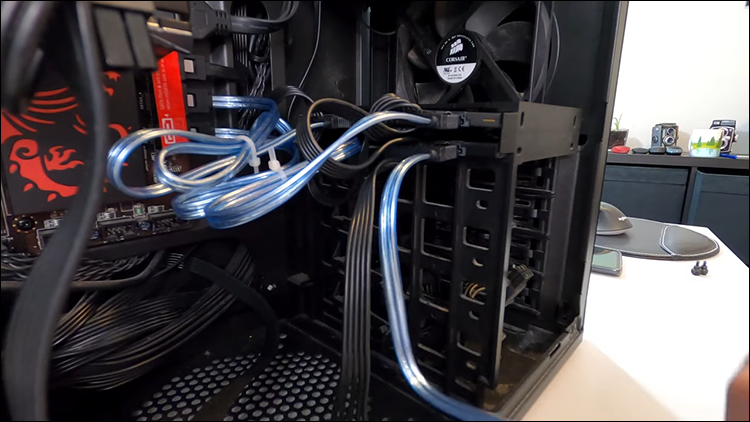
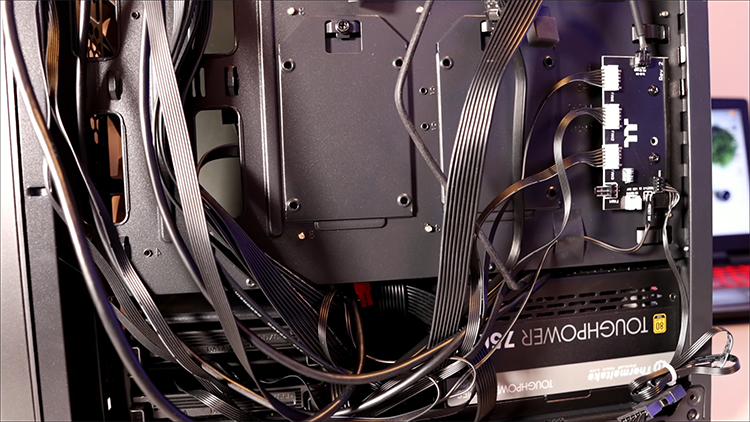
- Find an empty SATA data cable port on your motherboard, then install the SATA data cable.
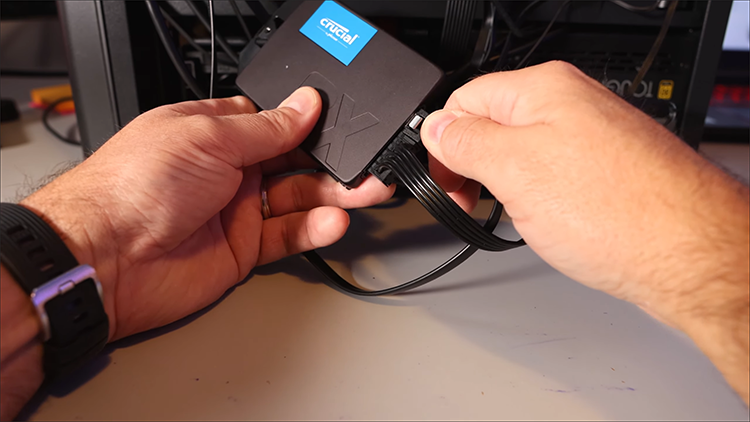
- Locate an available SATA power connector, then connect the SATA power and data connections to your new drive.
The longer connector on the SSD is the power connector. Be sure to fit the connectors in the correct orientation. - Ensure all the leads are securely fitted and that nothing else is unplugged or loose.
- Close the case, reconnect everything and switch on your PC.


Once you’ve confirmed everything works as expected, you can initialize your SSD. At this point, Windows will identify your second SSD but won’t use it. Once it’s initialized and formatted for use, you’ll be able to save files and move old files from your primary drive to create space there.
Follow these steps to start using your SSD:
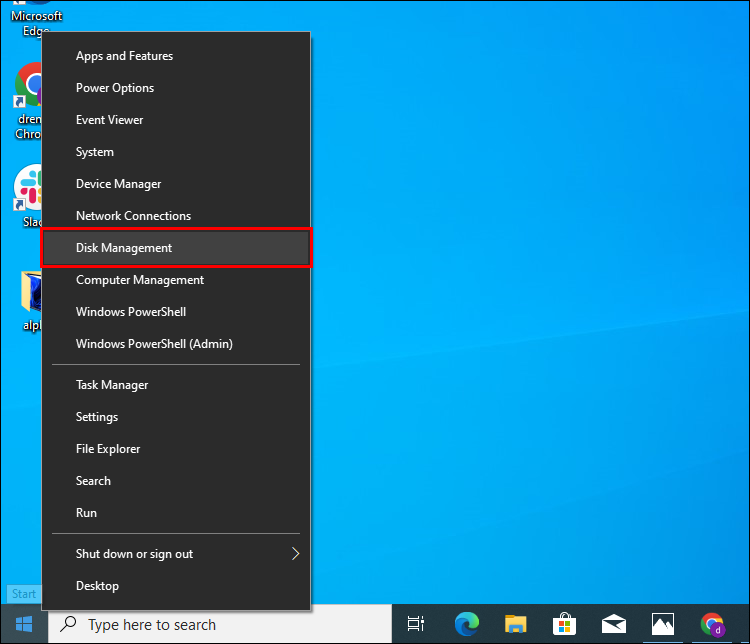
- Right click the Windows icon or press Windows + X keys then Select “Disk Management.”
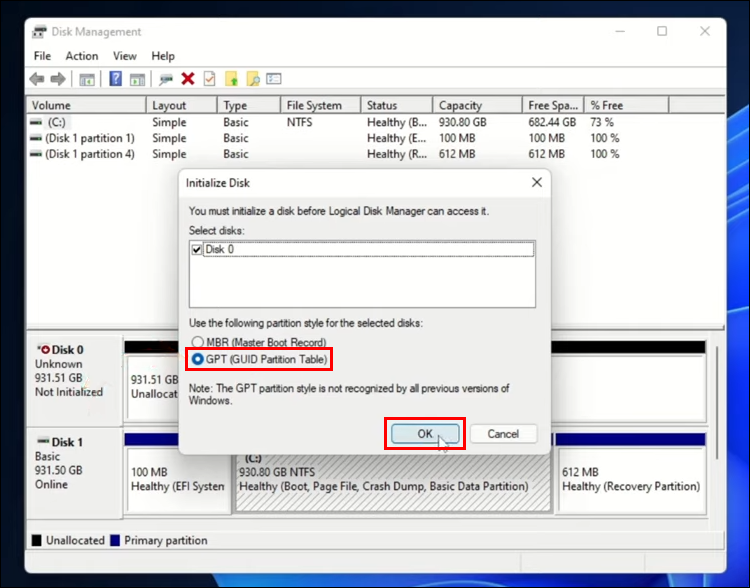
- If requested to initialize the disk, choose “GPT (GUID Partition Table), then “OK.”
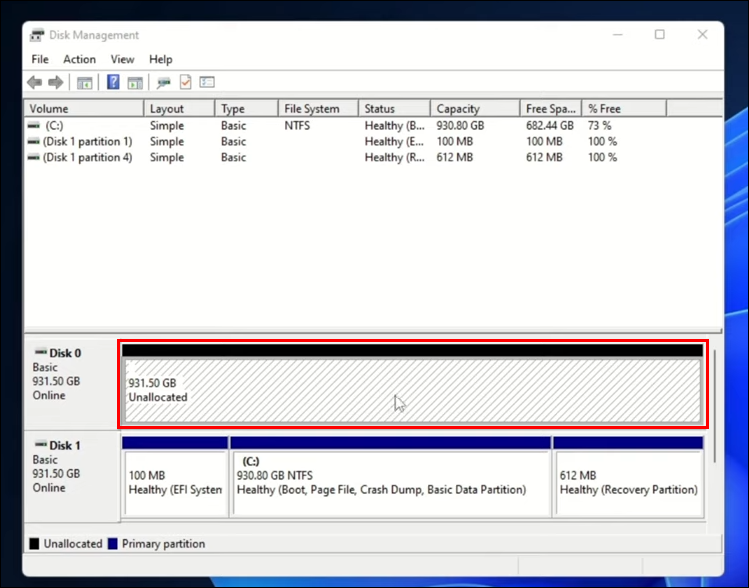
- If the setup wizard is launched, go to step 5. Otherwise, locate your new SSD in the “Disk Management” window, and it will be the one labeled “unallocated.”
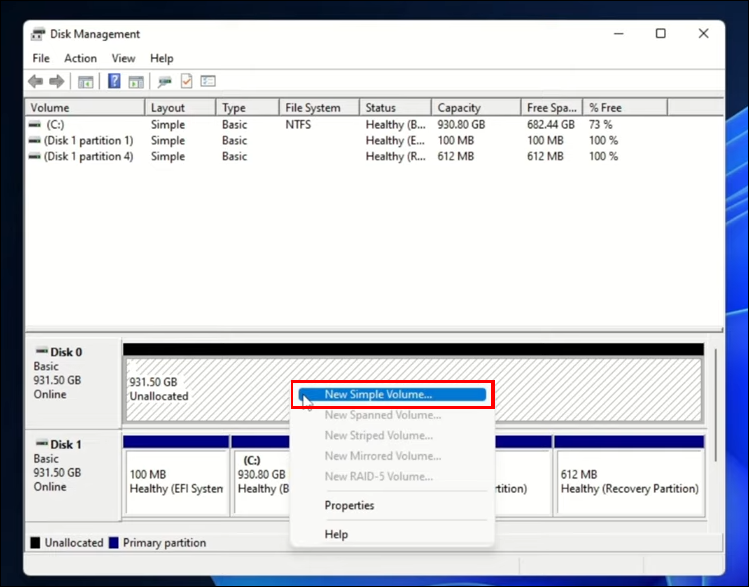
- Right-click and choose “New Simple Volume,” then “Next.”
- Ensure the two numbers match, then click “Next.”
- Choose a drive letter or stick to the default one, then press “Next.”
- Choose the “NTFS” file system, leave the allocation unit size, and add a volume label if you wish, then hit “Next.”
- Confirm the information, then press “Finish.”


Your new SSD is now ready to use.
How to Install a Second SSD in a Laptop
If your laptop can accommodate two M.2 drives, you can install a second SSD drive. Installation includes configuring the drive using the “Windows Disk Management” utility so your laptop will recognize it.
Every laptop is different, so you may need to find information online to gain access to your specific model. Before beginning installation, be sure to ground yourself on a piece of metal furniture like a furniture leg. This discharges static electricity, which is bad for computer components.
The following steps will generally apply. Here’s how to install a second SSD drive on your laptop:
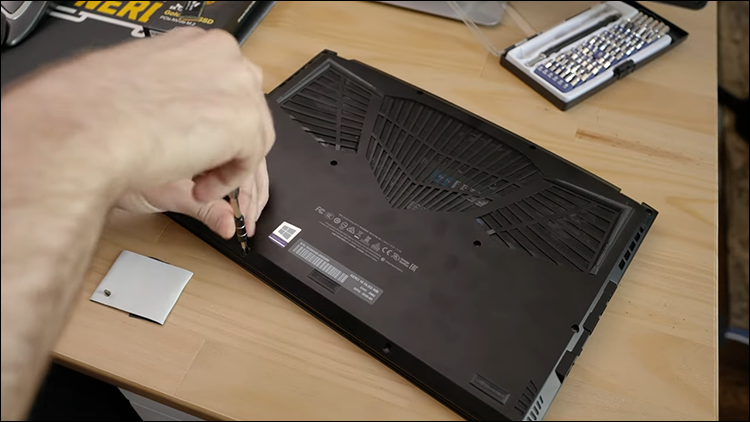
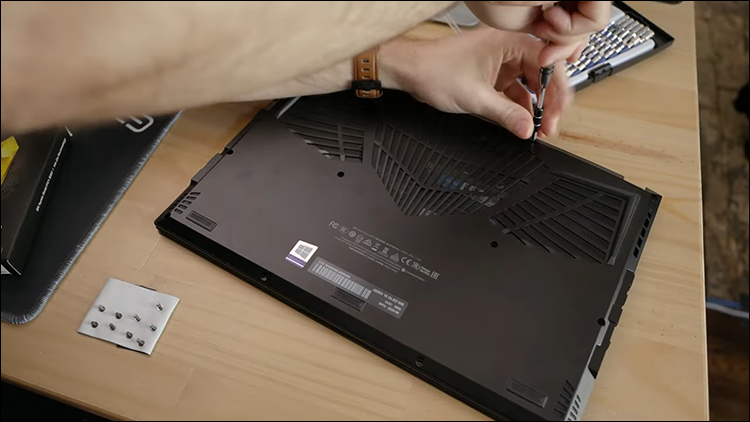
- Unscrew, then remove the laptop’s back cover.
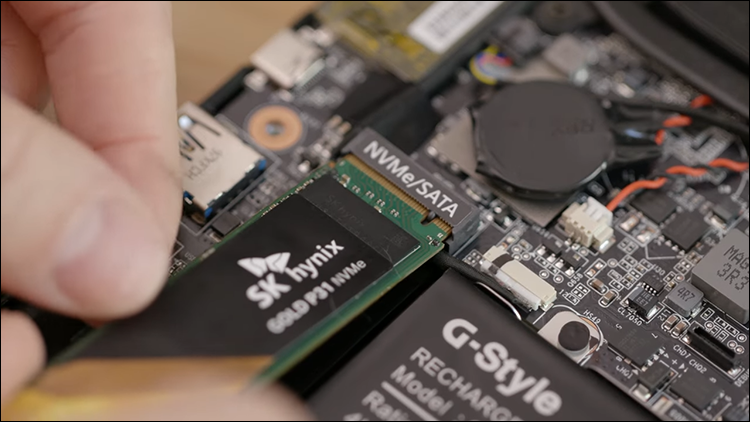
- Find the unpopulated M.2 slot. It may be marked NVMe/SATA or similar.
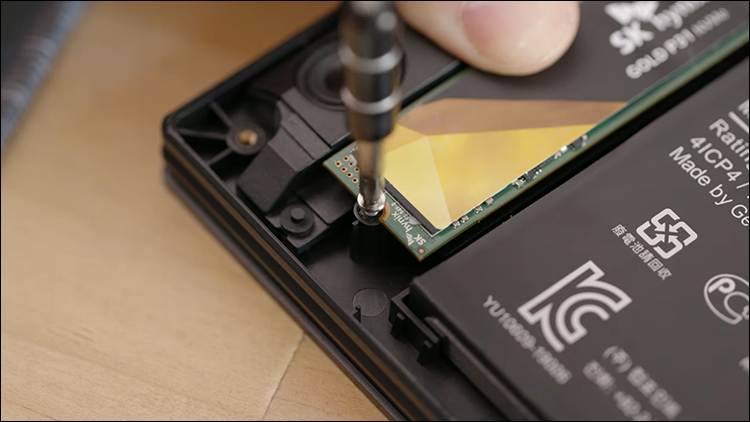
- To install the drive, first, unscrew the retention screw. If your laptop doesn’t have a screw already there, you may need to buy one before proceeding.
- Take the M.2 drive and line up the notch in the contacts with the notch in the slot so it inserts correctly.
- Install the screw back into the mount while holding the drive flat.
- Now take care to screw the laptop bottom back on, then boot up Windows.


Follow these steps to format and initialize the SSD for a laptop running Windows 11. For Windows 10 and earlier, please refer to the second set of steps in the section “How to Install a Second SSD in Desktop” above.
- Launch Windows 11.
- Right-click the Windows icon on the taskbar.
- In the context menu, select “Disk Management.”
- Two windows will launch, “Disk Management” and “Initialize Disk.”
- Choose “GPT(GUID Partition Table)” from the “Initialize Disk” window, then press “OK.”
- At the bottom of the “Disk Management,” right-click on “Disk 0,” and a context menu will pop up.
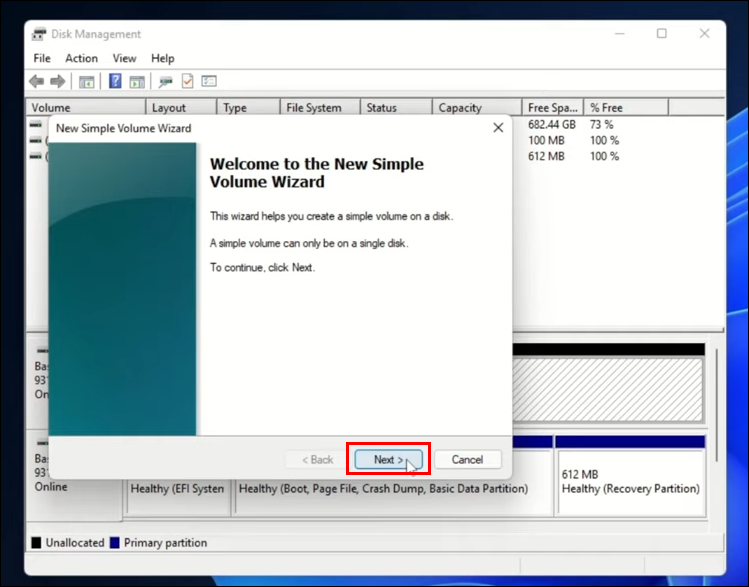
- Select “New Simple Volume,” and the “New Simple Volume Wizard” will launch.
- Click “Next.”
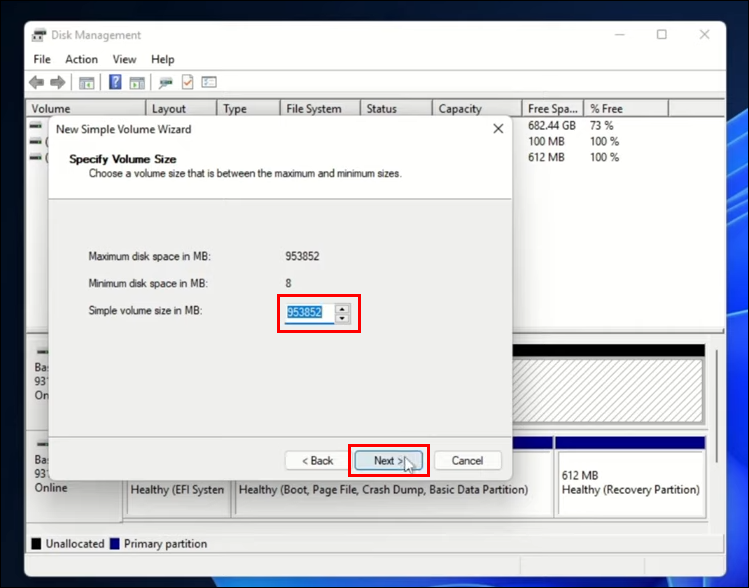
- Here you can see your new hard drive’s maximum space; hit “Next.”
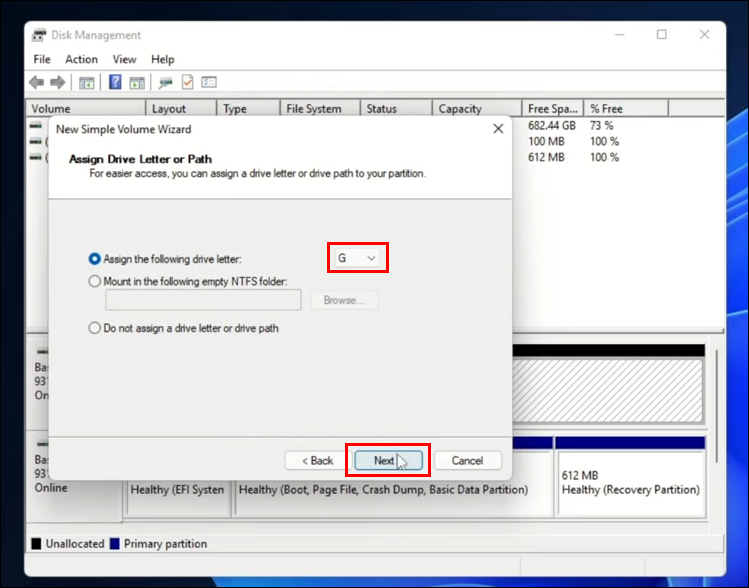
- Assign any letter to your new drive. Click the pull-down menu to choose a letter, then click “Next” to continue.


To format the SSD drive, perform the following:
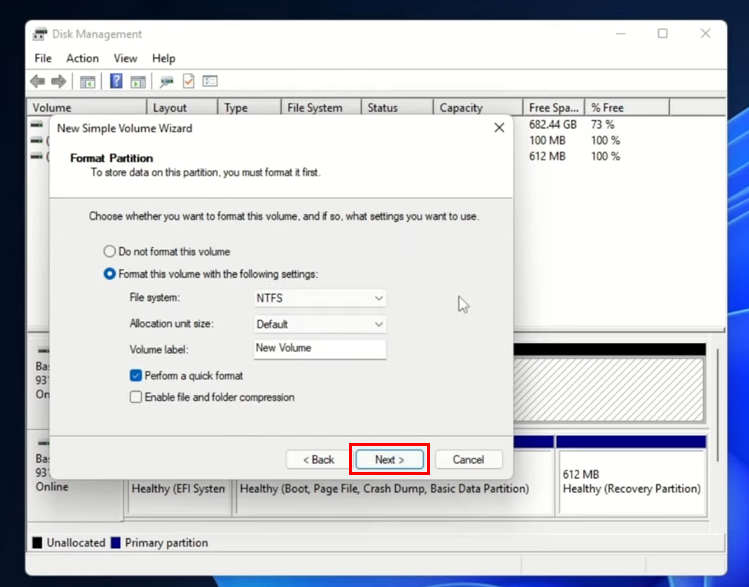
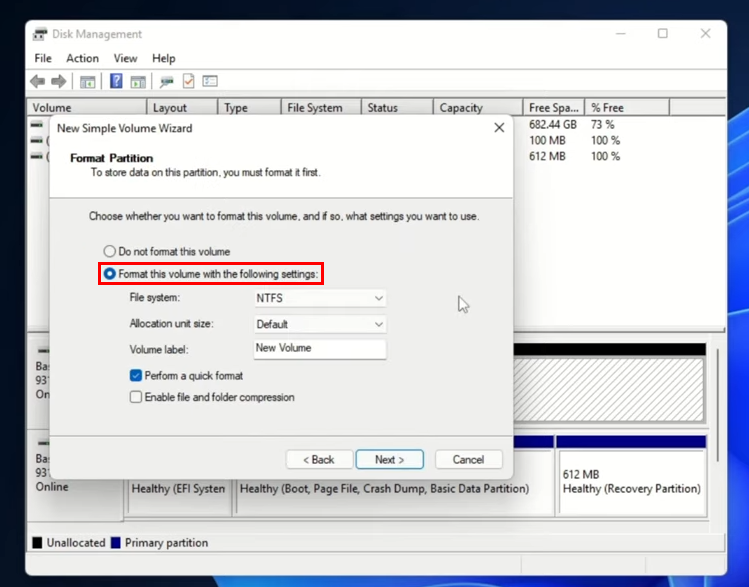
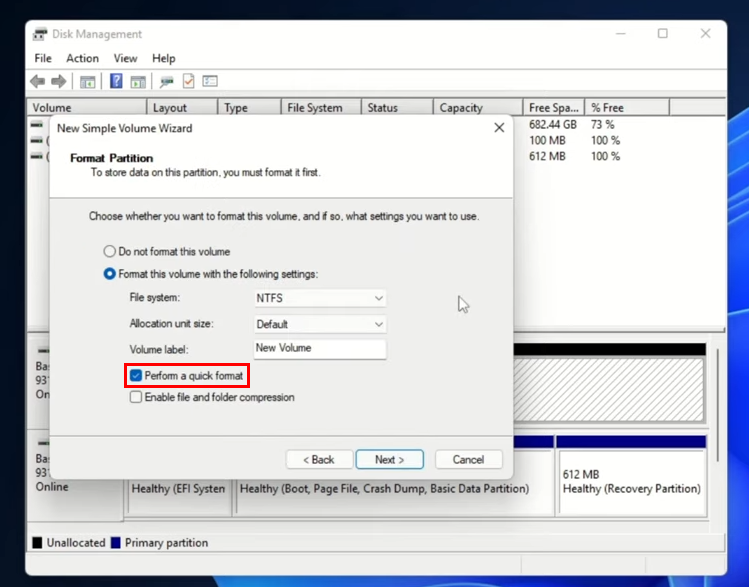
- After clicking “Next,” the “Format partition” window will launch.
- Choose “Format this volume with the following settings:”
- At “File system,” choose “NTFS.”
- Under “Allocation unit size,” select “Default.”
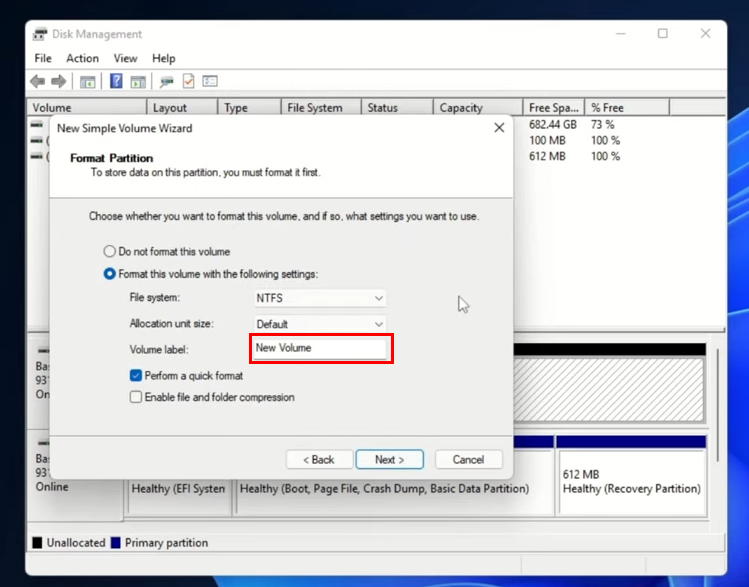
- Enter a name for your new drive in the “Volume label” text field.
- Check the “Perform a quick format” option.
- Click the “Next” button.
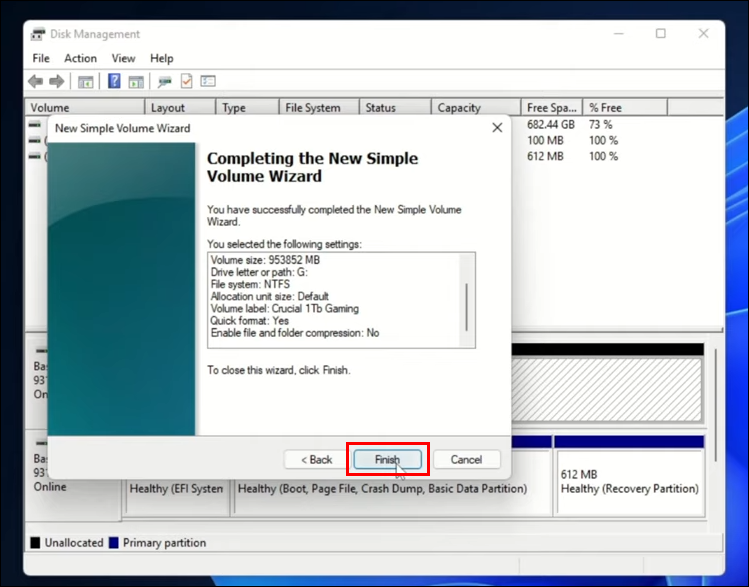
- The last window display’s all the information for your new hard drive. Click “Finish.”


Windows will start to format your SSD drive. Once it’s formatted, the “Disk 0” option will be set to the name you provided in step 5. It will be marked as “Healthy (Basic Data Partition)” and ready to use.
How to Install a Second SSD Windows 11
If you want to use a second SSD in your Windows 11 computer, installation involves configuring the disk once it’s fitted. The “Windows Disk Management” utility will get your computer to recognize the new drive so you can use it.
Before you begin, be sure to ground yourself on a piece of metal furniture. For example, use a chair with metal legs to help discharge static electricity that may affect the eternal components.
Follow these steps to install a second SSD on your Windows 11 PC:
- Ensure your PC is disconnected, then open the case.
- Locate an available drive bay.
- Remove the drive caddy, and fit the new SSD into it, then re-install the caddy. If there is no caddy, slide your drive directly into the bay or a metal bracket adapter, then fasten it.
- Locate an available SATA data cable port on the motherboard, then install the SATA data cable.
- Find a free SATA power connector, and connect the SATA power and data connections to your SSD drive.
The longer connector on your SSD is the power connector. Be sure to install the connectors in the correct orientation. - Ensure all cables are fitted securely.
- Close the case, then switch on your PC.


Here are the steps to format and initialize the SSD for your Windows 11 computer:
- Launch Windows 11.
- On the taskbar, right-click the Windows icon.
- Choose “Disk Management” via the context menu.
- Two windows will open, “Disk Management” and “Initialize Disk.”
- From the “Initialize Disk” window, choose “GPT(GUID Partition Table), then press “OK.”
- At the bottom of the “Disk Management” window, right-click on “Disk 0,” then choose “New Simple Volume” from the context menu.
- The “New Simple Volume Wizard” will launch. Click “Next.”
- There should display the maximum space of your new hard drive; hit “Next.”
- Click on the pull-down menu to choose a letter for your new drive, then click ” Next. “


To format the SSD drive, follow these steps:
- After clicking “Next,” the “Format partition” window will open.
- Press “Format this volume with the following settings:”
- Select “NTFS” as the “File system.”
- Select “Default” as the “Allocation unit size.”
- Enter a name for your new drive at the “Volume label” text field.
- Check the “Perform a quick format” checkbox.
- Click the “Next” button.
- The last window will display your new hard drive information, then click “Finish.”


Windows will begin formatting the drive. When complete, the “Disk 0” option will be set to the name you provided in step 5. It will be marked as “Healthy (Basic Data Partition)” and ready to use.
More Storage Space
Eventually, the in-built SSD drive in your computer will become full. However, installing a second SSD gives you more space and serves as a backup if your primary SSD gets hacked or corrupted. Most motherboards are designed for an easy SSD drive installation. Once fitted, the “Windows Disk Management” utility can configure it for use.
Were you able to install and configure your new SSD successfully? Has the additional SSD drive made a difference? Let us know in the comments section below.
Disclaimer: Some pages on this site may include an affiliate link. This does not effect our editorial in any way.


