Although Windows 11 boasts more advanced features than its predecessors, the operative system will still blackout the screen when you don’t use the device. After you return from your break, you’ll have to tinker with the mouse or touchpad to return to your work. If you’re looking for a way to resolve this problem, you’ve come to the right place.
This article will discuss several methods to keep the display up and running and reduce screen timeouts in Windows 11. We’ll also cover how to disable power saving and prevent screen disruptions.
How to Keep Screen on Longer in Windows 11 Using “Settings”
The “Settings” app adjusts most of your PC’s behavior, so you can use it to tweak the timeout time and keep your screen on longer. To prolong your screen timeout time:
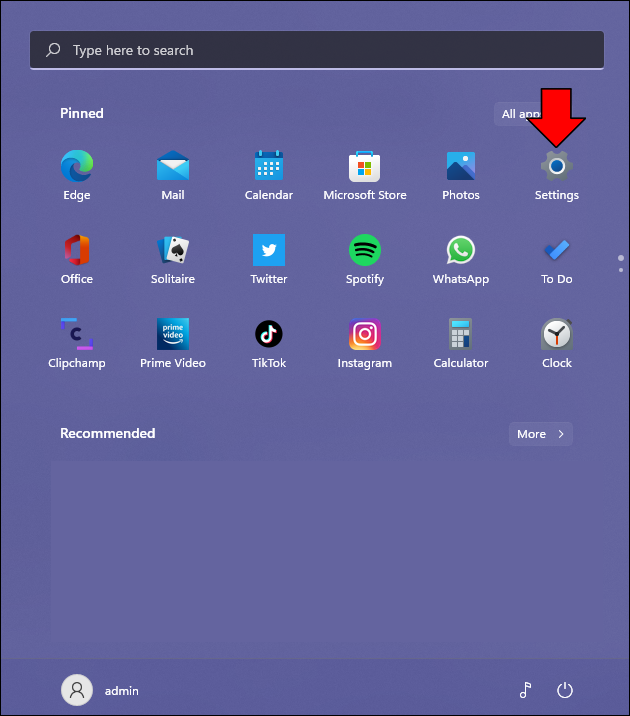
- Locate the “Settings” icon above the “Power” button and click on it.
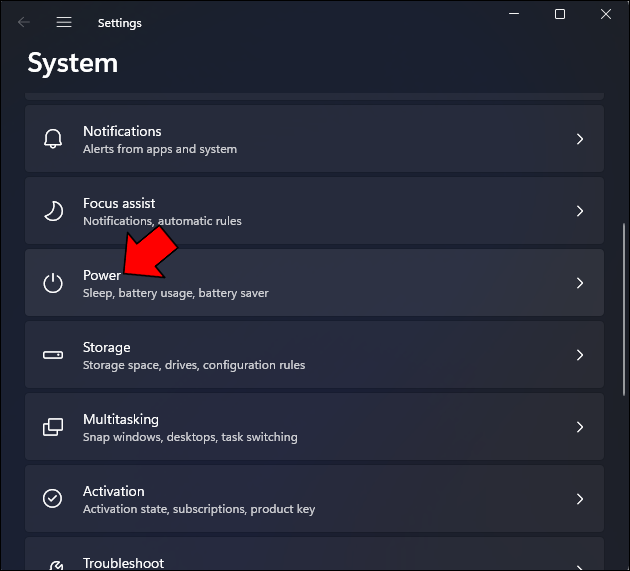
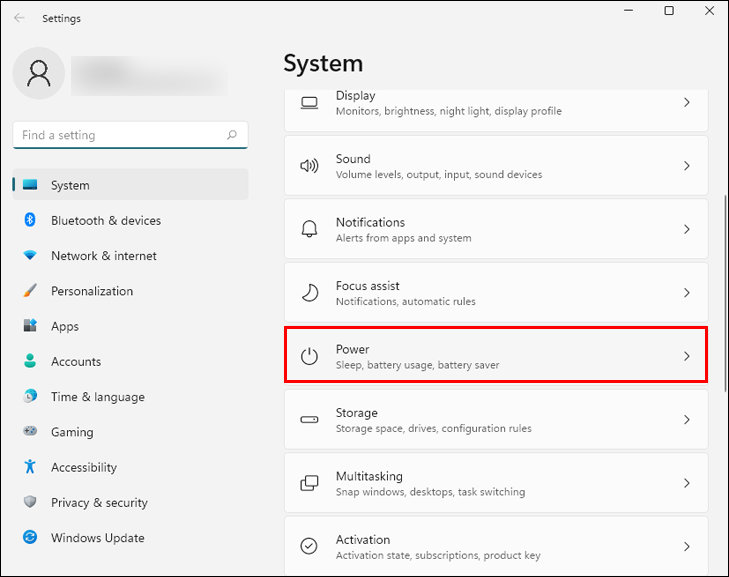
- Select the “System” option from the “Settings” menu bar and tap “Power & battery.”

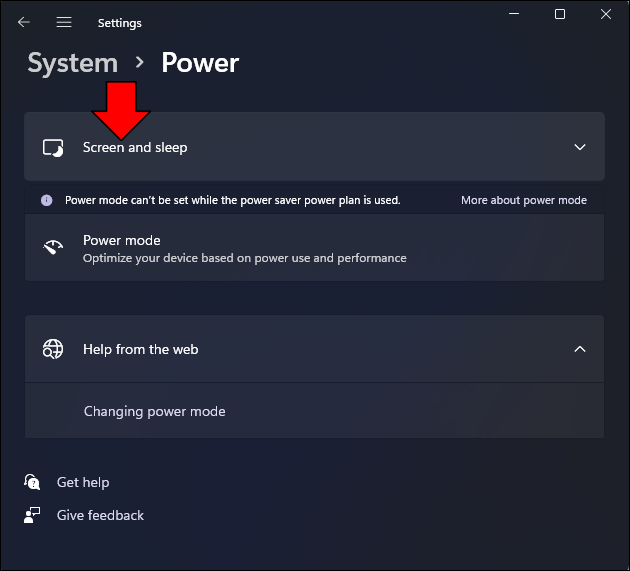
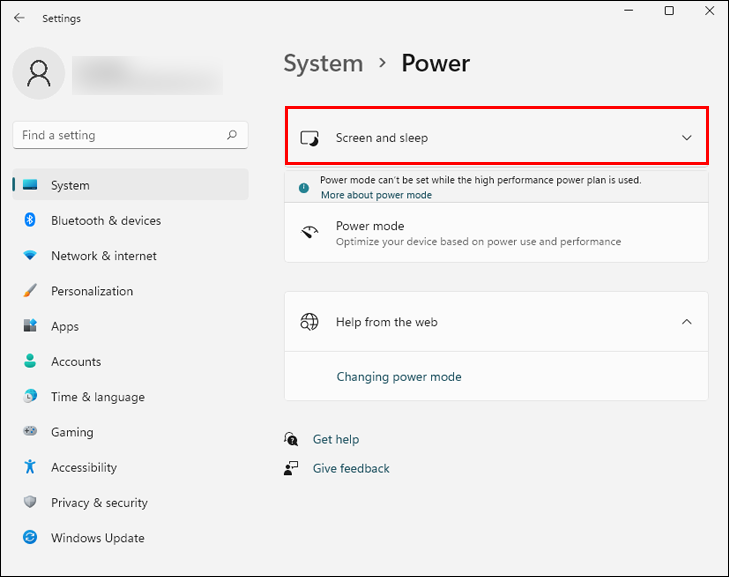
- Click on the “Screen and sleep” section to expand it.
- You’ll see two timeout options. Enter the desired timeout periods in the “On battery power” and “When plugged in” fields to prevent the screen’s darkening too early.

If waiting for the screen to light up frustrates you, you could also completely switch off the screen timeout. Users who prefer working on laptops should note that timeout prolongs battery life, so disabling it may drain the battery faster. To turn off timeouts and always keep the screen on:
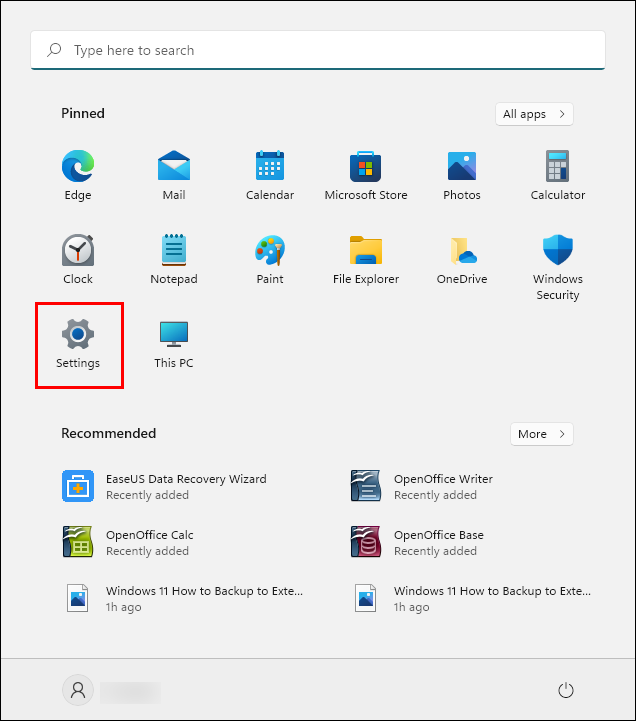
- Navigate to the “Start” button and click on the “Settings” icon above it.
- Choose the “System” option from the “Settings” side menu and click on “Power & battery.”
- Press the “Screen and sleep” section to view the screen timeout options.
- Go to the “On battery power” field and change the value to “0.”
- In the “When plugged in” field, adjust the value to “0.”
Your PC or laptop will automatically save the changes. Regardless of how long you’ve left the device inactive, it will keep the screen bright. You’ll be able to return to your work without wiggling the cursor to wake the screen.
How to Keep Screen on Longer in Windows 11 Using the Control Panel
Another way to improve screen life is tweaking the settings through the Control Panel. The process is relatively straightforward and allows users to leave their devices without worrying about returning to a black screen. Here’s how it works:
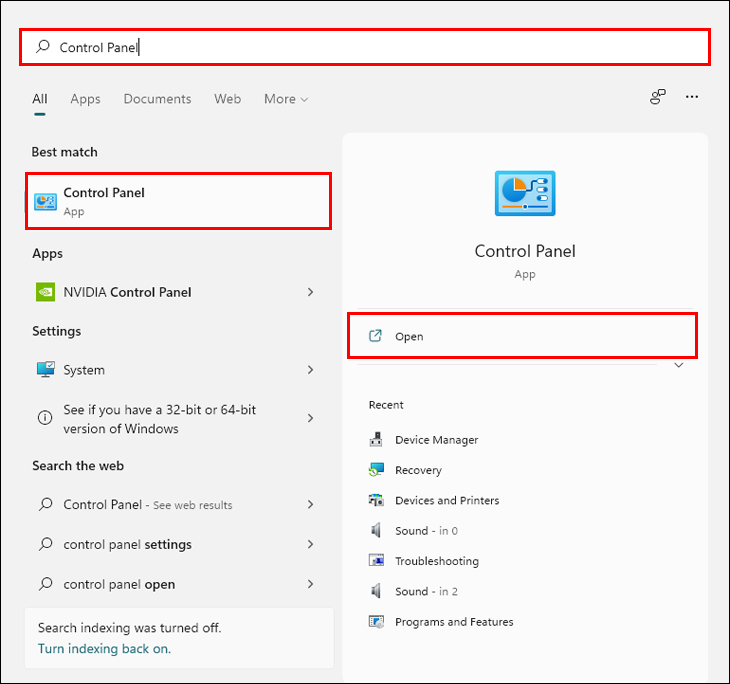
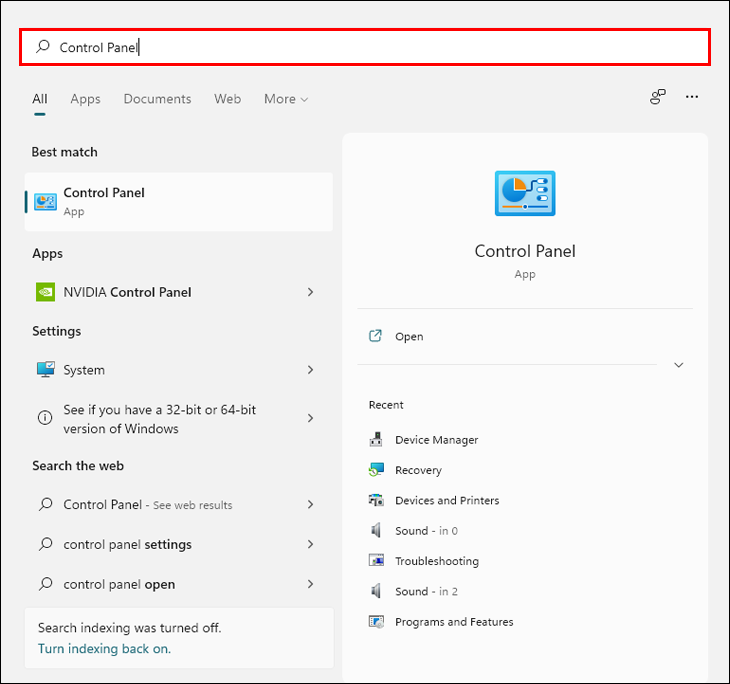
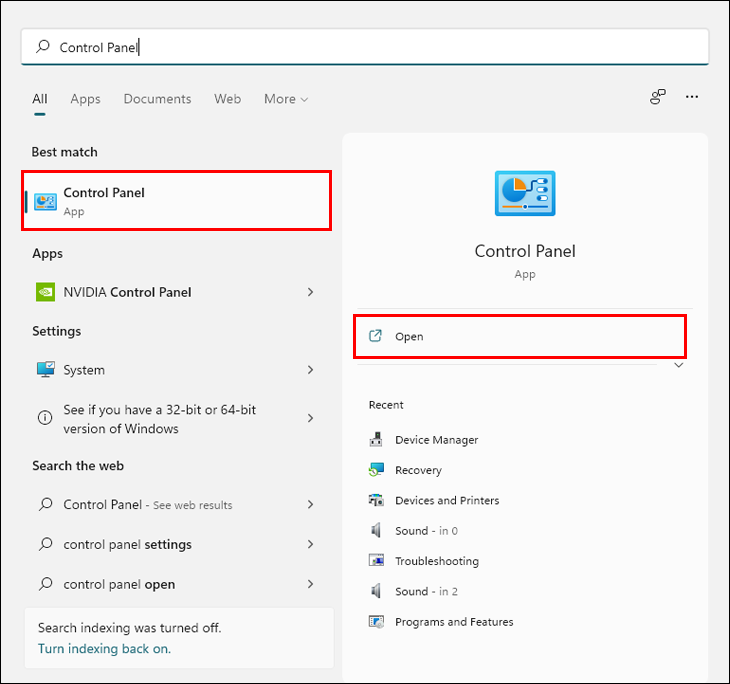
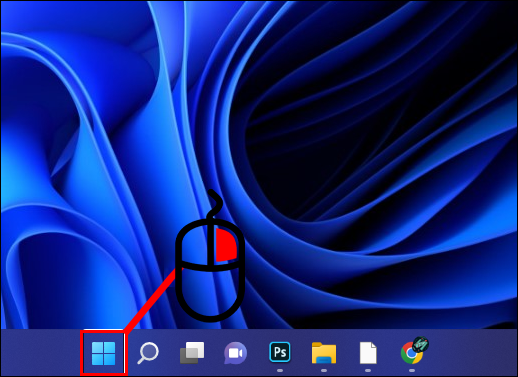
- Click on the “Start” button and type “Control Panel” in the search field. Tap the program when it pops up in the search results. It should be the first option.
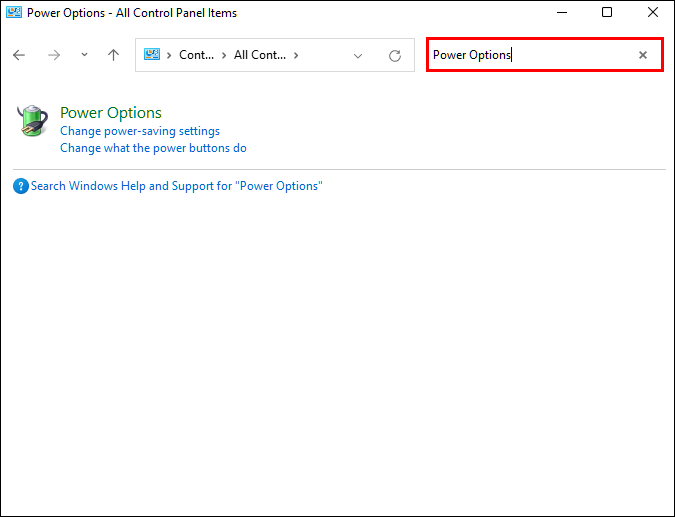
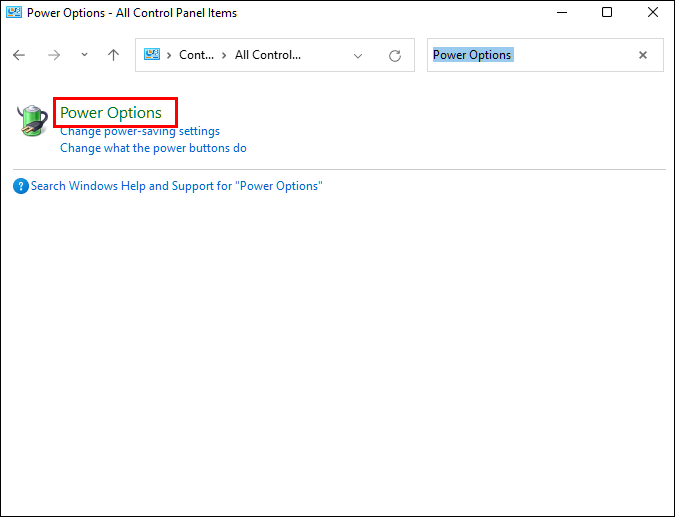
- Navigate to the Control Panel search field and type “Power Options.”
- Select “Power Options” from the Control Panel window.
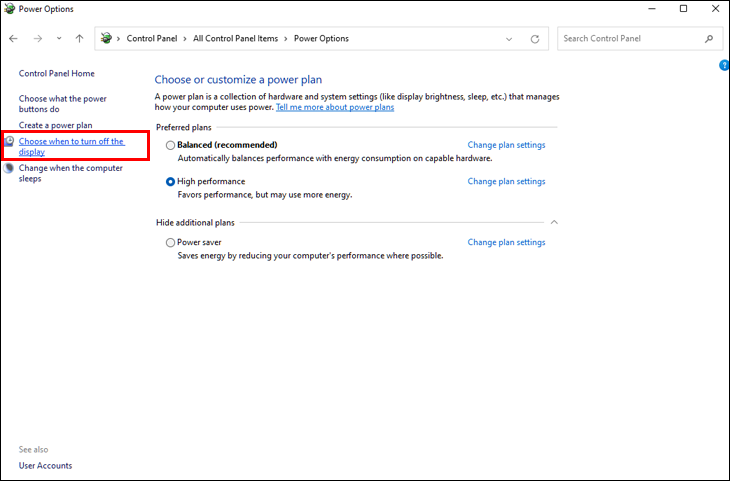
- Tap “Choose when to turn off the display” in the menu bar on the left part of the interface.
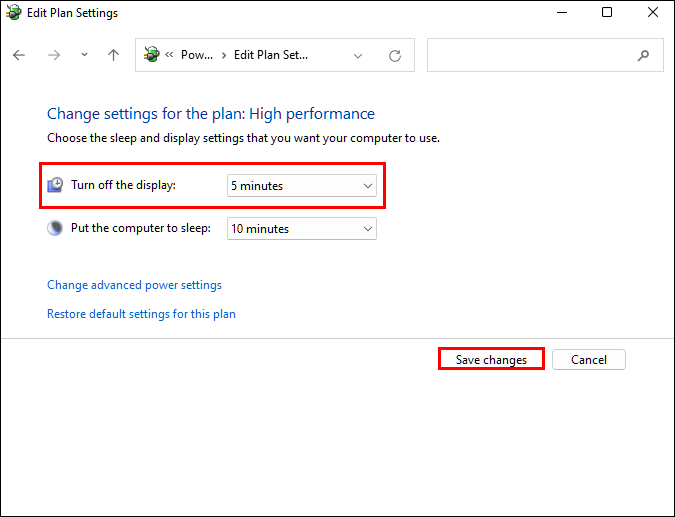
- Adjust the screen timeout setpoints and hit the “Save changes” button to implement the modifications.
The Control Panel is a powerful program that offers an additional method for adjusting screen timeouts. To access and modify the power plan settings:
- Tap the “Start” button and type “Control Panel” in the search menu.
- Click on “Control Panel” when it appears in the search results. Typically, it will show up as the first option.
- Go to the Control Panel search menu and type “Power Options.”
- Select “Power Options” in the left part of the Control Panel window.
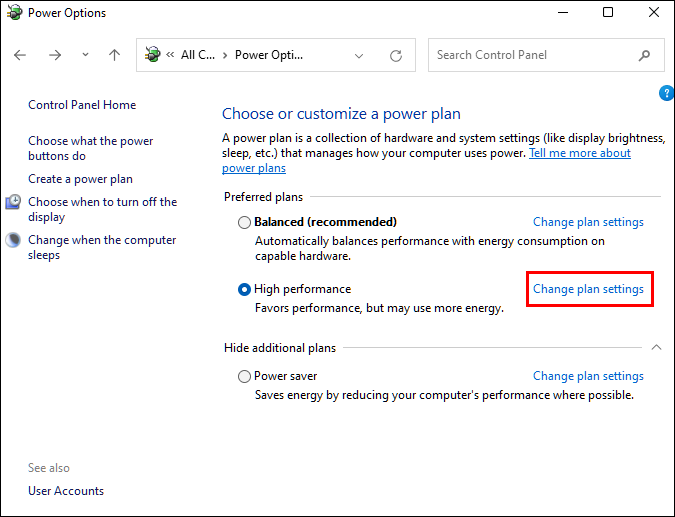
- Press the “Change plan settings” option beside the PC’s active power plan.
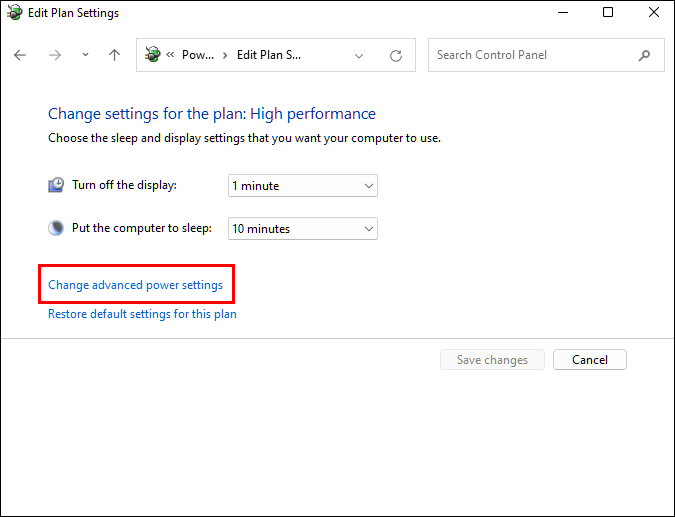
- Click on “Change advanced power settings.”
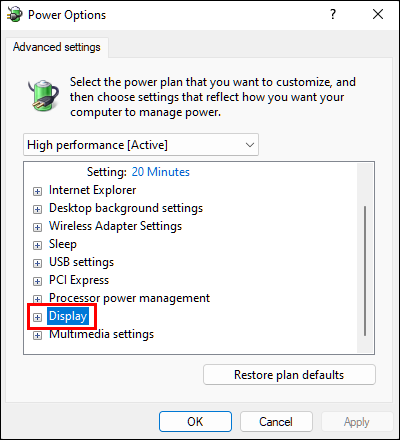
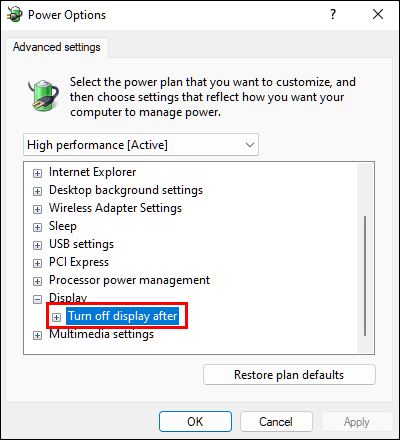
- Tap the “Display” heading to expand it.
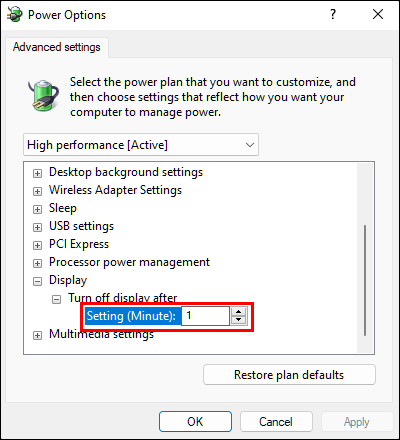
- Choose the “Turn off display after” section to view the timeout values.
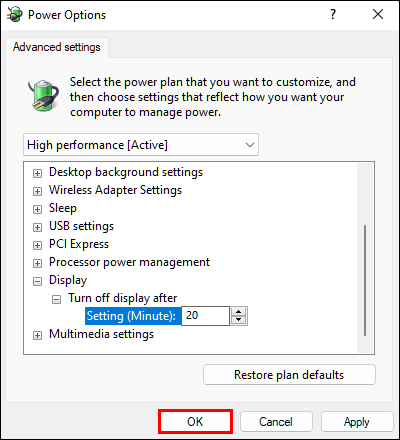
- Adjust the values so that they match your personal preference.
- Tap the “OK” button to record the changes.
Although prolonging the timeout period might satisfy some users, there might be circumstances when you’d benefit from disabling screen blackouts. To do so with the Control Panel:
- Press “Start” and find the Control Panel using the search bar.
- Select the program once you spot the Control Panel in the search results.
- Navigate to the Control Panel search field and type “Power Options.”
- Choose “Power Options” from the left side of the Control Panel window.
- Click on the “Change plan settings” option next to the PC’s active power plan.
- Hit “Change advanced power settings.”
- Press the “Display” heading to enlarge it.
- Select the “Turn off display after” heading to view the timeout setpoints.
- Choose “0” in the “On battery” field.
- Tap “0” in the “Plugged in” field.
Once you press “OK,” your device will implement the changes, and the screen will always remain powered on. Keep in mind that it’s best to disable timeout on computers since they operate on an external power outlet. When using a laptop, remember to monitor its battery life as the screen eats up a lot of energy. This is a non-issue if the laptop is connected to a power outlet.
How to Keep Screen on Longer in Windows 11 Using the Command Prompt
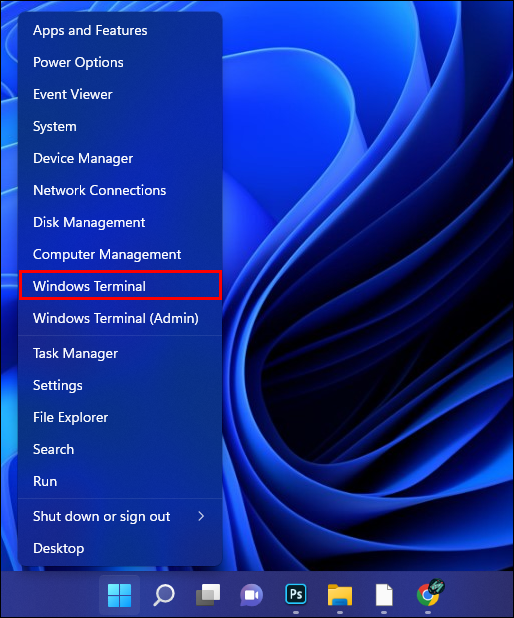
It’s also possible for users to modify their screen settings using the Command Prompt. To do so:
- Hover the cursor over the “Start” button and right-click.
- Click on the “Windows Terminal” option.
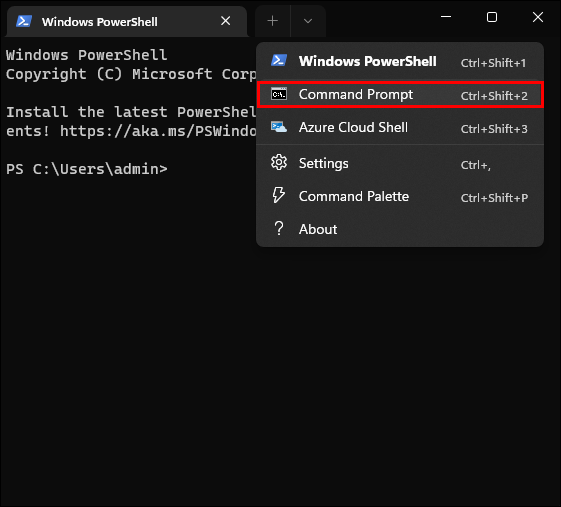
- Tap the downturned arrow button beside the new tab and select “Command Prompt” from the dropdown menu.
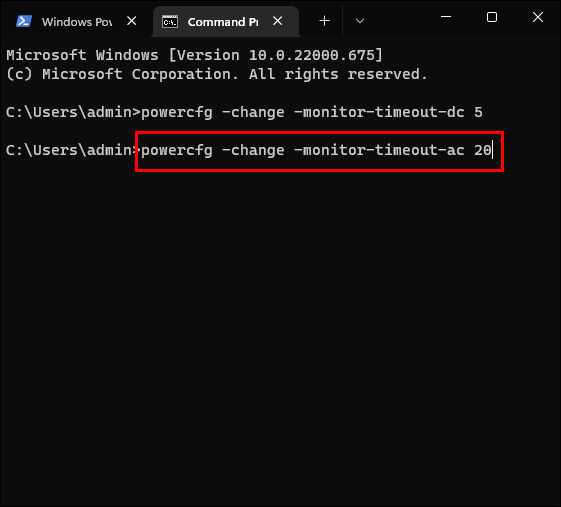
- When your device is running on battery mode, execute the following command:
“powercfg -change -monitor-timeout-dc x“
Instead of “x,” type the desired timeout period to stop the screen from becoming dark prematurely. - When the device is plugged in, execute the following command:
“powercfg - change -monitor-timeout-ac x“
Remember to replace “x” with the appropriate timeout period. - Tap “Enter.”
- Exit Windows Terminal.


If you feel comfortable working in the Command Prompt, you might consider turning off screen timeouts completely. As long as the device is switched on, the screen will stay bright and provide a hassle-free user experience. To disable timeouts:
- Navigate to the “Start” button and right-click.
- Find and select the “Windows Terminal” option.
- Press the arrow-shaped button next to the new tab and pick “Command Prompt” from the dropdown menu.
- If you often use your laptop in battery mode, execute the following command:
“powercfg -change -monitor-timeout-dc x“
Replacing “x” with “0” will prevent screen timeouts. - For plugged in devices, execute the following command line:
“powercfg - change -monitor-timeout-ac x“
Once you replace “x” with “0,” the screen will never turn black again.
Disabling Battery Saver Mode
If you’re having display issues, your laptop’s Battery Saver mode may be the culprit. When the device struggles to stay turned on, you’ll face more screen timeouts. In that case, you might want to disable Battery Saver mode to stop it from disrupting the display. However, doing so may result in the device switching off quickly unless you charge it.
To disable Battery Saver Mode:
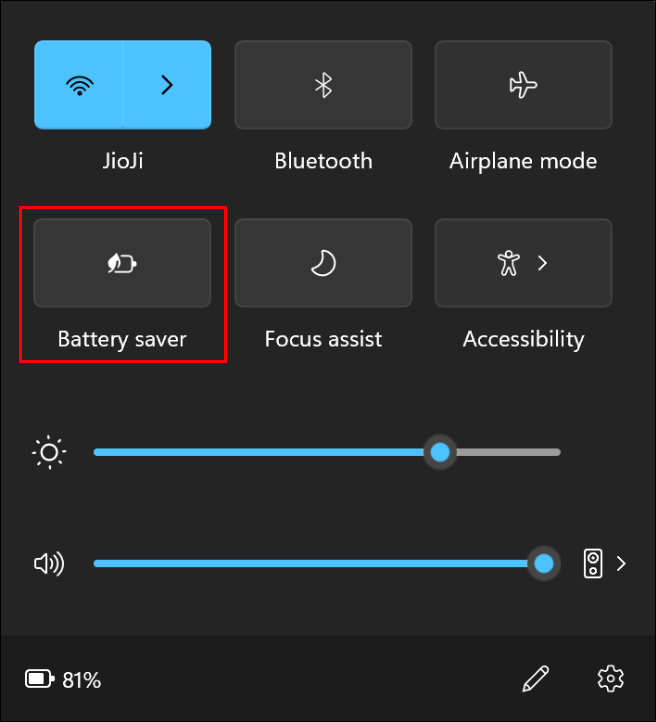
- Hold down “Windows + A” to launch “Quick Settings.”
- If the “Battery Saver” icon is selected, tap it to deselect it.

You can also turn off battery saving and improve screen brightness with the “Settings” app.
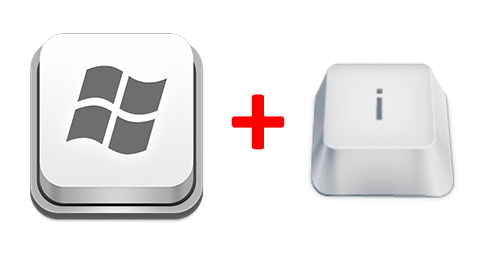
- Press “Windows + I” to launch your laptop’s “Settings.” Alternatively, find the program using the Windows 11 search bar.
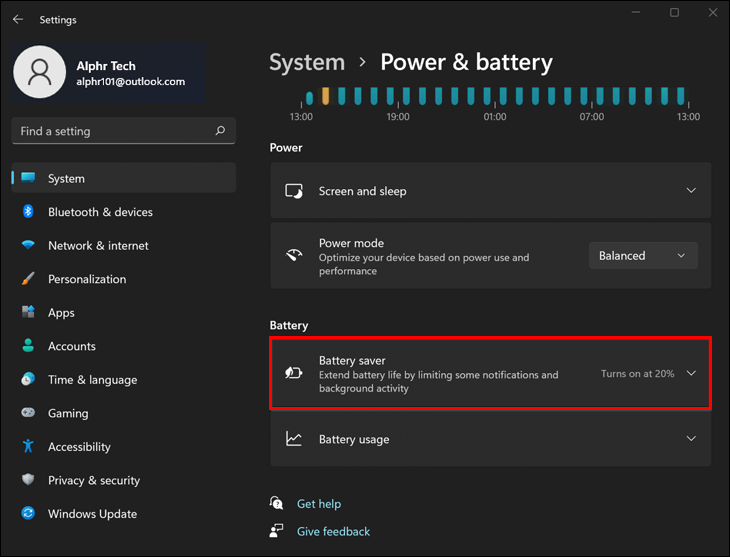
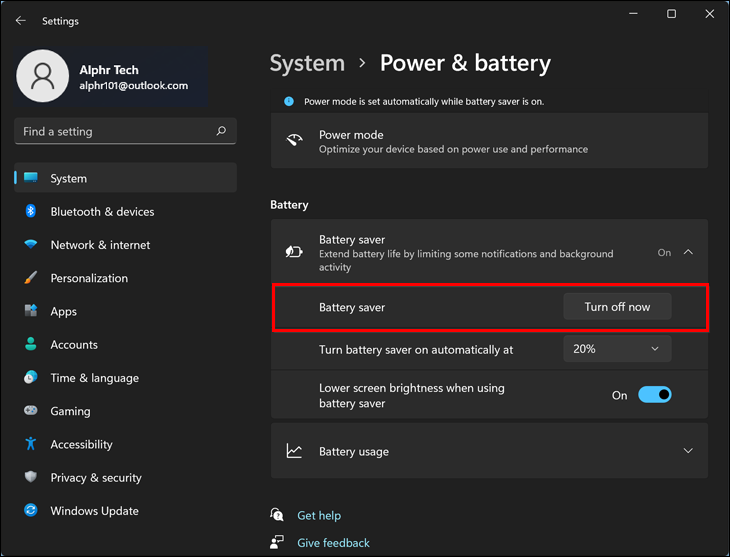
- Click on “System” and select the “Power & battery” option.
- Tap the “Battery saving” section to enlarge it.
- Press the “Turn off now” option.
- Exit the program.

Once you plug in your laptop, the device will automatically disable power saving, so your display brightness will remain unaffected.
Always Be in Control of Your Windows 11 Screen
While Windows 11 comes with numerous perks, it offers no built-in solution to screen timeout issues. Fortunately, you can tweak your device’s settings using the Control Panel, Command Prompt, or Settings up to adjust the timeout periods manually. These programs allow you to disable timeouts, keeping the screen always turned on.
Have you modified the display settings on your Windows 11 device? Which of the above programs did you use? Let us know in the comments section below.
Disclaimer: Some pages on this site may include an affiliate link. This does not effect our editorial in any way.