If you frequently use your computer in a shared environment, whether at home, work, or in public, it’s a good idea to lock your screen. Perhaps you’re working with sensitive information or writing your novel.
Either way, protecting your screen will prevent others from accessing it and relieve you from stressing about it. If you’re a Windows 11 user, the lock screen is a built-in feature you can utilize in several different ways.
The Windows 11 developers have ensured that users can rely on the Start menu, keyboard shortcuts, Command Prompt, and other options to lock their screens quickly. Here are all the lock screen solutions in Windows 11.
How to Lock Screen in Windows 11 Using Keyboard Shortcuts
One of the most efficient ways to lock the screen in Windows 11 is to rely on convenient keyboard shortcuts. There’s more than one way to use your keyboard to protect your screen from prying eyes, but let’s start with the most straightforward option.
To lock your screen in Windows 11, press the Win key + L simultaneously.
You’ll see the lock screen in front of you instantly. To unlock the screen and log in, all you need to do is enter the 4-digit PIN.
Also, if you’re a Windows 11 PC user, there’s a chance your external keyboard has a dedicated lock screen button. Many PC accessory brands such as HP, Logitech, and others incorporate this function to make the process of locking your screen completely effortless. The only downside is that you may occasionally hit the key in the middle of work.
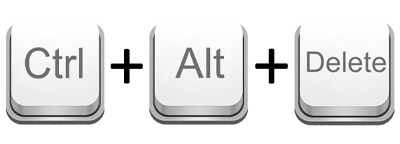
Finally, you can use the Ctrl + Alt + Delete Windows 11 shortcut to lock your screen. Pressing these keys at the same time opens a menu with several options.
Typically, users take this course of action when they need to close an unresponsive application with the “Task Manager” or switch user accounts. But here’s how you can use the Ctrl + Alt + Delete shortcut to lock the screen:
- Press Ctrl + Alt + Delete at the same time.
- Select “Lock” from the list of options.

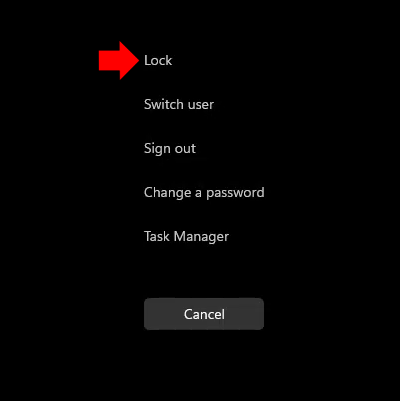
The lock the screen option is at the top of the list, and once you click on it, your screen will immediately switch to login mode.
How to Lock Screen in Windows 11 With Task Manager
As we established, the Ctrl + Alt + Del shortcut in Windows 11 is used for several reasons, but most commonly to open the Windows “Task Manager,” which helps you close glitching applications, such as an unresponsive browser. But you can also use the “Task Manager” to enable the lock screen.
Here’s how that works:
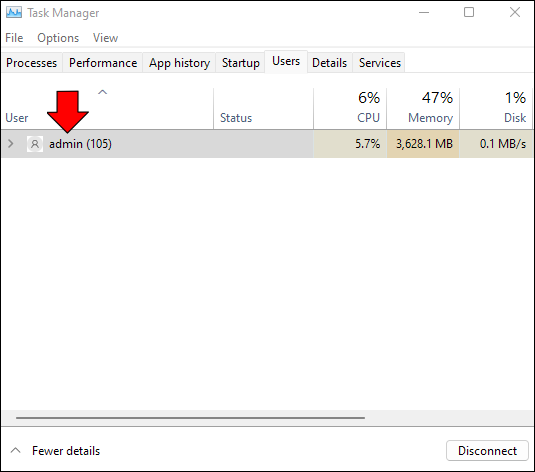
- Press Ctrl + Alt + Del keys or right-click on the Start menu.
- Select “Task Manager.”
- When a new window appears, switch to the “Users” tab.
- Select the current user account.
- Click “Disconnect” in the bottom-right corner of the window.


This is a helpful tactic when dealing with Windows 11 issues or if your computer freezes and leaves you unsure of what to do. You can temporarily lock the screen via the “Task Manager” until you find a way to solve the problem.
How to Lock Screen in Windows 11 from the Start Menu
The Windows 11 Start menu is well-organized and easy to use. You have all the power options available and quick access to system settings and documents. But you can also use it to switch to the lock screen in a few quick clicks.
Here’s how you find the lock screen feature in the Start menu:
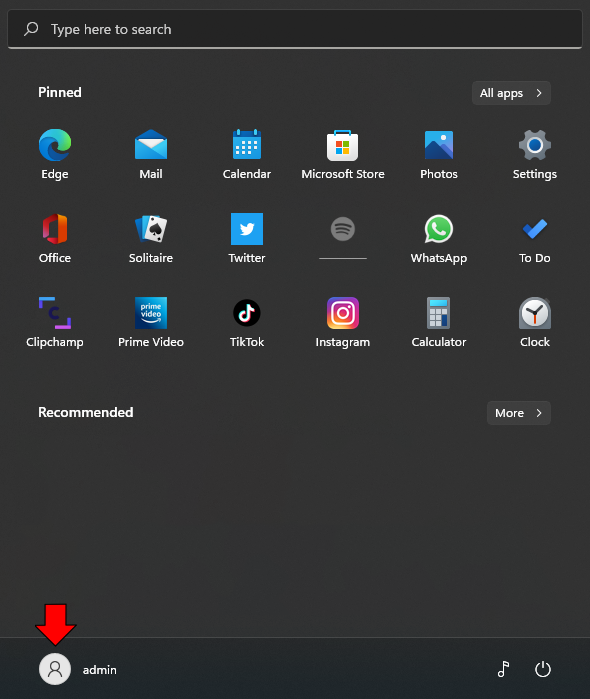
- Press the Win key on your keyboard or click on the Windows icon in the screen’s bottom-left corner.
- Click on your username or your profile picture.
- A short menu will appear. Click “Lock,” which is the middle option.

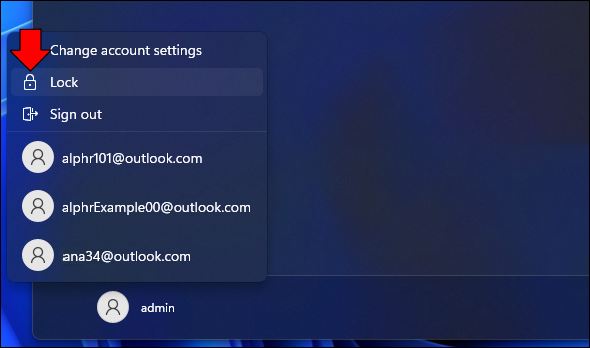
Instantly, your screen will lock, showing only the login page and designated field for your Windows 11 account PIN code.
How to Lock Screen in Windows 11 Using Screen Saver Settings
In the early days of Windows computers, the screen saver feature was used to prevent potential damage to old-school monitors. Today, their primary function is to maintain user privacy when they’re away from their computer.
A screen saver will appear after the preset period of inactivity, although you can disable it altogether. However, you can use this feature to lock your screen if someone tries to stop the screen saver and look at your screen. All you need to do is adjust the settings to your preferences.
Follow these steps to learn how:
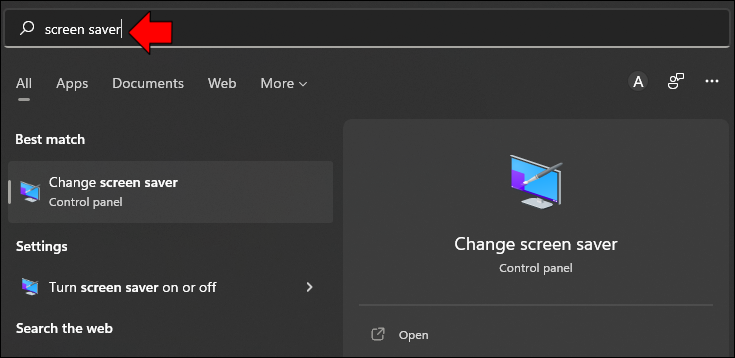
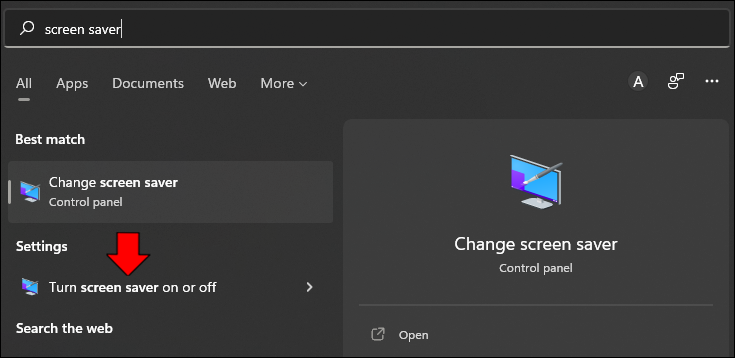
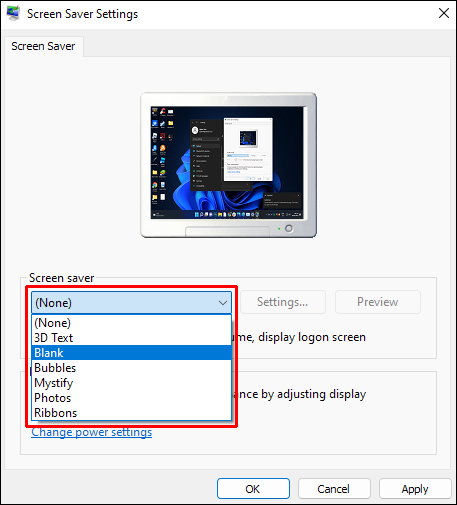
- Go to the Windows 11 Start Menu and search “screen saver.”
- Select the “Turn Screen Saver On or Off” option from the results.
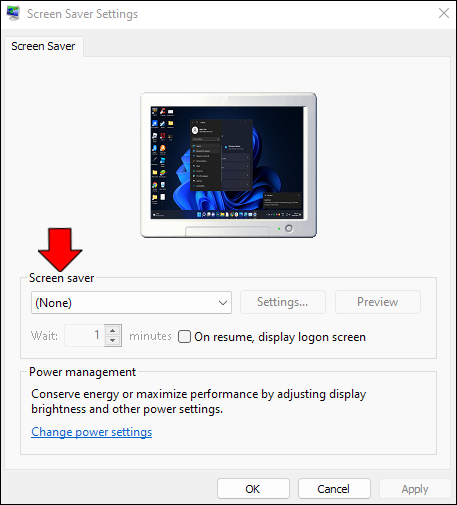
- When a new window launches, navigate to “Screen Saver” field.
- From the drop-down menu, select the type of screen saver you want. It can also be a blank page.
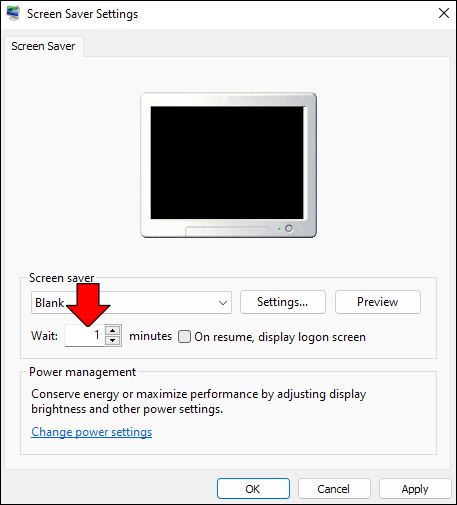
- Next to the “Wait” option, select the period of inactivity before the screen saver starts.
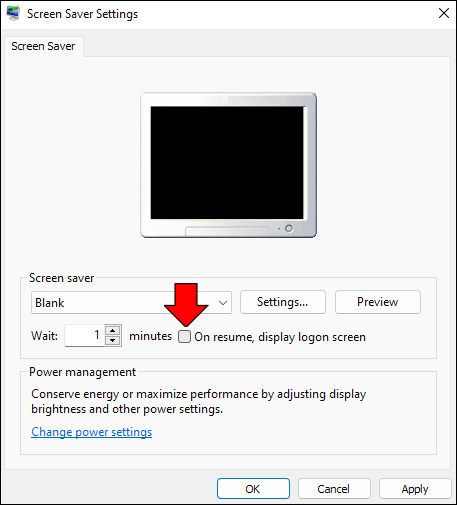
- Check the “On resume, display logon screen” box.
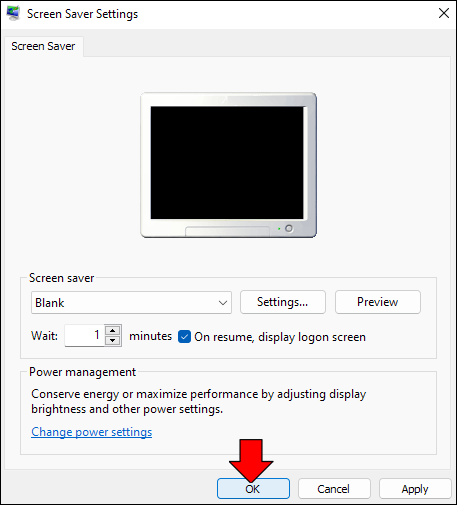
- Click “Apply” followed by “Ok.”
Note: You can also access screen saver settings by right-clicking anywhere on your desktop and selecting “Personalization” from the menu.
The next time you get up from your Windows 11 computer to grab a coffee or go outside for a bit, the screen saver will start after the predetermined waiting period. If someone walks by and moves the mousepad or presses any key on the keyboard, the lock screen will appear.
How to Lock Screen in Windows 11 Using Command Prompt
If you’re used to working with a command-line interface, you’ll likely appreciate the ability to lock the screen in Windows 11 via Command Prompt. It takes only a few minutes, and here’s everything you need to do:
- Search for “Command Prompt” from your Windows 11 Start Menu.
- Enter the following line “rundll32.exe user32.dll,LockWorkStation” when the app launches.
- Press “Enter.”

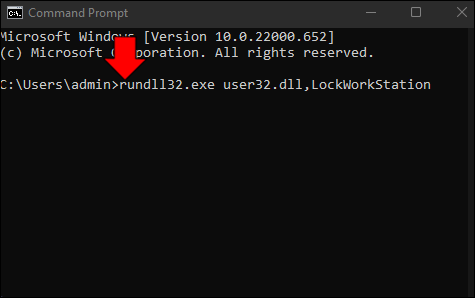

Your Windows 11 computer will lock instantly.
It’s also important to note that you can utilize this command in PowerShell–Windows task automation app, or Windows Terminal, a Windows terminal emulator.
Creating a Command Line Shortcut
Even if you’re a fan of using command line applications, there’s no need to type or even copy and paste the line every time you want to lock the screen.
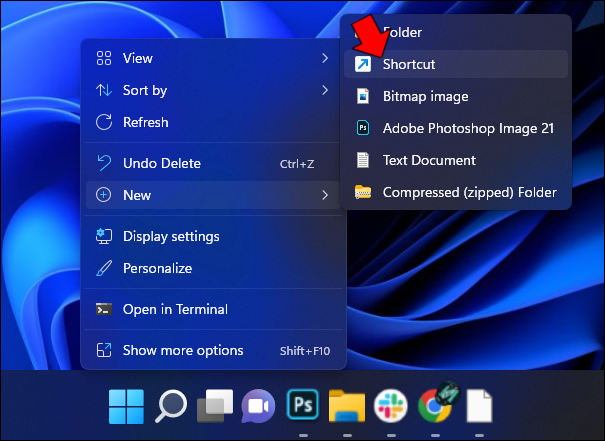
You can create a desktop shortcut and use it when you want to protect your screen. It’s a simple process. Here’s how it works:
- Right-click on an empty space on your Windows 11 desktop.
- Click the “New” option and “Shortcut” from the expanding menu.
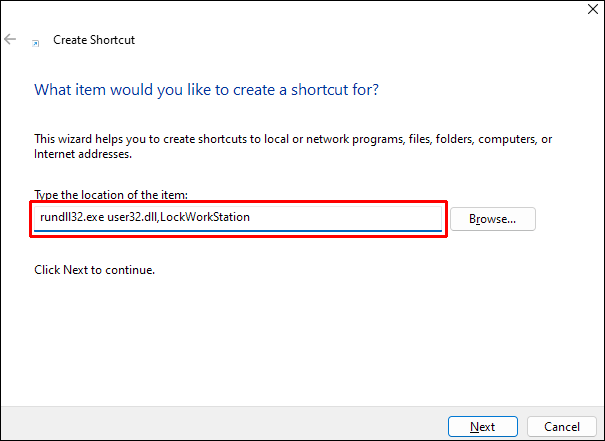
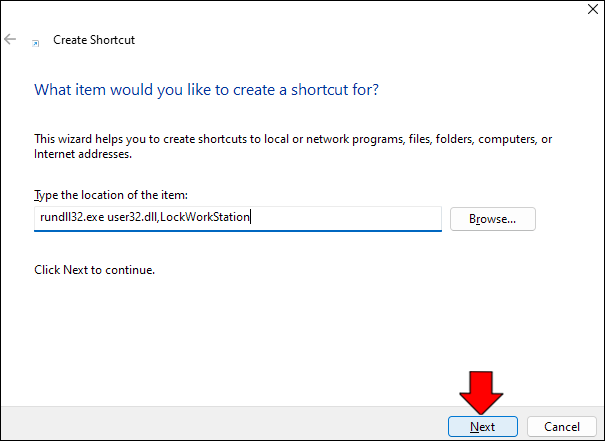
- The “Create Shortcut” window will appear. Under the “Type the location of the item,” paste the “rundll32.exe user32.dll,LockWorkStation” command line.
- Click “Next.”
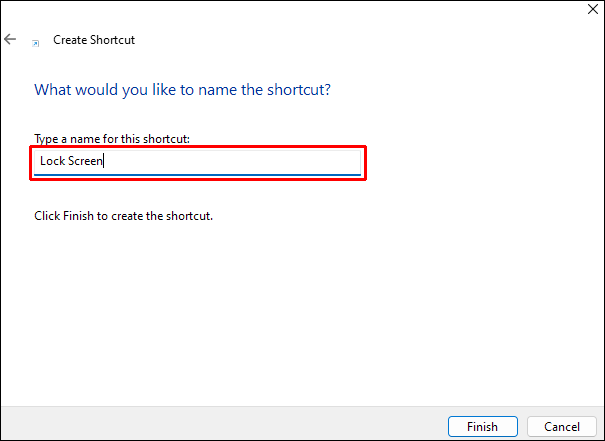
- Enter the name of the shortcut. For example, “Lock Screen.”
- Click “Finish.”

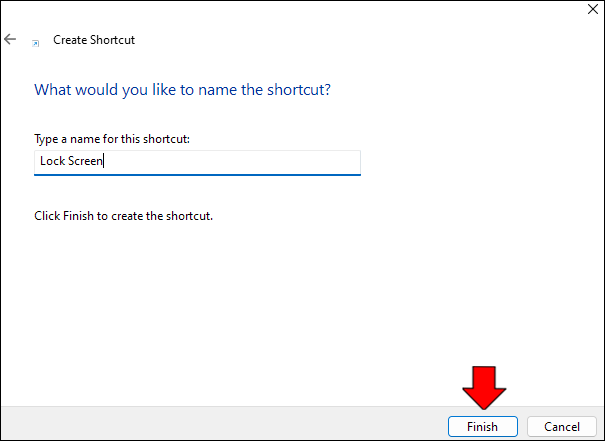
The shortcut will show up on your desktop, and you can move it, change its icon, or rename it if you want.
How to Lock Screen in Windows 11 Using Dynamic Lock Feature
If you want to take a comprehensive approach to locking your Windows 11 screen, then you must know about the built-in “Dynamic Lock” feature.
It automatically locks the screen as soon as you move away from the computer. However, the feature’s functionality depends on you connecting your mobile device with the computer via Bluetooth.
If you haven’t paired your smartphone with your Windows 11 computer already, that’s the first step you should take:
- Make sure the Bluetooth on your smartphone is switched on.
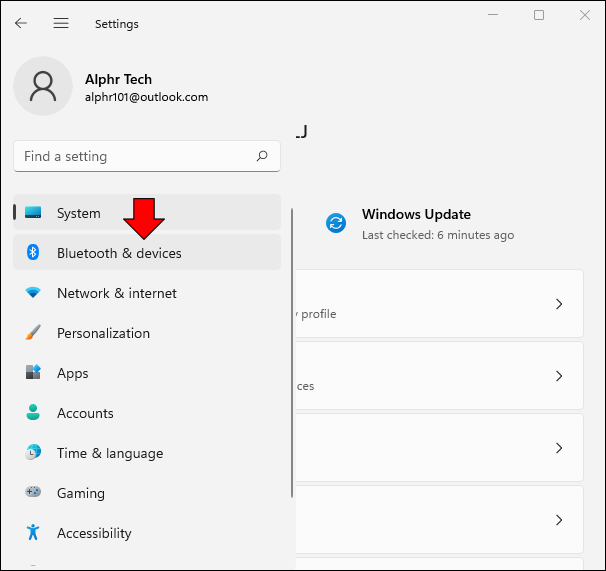
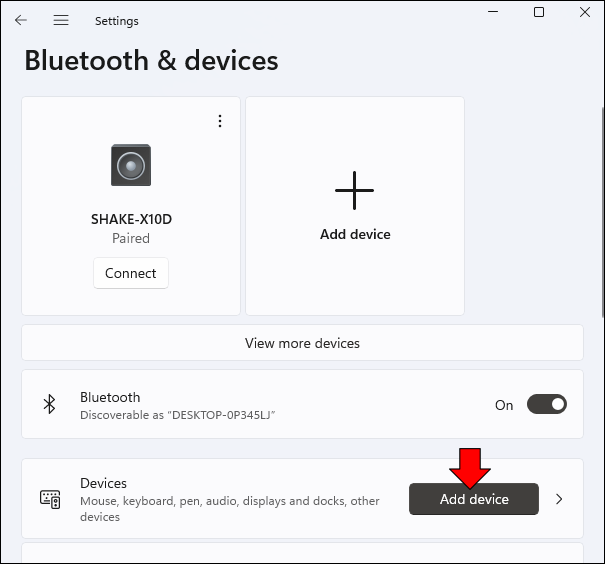
- Enter “Settings” by going to the Windows 11 Start menu.
- Select the “Bluetooth & devices” option on the left-side panel.
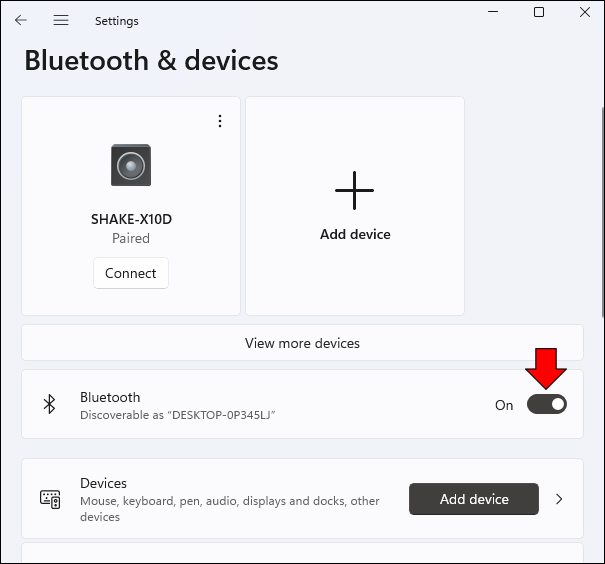
- Move the Bluetooth toggle switch from “Off” to “On.”
- Click “Add device” and find your mobile phone.
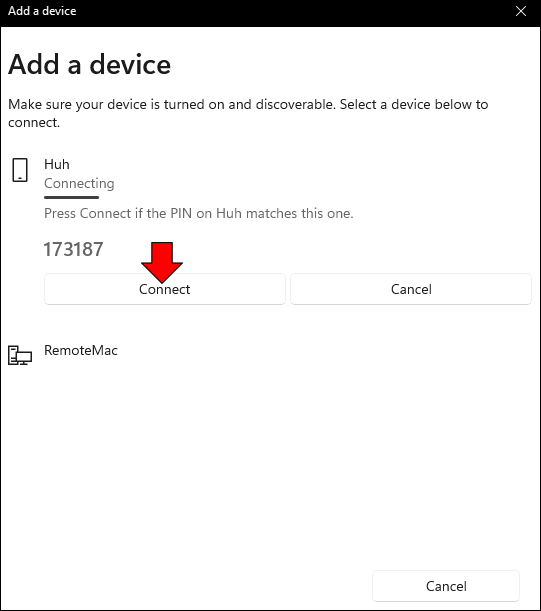
- Click “Connect.”
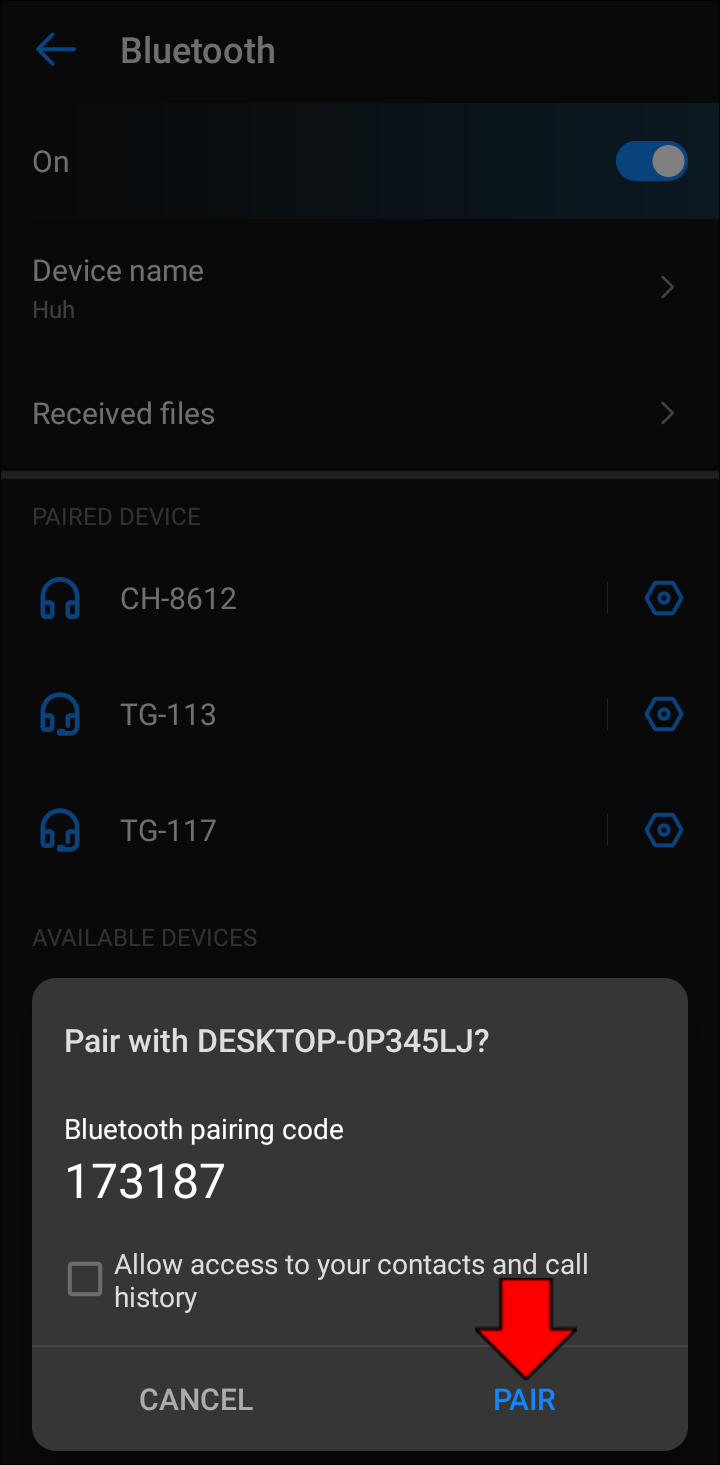
- Tap “Pair” on your smartphone.
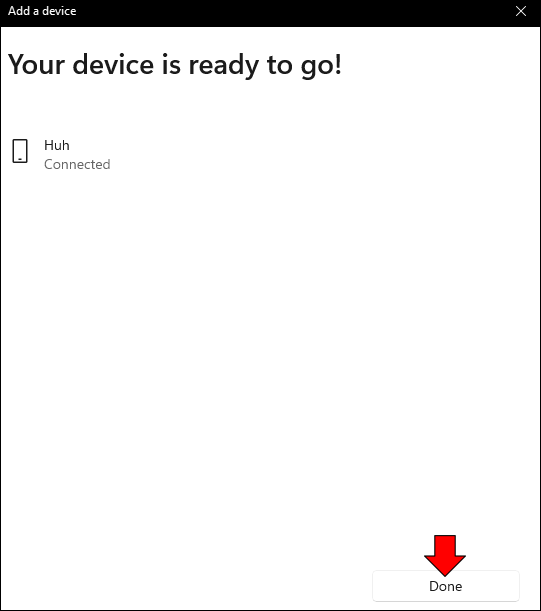
- Click “Done” when the pairing is complete.


Setting Up the Dynamic Lock Feature
When your smartphone and Windows 11 computer are connected via Bluetooth, you can set up the “Dynamic Lock” feature. It takes only a few more minutes, and here’s what you should do:
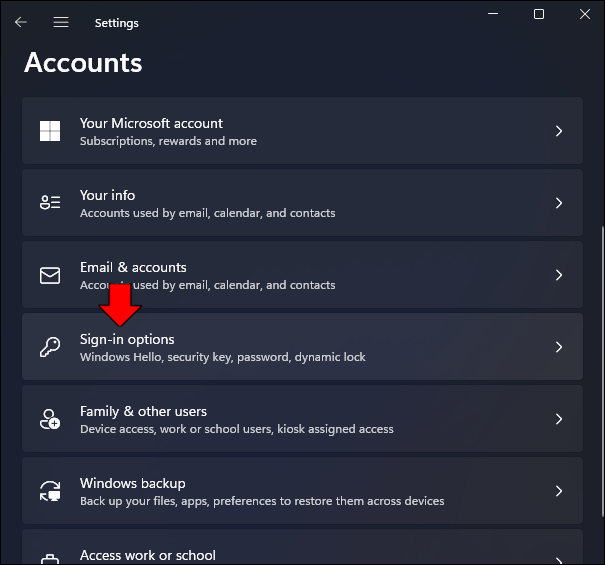
- Click on the Start menu and select “Settings.”
- Choose “Accounts” from the left-side panel.
- Select the “Sign-in options” section.
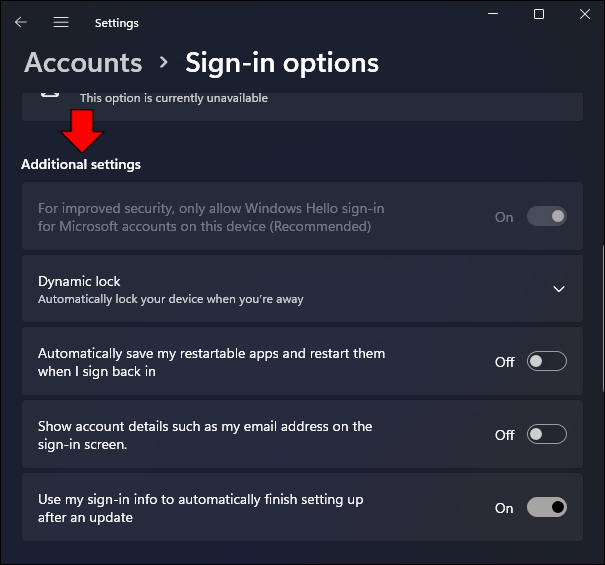
- Scroll down and navigate to “Additional settings” section.
- Click the “Dynamic Lock” section to expand it.
- Check the “Allow Windows to automatically lock your device when you’re away” box.


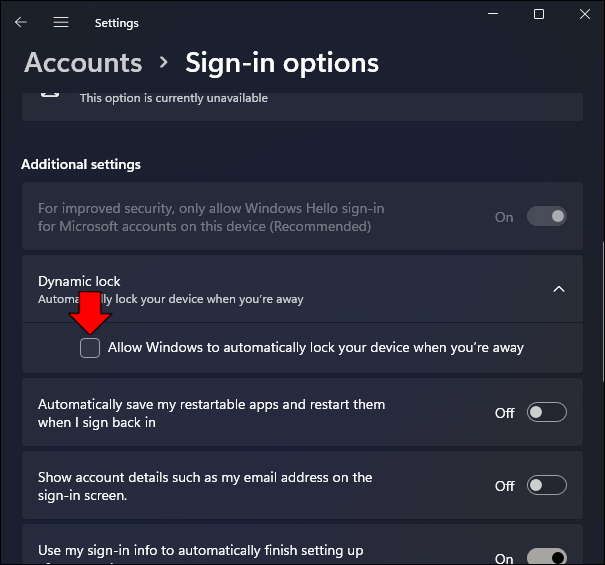
Windows 11 will scan for paired devices and show your smartphone was successfully connected.
If you want to ensure this feature works, move away from your Windows 11 computer and come back to check if it enabled the lock screen.
It’s also vital to point out that you need to take the phone with you when you move away from the computer. That is what triggers the lock screen. But most people already bring their phones when they get up from their desks, so this feature might come in handy.
Locking the Screen on Your Windows 11 Computer Like a Pro
Experienced Windows users are familiar with its many useful features, but the lock screen has only been around since Windows 8. Windows 10 and 11 bring several solutions when it comes to locking the screen and keeping your personal or business data safe.
Some people will stick to convenient keyboard shortcuts and the “Task Manager.” Others will use the command line, making the most of the screen saver settings and the “Dynamic Lock” feature. Either way, locking your Windows 11 screen is mostly effortless.
What is your preferred way to lock the screen in Windows 11? Let us know in the comments section below.
Disclaimer: Some pages on this site may include an affiliate link. This does not effect our editorial in any way.


