An admin account allows you to make administrative changes, and a local admin account is created automatically during the Windows 11 OS installation. However, unless you’ve created another admin account or enabled the built-in admin account, you won’t have the option to sign in as an admin from the login screen.
Read on to learn how to assign a user account admin rights, and enable the built-in admin account for admin account access from the login screen.
How to Login as Admin in Windows 11
There are several ways to access Windows 11 as an admin user. These are:
- Sign in to an existing admin account from the login page. Or swap to an admin account while signed in as a user.
- Enable the built-in admin account.
- Create a new local admin account.
- Change a regular user account to an admin account.
Next are the steps for how to achieve these options:
Sign Into Admin Account at Start-Up
If you’re signing into your account from the login screen, select the admin account and enter the admin password to sign in as you usually would when signing in as a regular user.
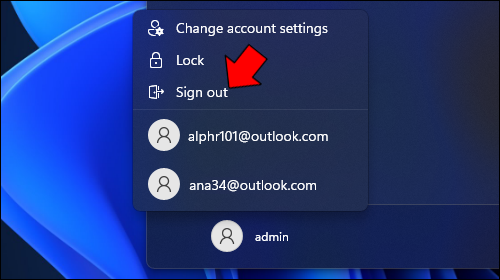
Or, if you are signed in as a user, you can swap to the admin account by:
- Launching “Start.”

- Select the user icon, then “Sign out.”

- Log into your admin using the admin password.
If you haven’t created an admin account and you have not enabled the built-in admin account, try the following tips:
Enable Built-In Admin Account
Windows 11’s integrated admin account comes disabled by default. However, they offer three ways to enable it. These are the “Computer Management” feature, using “Command Prompt” or “PowerShell.”
Next up are the steps for all three. After enabling the admin account, it will be available as one of the accounts you can sign into from the login screen.
Enable Built-In Admin Account Using Computer Management
- Launch “Start.”
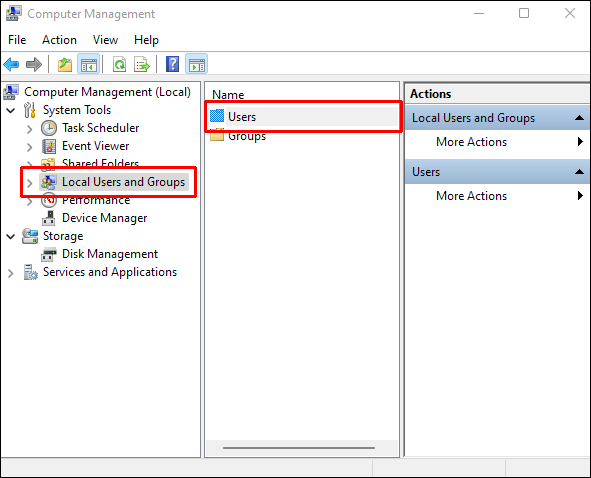
- Search for “Computer Management,” then open the app from the results.
- Expand “Local Users and Groups” and the “Users” branch.
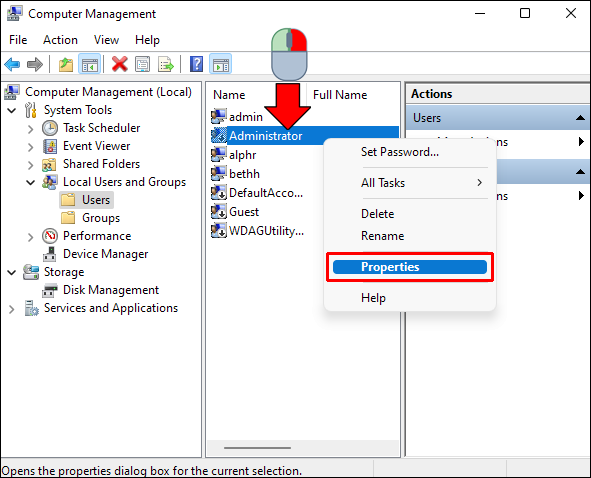
- Right-click the “Administrator” account on the right, and choose “Properties.”
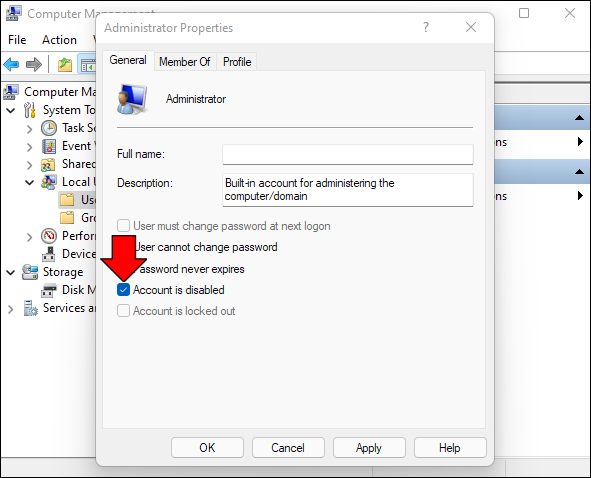
- Uncheck the “Account is disabled” option.
- Select “Apply” and “OK.”


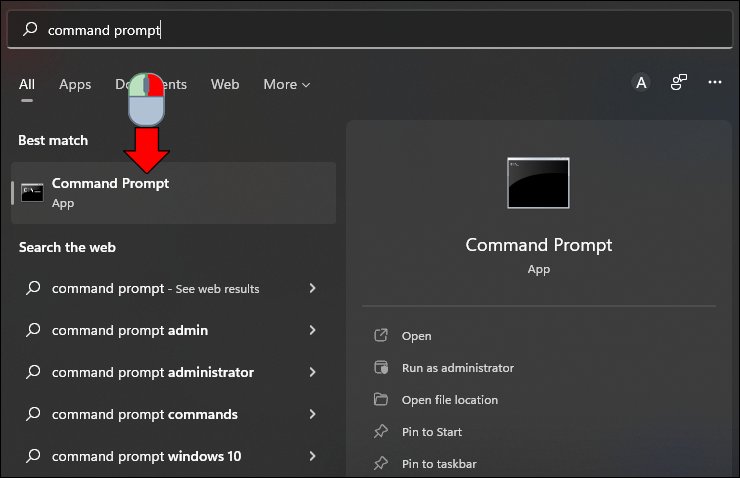
Enable Built-In Admin Account Using Command Prompt
- Open “Start.”
- Enter a search for the “Command Prompt” app, and right-click it.
- Choose “Run as administrator.”
- To enable the admin account, type in the following command, then press “Enter:”
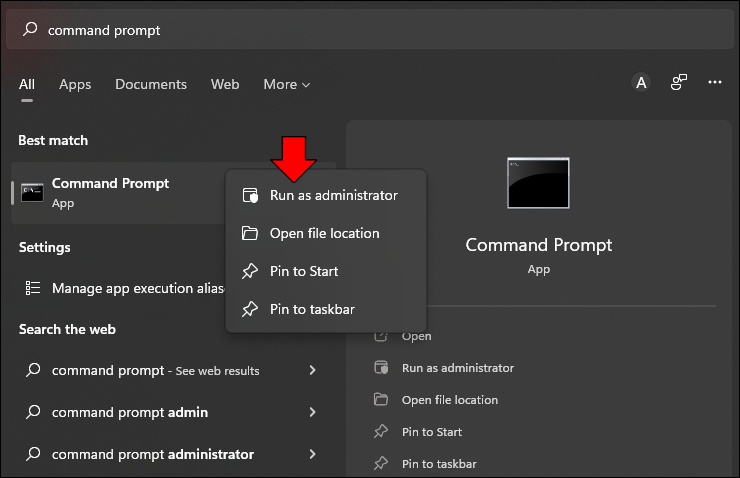

net user “Administrator” /active:yes
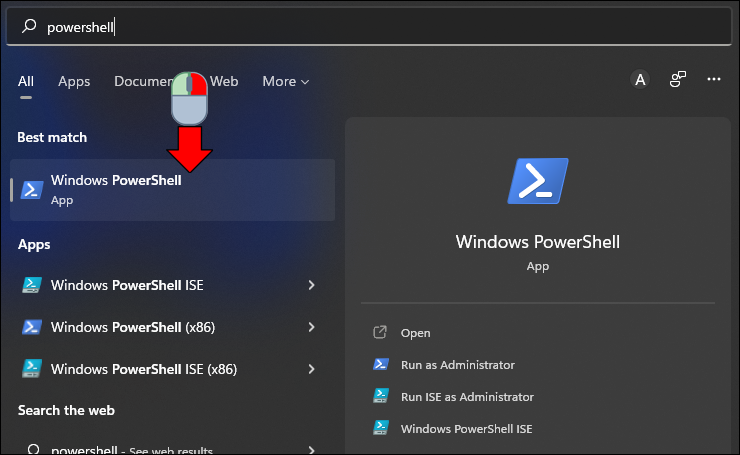
Enable Built-In Admin Account Using PowerShell
- Open “Start.”
- Enter a search for “PowerShell” and right-click the PowerShell result.
- Choose “Run as administrator.”
- Type the following command to enable the admin account, then hit “Enter:”
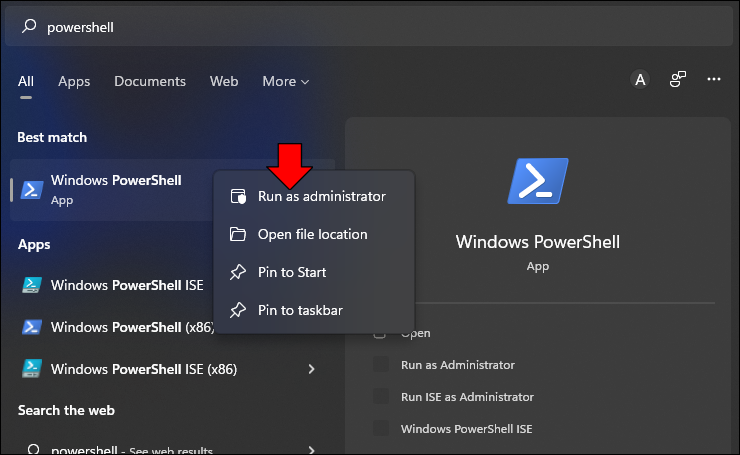
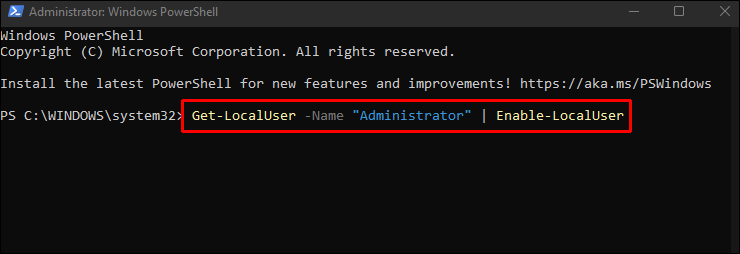
Get-LocalUser -Name "Administrator" | Enable-LocalUser
Now you can create your local admin account.
Create a New Local Admin Account
You can create a new local admin account by assigning admin rights to a family member or non-family member using your built-in local admin account.
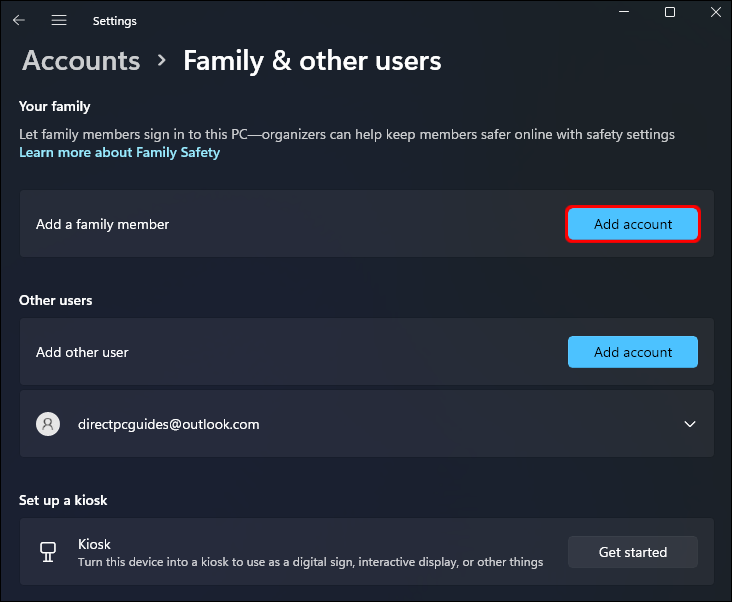
Here’s how to create a new local admin account for a family member:
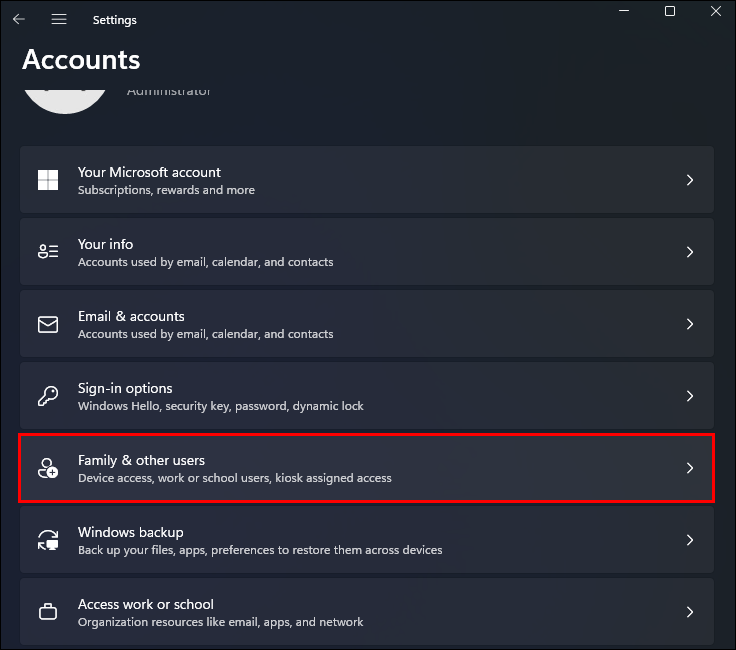
- Open “Start,” and go to “Settings,” then “Accounts.”
- From the “Family & other users” page, beside “Add a family member,” click the “Add account” button.
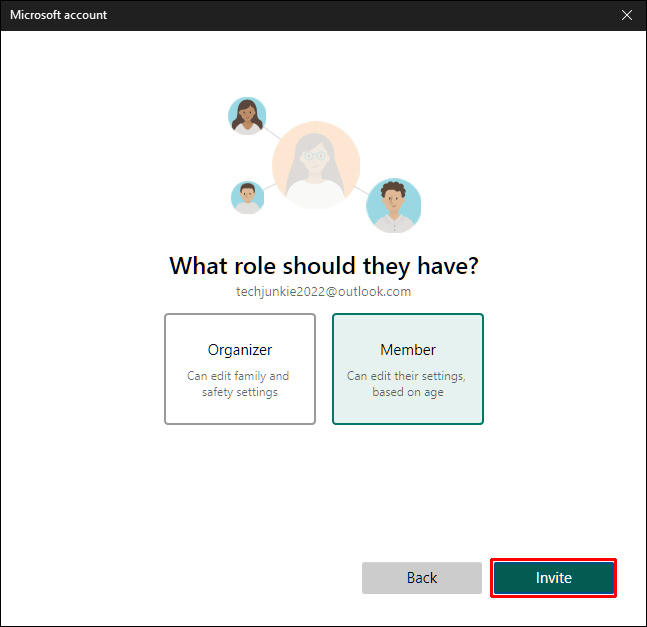
- Enter your family member’s email address, then click “Next.”
- Choose the role, then click “Invite” to send an invitation to the email address.
- Once the invite is accepted, the account will be added automatically.
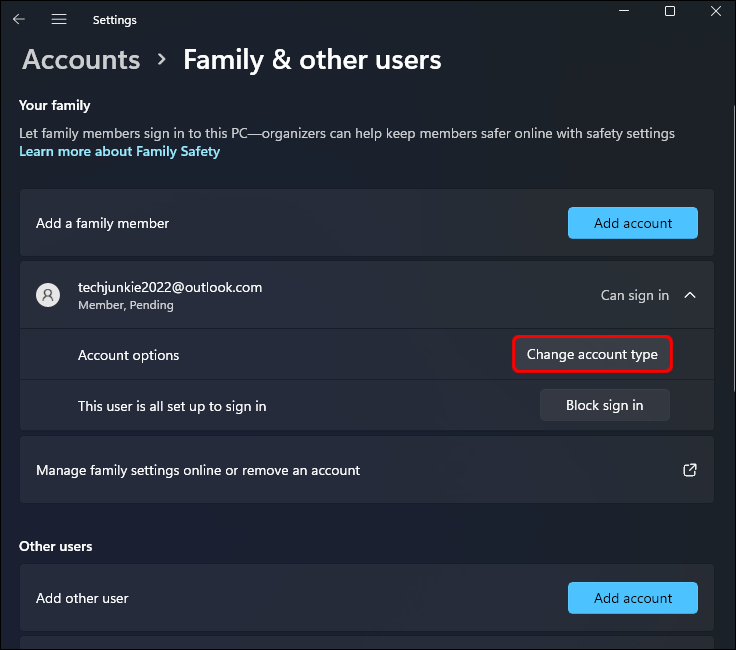
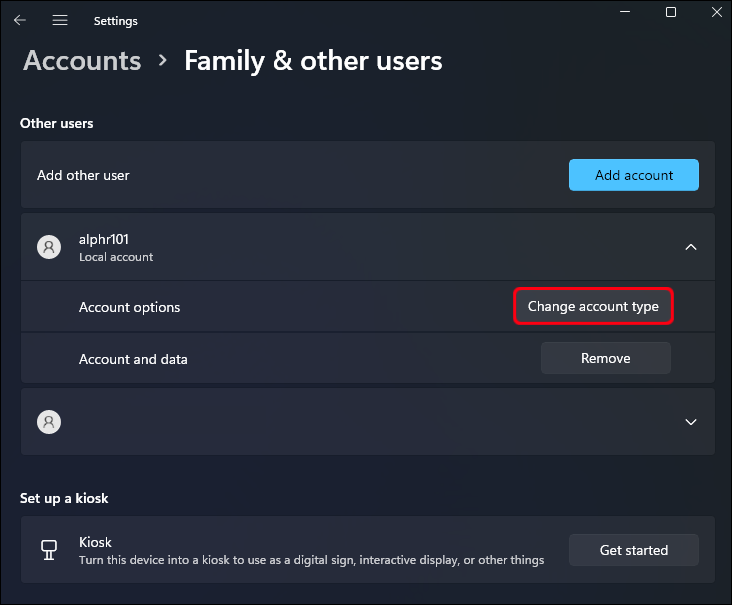
- Access the “Family & other users” page again and choose the new account from “Accounts settings.”
- Choose “Change account type.”
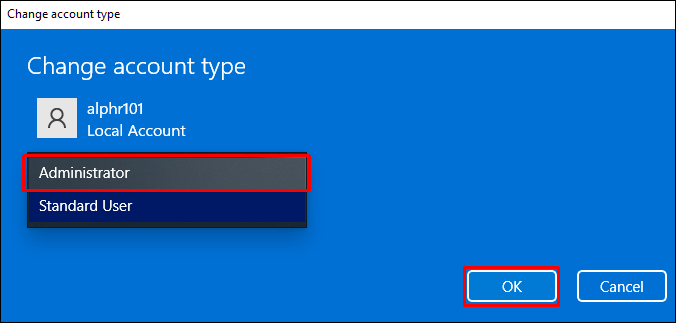
- Select “Administrator” from the pull-down menu, then “OK.”


Now you can use this account to sign in as an admin. Alternatively, you can create a local admin account using a non-family member account. You just need to add the account in the “Other users” section on the “Family & other users” page. Here are the steps:
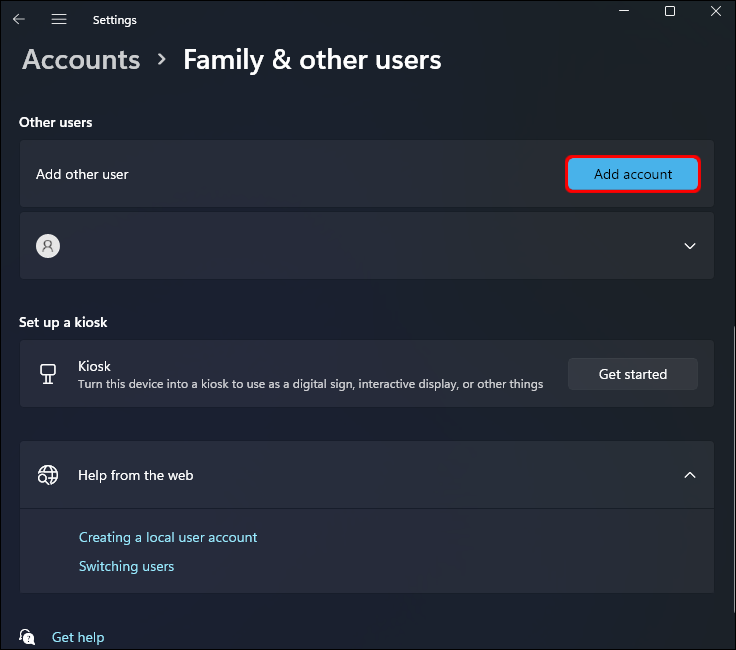
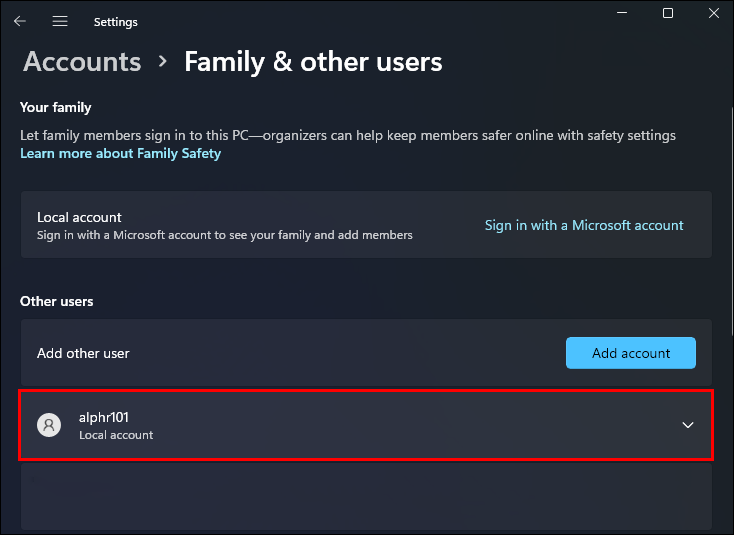
- Access the “Family & other users” page from the “Accounts” settings.
- Next to the “Add other user” option, hit the “Add account” button.
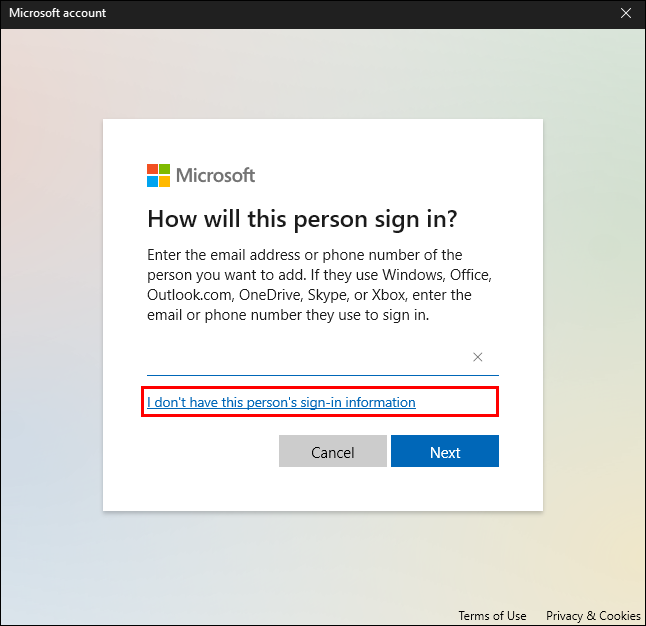
- You’ll be asked to type in the email address. Select the “I don’t have this person’s sign-in information” link.
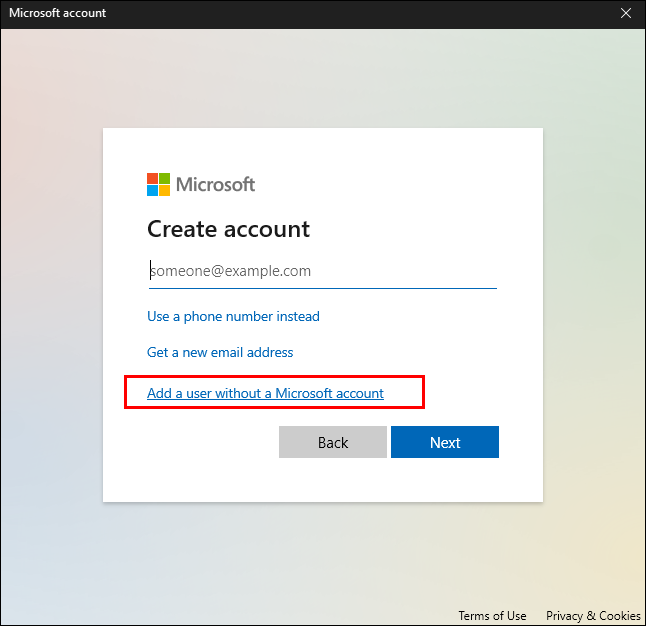
- Click on “Add a user without a Microsoft account.”
- Enter your login credentials, enter the answers to your security questions, then hit “Next.”
- Select the new account and click “Change account type.”
- Choose “Administrator” from the pull-down menu, then “OK.”

Change a Regular User Account Into an Admin Account
To change one of your local user accounts into an admin account, follow these steps:
- Open “Start,” go to “Settings,” and then “Accounts.”
- From “Family & other users,” choose the owner’s name (underneath the account, you’ll see “Local account”).
- Choose “Change account type.”
- Beneath “Account type,” click “Administrator,” then “OK.”


You will now have the option to sign in to the new admin account.
Additional FAQs
How do I change my password using my keyboard?
Follow these steps to change your password from your keyboard in Windows 11:
1. Turn on your PC and press the “Ctrl + Alt + Delete” keys.
2. Select “Change a password.”
3. Enter your current password and type a new one, then confirm it.
4. Reboot your PC for the changes to take effect.
How do I change my password using system settings?
Here are the steps to change your password via “Settings” in Windows 11. If you have an account login PIN, you’ll need to enter it before you can manage your passwords.
1. Launch “Settings.”
2. Navigate to “Accounts” and choose the “Sign-in” option.
3. Expand the “Password” option and choose “Change.”
4. Enter your current password, and your new password, then “Next.”
How do I change my password using Control Panel?
This is how to change your password via the “Control Panel” in Windows 11.
1. Hit the “Windows” key.
2. Type in “Control Panel” and select it.
3. Click on “Change account type” from the “User Accounts” option.
4. Choose an account to change the password.
5. Click on “Change the password.”
6. Enter the current password and then the new one.
In the “Control Panel,” you can also change your account name. Just select “Change the account name.”
How do I create a strong password?
Here are some tips to consider to create a stronger password:
• Avoid obvious number or letter combinations, e.g., sequential characters.
• Do not include the word “password” or any of your personal data.
• The longer, the better, so create one above 15 characters if possible.
• Mix up the characters, numbers, letters, and symbols for true password efficiency.
Windows 11 Admin Privileges
An admin account is required to make changes that affect other computer users. With admin rights, you can change security settings, make changes to other accounts, etc. You’ll have the option to sign in to an admin account from the login screen if you’ve created one or enabled the built-in admin account. As an admin user, you can also upgrade an account to admin in addition to removing admin rights.
Tell us in the comments section what functionality you think is better and what should have been left alone in Windows 11.
Disclaimer: Some pages on this site may include an affiliate link. This does not effect our editorial in any way.


