User accounts created in Windows 10 come in two forms: standard and administrator (or admin). While the functionality stays the same for both user types, administrator accounts will have expanded access to certain options.
This access includes administrator-approved permissions that allow users to change various settings. In fact, admins can install applications on computers, whereas standard users can only launch them. For these reasons, having more than one admin might prove very useful If you have a Windows 10 PC with several users.
In this article, you’ll learn four methods to make a standard user into an administrator in Windows 10.
How to Make a User an Admin in Windows 10
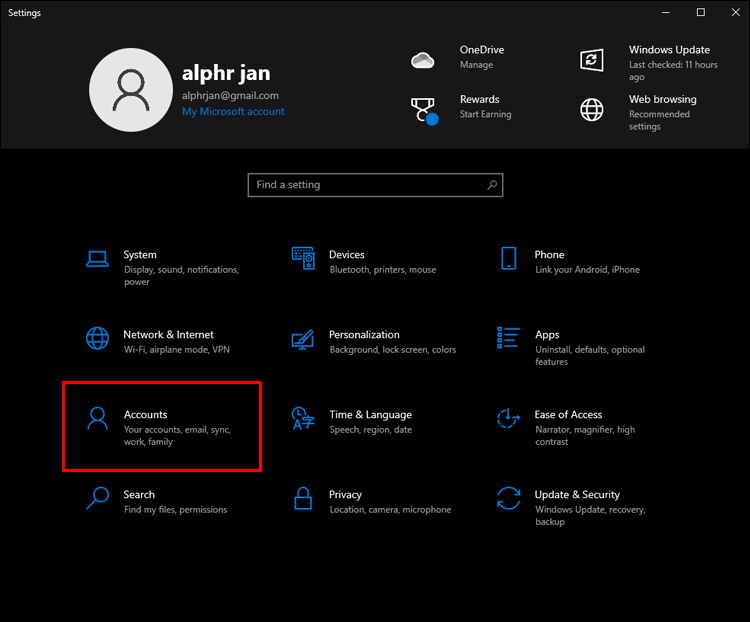
The first method you can use to make a user an admin in Windows 10 will utilize the “Settings” menu. Here are the steps for this method:
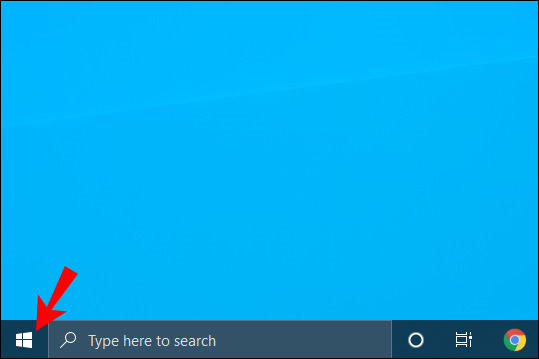
- Go to the “Start Menu” and open “Settings.”

- Go to “Accounts”

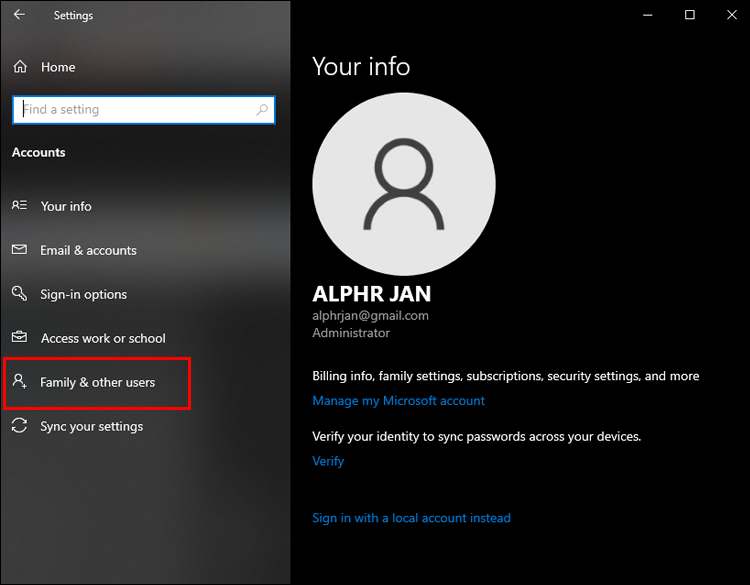
- You’ll see different sections in the left side of the window; choose “Family & other people.”
- On the right side of the window, locate the user you want to make an admin under “Other people.”
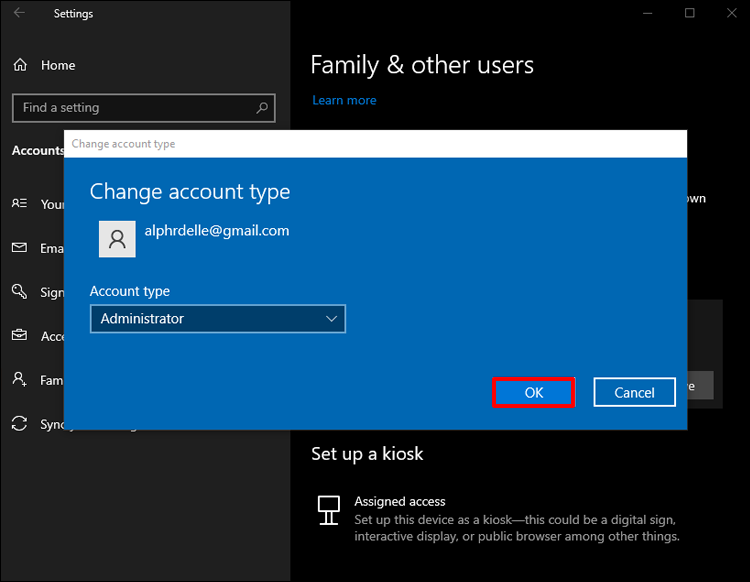
- Select “Change account type.”
- In the drop-down list that appears, choose “Administrator.”
- Hit the “OK” button and close “Settings.”


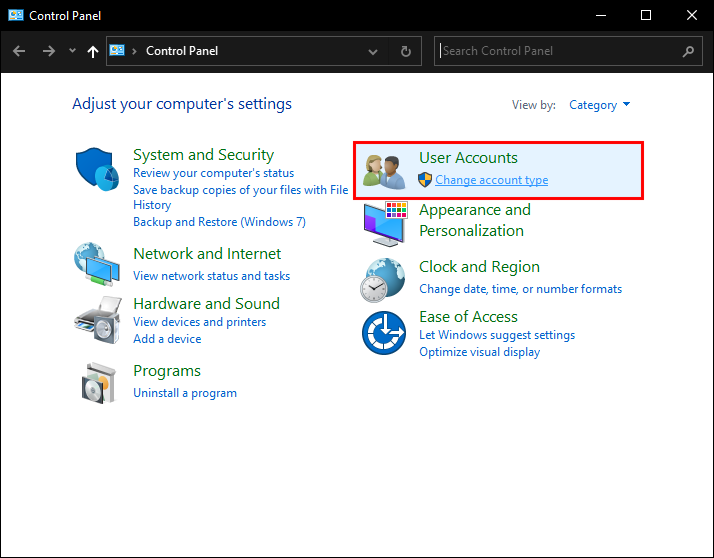
The second method involves going to the “Control Panel.” Here’s what you’ll need to do to make a user an admin via this utility:
- Bring up the “WinX Menu” either by right-clicking the “Start Menu” button or pressing Win Logo+X on your keyboard.
- If, for some reason, you can’t find the option in the “WinX Menu,” simply open the “Start Menu” and type “control panel.”
- Once you’ve found “Control Panel,” click on it to open the relevant window.
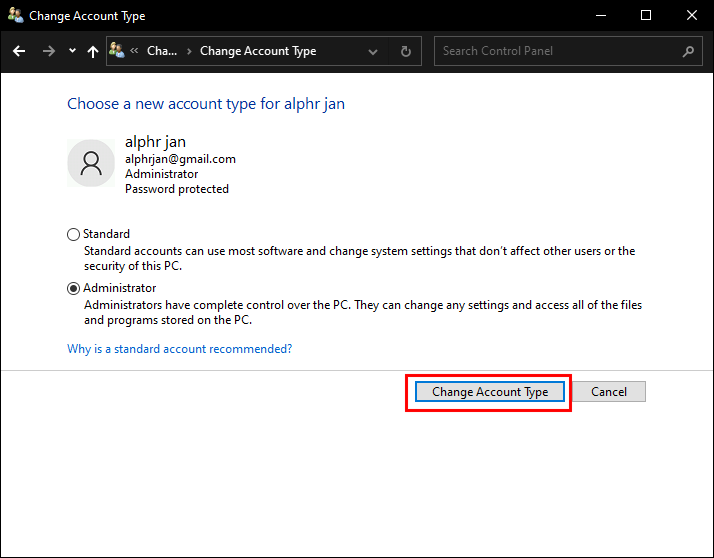
- Under “User Accounts,” select “Change account type.”
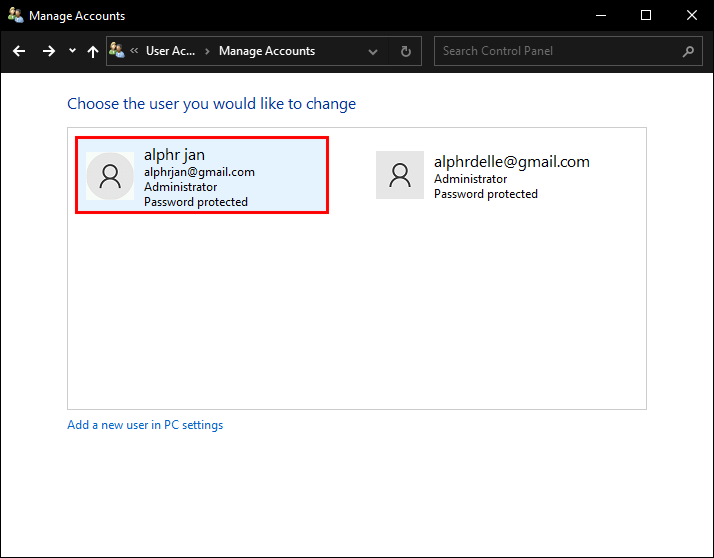
- Find the user you want to make an admin and click on them.
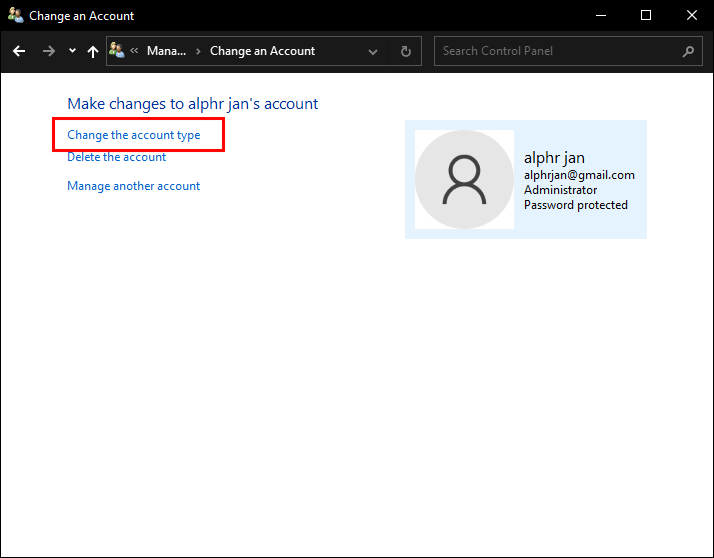
- On the left side, select “Change the account type.”
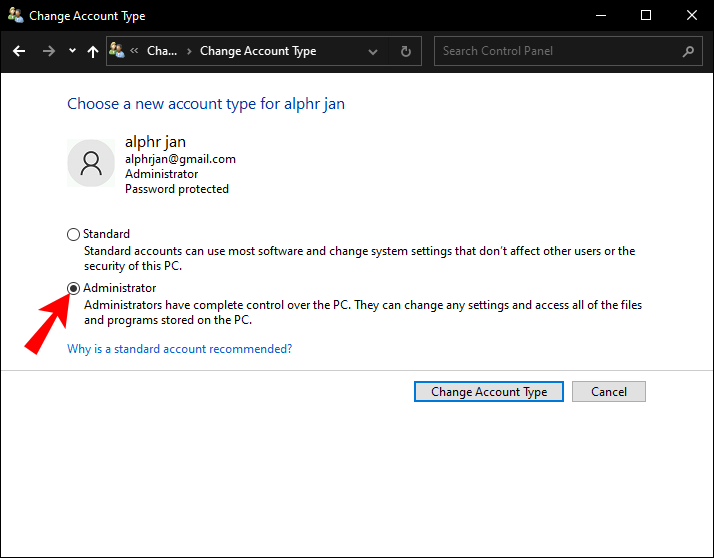
- Choose “Administrator” from the account options.
- Hit the “Change Account Type” button.

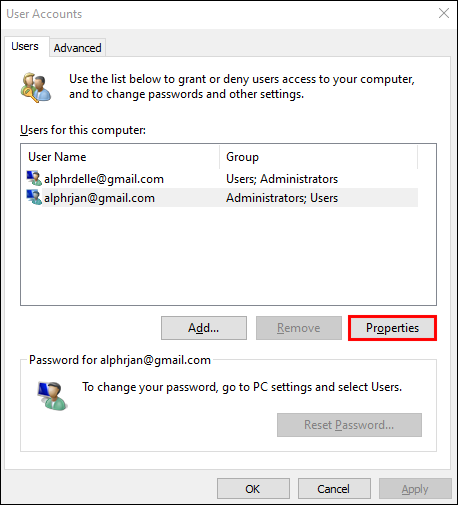
For the third method, you’ll need to enter the “User Accounts” settings. You can do that by following these steps:
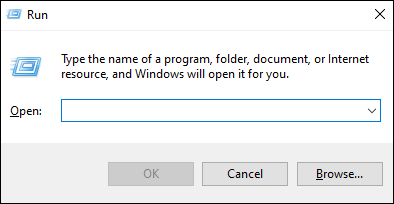
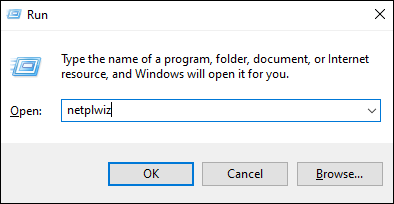
- Press Win Logo+R to launch the “Run” dialog.
- Enter “netplwiz” and hit OK.
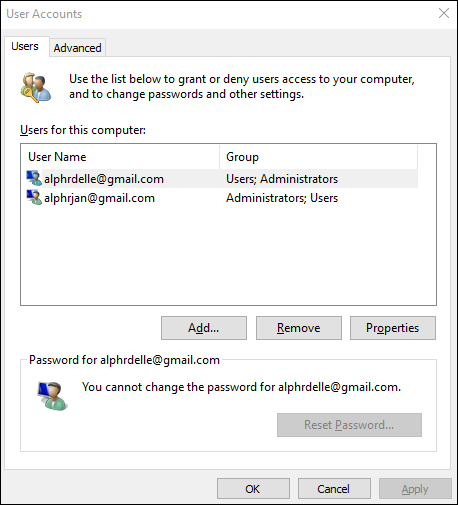
- A window will open with settings for user accounts; find the user you wish to give admin permission.
- After selecting the right user, hit “Properties.”
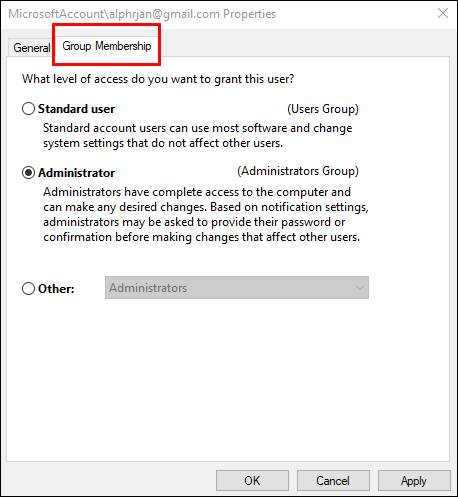
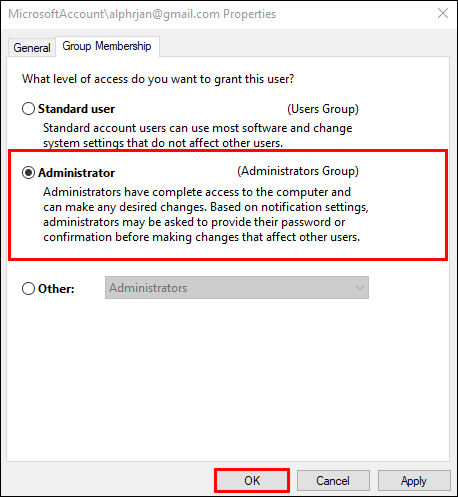
- From the tabs at the top, select “Group Membership.”
- Choose “Administrator” and click the “OK” button.
Finally, you can use the “Command Prompt” to change a standard user into an admin. Use the following steps for this method:
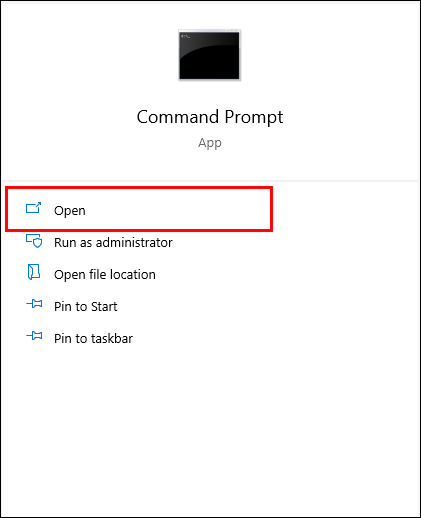
- Open the “WinX Menu.”
- From the menu, launch “Command Prompt (Admin).”
- In the administrator Command Prompt, enter “
net localgroup Administrators AccountName /add“. When entering this line, replace “AccountName” with the actual username. - Press “Enter” and wait for the command to execute.
- Once you see the confirmation message “The command completed successfully,” you can exit “Command Prompt.”


Employing either of these four methods will enable you to make any standard user into an administrator in Windows 10.
While these methods will allow you to perform the desired action for users sharing the same computer, the techniques will differ if you want to make a user a local admin on a network.
In the following sections, we’ll explain how to make domain and network users into local admins.
How to Make a Domain User a Local Admin Windows 10
There are three ways to make a domain user a local admin in Windows 10.
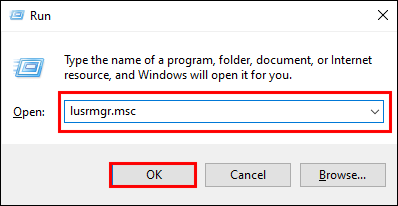
The first method is by using the “lusrmgr.msc” command:
- Access the user’s computer either through remote login or by direct physical access.
- Bring up the “Run” menu by pressing “Win Logo+R”.
- Type in “
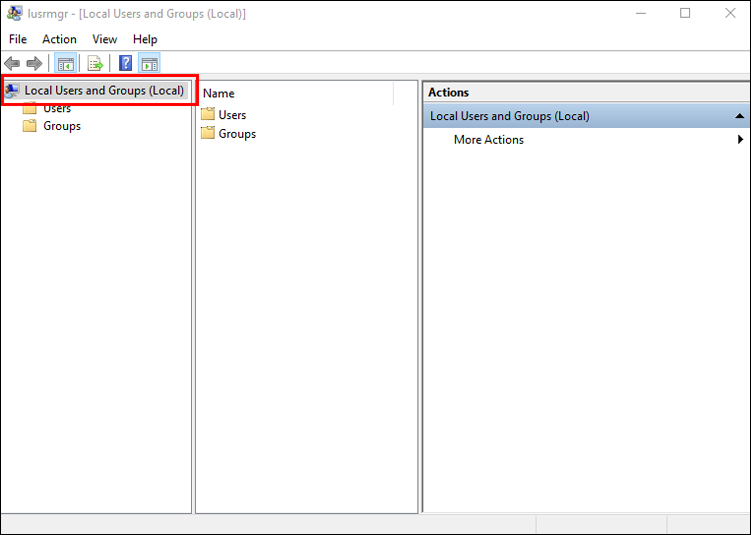
lusrmgr.msc” and press “OK.” - Locate “Local Users and Groups.”
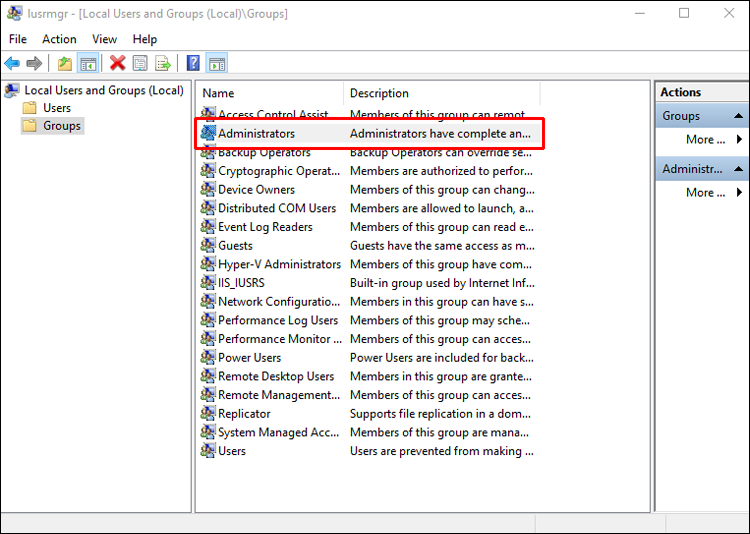
- Enter the “Administrators” menu.
- Find the user account you want to grant admin rights and insert them into the “Administrators” group.

The second method uses “Restricted Groups,” while the third utilizes “Secure Local Administrators.” However, both methods are much less straightforward than the first one. Since they would require more extensive setups, we’ll recommend using the proposed first method.
How to Make a Network User a Local Admin Windows 10
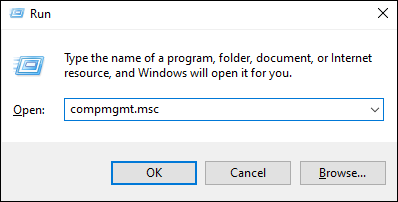
You can use several commands to make a network user a local admin in Windows 10. From the “Run” dialogue, you can use the “lusrmgr.msc” command described above or the “compmgmt.msc” command.
Both commands are accessible through the “Run” dialogue, which you can launch by pressing Win Logo+R.
Using the “lusrmgr.msc” command is described in the previous section. Here’s how to use the “compmgmt.msc” command:
- Launch the “Run” menu and type in the command.
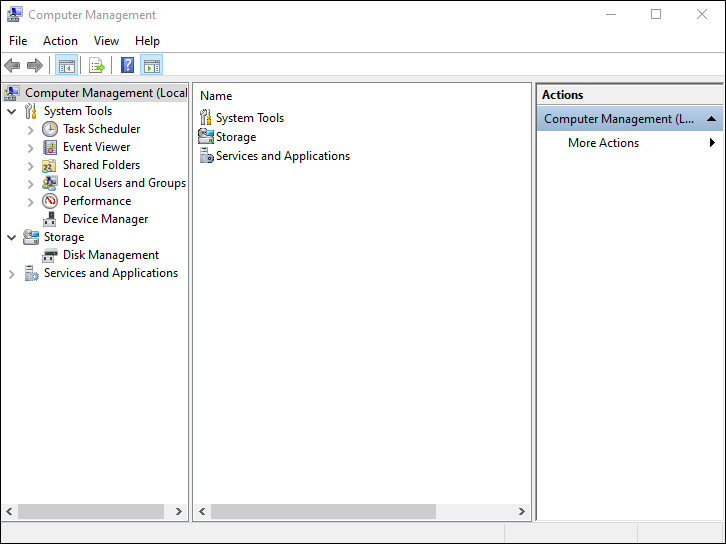
- Once you click “OK,” the “Computer Management” window will open.
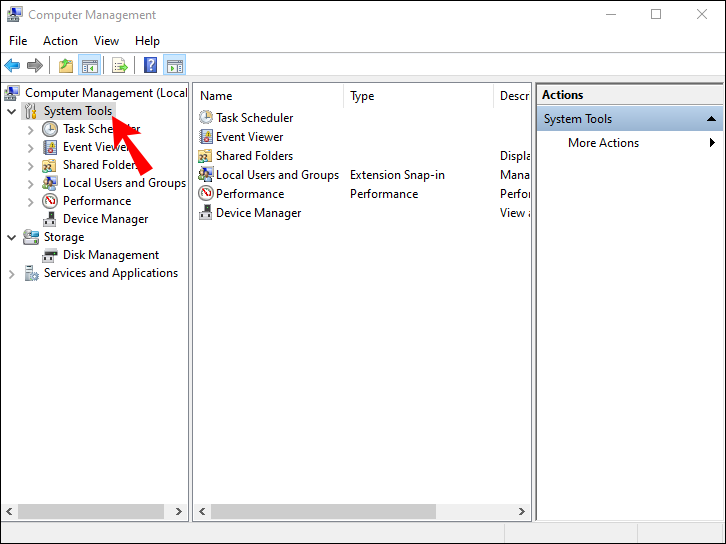
- In the left-side menu, navigate to “System Tools.”
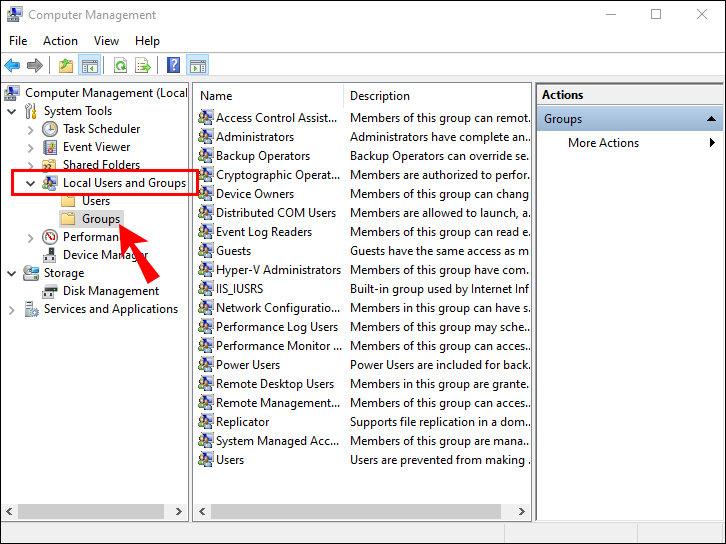
- Click on “Local Users and Groups,” then on “Groups.”
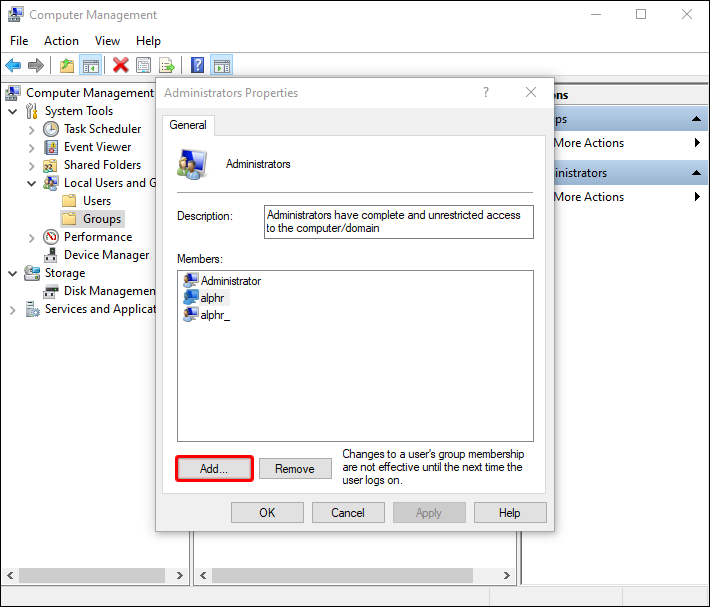
- You’ll see a list of groups on the right side; select “Administrator.”
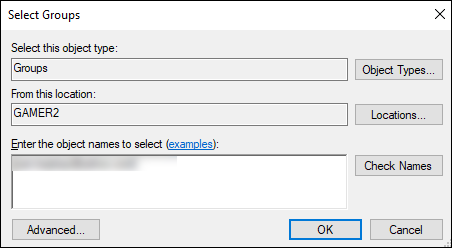
- Right-click the “Administrator” group and select “Add to Group.”
- Confirm your choice and choose “Add.”
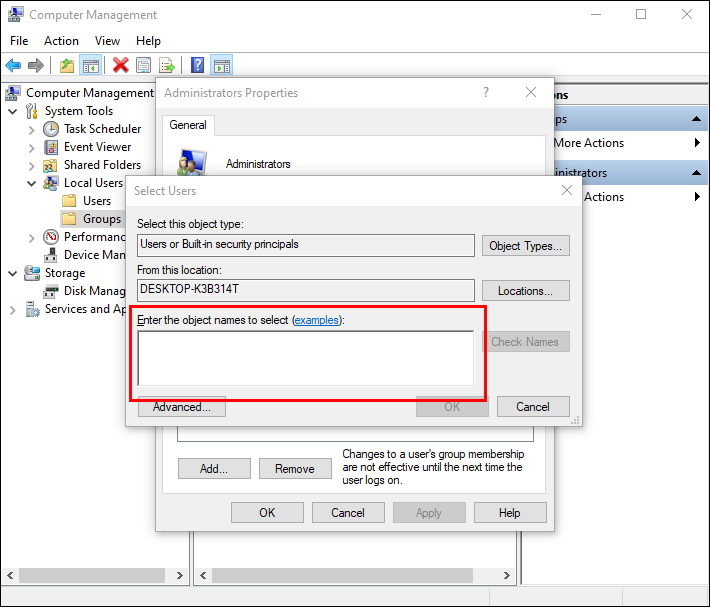
- Locate the “Enter the object names to select” box.
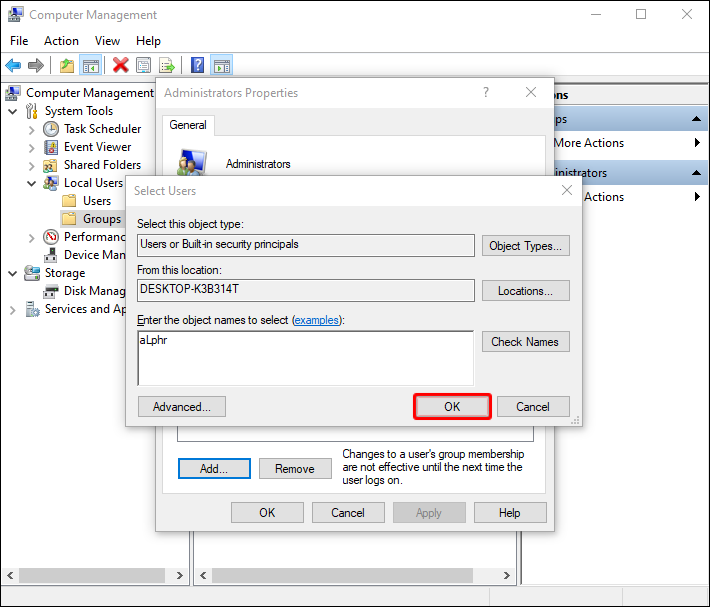
- Enter the user’s name in the box and click “OK.”


Alternatively, you can use the “Command Prompt” to add users to the admin group. Here’s how to do just that:
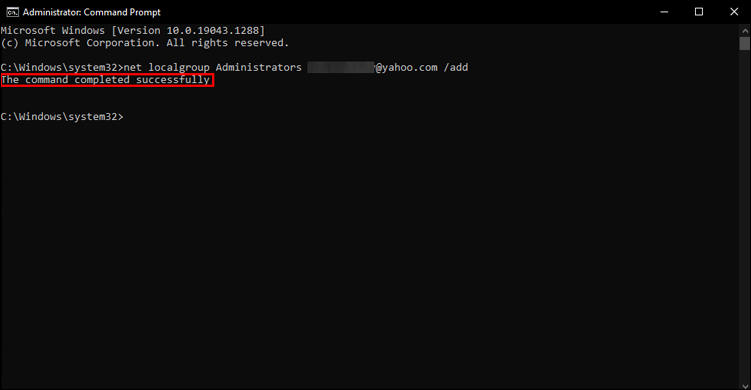
- Launch “Command Prompt” as administrator.
- Type in “
net localgroup Administrator AccountName /add” where you’ll replace “AccountName” with the user’s name. - Press “Enter,” wait for the confirmation message, and exit “Command Prompt.”


Give Users Admin Rights With Ease
Having more than one admin on a system or network can make many processes much easier. With other people having access to crucial settings and options, your network won’t have to depend on you always being available.
Now that you know how to make any user an admin in Windows 10, sharing admin rights – as well as responsibilities – with others will be much easier.
Did you manage to make another user an admin in Windows 10? Which method did you use?
Let us know in the comment section below.
Disclaimer: Some pages on this site may include an affiliate link. This does not effect our editorial in any way.


