In this age of constant online threats, it’s extremely important that you back up your files on a regular basis. Thankfully, Windows 10 makes this easy with useful built-in tools that automatically back up all your important data (including documents, photos, music and videos).
There are two ways to do this, one that uses the File History feature, the other OneDrive – for now though we’ll just start with the File History side of things. We’ll also show you how to back up all your PC’s settings and programs so you can easily restore them if something goes wrong.
Backing up keeps your files safe by copying them to an additional location, meaning you’ll need to have storage connected to your PC before you start. You can either use a network location to do this, or grab an external hard drive. If you don’t have one already, head to our sister site Expert Reviews for some buying advice.
How to backup Your Files with Windows 10 File History
First, we’ll show you how to use Windows 10’s File History feature. This lets you back up data to an external hard drive, then schedule automatic backups for that data.
- First, connect an external hard drive to your PC.
- Now, open your Start menu and click Settings.

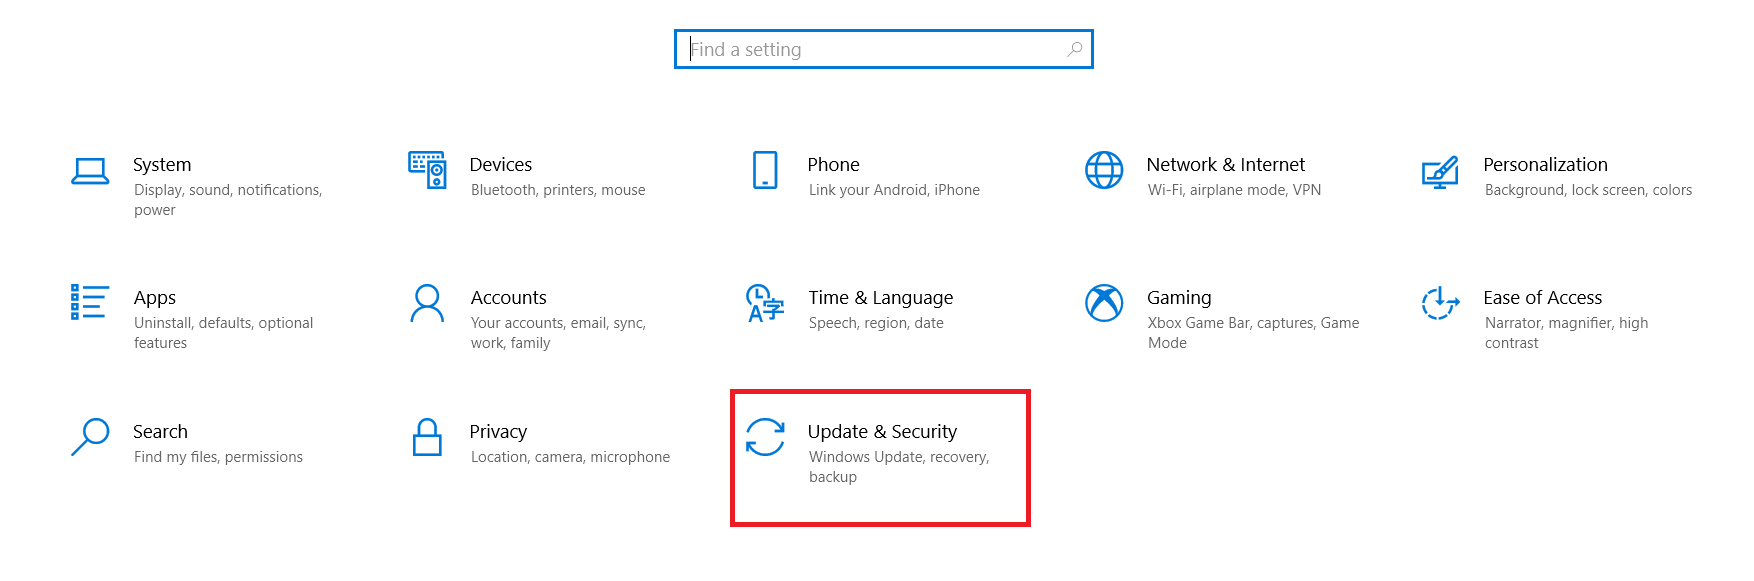
- Next, click on Update & Security.

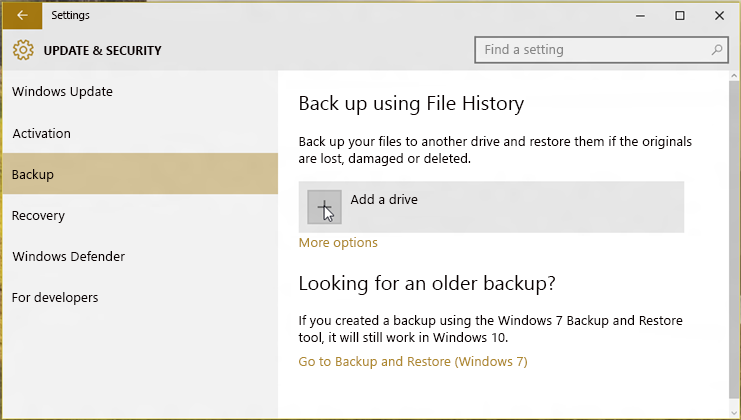
- Then, click on Backup > Add a drive and select your external hard drive.
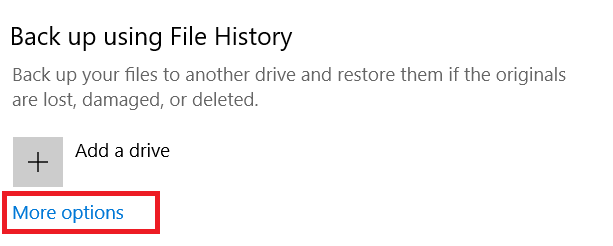
- Next, switch the Automatically back up my files slider on, then click the More options link below that. Now scroll down to the Back up these folders section. You’ll see a list of folders that are set to be backed up by default. To remove folders from the list, click to select them, then click Remove. To add a folder you want to back up, click Add a folder, navigate to the folder you want, then click Choose this folder.
- When you’ve finished, click Back up now. The first time you do this, the process can take a while (depending on the amount of data involved), but you can continue using your PC because the backup takes place in the background.
Changing Automatic Backup Intervals
If you don’t want to have to worry about backing up your files, but prefer to do it more than the default amount, then follow along.
- When you’ve finished amending your list, scroll to the top of the section. Click the Back up my files dropdown menu and select the regularity (from Every 10 minutes to Daily).
Setting Backup History
After you’ve started the backup, you’ll want to set how long to keep the files.
- Click the Keep my backups dropdown menu and select how long you want to store your backups for (from 1 month to Forever).
Restoring Files from Backup
In the future, changes you make to the files in the folders you’ve backed up will also be made to the files on your hard drive (as long as it’s connected to your PC). If your PC or any of your folders become corrupted, you can easily restore the backed-up data from your hard drive.
Here’s how to restore a file from backup.
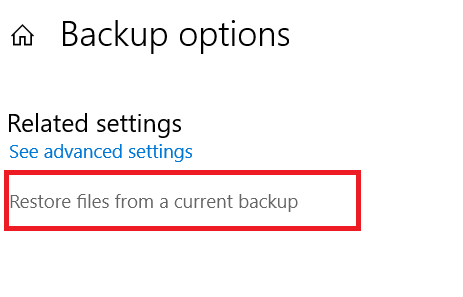
- To do that, go to the Backup section (see Step 1) and click the More options link below Back up using File History.
- Then, click Restore files from a current backup.
- You’ll now see your backed-up folders, press the Ctrl key on your keyboard, select the folders you want to restore, then click the Restore button.
- You’ll now see three options. If you want to replace all the files in the folders on your PC with their backed-up versions, then select the first option. If you only want to replace missing files with their backed-up versions, then select Skip these files. The third option lets you tick boxes to decide which files you want to restore.
- Click Continue after selecting the option you want to use, then follow the prompts.
File Backups
Keeping a copy or two of your important files is always a must. Thankfully, Windows 10 makes it quite easy to create a backup of those critical files you can’t live without.
Looking for a VPN to use with Windows? Check out Buffered, voted as best VPN for the United Kingdom by BestVPN.com.
Disclaimer: Some pages on this site may include an affiliate link. This does not effect our editorial in any way.


