The default video settings in Open Broadcast Software (OBS) typically work like a charm in most cases. However, some streamers prefer to manually change the resolution and aspect ratio for a more personalized streaming experience. Luckily, the software is incredibly user-friendly, allowing you to try out different configurations for each session.
Below, you’ll find step-by-step instructions on how to change the resolution in OBS, along with a breakdown of the primary video settings. We also included some tips on how to prepare everything for the stream and make your content pop. So keep reading to learn about the best OBS configurations.
How To Change the Resolution in OBS
Resolution is a metric used for determining the clarity and sharpness of a particular image. It’s one of the most critical aspects of streaming and getting it wrong can seriously hinder your viewers’ experience. You want to make sure the viewers can see everything that’s happening on screen instead of squinting at pixelated images.
Luckily, OBS provides you with different video and output settings for a seamless streaming session. The default configuration of the open-source software is decent. However, there’s always room for improvement. You can play around with different resolution and aspect ratios to find the best setup for your content.
Let’s look at each video setting and step-by-step instructions on how to adjust it.
Base Resolution
The Base or Canvas Resolution affects the image quality of the entire stream, including overlays and recordings. Since it’s the primary video source, you need to be careful when adjusting it. The wrong Base resolution can result in lagging and other annoying glitches.
There are two recommended configurations for Base Resolution: 1920×180 or 1280×720. With 1080p and 720p, the aspect ratio is automatically set to 16:9, which is the optimal solution for most computer screens. However, some streamers prefer the 1600×900 setting as a half-point between the two standard resolutions. If you’d like to try it out yourself, here are the steps to change the Base resolution in OBS:
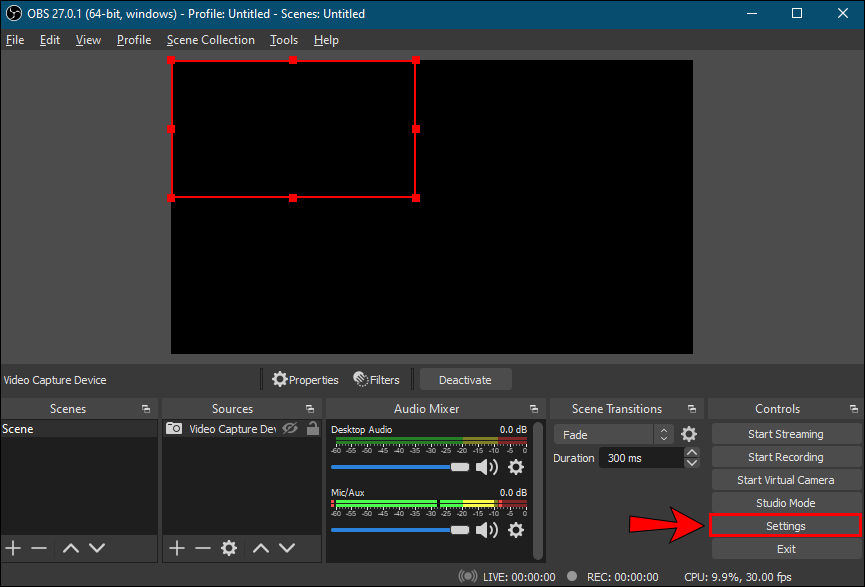
- Launch the OBS software and scroll to the “Sources” box. Click on the little plus icon (+) at the bottom of the panel to add a video source.

- Next, click “Settings” in the bottom-right corner of the screen. The “Settings” window will appear.

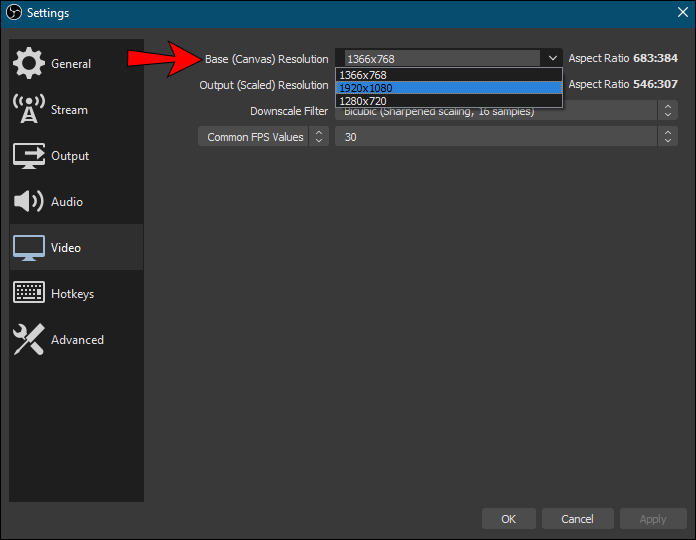
- From the menu panel on the left-hand side, click on the “Video” tab.
- Click on the dialog box marked “Canvas (Base) Resolution.” From the drop-down list, select a preferred value.
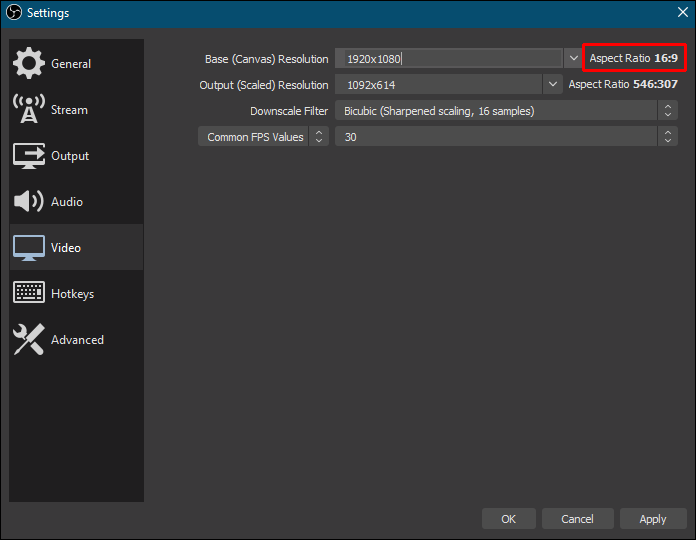
- Check the aspect ratio on the right-hand side, next to the dialog box. Ideally, you want to keep it at 16:9, but 4:3 can do the trick as well.
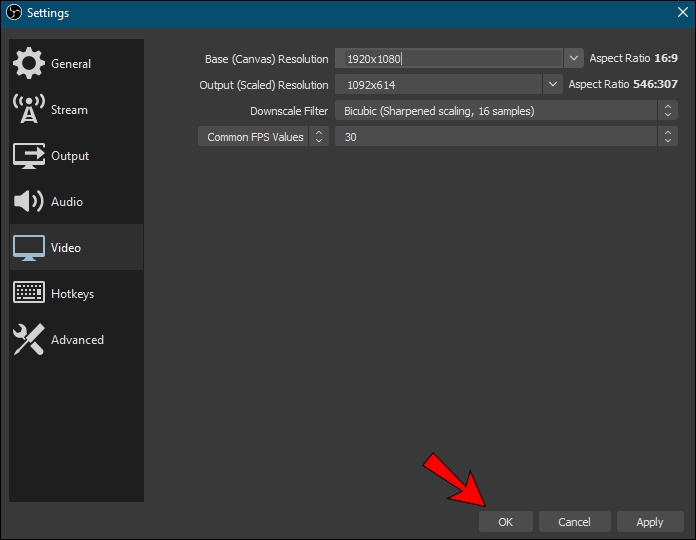
- Once you’re happy with the settings, click “OK” to apply the changes.

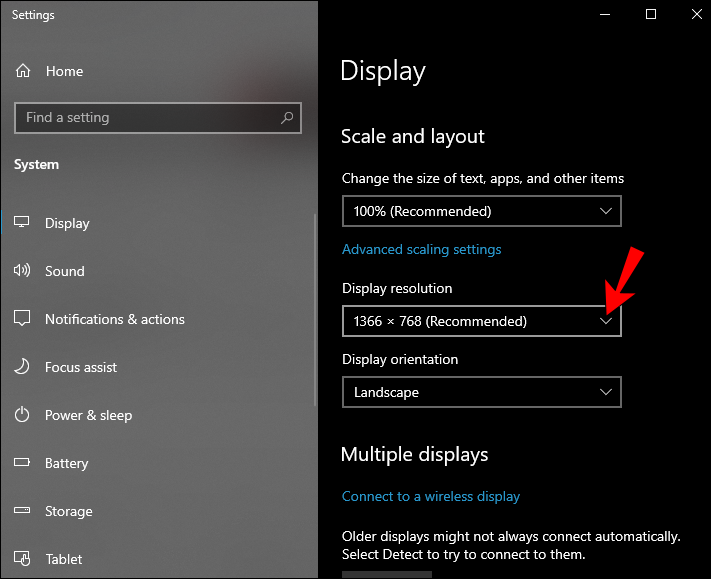
Another way to influence the Base Resolution is to change the resolution of your computer screen. It’s not entirely necessary, but it can sometimes help improve the image quality if all else fails. Here’s how to do it with a Windows PC:
- Right-click anywhere on the display to open a drop-down menu.
- From the list of options, select “Display Settings” to access the Control Panel.
- Under “Display Resolution,” click on the tiny drop-down arrow next to the current resolution. Then, select the preferred setting from the drop-down list.
- Finally, click “Apply” and “OK.”

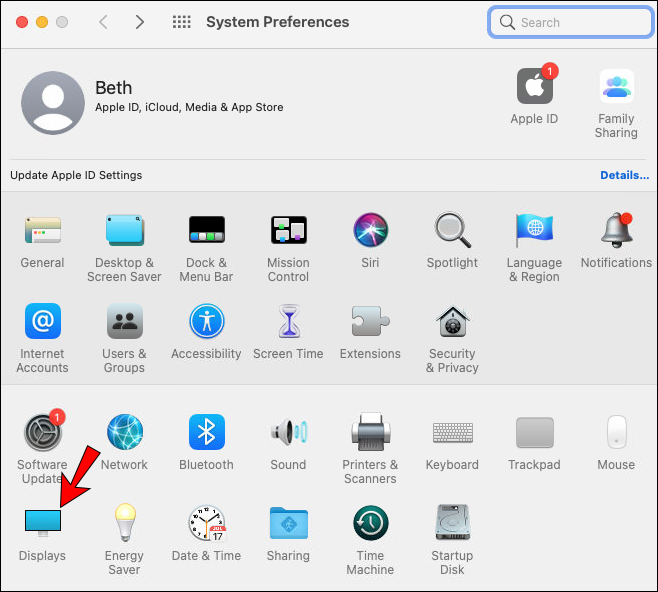
And here’s how to do it with a Mac:
- Click on the “Apple Menu” in the upper-left corner of the screen and go to “System Preferences.”
- Open the “Displays” tab and select “Display.”
- Next, click on the “Scaled” option to disable it. Finally, choose a different resolution from the list.


Output Resolution
OBS isn’t just a fantastic streaming software; you can use it for screen recording as well. The Output Resolution is the measurement for the image quality of a particular display capture. It’s essential to get it right if you’re content is mainly based on tutorials.
The Output Resolution is entirely independent of the Base resolution, meaning you can set the two to different ratios. However, that can sometimes lead to glitches, such as black bars appearing on the sides of the screen. That’s why it’s best to get the two settings to match.
Luckily, changing the Output Resolution is pretty straightforward so you can fix any potential issues relatively quickly. Here’s how to do it:
- Launch OBS and click on “Settings” in the bottom-right corner of the screen.
- A new window will appear. Select “Video” from the menu panel on the left-hand side.
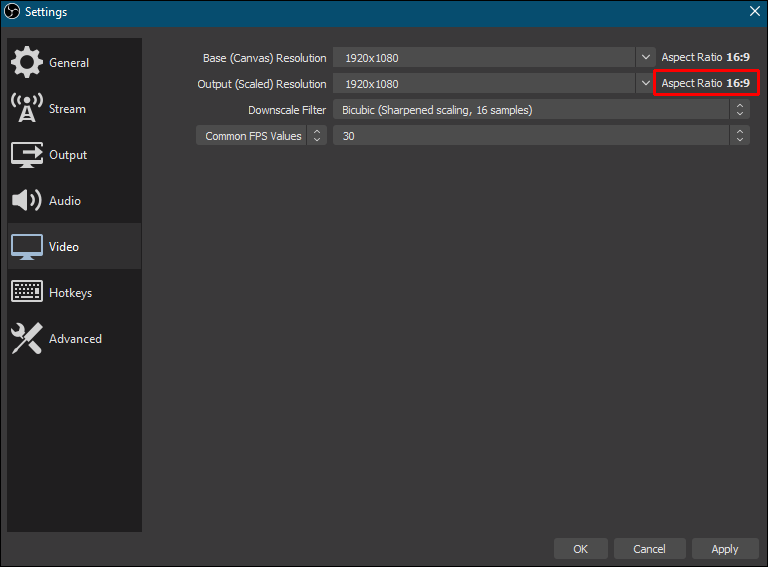
- Next, click on the “Output (Scaled) Resolution” dialog box to expand it. Then choose a preferred ratio from the drop-down list.
- Check if the aspect ratio is adequate. Remember, it should be either 16:9 or 4:3.
- Finally, click “Apply” to save the new resolution.


Downscale Filter
Some streamers prefer to stream in 720p, even if the Base and Output Resolution is set to 1080p. OBS has a special filter for downscaling that allows you to do that. Here’s how to apply it:
- Click on “Settings” in the lower-right corner of the OBS window.
- In the “Settings” panel, select the “Video” tab.
- Find the dialog box marked “Downscale Filter” to access the list of filters. There are several options to choose from. However, the recommended filter is Lanczos. Keep in mind it can put a strain on your CPU and GPU. If you want a lighter version, try Bicubic. The other two filters, Bilinear and Area, are somewhat outdated.
- Once you’ve chosen the filter, click “Apply.”

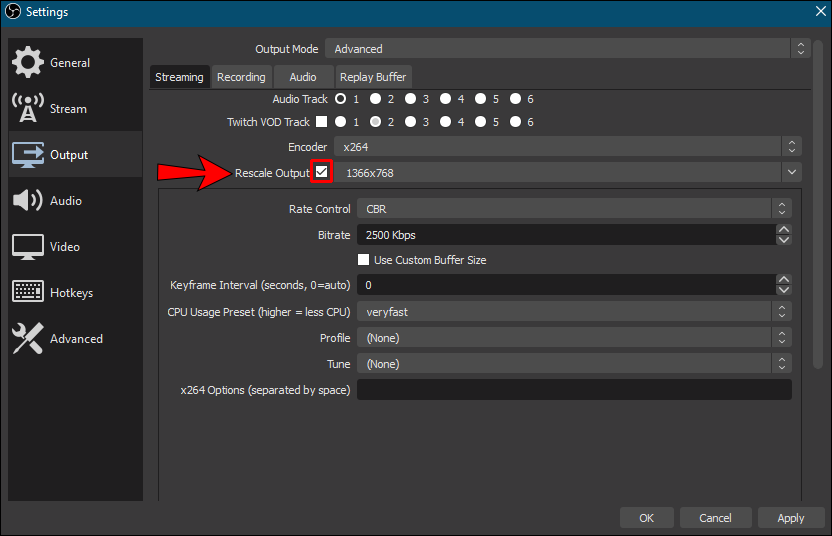
Rescale Output
There’s one more feature you need to enable if you want to stream in a lower resolution than the Base configuration. The Rescale Output will scale the image based on the downscaled filter instead of following the Base Resolution. You just need to activate it:
- Open OBS and go to “Settings.”
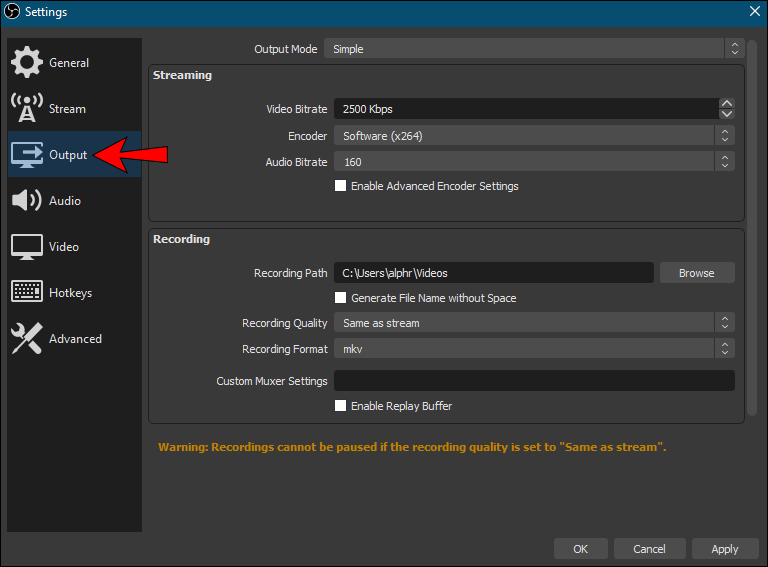
- From the menu panel on the left-hand side, click on the “Output” tab.
- Next, check the tiny box labeled “Rescale Output.”
The Best Configuration Options for OBS
Since we’ve pretty much covered all OBS video settings, we’ll focus on the “Output” tab in this section. As mentioned, the default configuration works for most streamers. However, that also depends on the type of content you produce. That’s why playing around with different settings can help improve your stream sessions and perhaps boost your following.
If you want to optimize your OBS configuration, it’s best to do it with the “Advanced” mode. It will allow you to micro-manage every aspect of the stream, from the bitrate to audio quality. Here’s how to do it:
1. Launch OBS and open the “Settings” window.
2. Next, click on the “Output” tab on the left-hand side.
3. Finally, expand the “Output Mode” bar by clicking on the downward arrow on the far-right. From the drop-down list, select “Advanced.”
Once you’re done, you’ll be able to fine-tune your OBS setup with extra efficiency. But to do that, you have to familiarize yourself with the different settings. So, let’s go over each one and explore how it affects the stream:
• Encoder. Hardware encoding will help minimize CPU usage, which can come in handy if you don’t have a powerful computer. But, unfortunately, it can sometimes hinder visual fidelity. To avoid that, try the x264 encoder setting.
• Bitrate. The “bits per pixel” rate is determined by the FPS, resolution, and upload bandwidth. Therefore, you want the audio and video bitrates to correlate to those three aspects. Usually, a 1080p resolution requires a 6,000Kbps video bitrate and 128Kbps audio.
• Rate control. It determines the consistency of your bitrates. Typically, CBR is the preferred bitrate, but if you have limited bandwidth, go with VBR.
• Keyframe interval. The recommended setting for live streams is a keyframe interval of two. That means the software will render the entire video frame every two seconds.
• CPU usage preset. Ideally, you want to set it to “very fast” if you use software encoding.
• Profile. It’s best to keep the default OBS setting since the “Main” profile has all the features you need for a successful stream.
• Audio. As mentioned, the recommended setting for audio bitrate is 128Kbps. However, if you’re using more than one track when recording, you can push it to 320Kbps instead.
Get the Ball Rolling With OBS
OBS is a highly customizable streaming software. While the default settings are pretty effective, you also have the freedom to make adjustments and get the most out of your content. You can change the Base and Output resolution to improve the video quality of both your streams and screen recordings, for starters. Furthermore, you can use a downscaling filter to the only stream in 720p if that’s what works best for your gameplay.
Thanks to the “Advanced” output mode, you can go even further than that. If you have the time and dedication to explore the different configurations, OBS is incredibly easy to navigate. It won’t be long before you get the ball rolling and optimize your streaming sessions.
Do you use OBS for live streaming? What’s your experience with the software? Let us know in the comment section below if there’s something we missed.
Disclaimer: Some pages on this site may include an affiliate link. This does not effect our editorial in any way.


