The Windows 10 Start Menu introduces a new All Apps section that, by default, lists all of the applications installed on a user’s PC. Although quite similar in name to the “All Programs” list from Windows 7 and earlier, the Windows 10 All Apps list doesn’t function in the same way. It does not allow the user unable to manually add, remove, or rearrange applications directly via the Start Menu. Thankfully, there’s a workaround that brings some of this functionality back to the user, although it includes some important caveats. That said, here’s how to add, remove, and organize the All Apps list in Windows 10.
A Note About Universal Apps
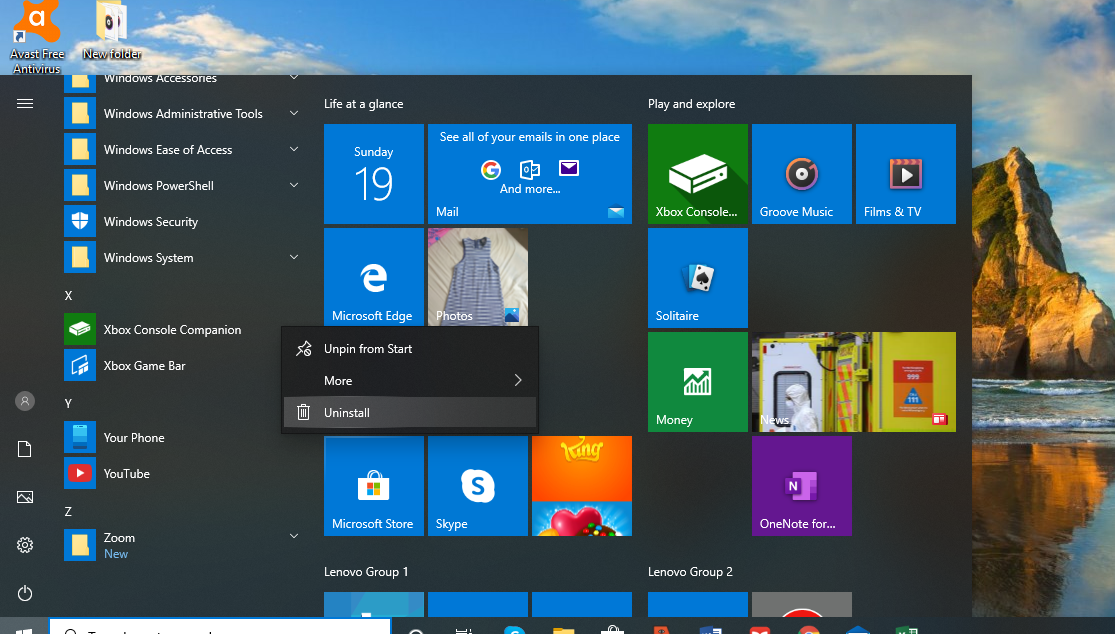
The Windows 10 All Apps list is home to both traditional “desktop” apps as well as “universal” apps from the Windows Store. Unfortunately, the steps described in this tip apply only to desktop apps, and won’t work with universal apps. You can still remove a universal app from your Start Menu’s All Apps list, but you’ll need to uninstall it completely (right-click on the app’s entry in the Start Menu and select Uninstall).
What are Universal Apps?
Microsoft has launched an initiative for all apps across their different platforms to be universal. This implies that apps in your Windows computer will also be compatible with Xbox, Windows phones, and tablets. The software can be primarily downloaded through the Microsoft Store.

Although this limitation is restrictive, the relatively good news is that users can re-download purchased apps from the Windows Store at any time, so the process of getting a universal app back if you regret uninstalling it later shouldn’t be a major issue. When it comes to desktop apps, however, the steps below demonstrate how you can, among other things, remove their icons from your All Apps list while keeping the apps installed and fully functional.
Removing Apps from the All Apps List
To remove a desktop app from the Windows 10 Start Menu’s All Apps list, first head to Start > All Apps and find the app in question. Right-click on its icon and select More > Open File Location.
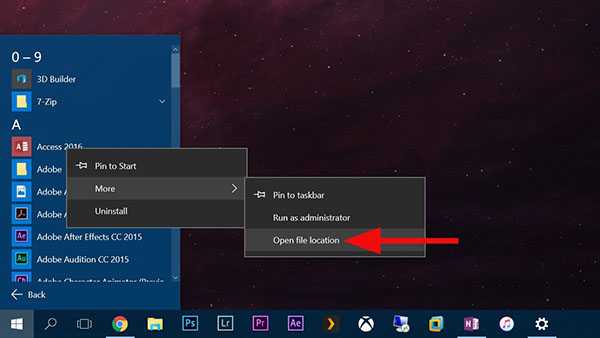
Of note, you can only right-click on an application itself, and not a folder that the app might reside in. This doesn’t mean that you can’t remove or modify folders in the All Apps list (we’ll show you how in a moment), but you’ll need a specific application icon itself to get to the next step.
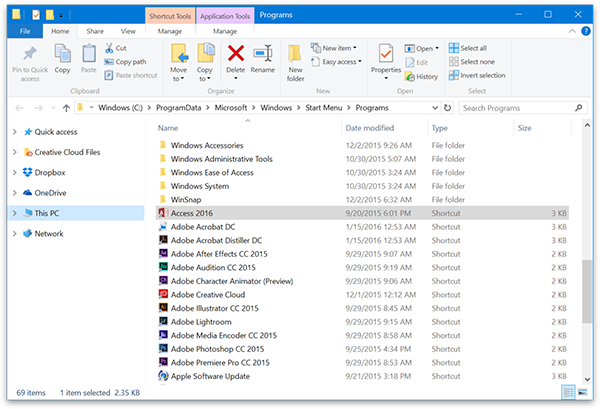
After clicking Open File Location, a new File Explorer window will appear showing you the application shortcut. Depending on whether the app is available to all users or limited to your own user account, you’ll be looking at one of the following directories, respectively:
C:ProgramDataMicrosoftWindowsStart MenuPrograms
%appdata%MicrosoftWindowsStart MenuPrograms
Changes made to the contents of these directories will be reflected in the All Apps list. For example, we want to remove Microsoft Access 2016 from our All Apps list, but we don’t necessarily want to uninstall the application. Using the steps above, we can locate the Access 2016 shortcut in the corresponding “Programs” folder and delete it. When we open the Start Menu’s All Apps list again, the entry for Access 2016 will not show.
You can remove other applications, including folders, from File Explorer to get rid of any unwanted apps that would otherwise clutter up your All Apps list. Note, however, that there are certain system files and entries that you can see in File Explorer but not in your All Apps list. It’s best to leave any entries that don’t show up in the All Apps list alone in case Windows or other applications rely on them.
Organizing Apps in the All Apps List
Rather than deleting apps from the All Apps list, some users may prefer to organize their apps into folders; thus, reducing desktop clutter and making it look more organized. This can be accomplished by repeating the steps above to find the app’s shortcut location. Instead of deleting any apps, however, you can create a new folder (or use an existing folder) and simply drag and drop the appropriate apps into place.

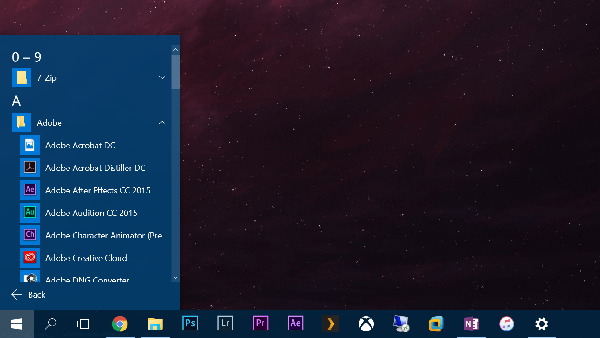
For example, all of our Adobe Creative Cloud apps are listed in the top-level Programs folder, but we can move them all to an “Adobe” folder to clean up our All Apps list while still maintaining easy access to our Adobe apps.
Folders in the All Apps list don’t need to be limited to certain developers, of course. Users can create custom folders such as “Games” or “Work” and populate them with the desired list of apps. You can also rename apps or folders in File Explorer and have the changes reflected in your All Apps list.
Once you’re done organizing your Start Menu in Windows 10, you’ll be able to search and find content and apps faster than ever before.
Choose Which Apps Show in Your Start Menu
There are apps which your want to be readily available in your Start Menu for easy access. There is a way to customize your Start Menu to show all the available apps or just the ones you use most of the time. To do this, you have to:
- Click the Start Menu.
- Go to Settings.
- Click Personalization, and adjust the settings you want to change.


Disclaimer: Some pages on this site may include an affiliate link. This does not effect our editorial in any way.


