Paint.NET (AKA Paint) is a terrific, useful, free image editing and art creation program with a lot of functionality. Paint’s a lot cheaper and easier to use than Photoshop and has much of the same power as GIMP with a tiny fraction of the learning curve. Paint is a good budget image editing application that’s relatively easy to learn.
Paint.NET has a reputation for being fast, intuitive to learn, and powerful. For designers who mostly do fairly simple image edits, Paint.NET is the perfect tool for the job.
A common task when editing images is outlining text and other objects. Creating text with a clear outline can be useful for things like creating original memes, adding captions to diagrams or photographs, or just making the existing text on an image more readable. If you’re a web or email designer you will find cases where it’s very useful to know how to outline text and other objects.
Paint.NET supports a number of plugins which allow you to write outlined text in Paint and these plugins are easy to find, but for the purposes of this tutorial, I’m going to assume that you don’t want to add the complexity of a plug-in just to outline some text.
Instead, this article will show you a quick technique for getting the outlined text with only the latest base version of Paint. At the time of this writing, that version is Paint.NET 4.0.21.
Let’s go step-by-step through the steps to outline text in Paint.NET.
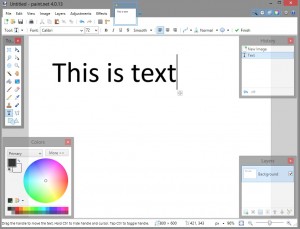
- First, use the Text tool to create the text you want. You should use a large font size for this – in the example, I use a 72-point font (equivalent to 1-inch-tall letters) but you can go even bigger, and the final result will look better the larger you go. This text is going to be at the center of your outlined text, so make it whatever color you want the center of your outlined text to be. (If you want the outlined text to have a white center, then this text needs to be white, for example.) Let’s start with something simple:

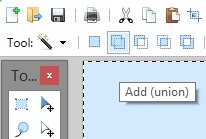
- Use the Magic Wand tool to select all of the text. Make sure the “Add (Union)” option is selected in the upper-left, so you can select all the letters at the same time:
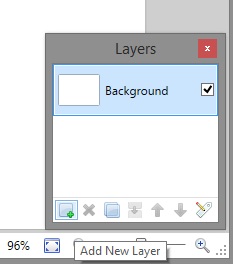
- Use the window in the bottom-right of the program to select “Add New Layer.” This should put a blank layer on top of your existing layer, but the shapes of the letters will still be selected:
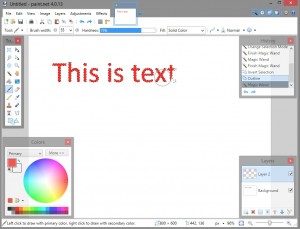
- Use the paintbrush to fill in the selected space with the color you want the outlines to be:
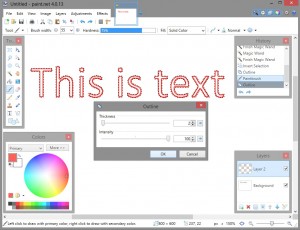
- Keep the text shapes selected. In the “Effects” menu, select “Stylize” and “Outline”:
- Move the “Intensity” slider all the way up to 100, so the outline will be solid. Adjust the “Thickness” slider to change how thick the outlines will be, in pixels:
- Now use the Magic Wand tool again to select the blank insides of each letter:
- Hit Delete to remove the insides of the letters. Now the original letters should show through, with your outlines on top of them:


Using this technique, you can now add outlines to your text fairly quickly and easily. You can also use this method to outline any other shape the same way. Outlines can add a little extra gloss to text and are especially useful for making the text clearer if the picture background has a similar color scheme.
We’ve got a few more articles on how you can manipulate text with Paint.NET, image-manipulation tricks like how to add blur to images with Pain.NET and miscellaneous tricks such as how to whiten teeth with Paint.NET. Paint has a lot of cool features, making it one of the best and easiest to use free image editors out there!
Do you have your own clever Paint.NET tips and tricks? Please leave a comment below!
Disclaimer: Some pages on this site may include an affiliate link. This does not effect our editorial in any way.