It’s hard to deny that Windows 10 has a wide range of options when it comes to display resolution. Changing the resolution to one of the presets is a cinch, but changing it to a setting that isn’t preloaded is a bit of a process.
There are many reasons why Windows may not offer you the optimal resolution you need. If you find yourself looking for that perfect resolution, there are two options for you. In this article, you’ll learn how to customize your display via the video adapter and by using third-party software.
Why Change Your Resolution?
Among the many purposes of using a resolution outside of the established parameters is gaming. One of the most common cases is for users who want to experience “retro” games in their original resolutions. Like other technologies, computer monitors have come a long way in the last decade or so, and the resolutions that many older games were designed for simply aren’t supported anymore. For hardcore players who want a genuine experience, this is a challenge worth taking on.
Another potential application is to get a feel for what the future holds. 4K monitors are already here, but not everyone has access to them. If you want to get an approximate sense of what those ultra-high resolutions look like, you can do so. To be perfectly clear, no amount of software manipulation will upgrade your monitor’s quality, but at least you can see what having all that desktop space feels like.
Ultimately, you may just want another resolution. More real estate on your screen, convenience for reading, or simple preference are all valid reasons to try out a custom resolution. If you do use these methods to experience ultra-high resolutions, you might also find it useful to resize your fonts and icons to keep up.
Changing Your Display Adapter Settings
The first way to gain access to more resolutions is through your display adapter. This is a simple process that doesn’t require anything except adjusting some settings. There’s no risk in using this method because the resolutions that it gives you access to are guaranteed to be supported by your graphics card, so you’re well-advised to use this procedure if it is suitable for your needs.
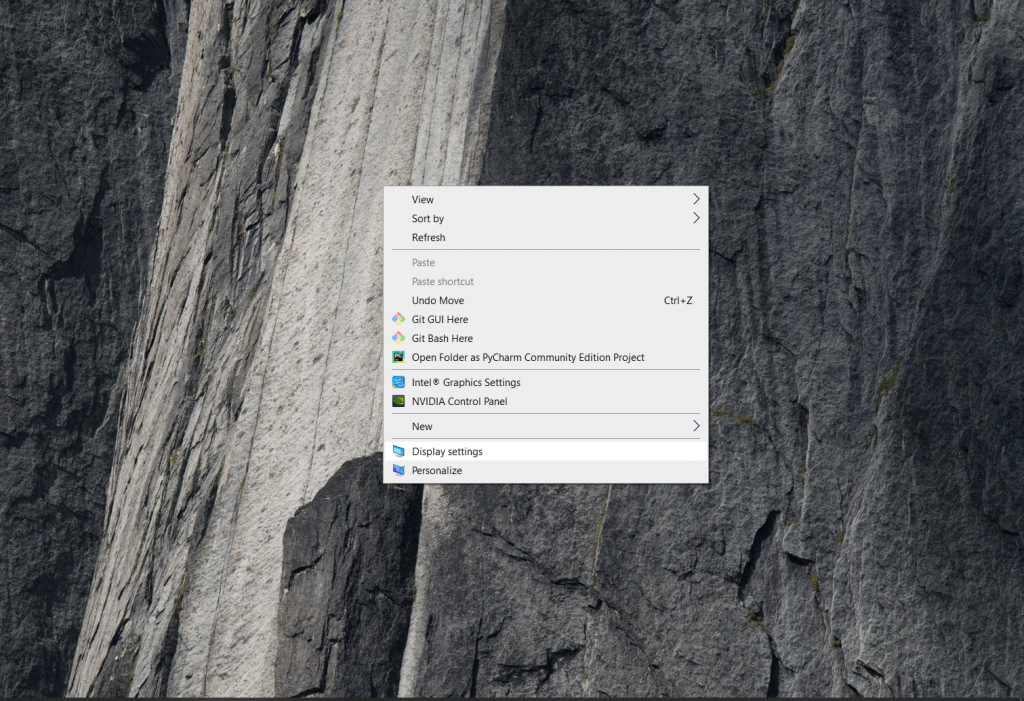
- Right-click anywhere on your desktop to reveal a menu and select Display Settings from that menu. You can also open the Settings menu and select System.
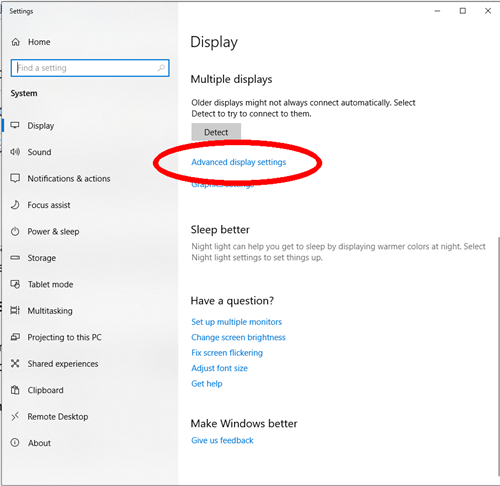
- In the display settings window, scroll down to find Advanced display settings.

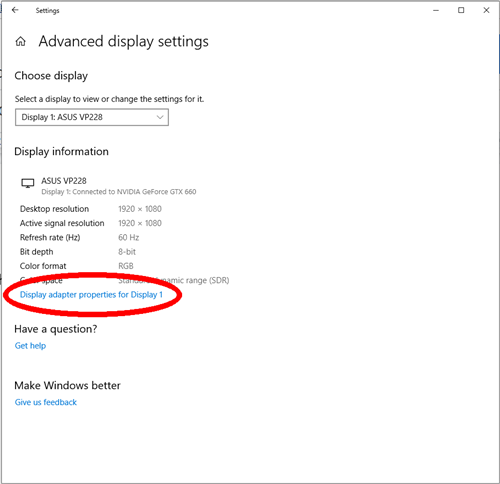
- Once you’ve accessed the advanced settings, click on the Display adapter properties for your monitor.
- In the properties, click on the button that reads List All Modes. This will display all the resolutions that your display adapter supports, which is likely to be many more than Windows 10 does. Choose the resolution you want and click Apply to switch to it.
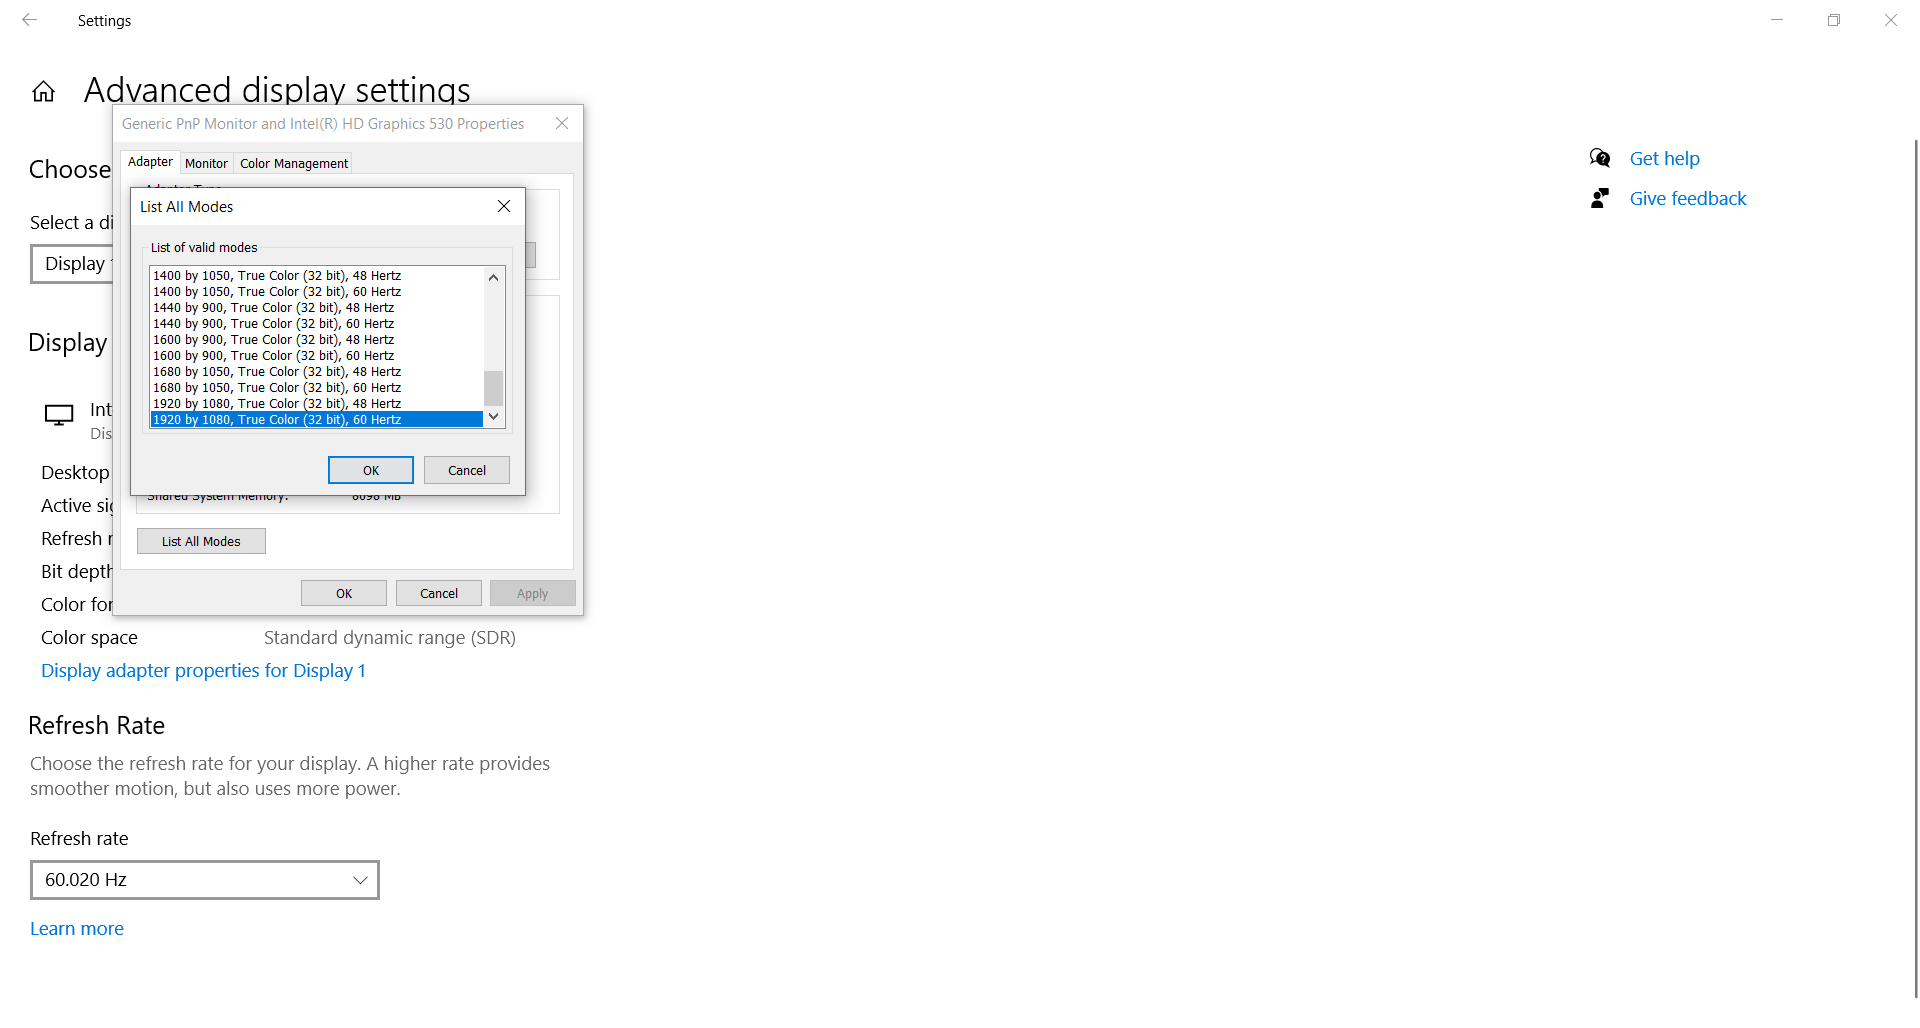
This will act identically to changing the resolution from the display settings. Once you activate the desired resolution, you’ll be prompted to revert the change or keep it.
This is a pretty simple procedure that will give you a broader range of options for your resolution. However, these are also presets, and you may want to go even further and choose a resolution completely defined by you. In that case, you will need third-party software.
A Little Outside Assistance From Custom Resolution Utility
If you still aren’t satisfied, there’s an application designed to help you customize the resolution of your monitor. It’s called Custom Resolution Utility. A word of warning: the application doesn’t work with Intel display adapters, and it functions by making edits to your registry. It’s also a good idea to stick to resolutions that would be normally supported on your device.
The software is free and doesn’t require an installation. Once you download it, simply run it, and it will auto-detect your monitor. Click the Add button when you’ve selected your display, and you will be given the option to create a completely customized resolution.
When you’re done choosing, run the restart application that’s in the zipped file you downloaded. This will restart your display adapter and apply your resolution.
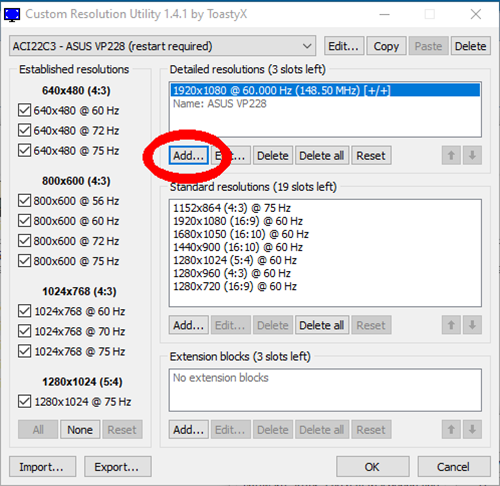
Follow the basic guidelines for aspect ratios to avoid problems. If you end up with a display that isn’t working, use the reset-all executable file that’s also in the zipped download.
How to Set Custom Resolution in Windows 10 With Intel Graphics
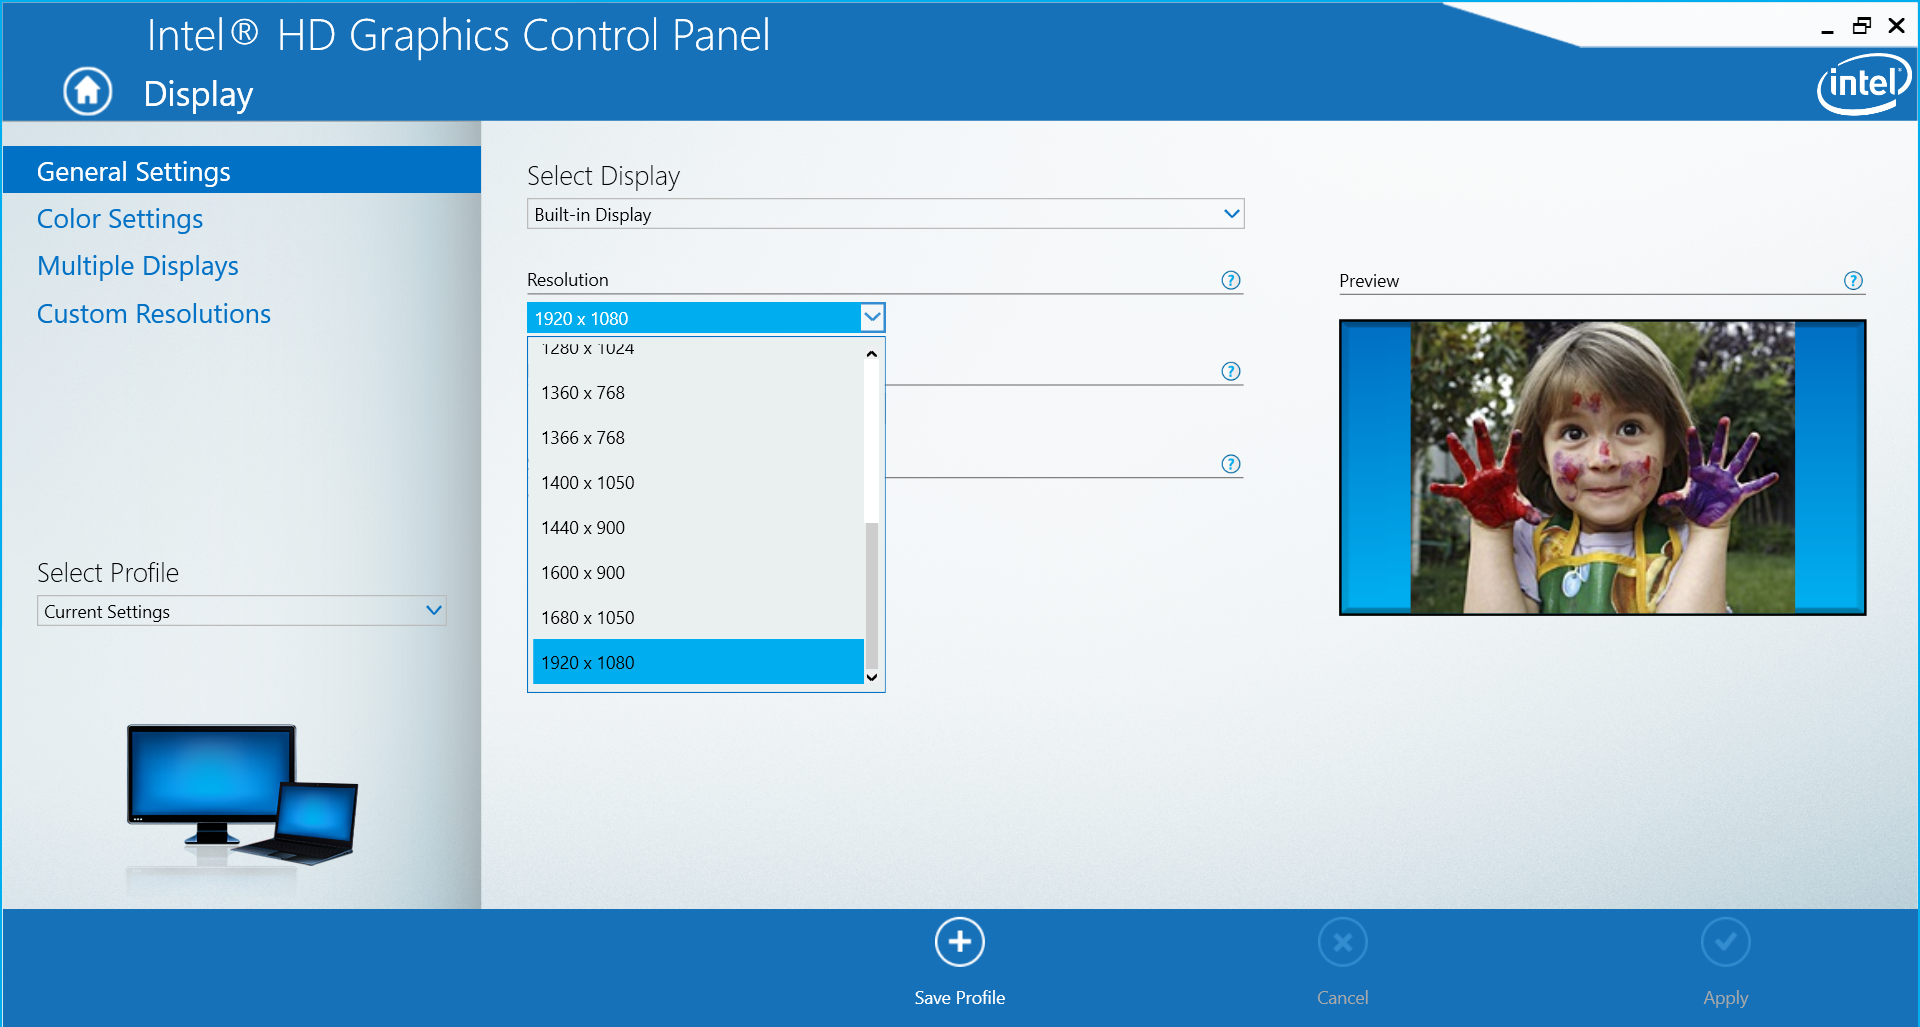
If you have Intel graphics, then you can simply use their built-in control panel to modify and customize your resolution.
- Right-click on your desktop and select Intel Graphics Settings.
- For simple display settings, you can stay on the General Settings page and adjust the Resolution drop-down menu.
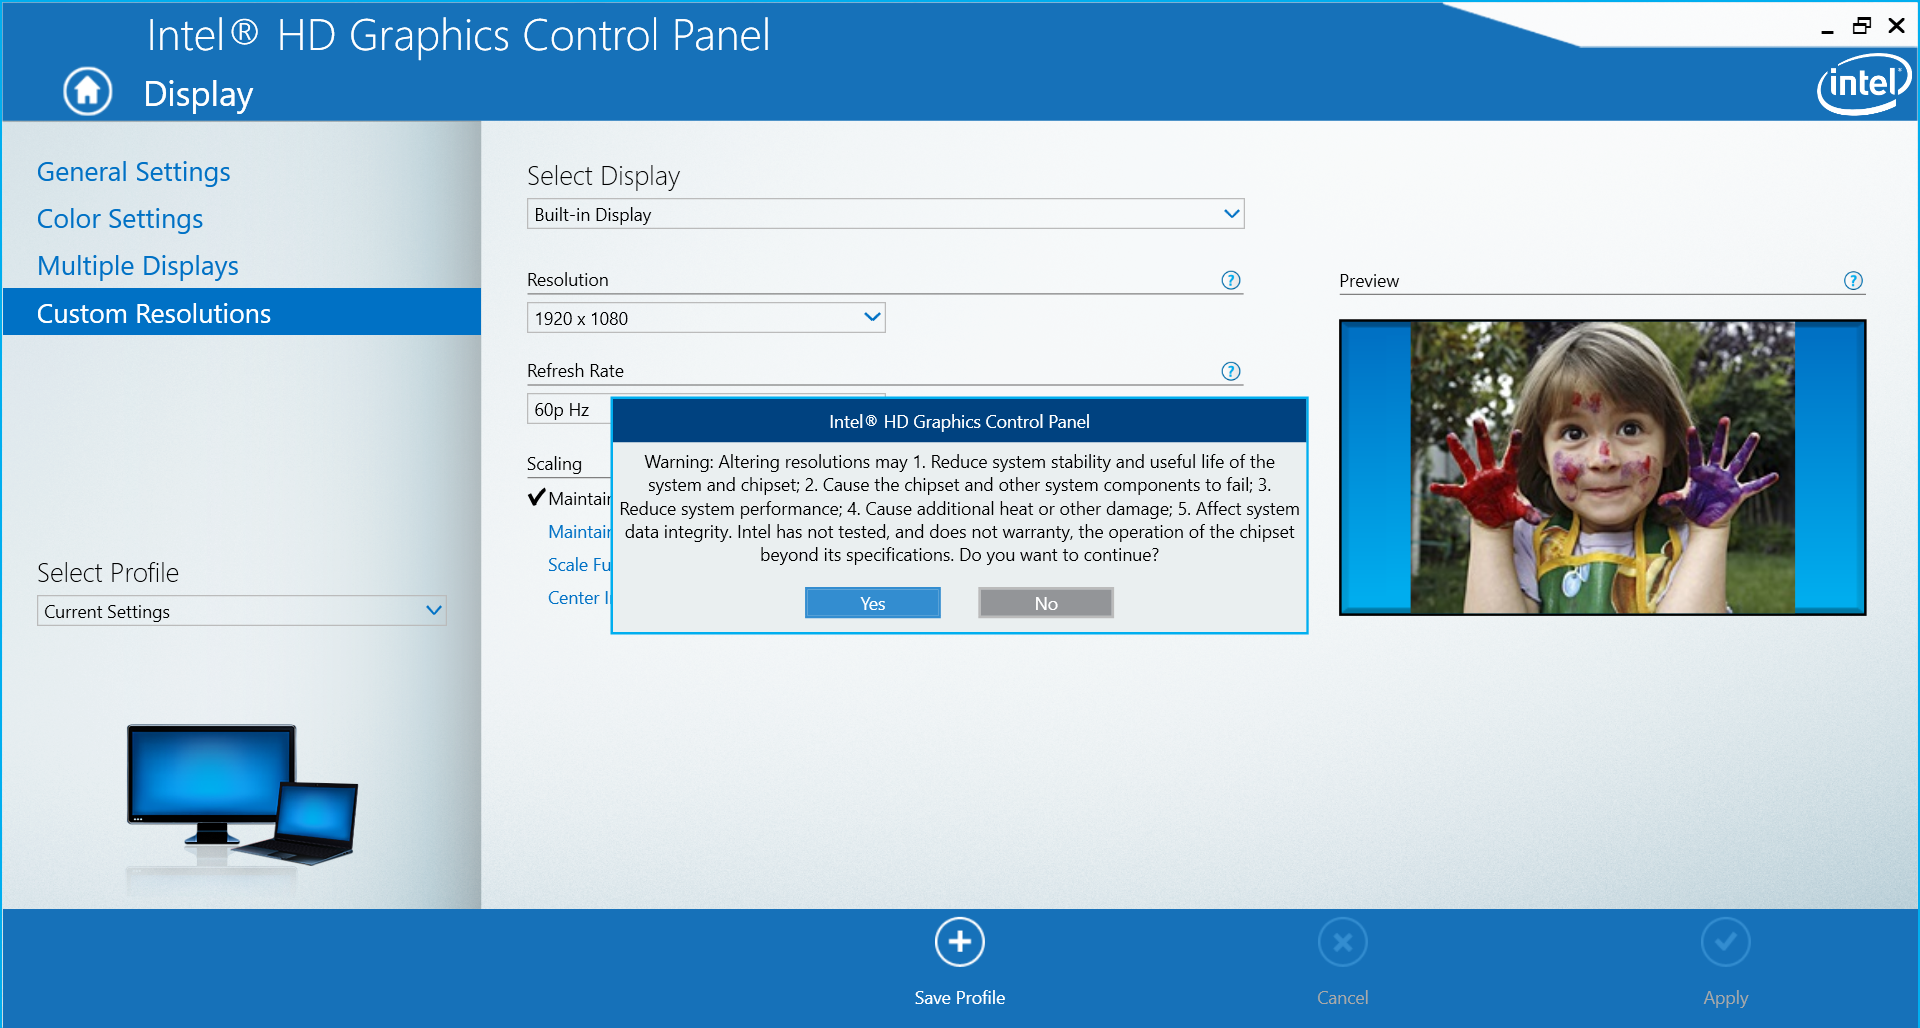
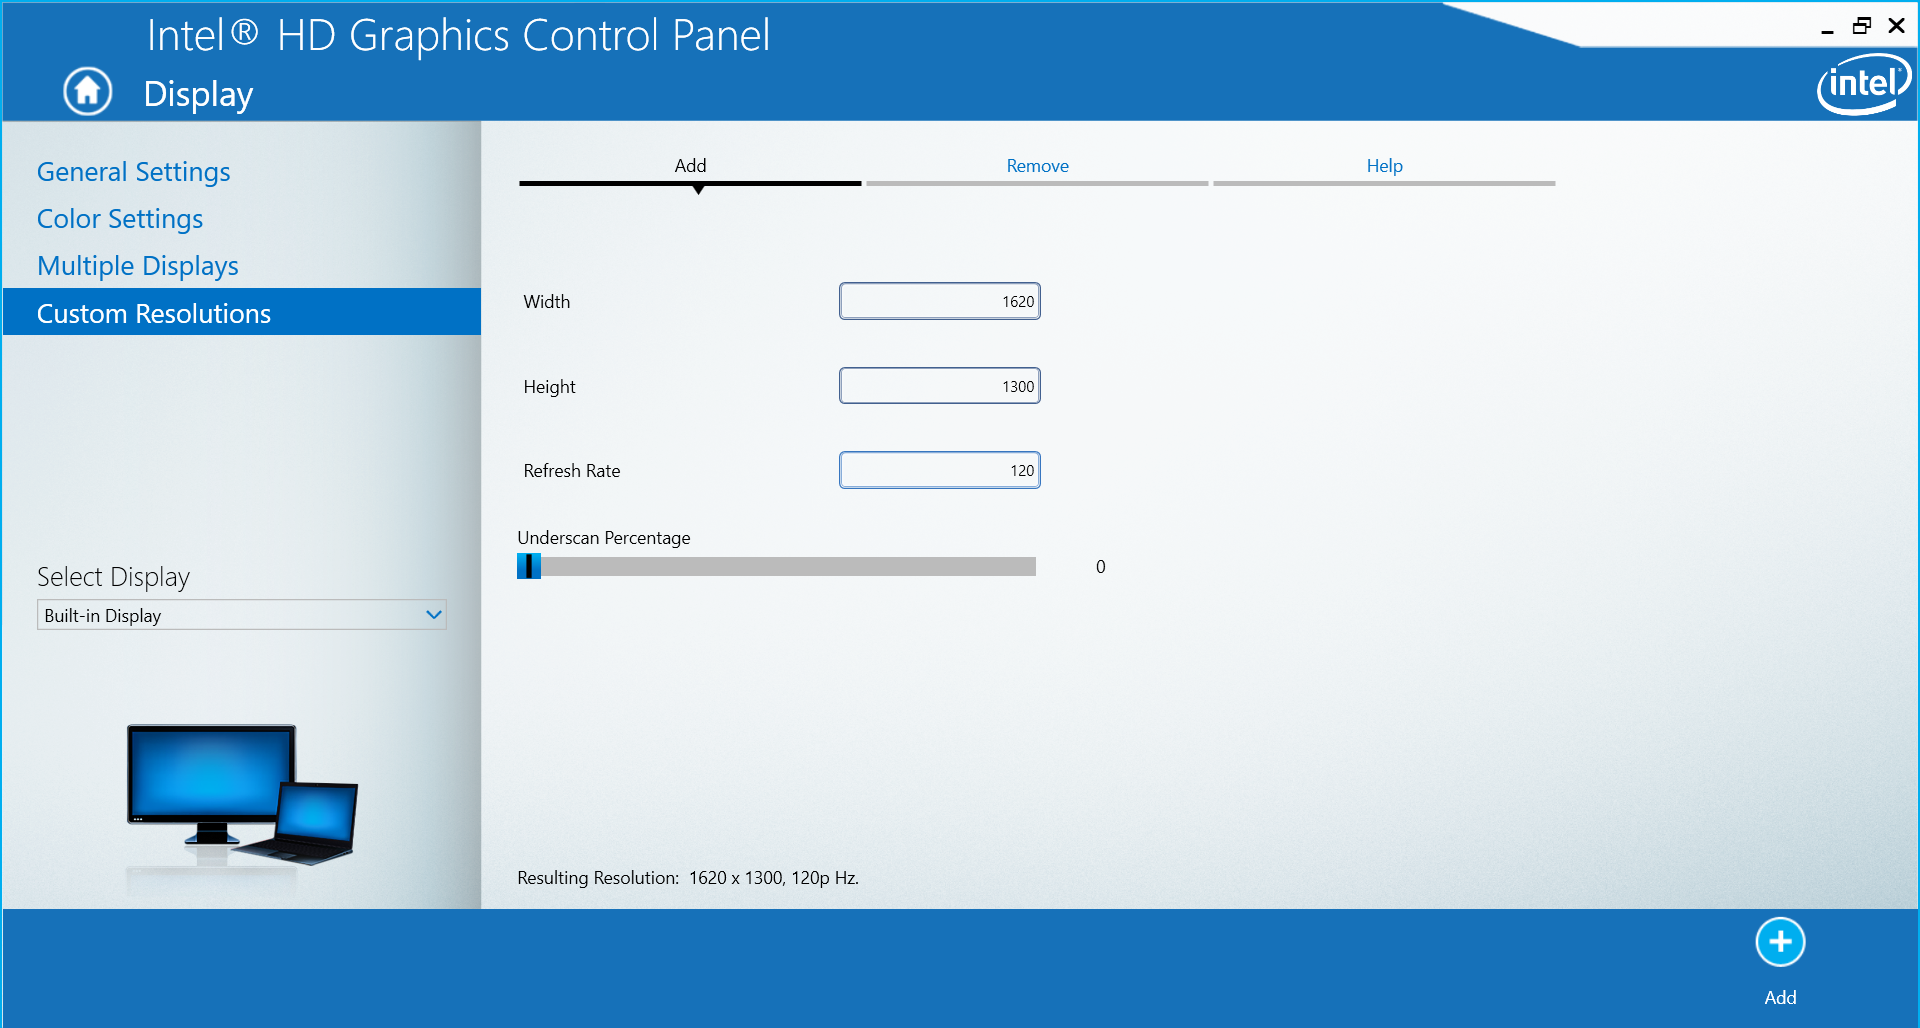
- If you need a custom setting, then select Custom Displays. You’ll be prompted with a warning about the risk of overheating, so make sure you know what you’re doing.
- Enter your desired resolution settings and click Add.

Resolved to Customize
Aside from coding your own application or editing the registry manually, these are the best options available to apply a custom resolution in Windows 10. You can choose the adapter route to avoid any potential issues but sacrifice some customization, or you can go with the Custom Resolution Utility, which grants you full control but may cause minor hiccups in some settings, or you can use the features offered by Intel, AMD, and Nvidia. Customize your resolution until your heart’s content.
Do you know of another way of customizing the resolution on a Windows system? What made you want to customize your resolution in the first place? Let us know in the comments below.
Disclaimer: Some pages on this site may include an affiliate link. This does not effect our editorial in any way.


