VirtualBox is free virtualization software that allows us home users to play with multiple operating systems within our main computer. By creating a virtual machine, we can run guest software, i.e. another operating system, and keep it completely separate from the one running the computer, as if the guest software is in a box, away from everything else.
You could run Linux within Windows or the other way round. We can also use different versions of Linux within Linux or Windows within Windows. VirtualBox doesn’t care what you use as long as you configure it properly.
Virtualization is massive right now. It allows individuals and enterprises to run several functions on a single computer, rather than forcing someone to find the space and the money to have more than one. So rather than building a separate computer to run a different operating system, you only need one. At an enterprise level, rather than running a backup server, a separate mail server, and a separate SharePoint server, each can run in its own virtual instance on a single physical host machine.
Two terms you need to learn right away to be able to work with VirtualBox are host and guest. Host refers to the computer you will be running VirtualBox on; your computer’s native OS. Guest refers to the operating system you will be running within the box. For instance, if you want to run Linux within Windows, then Windows would be the host and Linux would be the guest.

Set Up and Run a 64-bit Guest in VirtualBox
VirtualBox is free and fairly simple to use. However, there are a few configuration tricks you will need to know in order to get the best out of it. One of these is configuring VirtualBox to run a 64-bit guest operating system. Loading a 32-bit OS is simple, but running x64 takes a little more work.
- Download and install the latest version of VirtualBox from their page. The host refers to the computer you will be running VirtualBox on. There will be a couple warnings about installing device software and disconnecting your network; this is normal.
- Download and install the latest VirtualBox Guest Additions, the download link is located on the downloads page.
- Reboot your computer into BIOS and enable hardware virtualization. This will appear as ‘Virtualization Technology’ and/or ‘VT-x or AMD-V’ or words to that effect. Different manufacturers word it differently.
- Now start VirtualBox and click New.

- You should see the option for a 64-bit operating system. If you do, it means you are ready to install. If you don’t see the option, you may need to revisit your BIOS and either select a different option or update the BIOS.

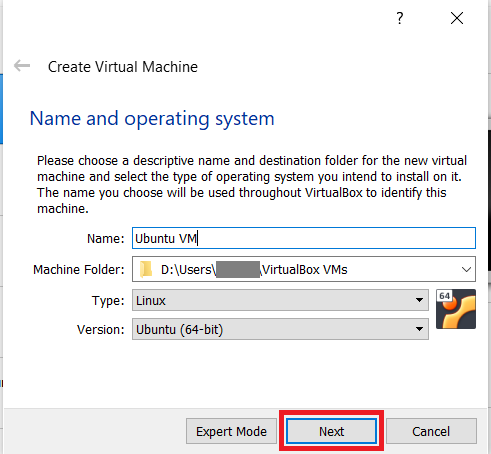
- Now, give your guest a meaningful name, choose the type of OS you plan to install, and that 64-bit is selected.
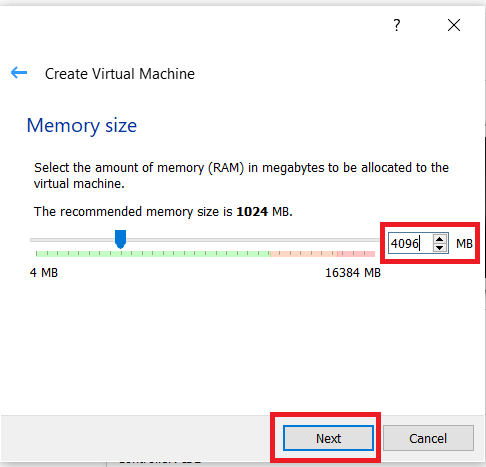
- Allocate some memory for your virtual machine, go in increments of 1024, use 4096 MB if your system can handle it. Don’t go into the red when setting memory size.
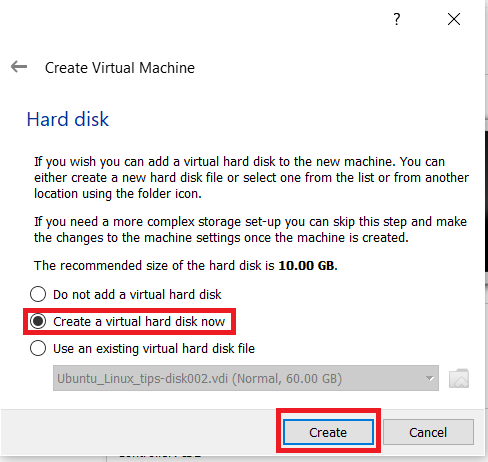
- Next, select Create a virtual hard disk now and click Create.
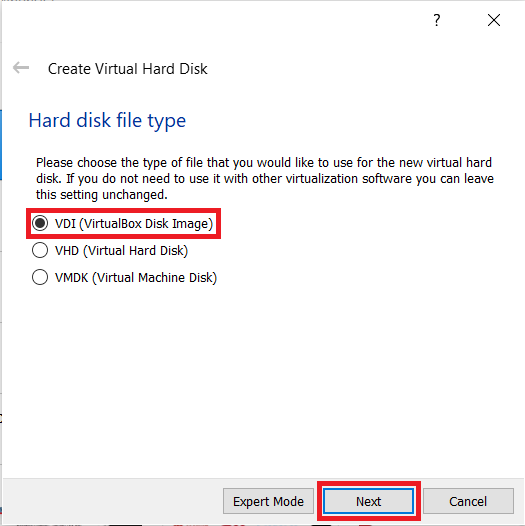
- Then, choose your hard disk file type, the preselected VDI option works for most things.
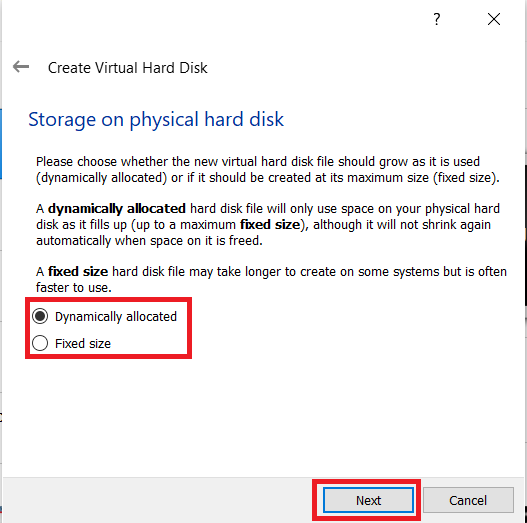
- From here, select your storage type. Dynamically allocated means it’ll only take up space as needed, whereas Fixed size will take up all of the physical disk space allotted to it from the time of creation.
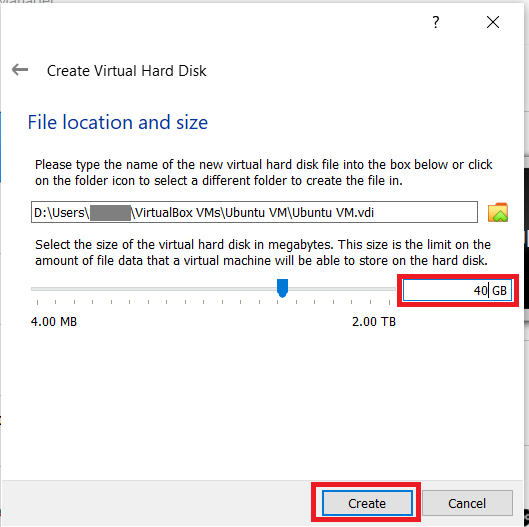
- Select the amount of disk space you want for your virtual machine, around 40+ GB is a good start, this will give you enough space for the OS and extra programs that you need to download.

VirtualBox should now set up your guest as directed. It could take a few seconds or a few minutes depending on your computer and required settings.
Setting Up Your 64-bit Guest in VirtualBox
Once created, we need to do a little configuration before we install our guest operating system.
- Highlight the drive you just created and click Settings.
- Navigate to System and set your boot order.
- Select the Processor tab and select at least two virtual processors.
- Select Acceleration and make sure Enable VT-x/AMD-V is checked.
All other defaults should be acceptable, but feel free to explore and configure as you see fit. It’s a good idea to have some idea of what you’re doing, though, rather than changing things at random. Luckily, VirtualBox has a very comprehensive user manual.
Then, once you’ve got everything set up the way you want it and you’re ready to proceed, click Start. A new window will appear asking you to select a start disk. Select the DVD or ISO of the operating system you want to install and click OK.
Your operating system of choice will perform the usual installation process and will eventually load into its desktop. Depending on your computer, this could take longer than it usually would as your computer is not only running the host and VirtualBox itself, it is also running a virtualized installer. It’s doing a lot of heavy lifting, so be patient.
Once loaded into your new 64-bit guest, you can install apps, programs, and whatever you want to make it work how you want. When you have it running perfectly, navigate to the Machine menu at the top of the virtualization screen and click Take Snapshot. This takes an image of your guest so you can quickly restore a working version should you need to.
VirtualBox is a great way to explore new operating systems without committing to one or reconfiguring a perfectly good computer. It is free, and while there is a bit of a learning curve it isn’t so steep that you cannot quickly master it. I think it is an excellent piece of software and use it regularly to see how destructible Windows 10 is.
Disclaimer: Some pages on this site may include an affiliate link. This does not effect our editorial in any way.