For two decades, SharePoint has been the go-to collaboration system for companies all over the world. The platform’s highly advanced features create a safe environment for information exchange, data recording, and document sharing.
One such feature enables you to open a SharePoint file, even if you’re not a regular user. In this article, we’ll cover the basics of external sharing – from how to share with external users to what type of files you can include.
Share Documents Using SharePoint
SharePoint allows you to both store and share files by using your chosen web browser. It’s compatible with almost all search engines and devices. You can also sync it with other cloud storage services, such as OneDrive.
The platform is well-suited for sharing all types of file formats. The interface is relatively easy to read, so the process is pretty simple. Here’s how to share documents using SharePoint:
- Open your browser and go to office.com/signin. Log in with your Microsoft account using your email, phone number, or Skype profile. If you’re not signed up, click on the link below to create an account.
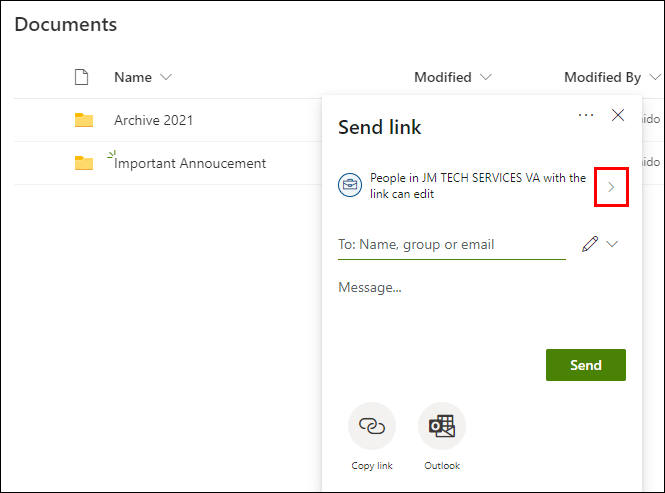
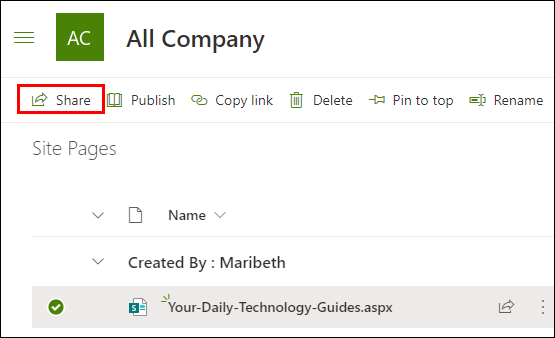
- Scroll through your files. Highlight the ones you want to share. SharePoint also allows you to select entire folders. Click the “Share” button in the top-left corner.

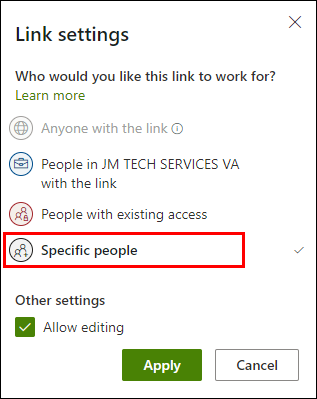
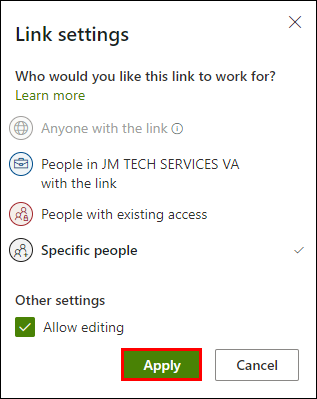
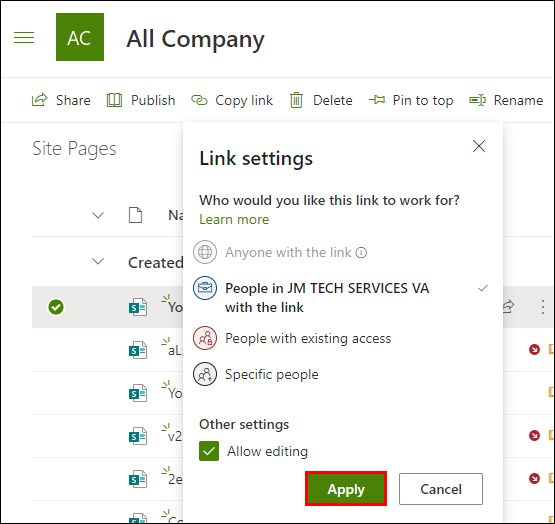
- Click on the downward arrow to open a drop-down menu. Select one of the link-sharing options.

- To allow access to anyone with the link, choose “Anyone.”
- To share the file with your co-workers, select “People in <Company/School Name>”.
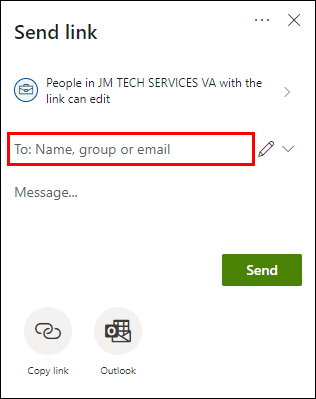
- If you only want to share with specific people, enter their names in the appropriate field.
- If you want to add some further instructions, you can write a message.
- When you’re done, click on “Apply.”

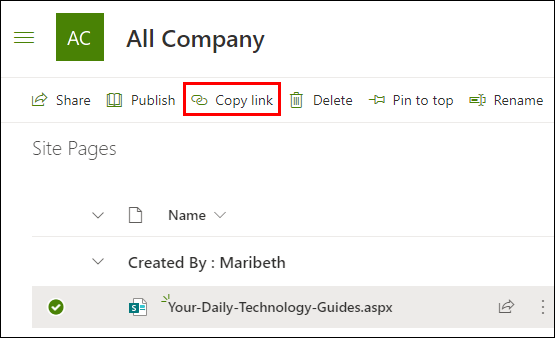
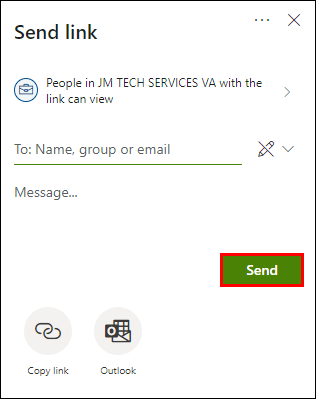
A quicker way to do it is to create a link that leads to a particular file. You can then attach the URL to a text message or copy it to a different website. The person who receives the link will be able to share it with other people as well. Here’s how to do it:
- Log in to your account on office.com/signin.
- Click on the “Copy Link” tab in SharePoint.
- Choose a sharing option from the drop-down menu. Click “Apply” to create the link.
- Use the CTRL +C and CTRL + V keyboard shortcuts when you want to copy/paste the link. You can also do it by right-clicking on the URL and selecting the options from the drop-down list.
Share a Website Using SharePoint
SharePoint doesn’t limit you to sharing files and folders. You can also share your entire site with both external users and members of your directory. Here’s how to do it:
- Log in to your SharePoint account.
- Click on the “Share Site” button.
- A new window will open. Type the name of the person or group you want to add to the site. You can also share the site with the entire organization. Just type “Everyone Except External Users” in the dialog box.
- Set the desired permission level. You can allow people to view, edit, or fully manage the site.
- If you want, you can attach a message containing additional information or instructions.
- Click “Share” when you’re done.

Share Anything Using SharePoint Teams
With SharePoint Team, you and your co-workers can seamlessly exchange documents, media files, and applications regularly. The portal is meant to increase productivity and optimize project collaboration.
As a Team member, you can access all the links to relevant directories, files, and websites on the portal’s home page. You can also use the activity feed to keep track of site interactions.
SharePoint Team has a “Files” tab with a wide range of features. Any member can use these features to edit shared files and customize the portal. Here’s a list of options:
- Access additional features in the “New File” section.
- Sync the files to the corresponding local drive.
- Change the view to make the portal interface more organized. Several options are available, including List view, Tiles view, and Compact view.
- Weed out malware or junk files or report suspicious files.
- Upload and check-in files.
- Check out and download files.
- Rearrange the file order.
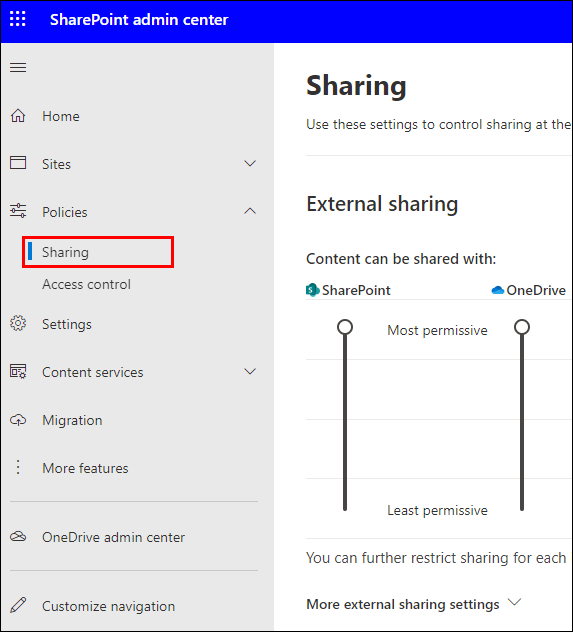
Manage SharePoint Guest Sharing Settings
If you’re a global or a SharePoint admin, you have the authority to customize the sharing settings for the entire organization. That means you get to decide the level of participation of Guest users on the SharePoint server. There are several sharing configurations you can choose from, depending on your needs. Here’s how to manage Guest sharing settings:
- Open your browser and sign in to your admin account.
- Open the “External Sharing” tab.
- Select the desired sharing level for your organization. Usually, the default setting is “Anyone.”
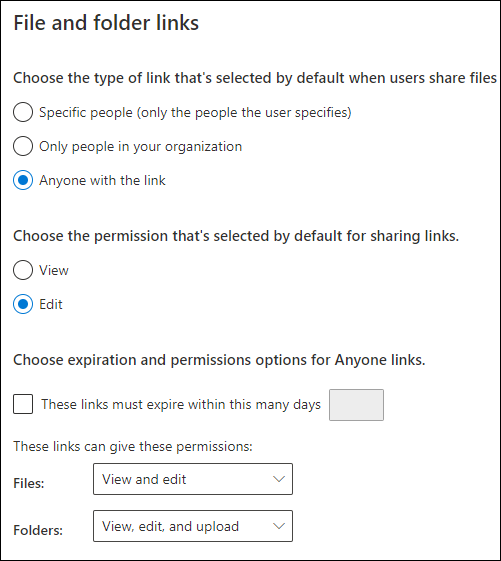
Different sharing settings imply different levels of access. Make sure to choose one that corresponds to the type of document you’re sharing. Here’s a quick breakdown of each sharing configuration:
- Anyone. This setting allows users to share links that don’t require any authentication. That means they can send it to both existing guests and new ones. As an admin, you can set an expiration date for each link.
- New plus Existing Guests. With this setting, Guests have to sign in with their Microsoft account to access the link. They can also use their school or company User ID. It’s because these types of links require identity verification codes.
- Only Existing Guests. This way, you’ll be able to share files with Guests from your directory. This includes anyone who has accepted your invitations in the past. It also refers to Guests you added manually via Azure B2B or similar collaborative features.
- Only members of your organization. If you want to prevent external users from accessing your directory, choose this setting. It disables the external sharing feature and keeps all the files within your organization.
If you disable external sharing, then turn it back on, Guests who were previously granted access can still join the server. If you don’t want Guests to regain access to particular sites, you have to turn the setting off for those sites individually.
SharePoint Guest Sharing FAQs
How Do I Turn External Sharing On and Off Whenever I Need?
The files you save on your SharePoint server are accessible to everyone with site permission. However, you may want to share certain files with people who don’t use SharePoint regularly. That’s where the external sharing feature comes into play.
To activate the setting, you have to be a SharePoint manager in Microsoft 365. Site managers don’t have the authority to enable or disable external sharing. Here’s how to do it:
1. Log in to the SharePoint admin center web page.
2. Navigate to the column on the left-hand side. Choose a site from the list.
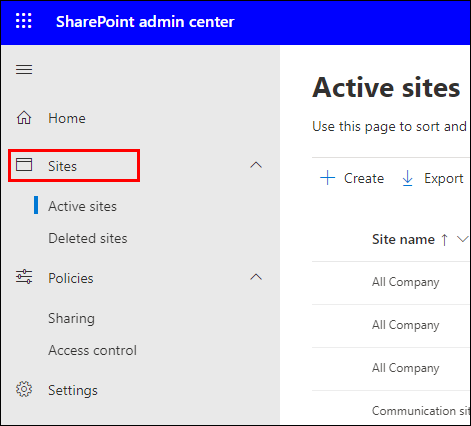
3. Click on the circle next to the sharing option you want to enable.
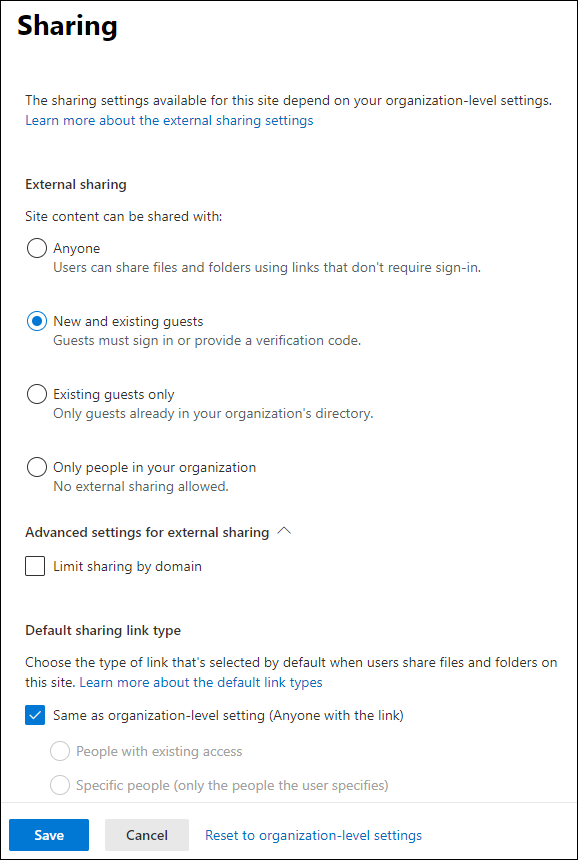
The options available are determined on the company level. If you disable external sharing on a particular site, any links you shared on it will no longer function.
What Can Guests Do With My Shared Documents?
When sharing a link, you can determine whether the person who opens it can make changes to the file. If you check the “Allow Edits” box, here’s what other users can do after receiving the link:
• Both upload and download files and folders to the server.
• Create new folders and upload new files.
• Remove files from the SharePoint server.
• Edit existing items and folders.
• Transfer files from one folder to the other.
• Change the name and format of a particular file.
• Share the file links with other people.
Even with enabled editing, some things are still off-limits. Here’s what the receiver can’t do:
• Edit or rename a root directory. This goes for other high hierarchy folders.
• Open other folders from your SharePoint server. They can only view and edit the ones you shared.
• Access anything else on your SharePoint site without permission.
There are also three sharing settings available for Guest users on your directory. You can choose any of the following options:
• Anyone (the link can be accessed without verification).
• New Guests (the link requires the Guest to verify their identity). Existing guests can also access these links after they sign in with a Microsoft account.
• Only Existing Guests (the sharing is limited to Guests who are already included in your directory).
• Only members of your organization (no external Guests can access the link).
What Can I Share Using Microsoft SharePoint?
SharePoint supports all types of file formats. You can pretty much upload anything to your directory without a hitch.
However, the older versions have issues with particular file types. For example, the following extensions are completely blocked from the 2016 server:
• .asmx
• .asmx
• .svc
• .soap
• .json
• .xamlx
Luckily, the current server has no such limitation. As of now, there are no formats and extensions that are banned from SharePoint.
Sharing Is Caring
SharePoint brings order to the online workplace. The system’s advanced features allow you to share both files and entire sites in just a few simple steps.
There’s a preferred sharing setting for each situation and link type. Global and SharePoint admins can even enable external sharing and manage the Guest settings for the entire organization.
Do you and your co-workers use SharePoint for exchanging files? Is there a different collaboration system you prefer? Comment below and share your thoughts on the external sharing feature.
Disclaimer: Some pages on this site may include an affiliate link. This does not effect our editorial in any way.