It’s not that tricky to delete a page or even whitespace in Word, but not doing it seems to cause a fair amount of problems, especially if you have a table or an image that doesn’t fit at the end of a page.
Several methods work to fix whitespace issues, but they all end with the same purpose. If you’re getting frustrated by blank sheets within your perfectly honed documents, have rogue pages in the middle, or have empty gaps within pages, read on to find out how to remove blank pages and whitespace in Microsoft Word.
Simplest Way to Delete Blank Pages in Word
The simplest way to delete a page in Word involves cursor placement and the delete button.
- For Windows, place your cursor at the very end of the document after any full stops or pictures.
- Continually press “Delete” until the blank page(s) disappear. On Mac, press “fn + delete.”

Note: If the blank page (not on-page whitespace) only appears when you print the document and doesn’t appear on the screen, you may need to check your printer settings.
Use Paragraph Marks to Delete a Page in Word
Enabling paragraph marks is the most effective and safe way to delete blank pages. This process makes it easier to visualize what you’re deleting and what is causing the gaps. The characters show the beginning areas of all paragraphs, whether they contain content or not.
- In Windows, press “Ctrl+Shift+8” to switch on paragraph marks. On a Mac, press the “command key (⌘) + 8.”
- To delete empty paragraphs, place the cursor before the paragraph mark. Press “delete” in Windows or “fn + delete” in macOS.
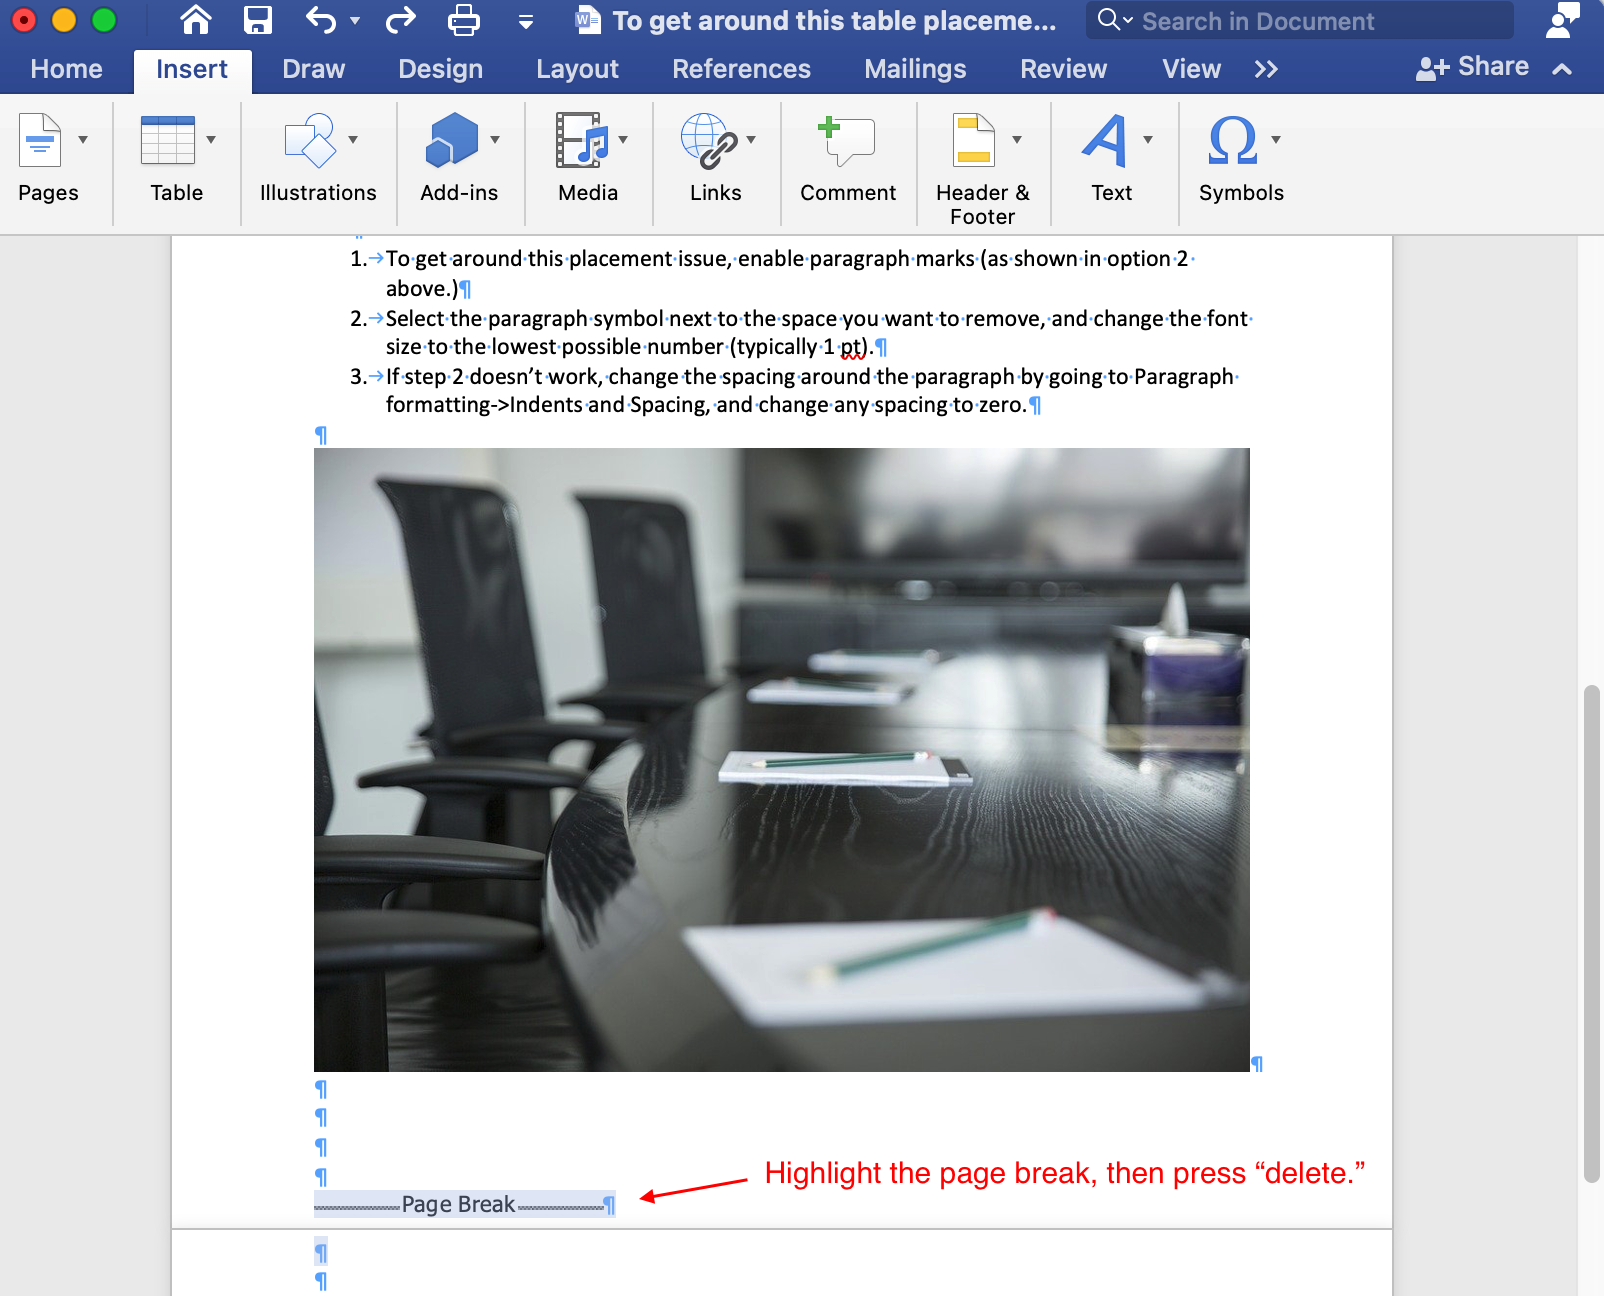
- To erase page breaks, select the page break and press the “Delete” key.
Note: If you’re using “Word Online,” you can’t use paragraph marks, but you can still delete empty pages, as explained in the first option above.
Delete a Page in Word Using the Navigation Pane
- Select the “View” tab and then check the box next to “Navigation Pane.”
- Select the blank page thumbnail in the left-hand panel and press the “Delete” key to remove that page from the list.
Delete Whitespace in Word When Using Tables or Images
Every time you insert a table into a Word document, a small space gets added beneath it. If the table sits at the end of the doc and forces a portion of it onto a new page, removing that rogue blank sheet area or whitespace becomes difficult. Try one or both methods below to get around the table placement issue.
Option 1: Reduce Font Size to Fix Whitespace after Table/Image in MS Word
This procedure helps prevent a table from carrying over to the next page due to the whitespace under it.
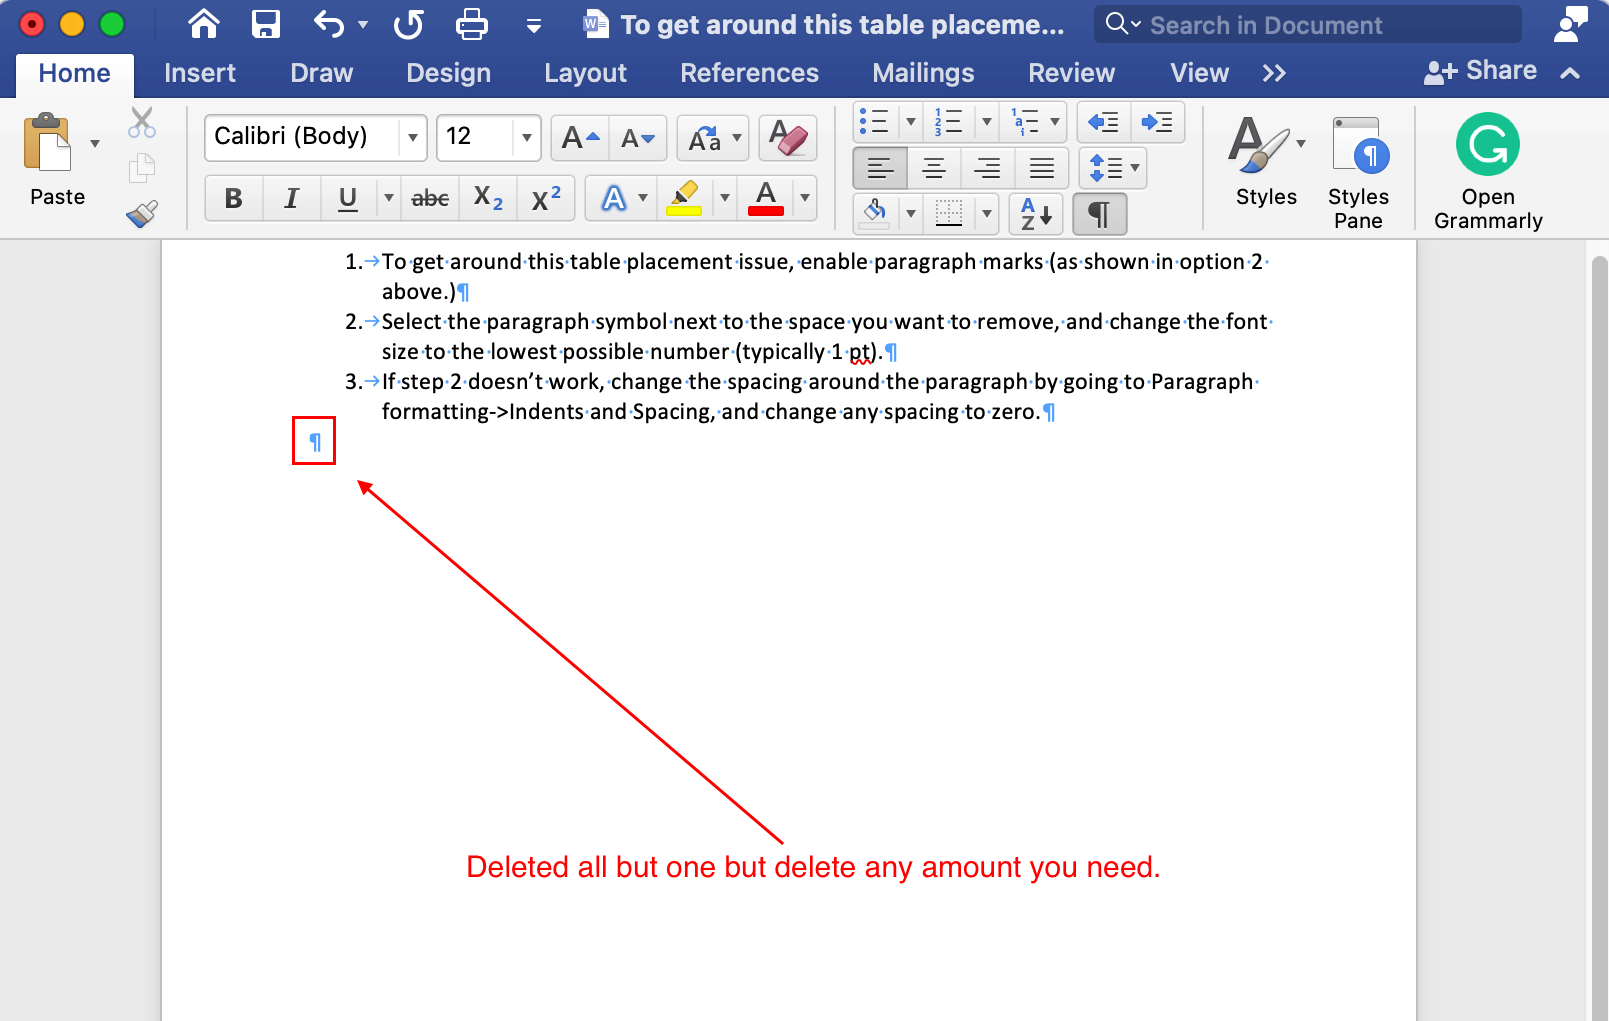
- In Windows, press “Ctrl+Shift+8” to enable paragraph marks. On a Mac, press the “command key (⌘) + 8.”
- Right-click the paragraph symbol next to the space you want to remove, and manually type in the lowest font size possible (typically 1 pt). This step shrinks the blank row to provide more page space.
Option 2: Adjust Paragraph Spacing to Fix Whitespace after Table/Image in MS Word
- If the previous steps don’t work, change the paragraph’s spacing. Go to the “Paragraph” section, choose the “Line and Paragraph Spacing” icon, then select “Remove Space After Paragraph.”
- Your table should hopefully stay on one page just before the page break.
Option 3: Hide Whitespace to Prevent Table/Image from Splitting to the Next Page
If you see whitespace areas in your Word doc from a table or image not fitting at the bottom, you can let the table or image sit on the next page and eliminate the whitespace on the previous one. Here’s how to do it.
- Click on “Layout -> Margins -> Custom Margins.”
- Select the “Top” and “Bottom” margins, and set them to “0.”
- Go back to your Word doc and double-click the gap between page breaks.
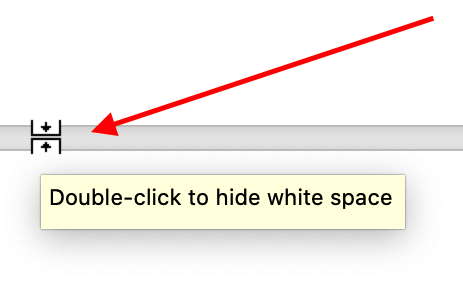
The above steps eliminate whitespace between pages so that your image appears as if it is correctly underneath the above content. However, you may need to add a page break too.
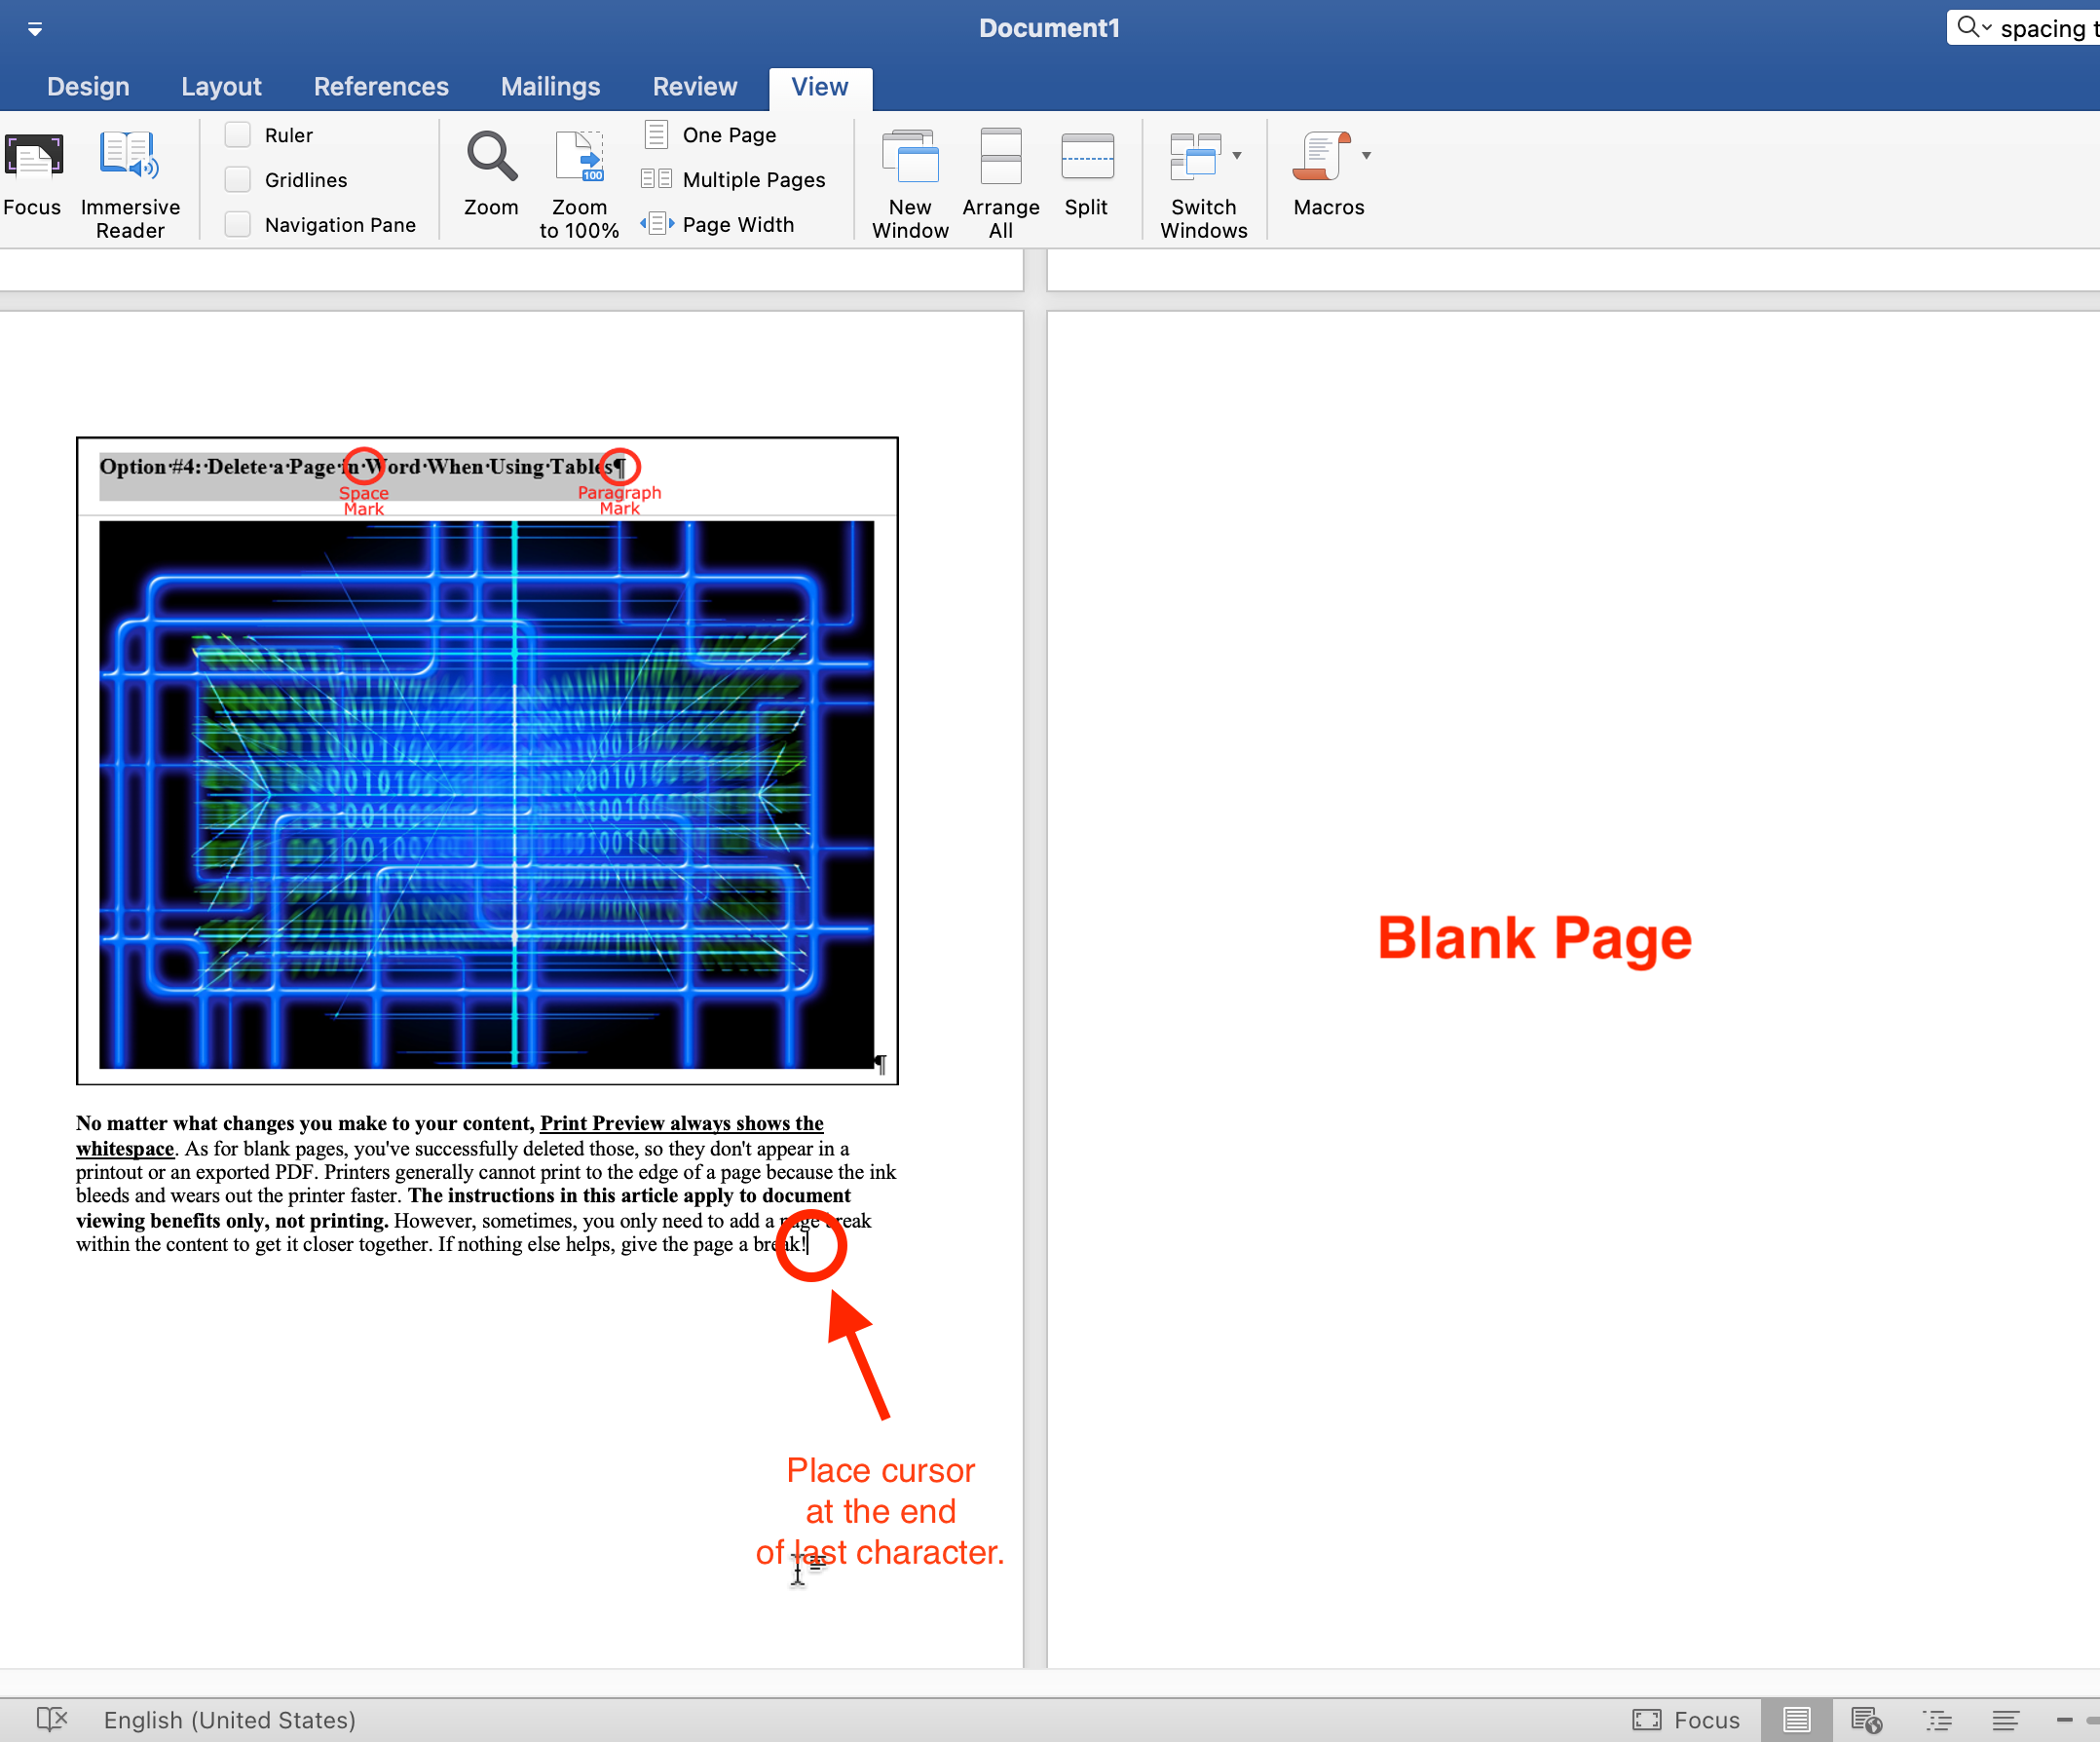
Here is a sample heading (paragraph marks enabled) followed by an image that didn’t initially fit at the bottom of the page. The two items appear together without any whitespace.![]()
Print Preview always shows the whitespace, no matter what changes you make to your content. As for blank pages, you’ve successfully deleted those, so they don’t appear in a printout or an exported PDF. Printers generally cannot print to the edge of a page because the ink bleeds and wears out the printer faster. The instructions in this article apply to document viewing benefits only, not printing. However, sometimes, you only need to add a page break within the content to get it closer together. If nothing else helps, give the page a break!
Disclaimer: Some pages on this site may include an affiliate link. This does not effect our editorial in any way.