Like its predecessors, Windows 10 can be configured by organizations to limit user access to certain settings and features. From a consumer standpoint, you may have encountered one of these business-specific options when, during the Windows 10 upgrade process, you were asked “who owns this PC?” with either you or your organization as the possible answers.
Unfortunately, certain bugs and settings can incorrectly configure your own PC as being locked down by a nonexistent organization, which limits your access to certain settings in the operating system.
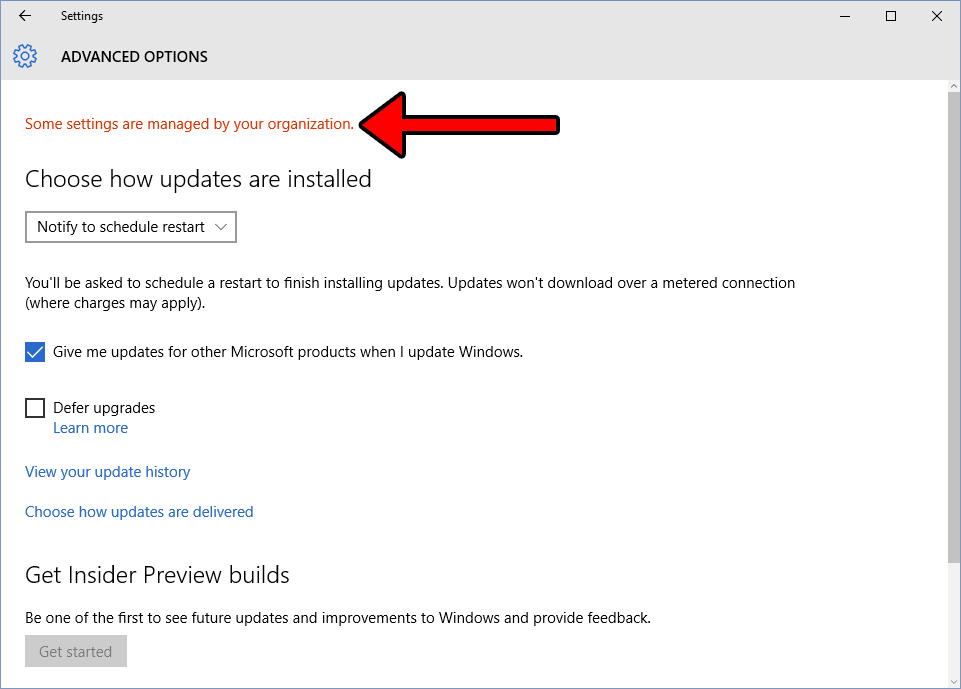
If you’re experiencing this issue, you’ll notice in several locations (primarily in the Settings app) that “Some settings are managed by your organization.” If your Windows 10 PC belongs only to you (that is, you have admin control of your PC), here’s how you can reconfigure Windows 10 to fix the “Some settings are managed by your organization” issue.
Resolving the Issue Using Group Policy Editor
Unfortunately, this option is only available to Windows 10 Pro and Enterprise users, Home users can skip this section.
The solution to this problem can be found in the Group Policy Editor, but you’ll need to launch this utility with administrative privileges.
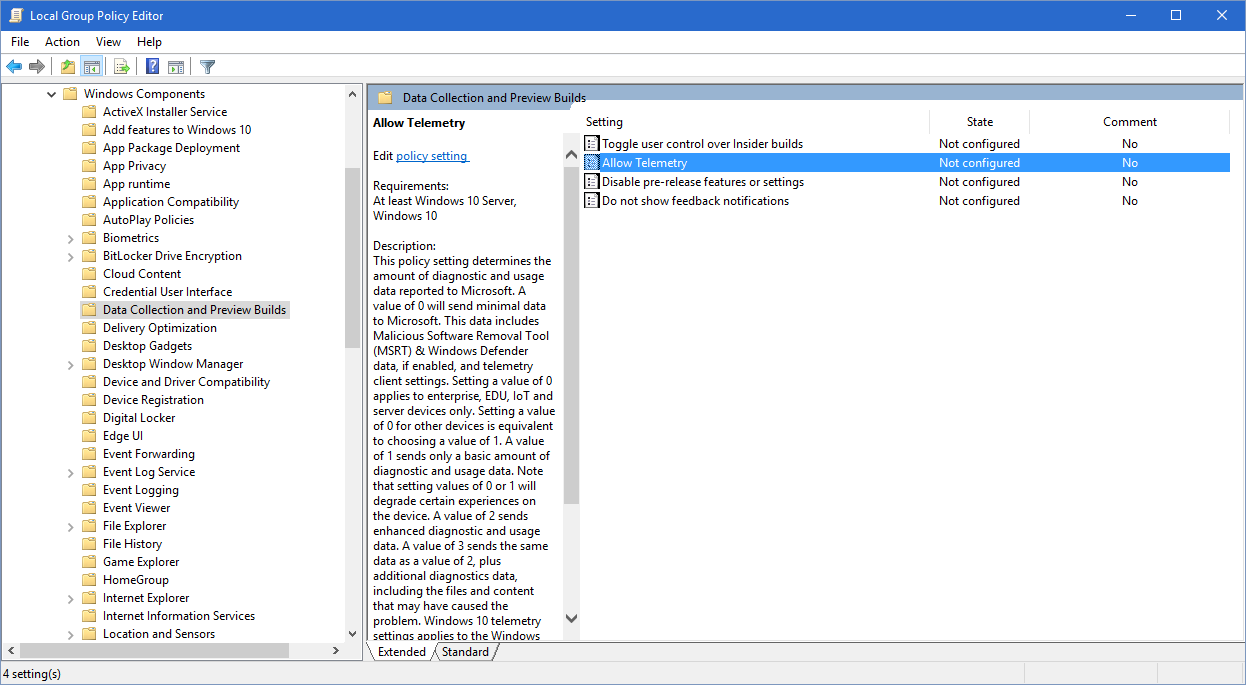
- To do so, click the Start Menu and type gpedit.msc. The top result should be the Local Group Policy Editor as shown in the screenshot below.
- Right-click on the gpedit.msc result and select Run as Administrator.

- In the Group Policy Editor, use the hierarchical list of options on the left side of the window to navigate to Computer Configuration > Administrative Templates > Windows Components > Data Collection and Preview Builds.
- With Data Collection and Preview Builds selected, you’ll see an option labeled Allow Telemetry on the right side of the window. Double-click it to change its options.
- At the top of the Allow Telemetry options window, click Enabled. Don’t freak out, privacy advocates. This is a temporary change and we’ll soon turn Windows 10 telemetry back off.
- With Telemetry Enabled, click the drop-down box in the Options section and choose 3 – Full.
- Click OK to save your changes and close the window. Next, double-click Allow Telemetry in the Group Policy Editor again to bring the same configuration window back up.
- This time, select Not Configured instead of “Enabled.” Finally, click OK to save the change and close the window. You can also now quit the Group Policy Editor.
- Now head back to a location where you previously encountered the “Some settings are managed by your organization” message. You should see that the message is now gone and that you have full access to your Windows 10 settings.


Note, however, that this fix is intended for individually-owned consumer PCs. If your Windows 10 PC or license is owned by your company or organization (or was initially set up that way), there will be other settings which will continue to limit your access to certain functions and you shouldn’t change Group Policy settings without consulting your IT administrator.
Adjust Your Data Sharing Usage
Now, this method can actually be performed by Windows 10 Home users, so you can read this one.
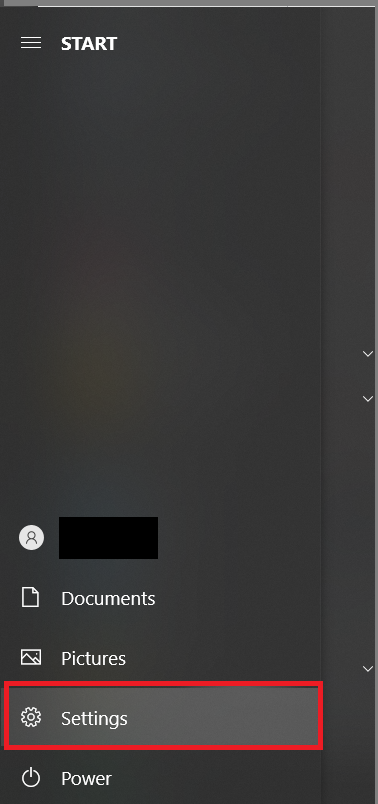
- Open the Start menu and click on Settings.
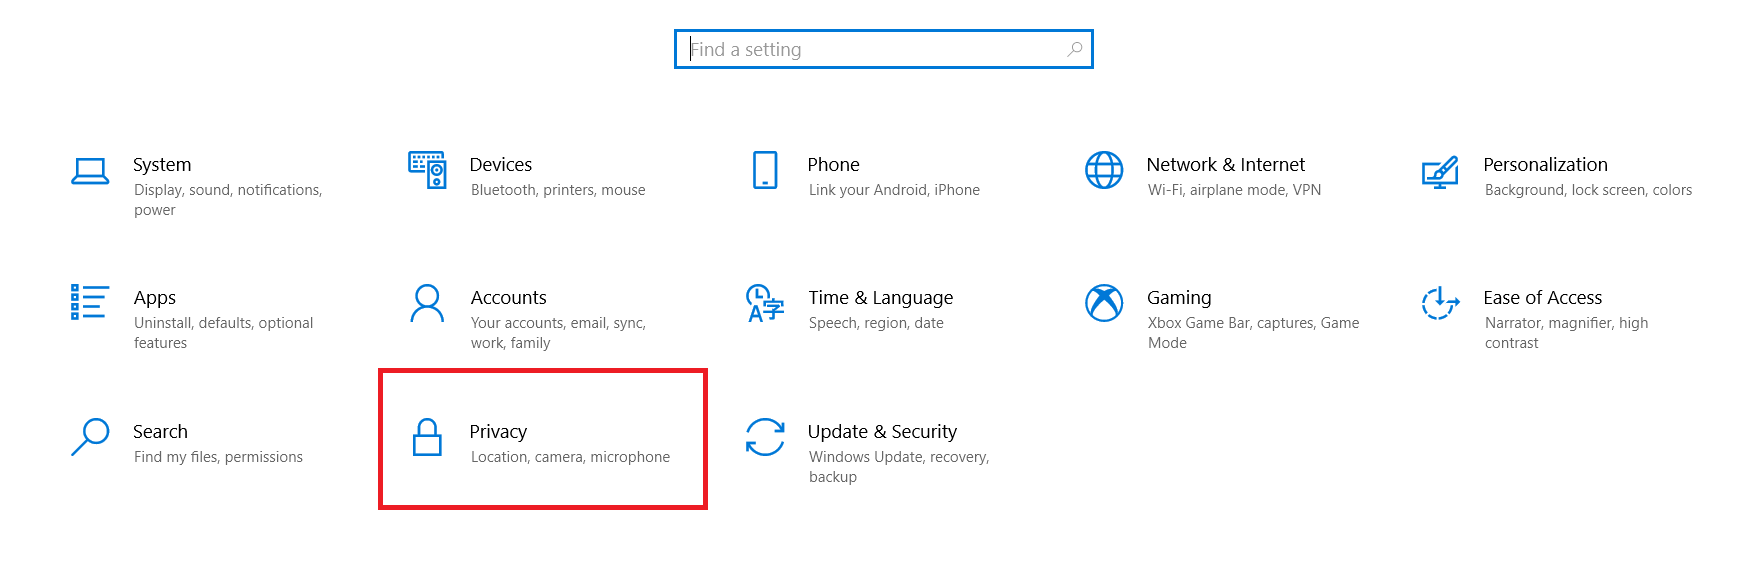
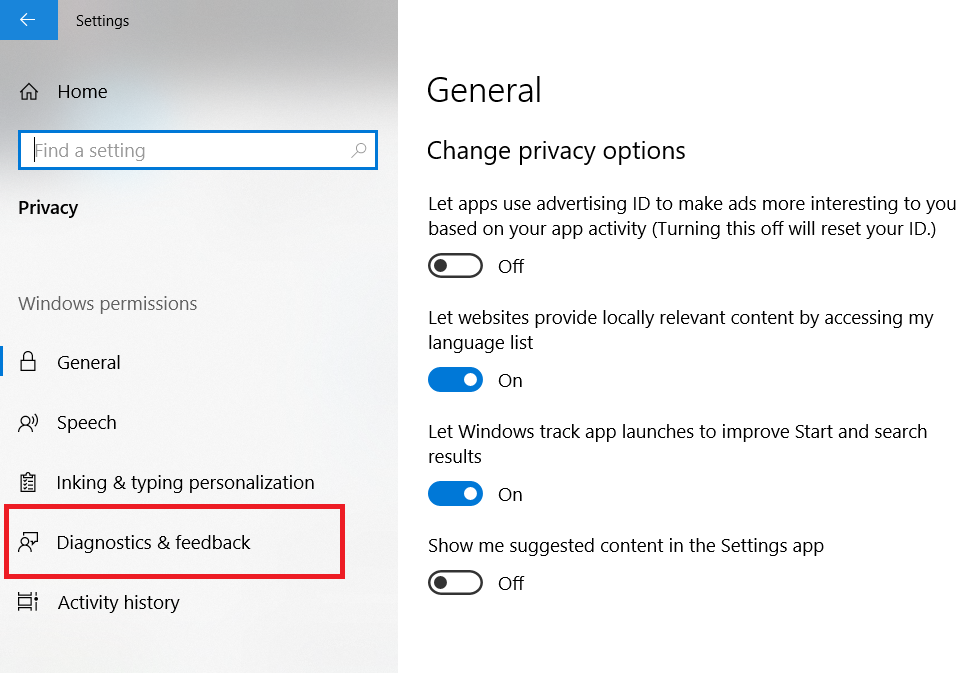
- Next, click on Privacy.
- Now, click on Diagnostics & feedback.
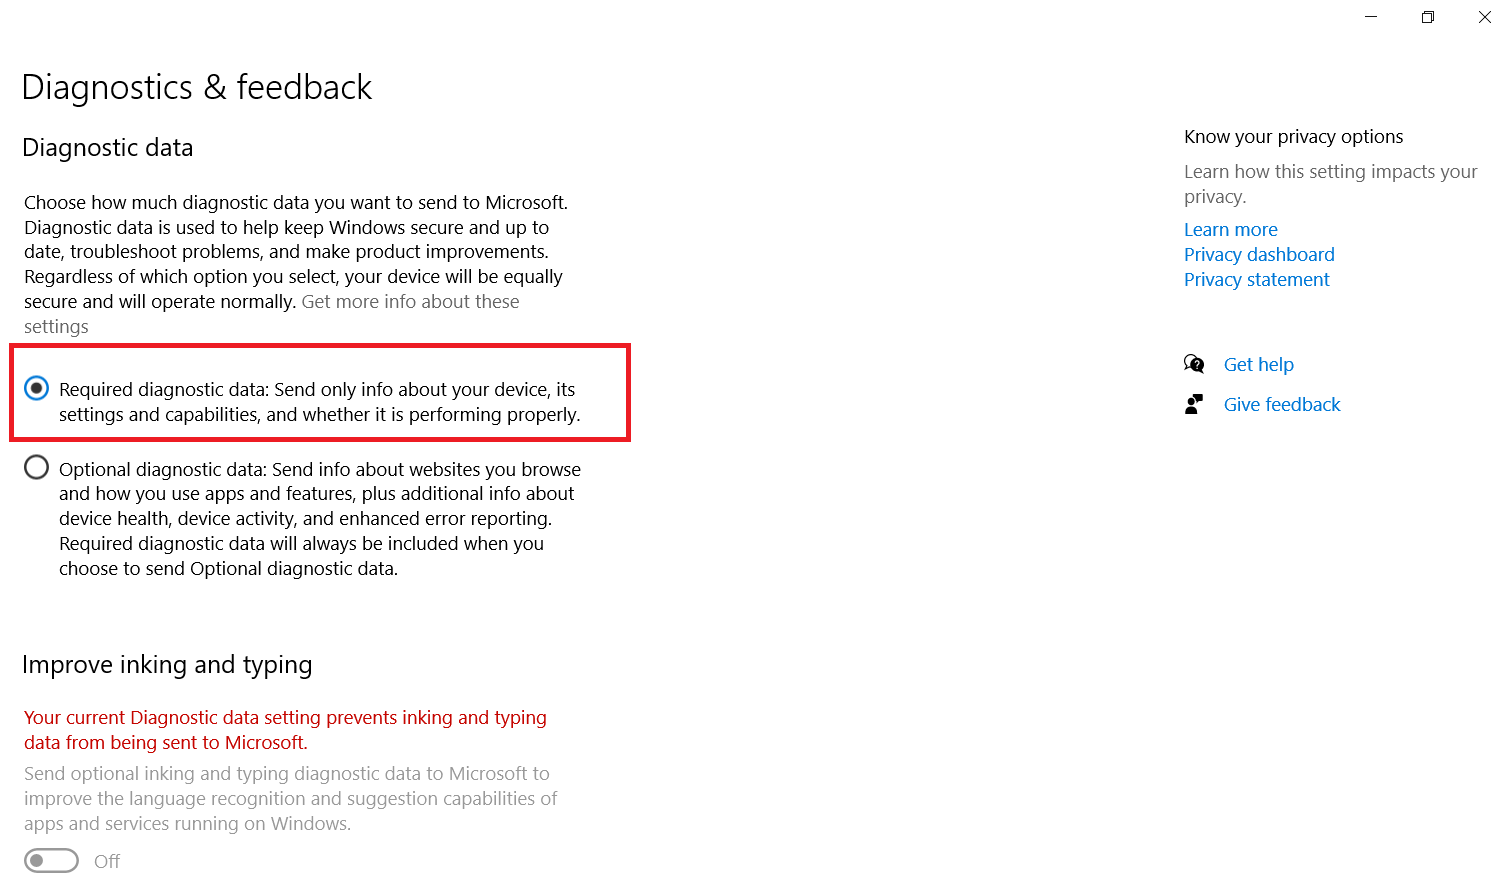
- Then, if it isn’t already, click on Optional diagnostic data, this used to be labeled as Full. As implied, this will send back significantly more data for Windows to analyze.
- Next, click on Required diagnostic data, this used to be labeled Basic.

Removing Work or School Accounts to Fix the Error
If the steps above didn’t solve your problem, then you might need to delete some accounts associated with your school or work.
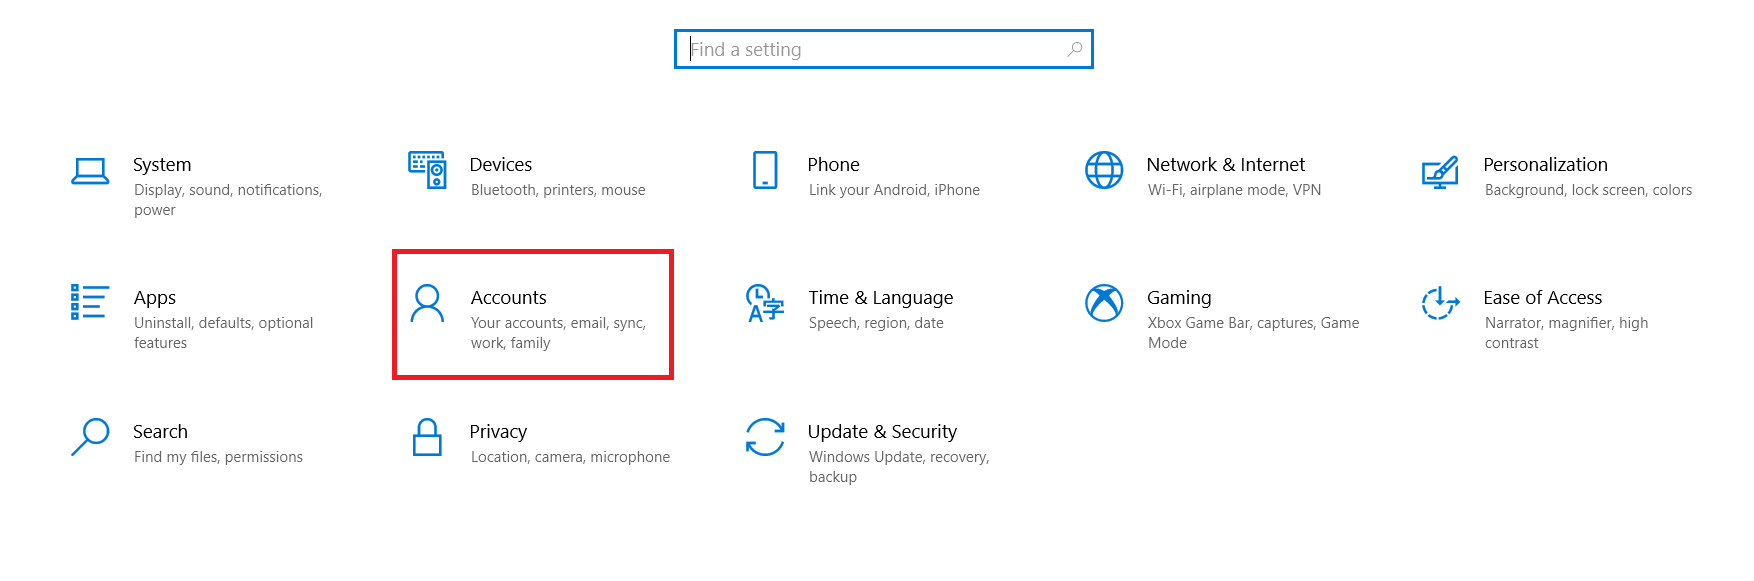
- Again, click on the Start menu and select Settings.
- Next, click on Accounts.
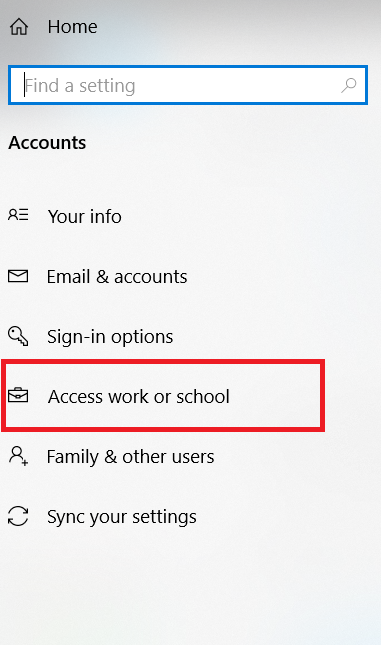
- Now, click on Access work or school.
- Then, select any accounts associated with your work or school and remove it. Note, you’ll want to make sure the accounts aren’t still needed and that any data you need is backed up.
Fixing Windows 10 Bugs
Unfortunately, errors and bugs occur in any OS, especially Windows 10. But, with something like upwards of 40 million lines of code, it’s understandable that things can go wrong.
If you found this article helpful, you might like these other TechJunkie tutorials:
- How To Connect a Bluetooth Device to a PC
- Xbox Game Pass for PC—What You Need to Know
- How To Use the Apple Magic Trackpad on your PC
Have you encountered the bug where you received a message saying your PC was managed by a non-existent organization? How did you resolve the issue on your Windows PC? Please tell us about it in a comment below!
Disclaimer: Some pages on this site may include an affiliate link. This does not effect our editorial in any way.


