The best way to move to Windows 7 is always a clean install, as it ensures everything is precisely how Microsoft designed it to be from the start.
However, that can be a real pain if you already have a Vista PC set up to your liking. Thankfully, Windows 7 can be upgraded very easily from Vista, but only when you match the version of Windows 7 you buy to your version of Vista.
It isn’t hard to figure out which version you should buy: Vista Home Premium upgrades to Windows 7 Home Premium, for example, and you need to install 32-bit (as opposed to 64-bit) Windows 7 over 32-bit Vista. If you want to check for certain which version is right, use Microsoft’s Upgrade Advisor tool, which scans your current PC and gives you the upgrade information you’ll need.
In theory, the upgrade process should leave your existing files completely as they are, but there’s always the slim chance of something going awry.
If there are any files you can’t afford to lose, just copy them onto an external hard disk or USB stick – or, if you have many, run a full backup. Once you’re confident you have everything you need safe and sound, you can begin the upgrade process.
Start the upgrade
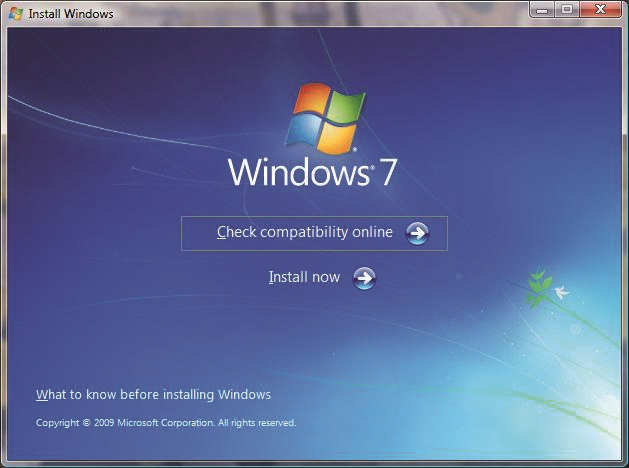
When you insert the Windows 7 disc, the upgrade process is similar to a full install. You can run a compatibility check online, which gives you a report similar to the Upgrade Advisor, but if you’ve reached this stage your PC should be ready for Windows 7
Get the latest files
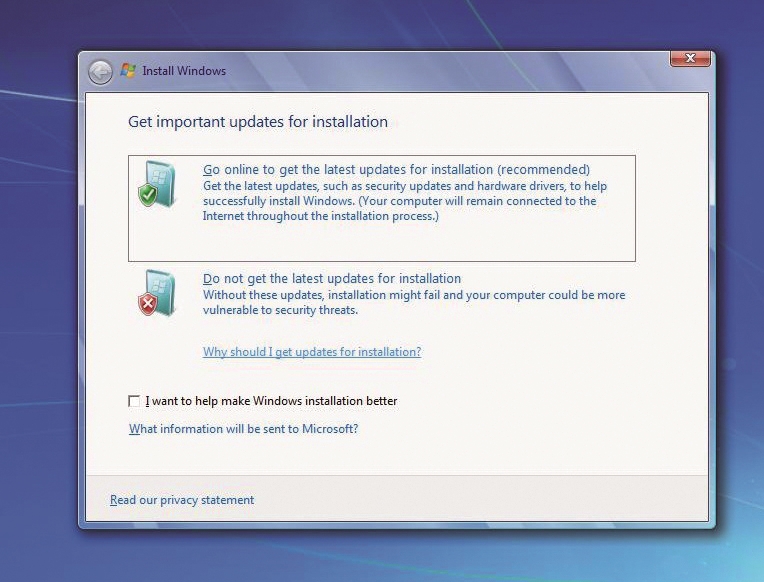
Click “Install now”. You’ll be asked if you want to go online to check for updates; if you have an internet connection it can’t hurt to do so, although this often just consists of additional language packs for the early months after release. After reading Microsoft’s terms and conditions, tick the box to agree and then click Next
Choose the upgrade option
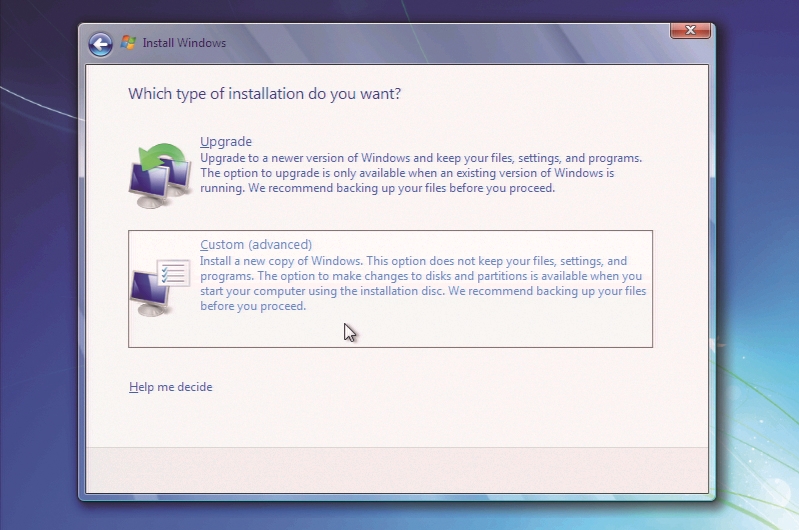
Depending on your Windows 7 version, you may be offered the choice of a Custom (full) install or an upgrade. If you want to move up to Windows 7 the easy way, you’ll click the Upgrade option to ensure Windows keeps all the important files from your Vista system in place.
Check compatibility
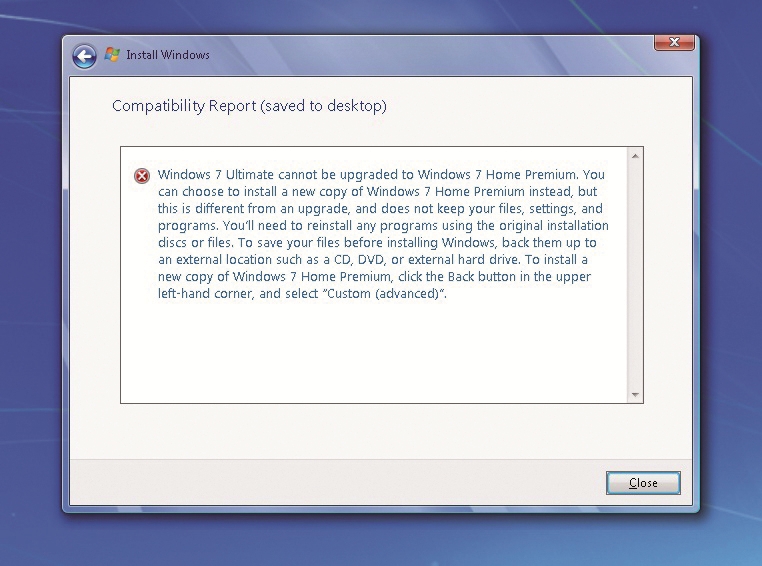
The wizard will then check the compatibility of your system. Provided you’ve followed the instructions and bought the correct version of Windows 7 to upgrade to, all you may get back here is a warning that certain currently installed programs might have problems running properly in Windows 7.
These issues can often be circumvented later using Windows 7’s Compatibility Mode, so don’t worry too much. If there are any critical issues – such as an incompatible version of Windows 7 itself – the installer will inform you and the process will be terminated before you can go too far and mess up your system.
Begin the upgrade
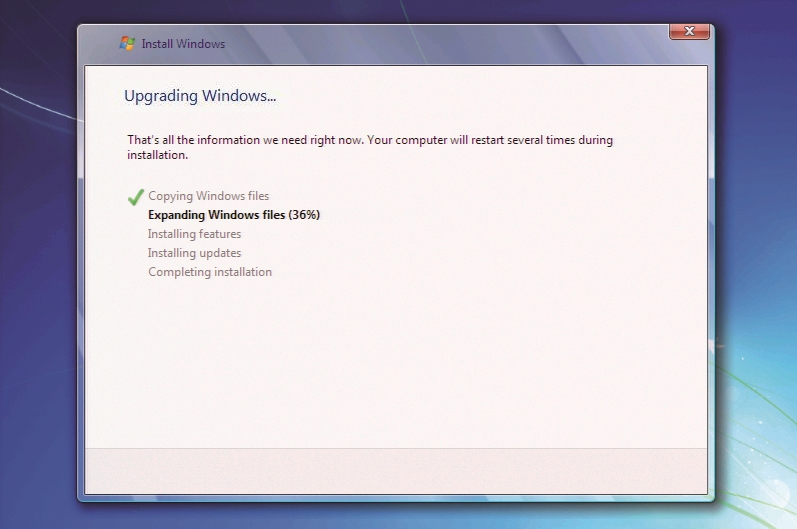
As long as no major compatibility issues are found, you’ll be ready to begin the upgrade. Once it starts, it will proceed in a very similar fashion to a normal installation: you’ll be given full details of what it’s doing at all stages, and the system will restart several times. When it does, don’t panic, just leave it to continue transferring its files until it asks you explicitly for some input. At that point, you’re just a few steps from the Windows 7 desktop
Enter your product key
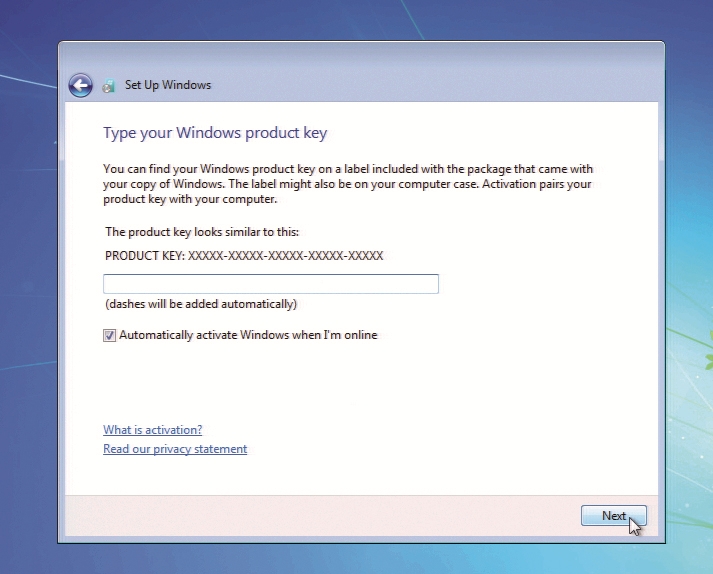
You don’t strictly have to enter your Microsoft product key now – you have up to 30 days from installation to do so before you’re locked out of your PC – but it makes sense to do it if you have it to hand. You’ll find the 25-character code somewhere on the packaging of your Windows 7 DVD, so just copy it out exactly into the dialog box and, provided you’re made no mistakes, the wizard will check it for a few moments and confirm that your copy of Windows has been activated successfully. Make sure you keep the code somewhere safe, in case you decide to use it to move your Windows 7 licence to a new PC in the future
Finalise your settings
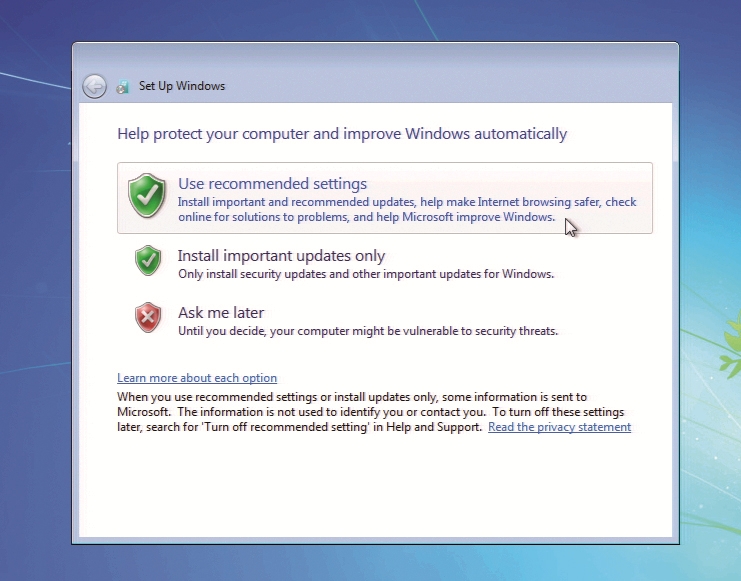
You’re almost there. Just choose your Automatic Update preferences: it’s best to let Windows download and install its important updates automatically to keep your system secure and up to date. Then set the correct time and location, and you’re done. The system may restart once more, and – a mere coffee break after you began – you’ll see the new Windows logo, your desktop will appear, and you’re up and running in Windows 7
Check your files

If all has gone to plan, all of your files should be right where you left them. In the rare instance that they’re missing, get out the disk onto which you backed them up earlier and simply copy them across. Alternatively, if you ran Windows Backup, you should be able to run a restore to bring them back. Then you’re free to explore your shiny new Windows 7 environment.
Vista

Disclaimer: Some pages on this site may include an affiliate link. This does not effect our editorial in any way.


