As part of our feature on two-step authentication, and why you should enable it and use it today, we mention Google as one of the companies that offer this security enhancement. Here is a step-by-step guide for adding two-step authentication to your Gmail account.
Step #1: Turn On Two-Step Verification in Gmail
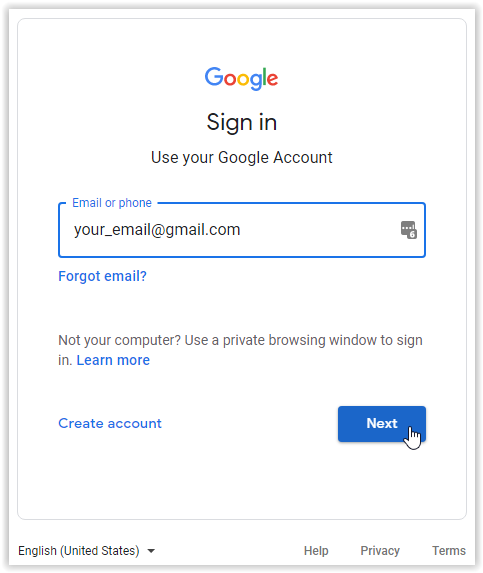
- Open your Google account.
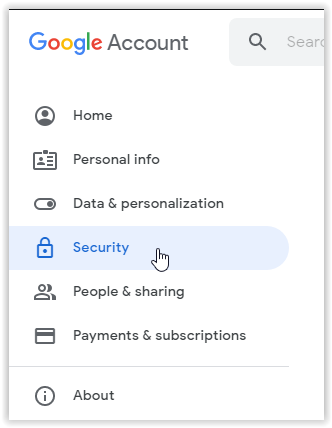
- Your account page will open. In the left navigation menu, click “Security.”

- On the Security page, scroll down to the “Signing in to Google” section and select “2-Step Verification.”
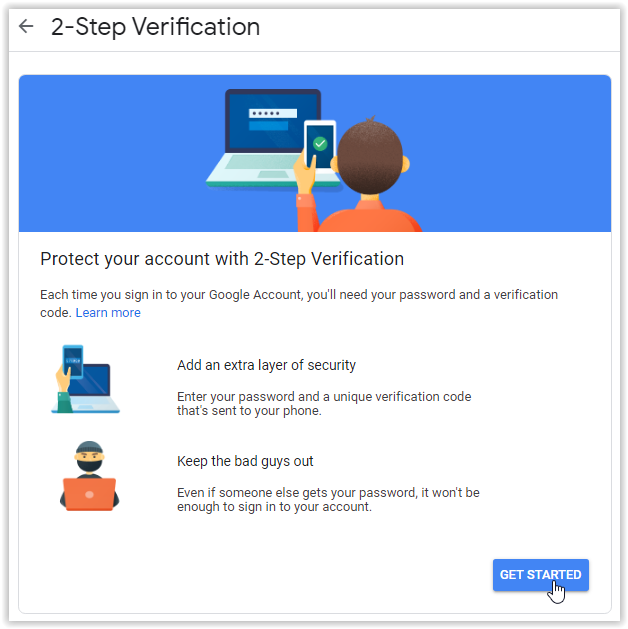
- On the 2-Step Verification page, click “GET STARTED.”
- Verify it’s you changing the settings by entering your password on the verification page (if prompted). Click “Next” to continue.
- On the 2-Step phone confirmation page, select “CONTINUE” to confirm your phone for 2-Step authentication/verification.
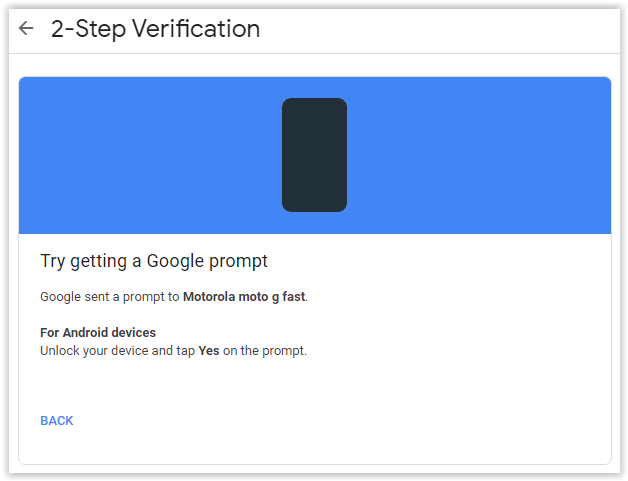
- A verification prompt gets sent to your phone.
- In the verification prompt on your phone, click “YES.”
- On the 2-Step backup options page, confirm or change the phone number and whether you want to receive texts or calls. Click “SEND” when finished.
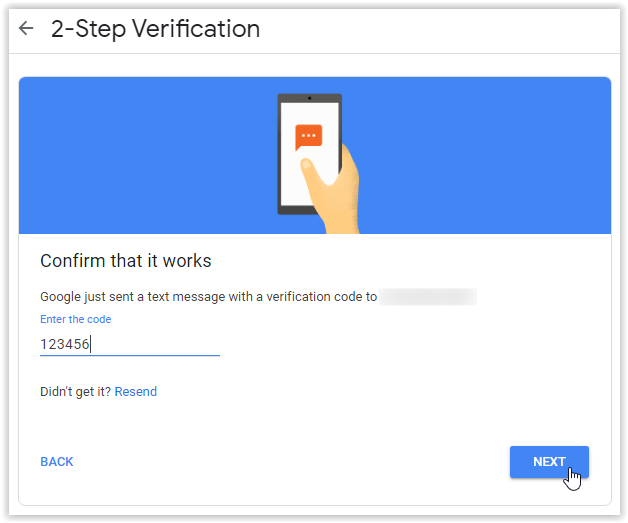
- A page loads prompting you to confirm that it works. Enter the verification number that was sent to your phone, then click “NEXT.”
- The next page prompts you to turn on 2-Step Verification. Click “TURN ON” to activate the feature.
- A confirmation window will appear, showing that you successfully added 2-Step Verification, and it offers a button to turn it off.


Disclaimer: Some pages on this site may include an affiliate link. This does not effect our editorial in any way.