If you’re looking for a fun way to reward your viewers on Twitch with channel points and give them a taste of the benefits usually only available for subscribers, don’t worry. Twitch makes it easy for its content creators to issue points to viewers while, at the same time, allowing streamers to make their channels more engaging and exciting. Viewers can use the points to unlock or modify emotes or have their messages highlighted. The options to involve your community in new and exciting ways are virtually limitless.
Read on to learn more about how to give channel points to your loyal followers on Twitch.
Channel Points Management
You might wonder how to give channel points if you’re new to the platform or the Twitch Affiliates program. There are three main steps that you’ll need to go through – (1) Enable channel points. (2) Customize channel points. (3) Manage your rewards. Going through these steps is simple, but it’ll take a little while to complete. Also, prepare to put your thinking cap on because creativity is necessary to properly manage your rewards.
So, when you have some time and creative energy, let’s go!
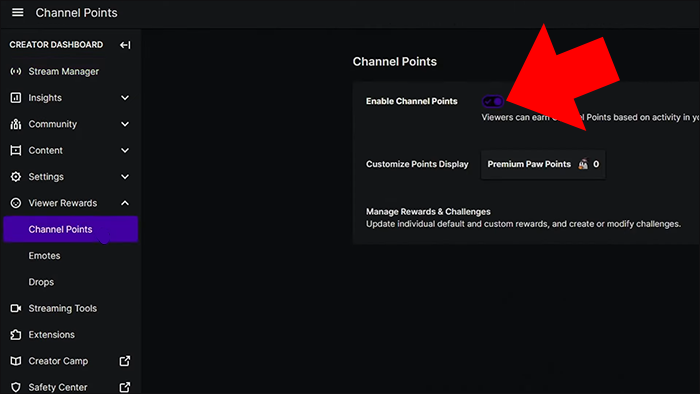
Enable Channel Points
The first thing you need to do is enable channel points. Follow these steps:
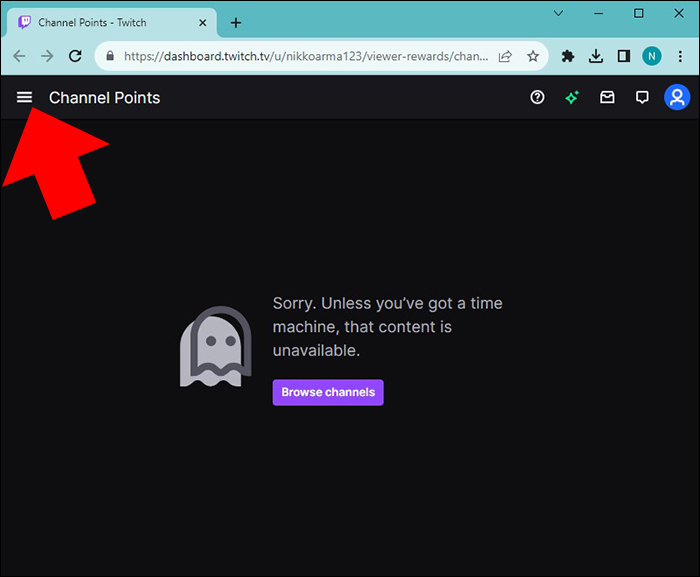
- Head on over to the Creator Dashboard to manage your program.
- Click on the hamburger icon (it’s three lines that look like a hamburger) in the top-left corner.

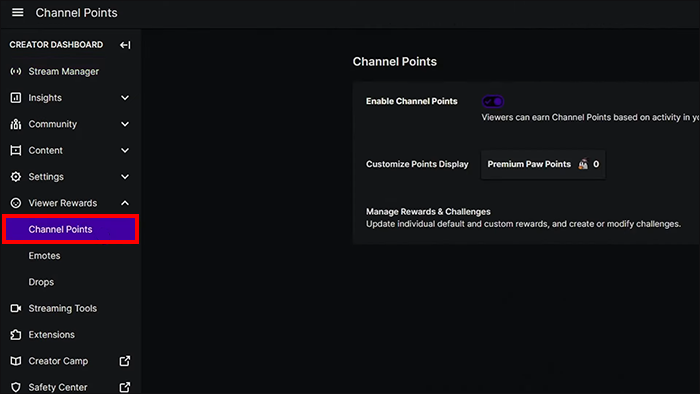
- Under “Viewer Rewards,” click on “Channel Points.”
- Slide the toggle to “Enable Channel Points.”
Now that’s enabled, the next step you’ll need to take is to customize your channel points.
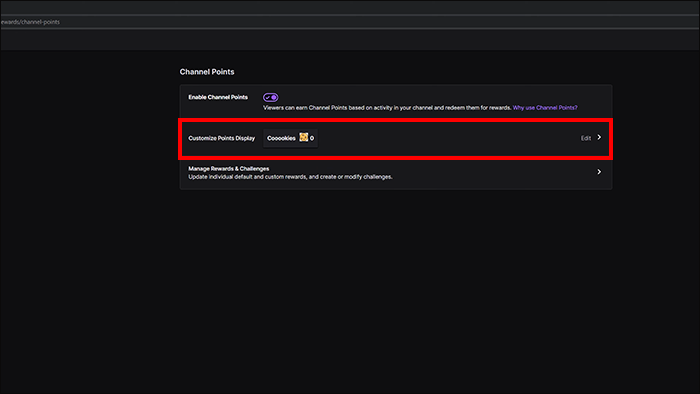
Customize Channel Points
To customize your channel points.
- Click on the “Edit” button of the “Customize Points” tap.
- Choose a name for your Channel Points and enter it.
If you need help deciding what name to choose, a helpful tip is to pick something that reflects your brand, community, and the rewards you’ll be offering. For example, if you spend most of your time on Twitch trying to get high scores on “Mario,” label your Channel Points “High Scorers Only.”
Your channel name can give you reward ideas, too. For instance, as a reward idea, showcase your viewers’ gaming skills by playing videos of them unlocking high scores on “Super Mario Maker.” - Next, select the icons for your rewards. You can customize your icon if you want or select the default options available from the Twitch library.
- Once you’ve chosen your icon, select “Save.”


Manage Your Rewards
It’s time to manage your rewards. Managing your tips involves creating custom rewards and activities for your viewers. Note that you don’t have to come up with a reward for everything, as there are default rewards that Twitch has already set up. But you’ll have to create some custom ones, too. Let’s look at the default rewards and then move on to setting up the fun and exciting custom rewards.
Default Rewards
Default rewards are those already predefined and created by Twitch. Two default awards highlight a viewer’s message or unlock an emote. Streamers don’t have to think of their own ideas or do anything to fulfill these rewards once unlocked. You can, however, edit a default award to set the cost necessary to achieve it.
A fantastic feature Twitch offers for streamers is to automatically adjust the cost based on the size of their audience. This option helps unload the burden of updating your rewards costs as your viewer base grows. You can set your own cost and turn on or off the Smart Cost at any time. Click on the box next to “Auto Adjust with Smart Costs” to enable or disable it. You’ll find this on the right-hand side of the “Manage Rewards” page.
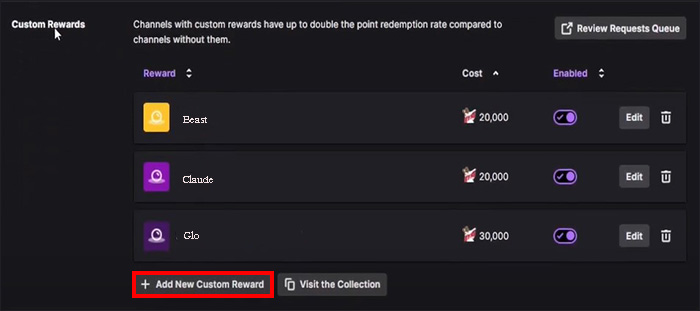
Custom Rewards
Custom rewards require you to consider what rewards to give your viewers. Some reward ideas include inviting a viewer to the game with you, letting a viewer choose the map you play, giving a shoutout to someone, dancing, or doing something funny. Once you’ve got your list of unique, creative ideas, you’re ready to add them. How to do this is simple:
- From your dashboard go to “+Add a new custom reward.”
- Choose a name for your reward.
- Describe what happens after a viewer redeems their channel points award.
- Choose the channel points required to win the award.
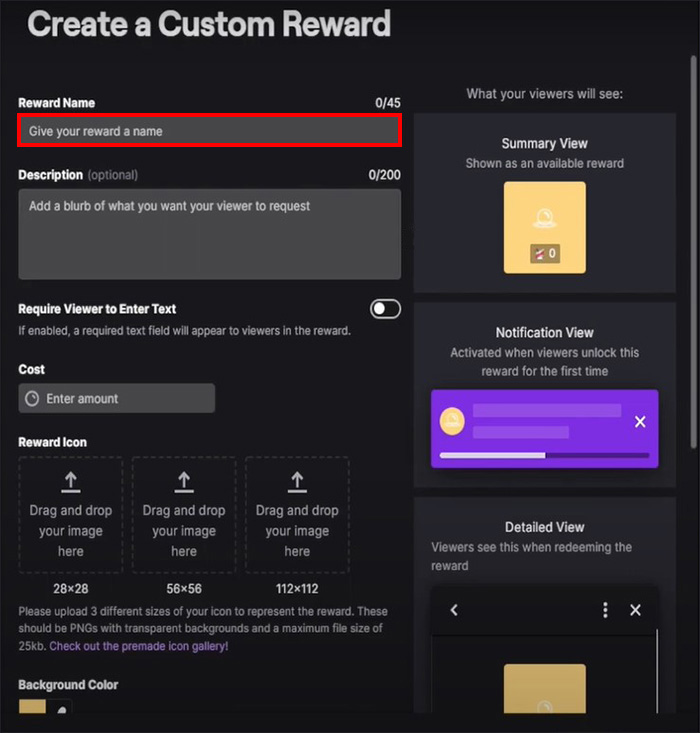
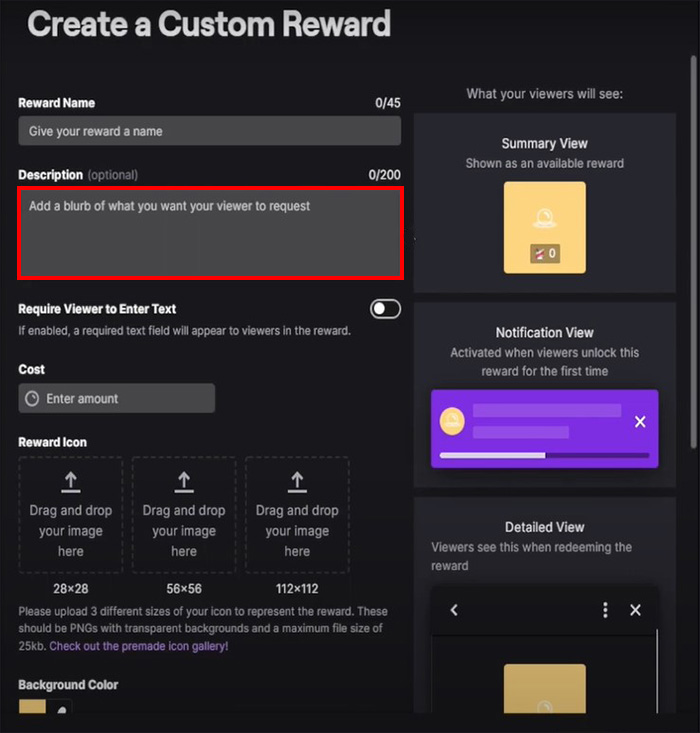
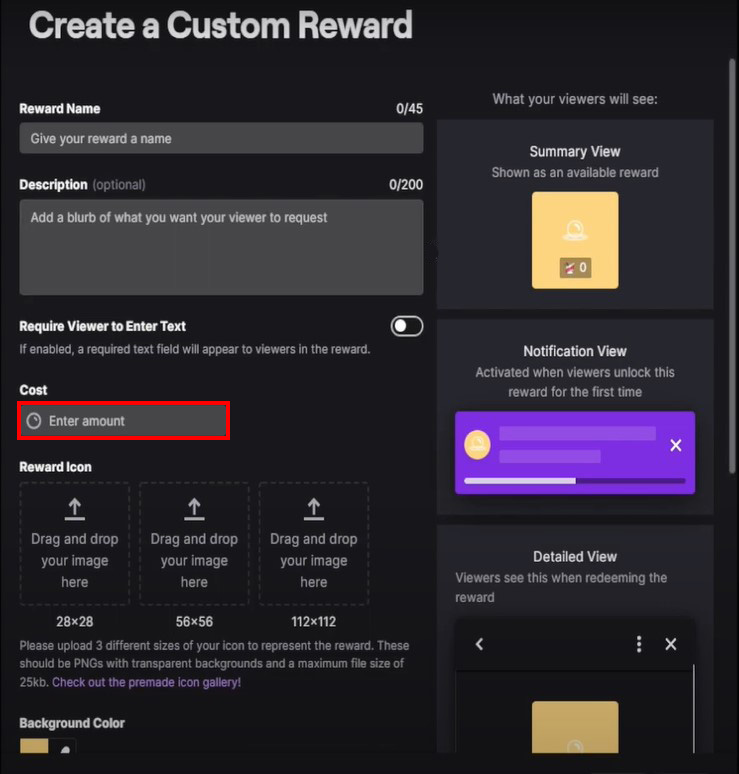
Make sure to include information that makes it clear to your audience what they’re redeeming. Note that you can also customize the reward icon.
There’s also a “text option” you can enable if you want the viewer to write a text after redeeming channel points. You may need to do this if, for example, your reward is to play a game with a viewer. In that case, you’ll need to know their in-game name to invite them to play.
Here is a helpful bit of information: Twitch has created a list of activities viewers can engage in to receive points and how much each activity is worth. Points-earning actions include watching (live streams and offline, as well as watching consecutively), participating in raids, following, cheers, and gifting subscriptions.
Some earning actions earn more points than others. For instance, following the streamer will earn a viewer 250 points, while gifting a subscription will earn the viewer 500 points. You can find the table with that information here. However, streamers are free to change the point costs and set a limit to the amount of time followers have to earn points. Simply set the cooldown timer and then click “Create.”
That’s it! Your rewards are set up, and your viewers can start raking in the points by following your set limits to achieve them. If, for any reason, you don’t want to have Channel Points enabled, you can disable the feature by toggling the “Enable Channel Points option.”
Managing Rewards While Live
Once a custom reward has been redeemed, you’ll see it on the Activity Feed in your Live Dashboard. The Activity Feed allows you to access the Reward Queue. All you have to do is click on the “Pop-Out” icon. Use this to view and manage your custom reward requests. You can “Mark as Complete” or “Reject” a custom reward. If you reject, the points will be returned to the viewer.
Ensure you’re enlisting your mods’ assistance because they can help manage your channel, including the rewards function. Mods can do this by following these steps:
- Open the queue window:
- Click on the Channel Points reward button in chat.
- Type in “/requests.”
- Click on the rewards queue under “Tasks.”


Setting Limitations for Reward Redemptions
Twitch allows you to limit the number of rewards claimed so you won’t be overwhelmed. You can control how many claims there can be per stream. You also have the option of setting a “cool down” in between redemptions per stream or user.
- Find the “cool down” option under “Cooldown and Limits.”
- Toggle to the right to activate.


Beneath that, you can set the “Redemption Cooldown Time” based on the number of minutes and days. You can also limit redemptions per stream and user. And if you want, you can simply “pause redemptions” if you find yourself overwhelmed with requests or simply want to take a break.
Giving Channel Points on Twitch
It’s easy to give Channel Points. You can manage everything right through the Creator Dashboard, and you’re sure to get viewers more involved. By giving away points, your viewers are incentivized to watch your streams and participate in different activities. Channel Points are a great way to make your channel fun for your growing community while fostering positive emotions that are sure to fuel loyalty.
Have you set up Channel Points using this guide? Did the tricks and tips help you? What are your thoughts about Channel Points? Please share with us in the comments section below.
Disclaimer: Some pages on this site may include an affiliate link. This does not effect our editorial in any way.