Icon grouping is a feature introduced in Windows 10 that tidied up the taskbar considerably. While running, similar apps were grouped onto a single tab on the taskbar, making it easier to manage multiple open windows. In Windows 10, this function could be turned off at the user’s discretion, but Windows 11 removed the ability to toggle this feature off.
In this article, we’ll show you how to ungroup icons on Windows 11.
On by Default
Under Windows 10, Icon Grouping could be easily configured under the Taskbar Settings in the Personalization tab of the Windows Settings Menu. This has been removed on Windows 11, and currently, there is no official way to turn this off.
Windows 10 users may not notice the change as this was on by default, but people migrating from Windows 8, 7, or XP will immediately feel the difference. Fortunately, there are workarounds available until Microsoft comes out with a native solution for toggling this feature.
The Workarounds
To get around the lack of native taskbar icon controls on Windows 11, you’ll need to install third-party apps or use a registry hack. These methods are as follows:
Explorer Patcher
Explore Patcher is a free tool that can be used to keep icons ungrouped on your taskbar. This app is currently still in development, but it already has many valuable features that you can take advantage of. Installation and set-up can be a bit unwieldy, however, but here are a few instructions to help you on using this tool:
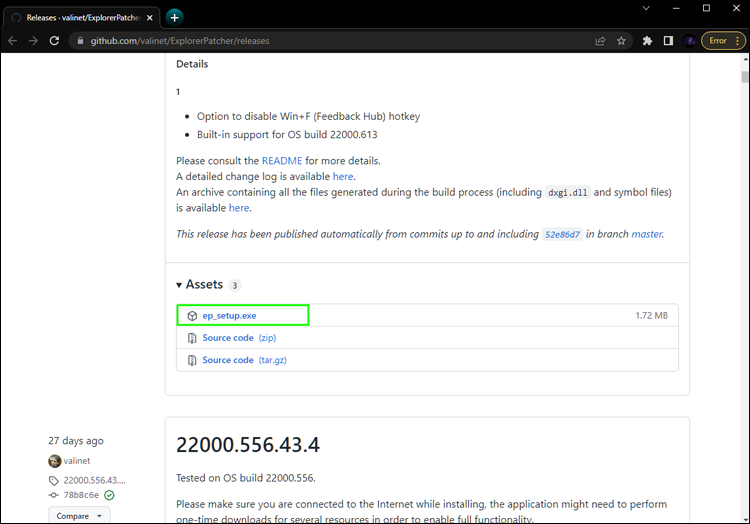
- Proceed to Explore Patcher’s GitHub page.
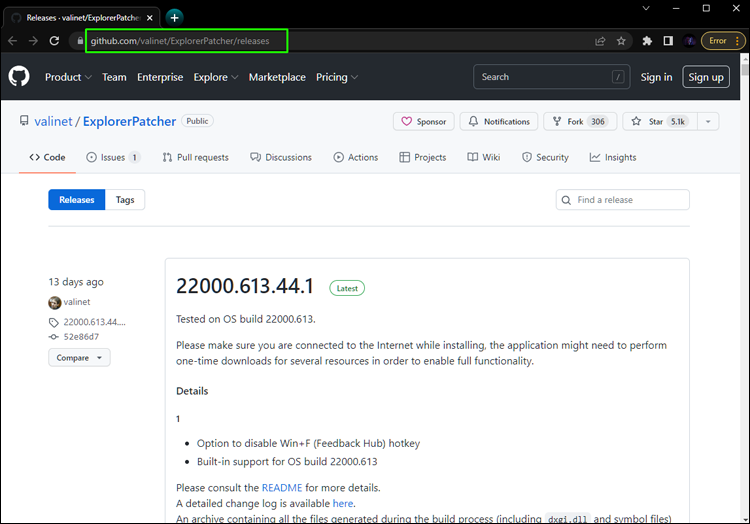
- Under the Assets tab, download “ep_setup.exe”.

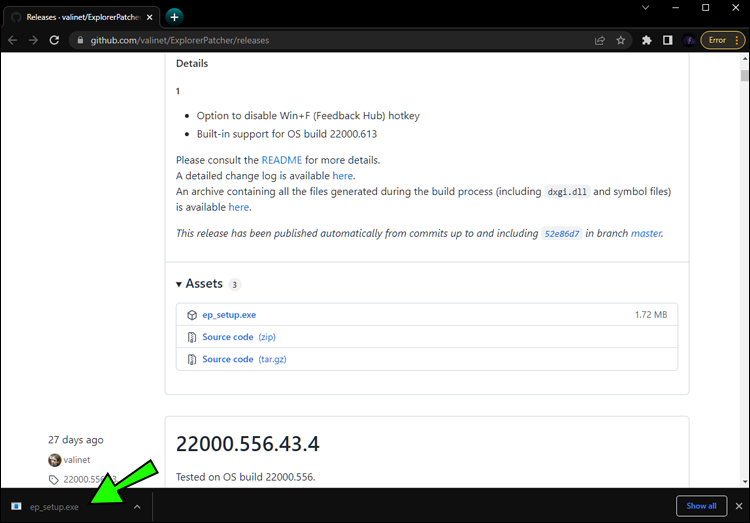
- Once downloaded, double-click the file to begin the installation.
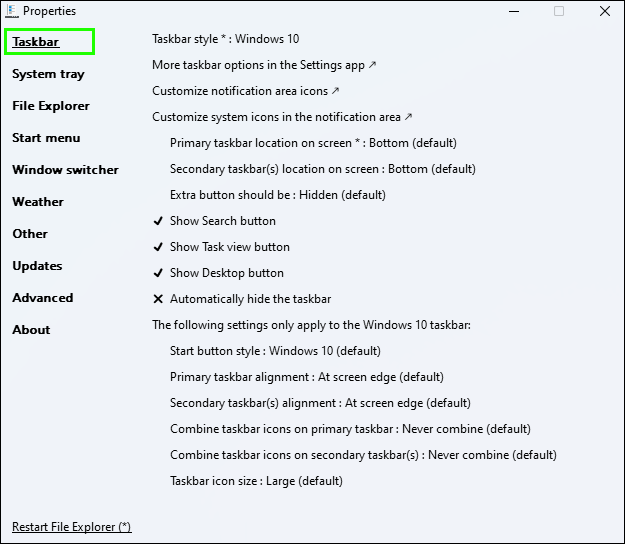
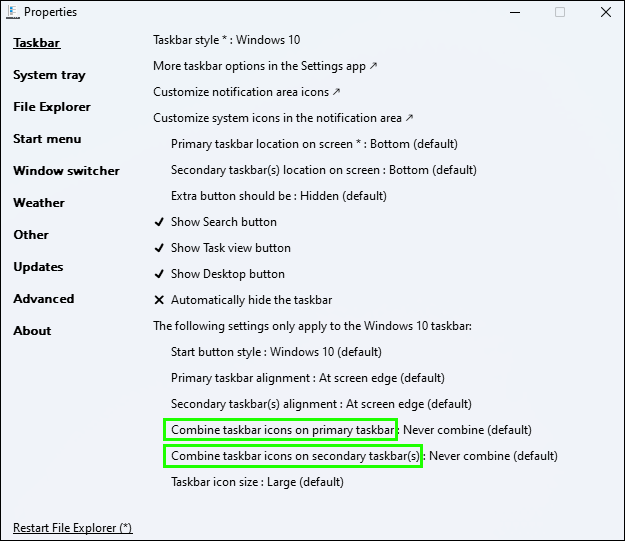
- After the app is installed, you’ll need to adjust the settings to fit your needs—Right-click on your taskbar and select “Properties.” Don’t select Taskbar settings, as this will only open up the Windows 11 taskbar menu and not Explorer Patcher.
- On the Properties window, click on “Taskbar” on the left menu.
- Under Taskbar Style, make sure that “Windows 10” is selected.
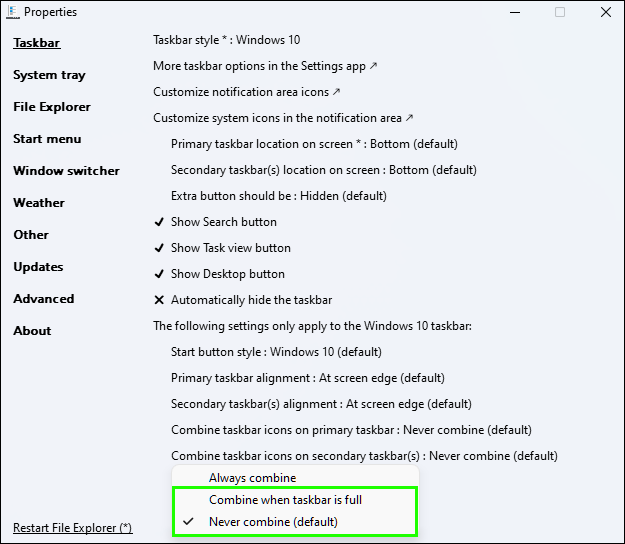
- At the bottom of the window, locate the line “Combine taskbar icons on primary taskbar” and “Combine icons on secondary taskbar.”
- Choose between “Combine when taskbar is full” or “Never combine.”
- Your taskbar icons should now be on separate tabs.


You may have noticed that your taskbar is currently centered by default. You can adjust this back to left-aligned by doing the following:
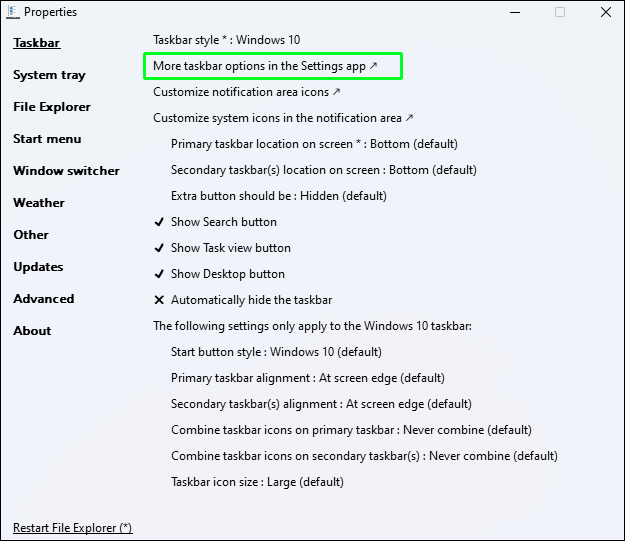
- Right-click on your taskbar and choose “Properties.”
- Select “Taskbar” on the left menu.
- Click on “More taskbar options in the Settings app.”
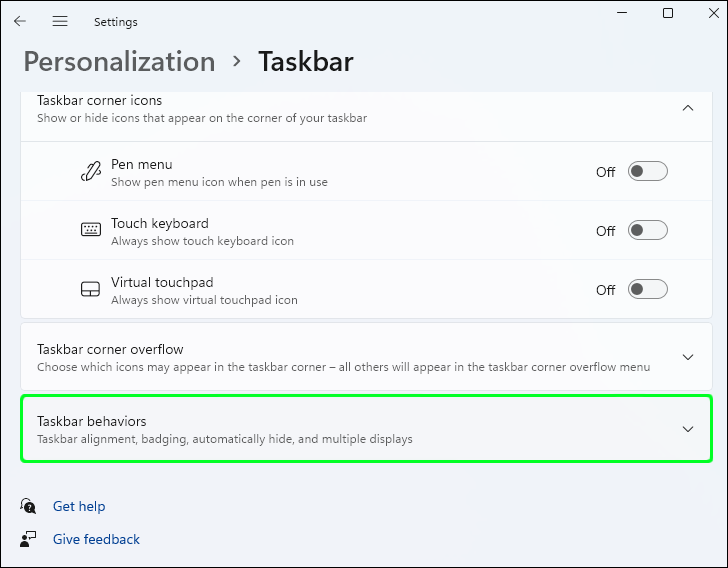
- Scroll down and click on the Taskbar Behaviors tab.
- On the Taskbar alignment portion, click on the dropdown menu.
- Choose “Left.”


Registry Hack
This method still uses a third-party app to work. It does offer a lot more configuration options for those that want to tinker with their taskbar settings. However, if you don’t want to mess with your OS registry, you’re better off using StartAllBack or Explorer Patcher. If you want to try the registry hack method, the steps are as follows:
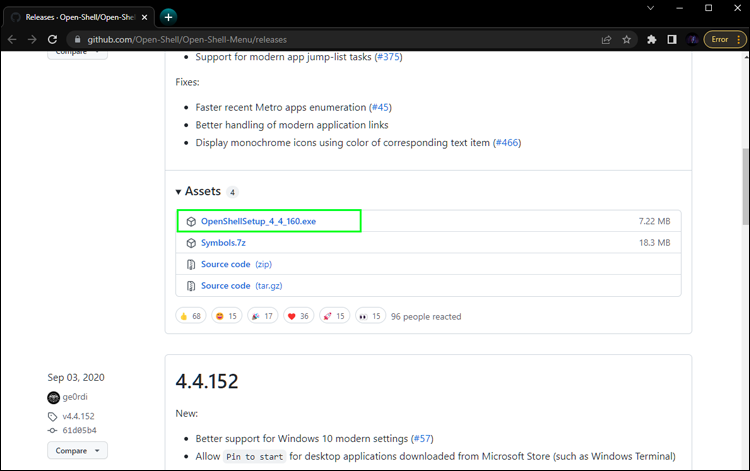
- Proceed to the Open-Shell GitHub page. Find the OpenShellSetup EXE file under Assets and download it.
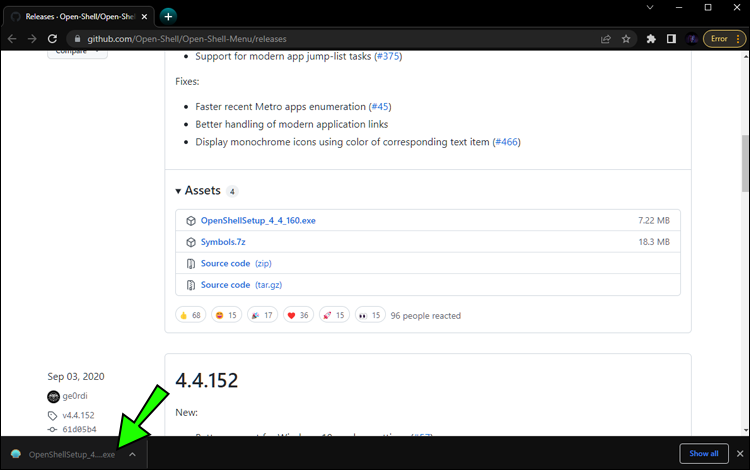
- Once done, double-click the file to run it.
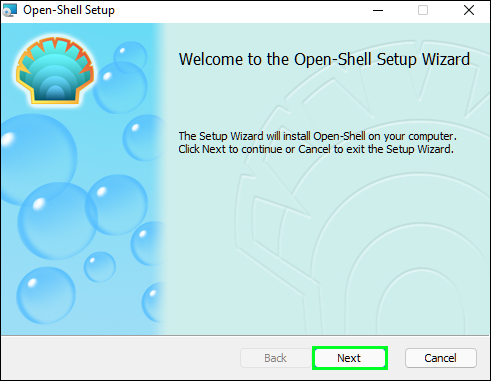
- On the initial set-up window, click on “Next.”
- Agree to the terms and conditions, then click “Next” again.
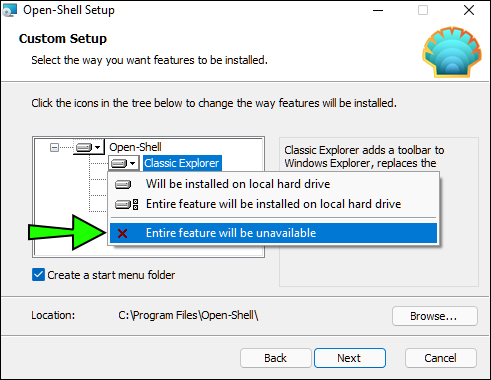
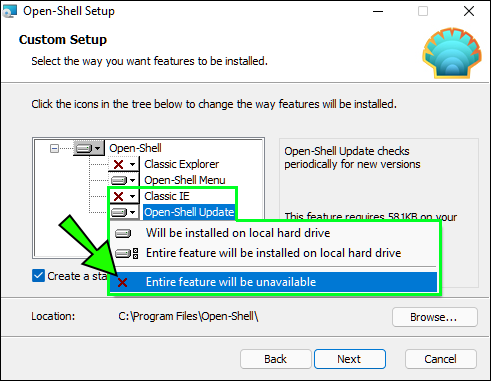
- Click on the dropdown menu beside Classic Explorer and choose “Entire feature will be unavailable.”
- Repeat step 5 for Classic IE and Open-Shell Update.
- Click on “Next.”
- Select “Install.”
- Once down, click on “Finish.” Open-shell should now be available on your system.


To begin configuring your taskbar, do the following:
- Click on the Windows button on your keyboard.
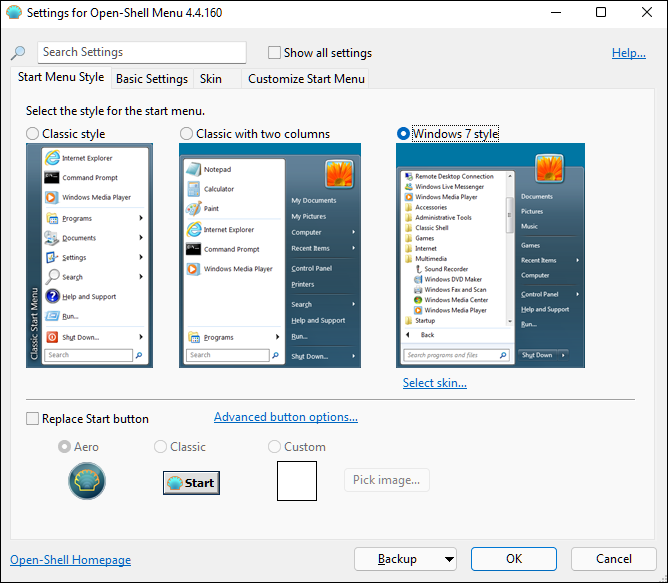
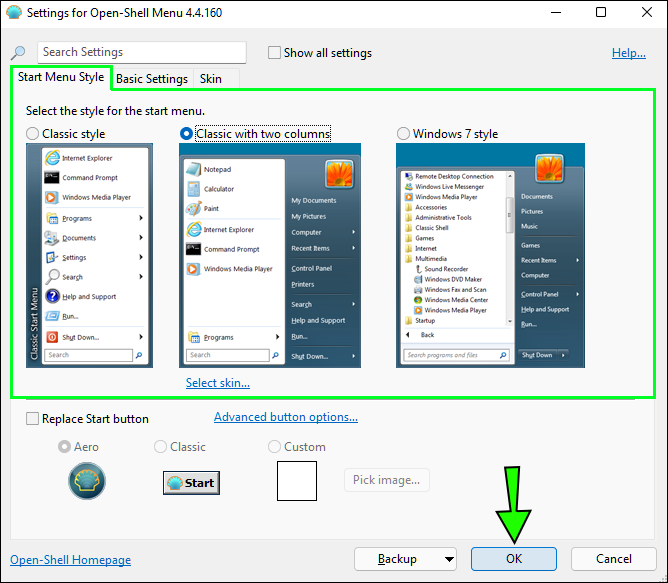
- From the Start menu, choose “Open-Shell Menu Settings” on the top.
- Choose your Windows Start Menu style, then click on “OK.”

To start ungrouping your taskbar icons, we’ll need to edit the registry. A quick reminder that entering wrong values may cause other features to stop working. Care should be taken when attempting to follow these steps:
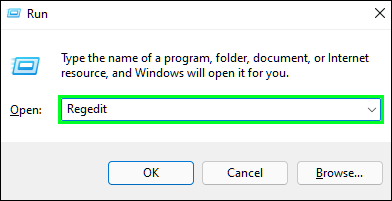
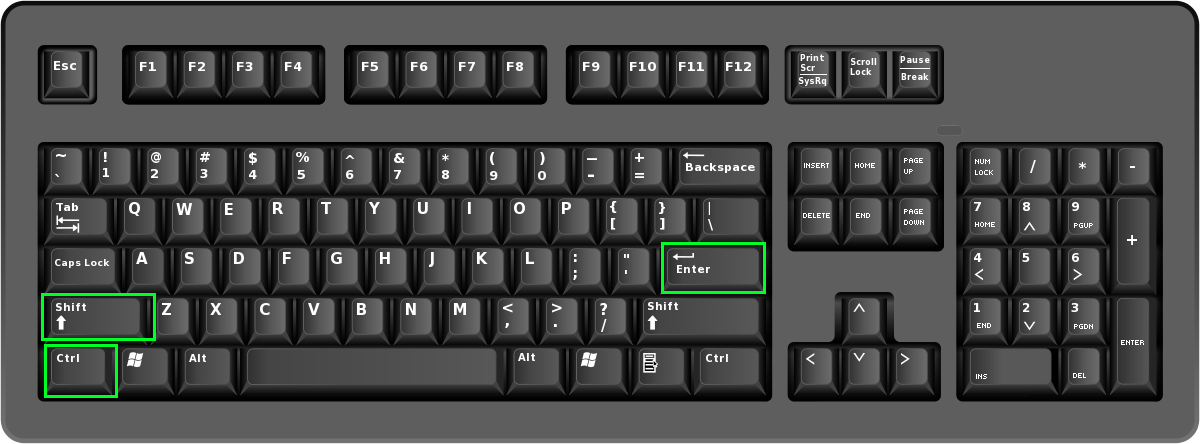
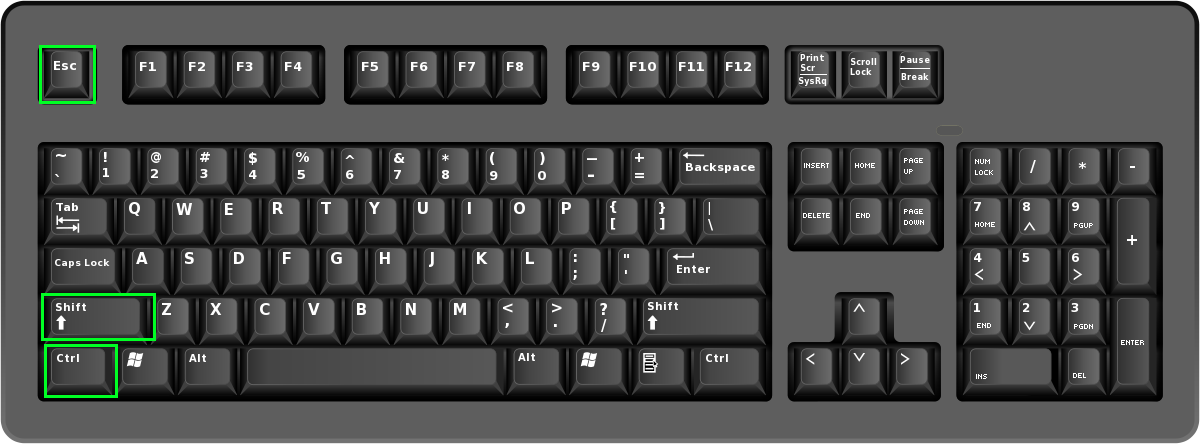
- Press “Windows + R” on your keyboard.
- In the text box, type in “
Regedit”. - Press the “Ctrl + Shift + Enter” shortcut.
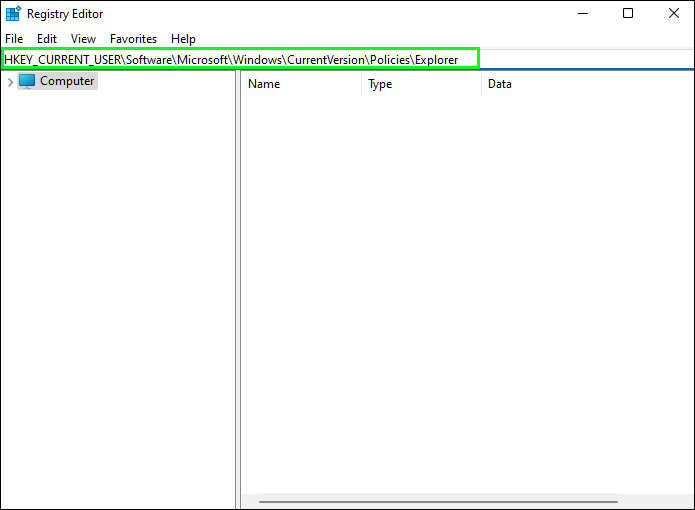
- On the address bar, type in or paste “
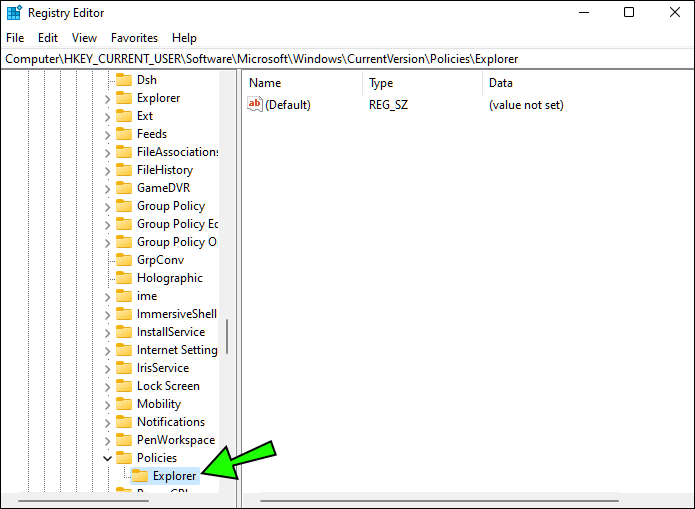
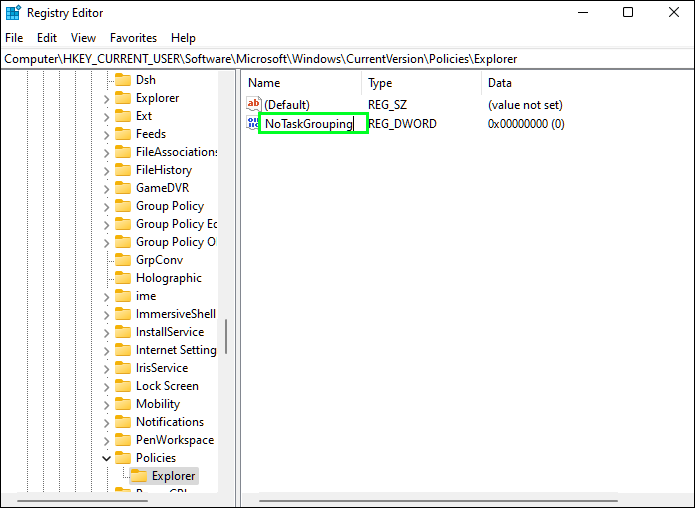
HKEY_CURRENT_USER\Software\Microsoft\Windows\CurrentVersion\Policies\Explorer” without the quotation marks. - In the left menu, click on the “Explorer” folder.
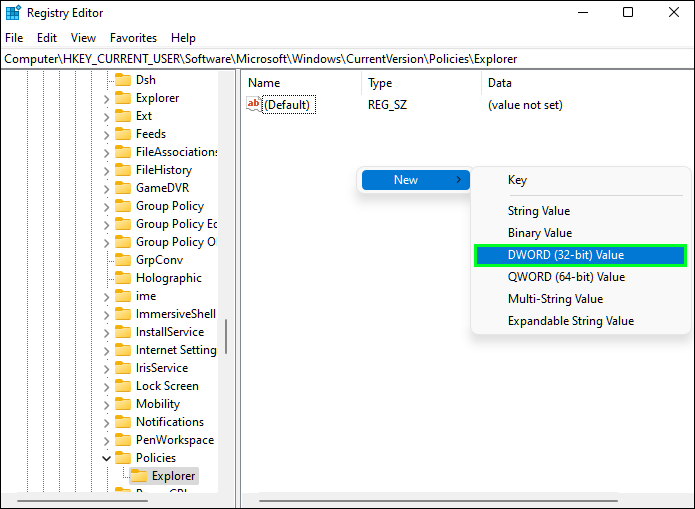
- In the right window, right-click and hover over “New.”
- Choose “DWORD (32-bit) Value.”
- Change the name to “NoTaskGrouping” without the quotation marks, then press “Enter.”
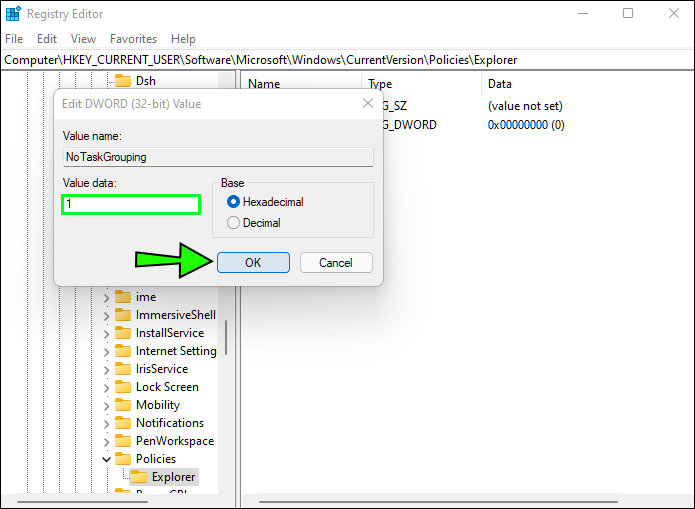
- Double click on “NoTaskGrouping” and enter “1” as its Value Data. Make sure it’s toggled to Hexadecimal, then click on “OK.”


Now for the final part of this method, which is restoring the taskbar to its classic configuration. To do this, follow these steps.
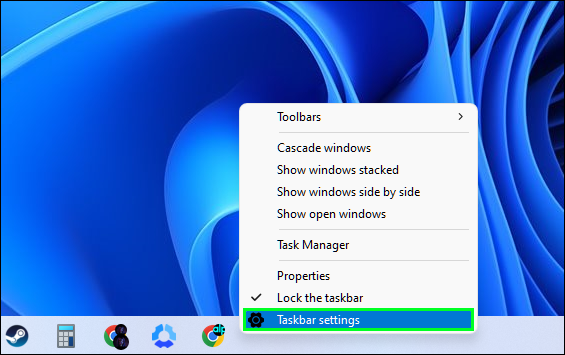
- Right-click on your taskbar and select “Taskbar settings.”
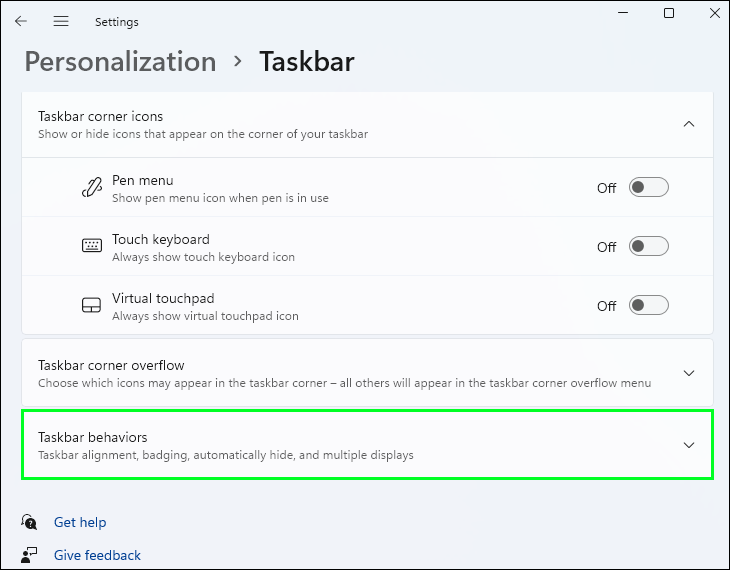
- in the window, click on “Taskbar behaviors.”
- On the taskbar alignment dropdown menu, choose “Left.”
- Press “Windows + R” on your keyboard.
- Type in “
Regedit” and press “Ctrl + Shift + Enter”. - In the address bar, type in or paste “
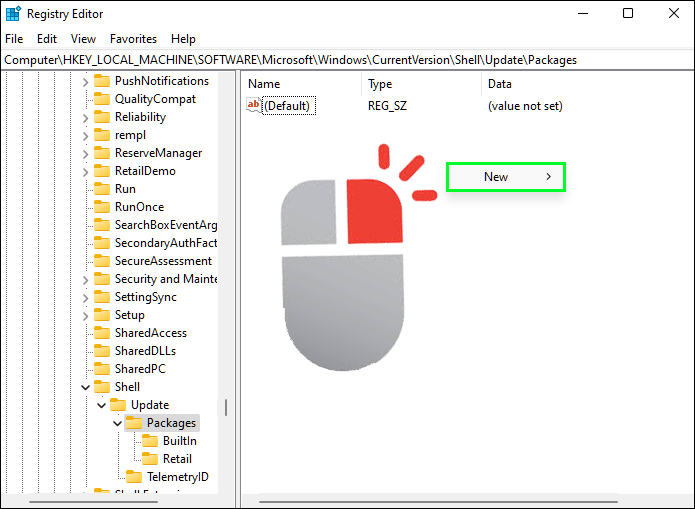
HKEY_LOCAL_MACHINE\SOFTWARE\Microsoft\Windows\CurrentVersion\Shell\Update\Packages” removing the quotations. - Click on the “Packages” folder on the left menu.
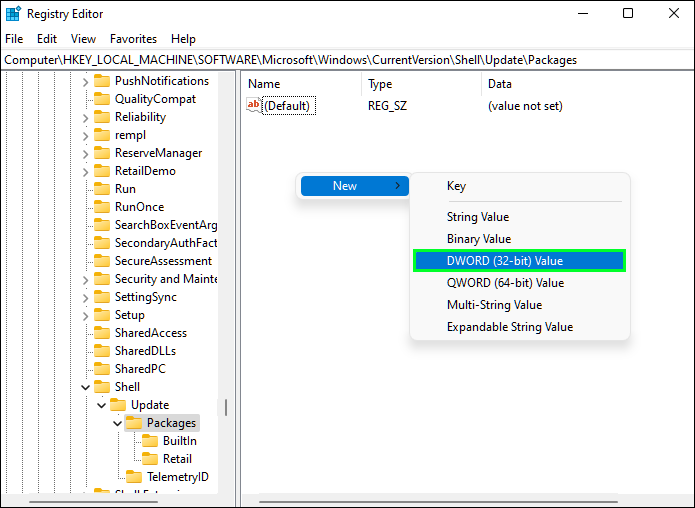
- Right-click on the right menu and then hover over “New.”
- Choose “DWORD (32-bit) Value.”
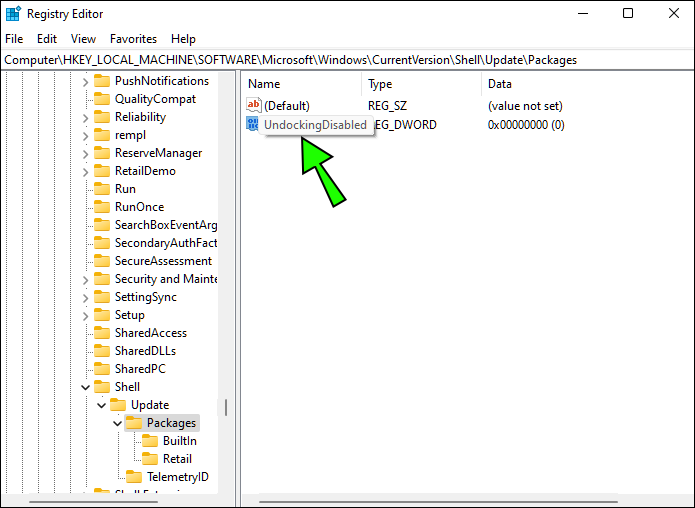
- Name the value “UndockingDisabled” without quotation marks.
- Double click “UnlockingDisabled.”
- Set the value as “1” and click on “OK.”
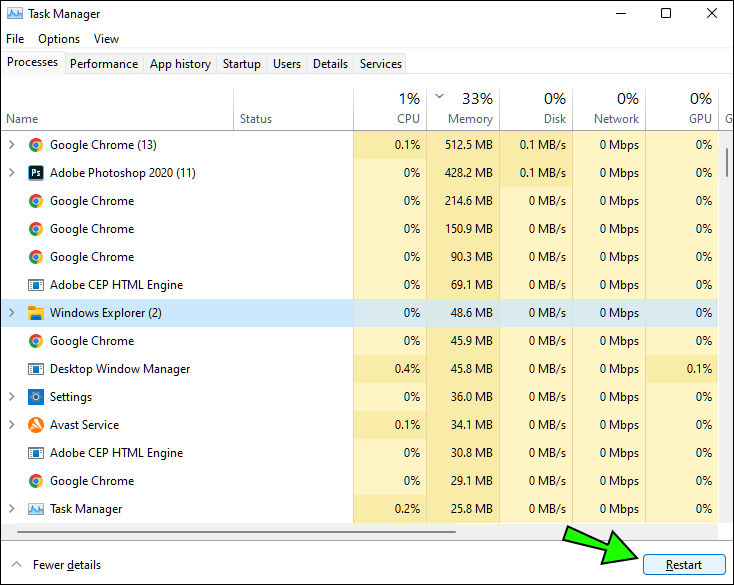
- Press “Ctrl + Shift + Esc” to open the Task Manager. From the list of processes, find Windows Explorer, then click on it.
- Click on the “Restart” button on the lower right of the window.
- Your taskbar should now be ungrouped.


As these methods aren’t official releases from Microsoft, be aware that any Windows updates may cause these methods to experience errors. If that happens, please wait for a developer’s patch, or wait for Microsoft to release an official ungroup feature.
Stuck With Workarounds
There has yet to be an official statement on why ungrouping icons on Windows 11 were removed, and there is no news if there are plans to restore the feature. It may be because of the new aesthetic of the Windows 11 taskbar that the developers decided to keep the screen uncluttered. Until Windows 11 comes with an official ungrouping feature, we’re stuck with using workarounds.
Do you know of other ways how to ungroup icons on Windows 11? Feel free to share your thoughts in the comments section below.
Disclaimer: Some pages on this site may include an affiliate link. This does not effect our editorial in any way.


