AirPods are a premium pair of well-designed earbuds. They offer high-quality sound, work seamlessly with your devices, and look trendy in your ears. AirPods are compatible with Windows 11 and are configured and used similarly to Apple devices.
Read on to learn about setting up your Windows 11 computer for your AirPods and what to try if it doesn’t work as expected.
How to Use AirPods With Windows 11
Before you can start using your AirPods with your PC, you’ll need to pair them. Your AirPods can be paired with several devices simultaneously but will only work with one device at a time. Follow these steps to pair your AirPods with your Windows 11 PC:
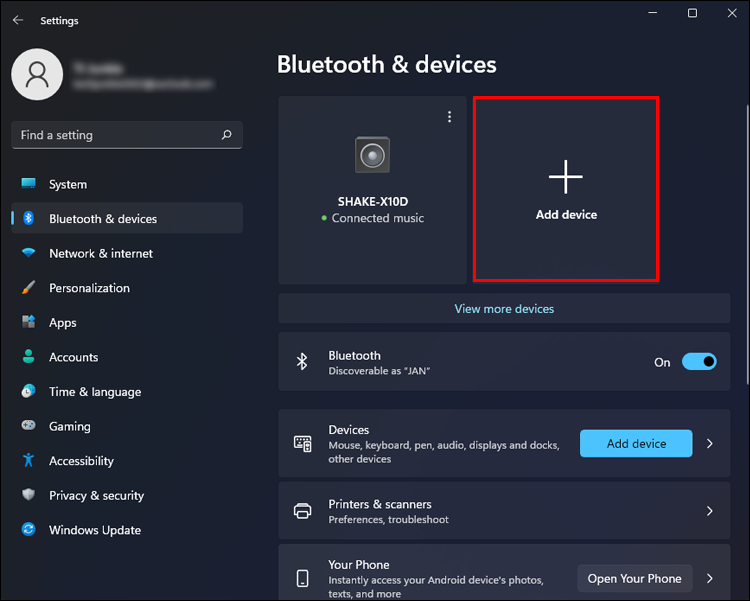
- Open “Settings.”

- Choose “Bluetooth & devices.”

- Ensure the slider switch is “On.”
- Click on “+ Add device.”
- Place your AirPods in their case, and leave the case open.
- Long-press the button on your AirPods case.
- Once the light on the case flashes white, release the button.
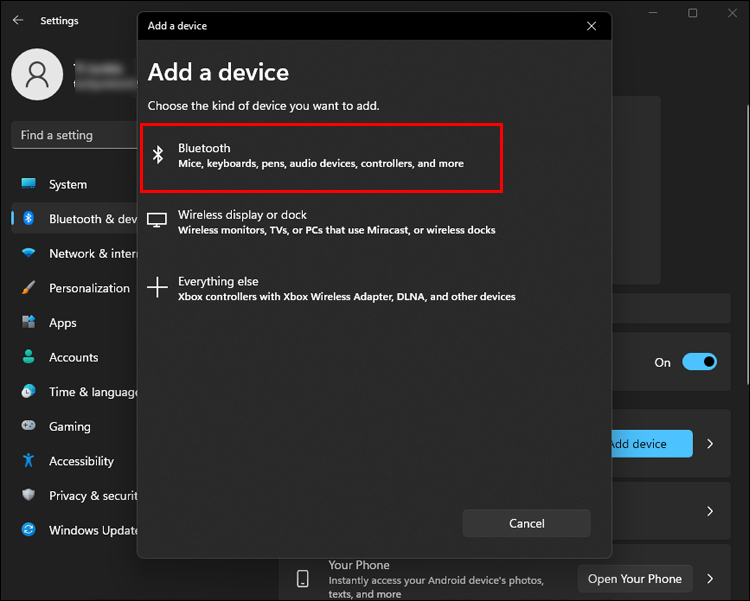
- Click “Bluetooth” on your PC.
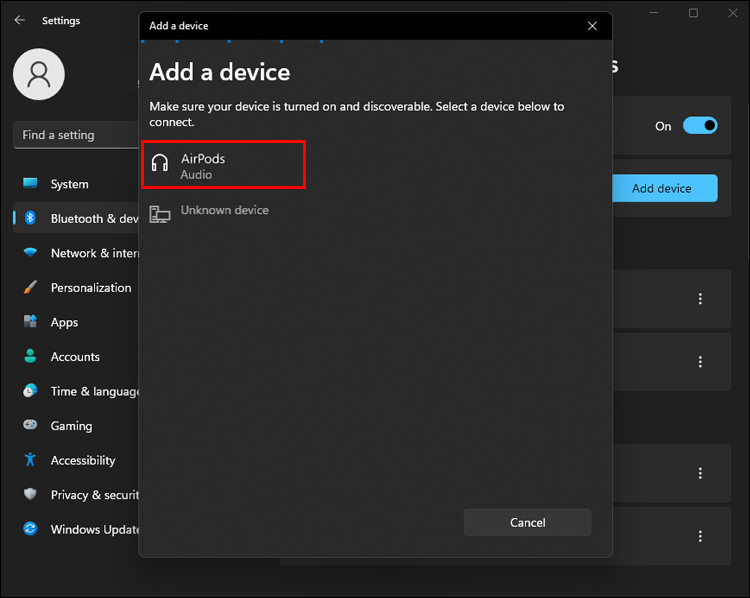
- Your computer will search for discoverable devices. Select your AirPods when it appears in the list.
- Wait for your computer and AirPods to pair up, then click “Done.”


Your AirPods are now ready to use.
How to Re-establish a Connection
If you’ve paired your AirPods with an Apple device, it will ask whether you want to connect whenever it senses the device. However, using AirPods with Windows 11 is slightly trickier. After connecting to your PC for the first time, you’ll need to re-establish the connection if you’ve been using your AirPods with another device. Here’s how:
- Remove your AirPods from their case and place them close to your computer.
- Click on the speaker icon on the taskbar.
- Increase the volume by clicking on the “>” icon to the right of the sound control.
- In the list of devices, select “Headphones (AirPods).”
Once you’ve chosen your AirPods from the menu, they are connected and ready to use.
How to Troubleshoot If Your AirPods Are Not Working
Next, we have some fixes to try that should help to solve the following:
- No connection between your AirPods and PC.
- The connection keeps disconnecting.
- No sound.
- The microphone doesn’t work.
Try Reconnecting the AirPods
In this scenario, reconnecting your AirPods includes uninstalling and then re-installing them. Follow these steps:
- Use hotkey “Windows + S” to open the “Search” menu.
- Type “Device Manager” into the text field, then click on the top result.
- Expand the “Bluetooth” option to see your connected devices.
- Find all the devices that begin with “AirPods,” right-click them, and then choose ” Uninstall device” from the context menu.”
- Click “Uninstall” in the pop-up to confirm.
- Open your AirPods case and long-press the button on the back until the white light appears.
- Restart your PC.
- Once it has restarted, use hotkey “Windows + I” to open “Settings.”
- Select the “Bluetooth & devices” tab on the left.
- Click on “Add device,” then “Bluetooth.”
- When your AirPods appear, click on them to connect.


Now you’ll need to set your AirPods as a default device. Here’s how that is done:
- Use hotkey “Windows + S” to open the “Search” menu.
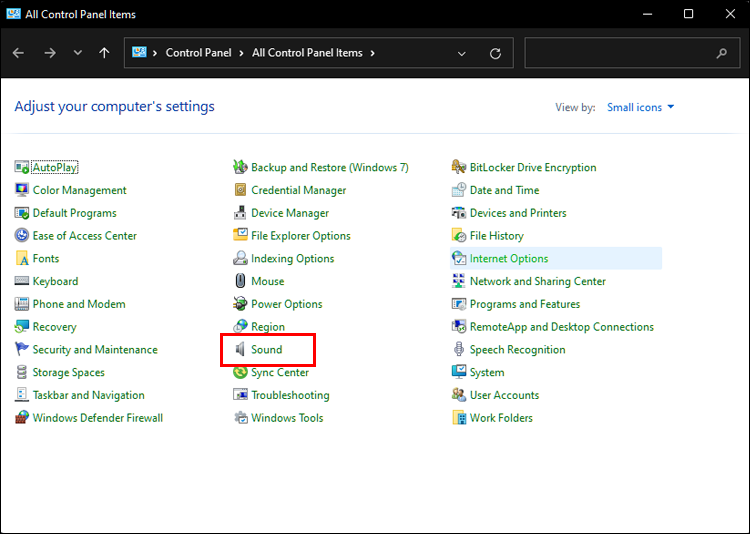
- Type “Control Panel,” then click on the control panel result.
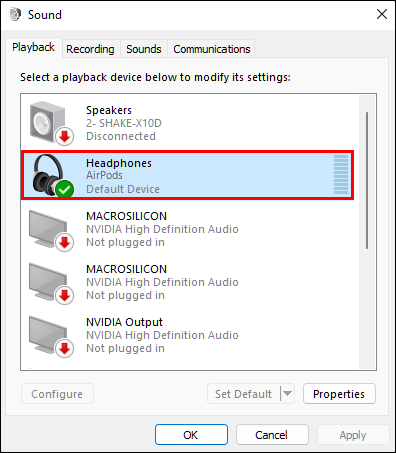
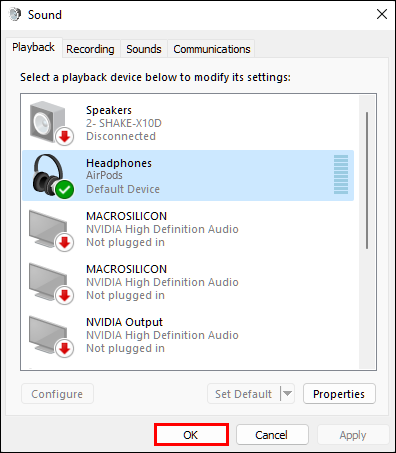
- Select “Hardware and Sound,” then “Sound.”
- Beneath the “Playback” tab, choose “AirPods” (listed as headphones), then click on “Set Default.”
- Click on “OK” to save the change and exit the window.

Use Bluetooth Troubleshooter
If your AirPods have connected successfully, but you can’t hear anything, the cause could be down to a misconfigured playback device selection. Here we’ll run the “Bluetooth Troubleshooter” and update the Bluetooth drivers to see if that helps. Follow these steps:
- Use hotkey “Windows + I” to open “Settings.”
- In “System,” select “Troubleshoot.”
- Choose “Other troubleshooters.”
- Find the “Bluetooth” troubleshooter, then hit “Run.”
- Follow the instructions and make the changes, if any, to fix the issue.


To update the Bluetooth drivers:
- Open “Search.”
- Enter “Device Manager” and click on the relevant result.
- Double click on “Network adapters.”
- Right-click on the “Bluetooth Device,” then from the context menu, choose “Update driver.”
- In the “Update Drivers” window, select “Search automatically for drivers.”
- Windows will now scan for the best driver to install for the Bluetooth adapter.


Drivers are vital for any device to function effectively, and it’s imperative to have the latest version installed at all times.
The method listed above only scans for the best driver versions available. If you haven’t downloaded a driver previously, the driver is likely out of date. In this case, find the latest version in “Windows Update” or visit the manufacturer’s website to download and install the setup.
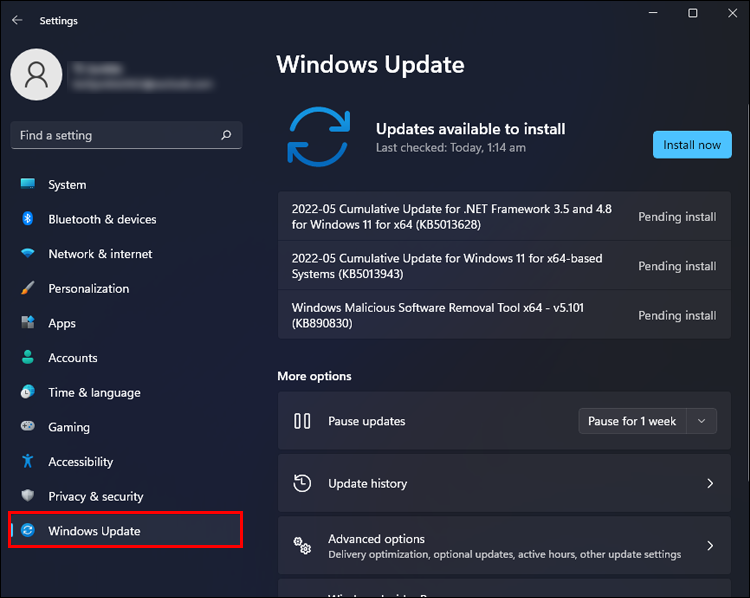
Update Windows 11
Older versions of Windows 11 are likely to cause problems for your AirPods, as each update includes bug fixes and performance enhancements. So to keep it updated:
- Use hotkey “Windows + I” to open “Settings.”
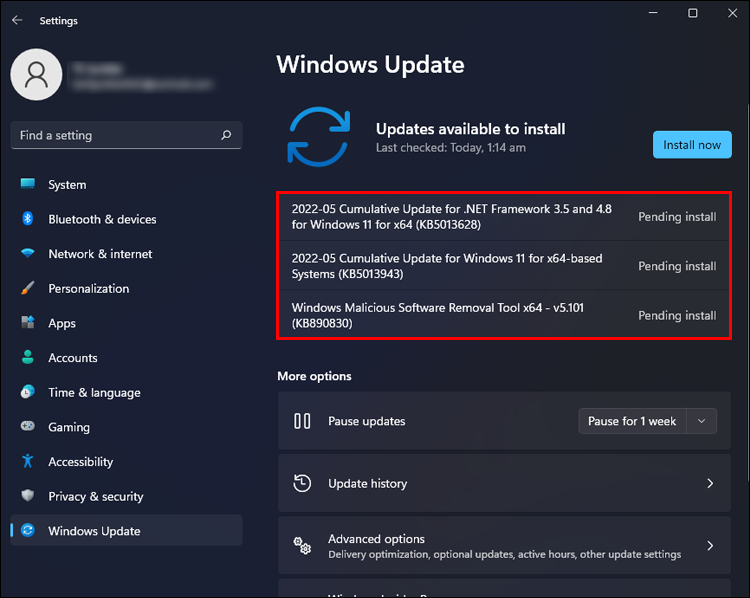
- Choose “Windows Update” from the tabs on the left.
- Click “Check for updates” to scan for new OS versions on the right.
- If a new version is available, it will be listed with a “Download & install” button. Click on it.
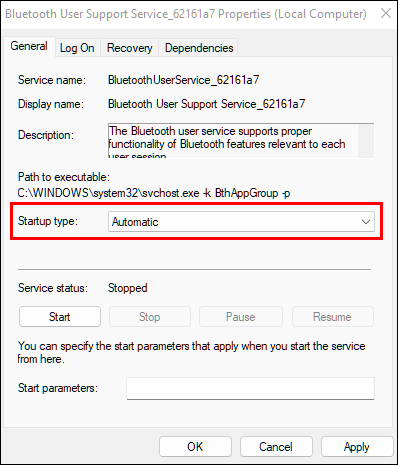
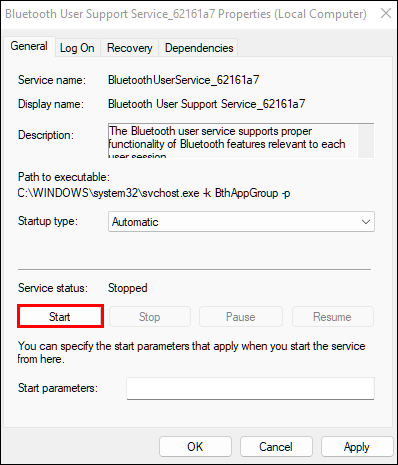
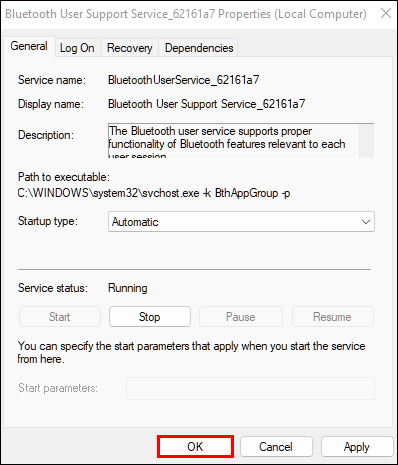
Ensure Bluetooth Support Is Running
The Bluetooth service should be running for Bluetooth devices to operate correctly:
- Use hotkey “Windows + R” to open “Run.”
- To open the “Services” app, type “services.msc” and click “OK” or “Enter.”
- Find and double-click the “Bluetooth Support Service.”
- From the “Startup type” pull-down menu, choose “Automatic.”
- Beneath “Service status,” click on “Start.”
- To save the changes and close the “Properties” window, click on “OK.”


Disable the Wireless iAP Service
This service facilitates the use of voice commands using AirPods. However, it can also affect functionality. So if nothing else has worked so far, disabling this service should get your AirPods working. Here’s how to disable the wireless iAP service:
- Use hotkey “Windows + S” to open “Search.”
- Enter “Control Panel,” then click on the relevant result.
- Choose “Hardware and Sound.”
- Click on “Devices and Printers.”
- Beneath “Devices,” right-click the AirPods.
- From the context menu, choose “Properties.”
- Go to the “Services” tab.
- Uncheck the “Wireless iAP” box, then click “OK” to save changes.


How to Resolve AirPods Microphone Problems
If your microphone still doesn’t work with calls after trying the above fixes, we have a few more options:
Keep Using the Microphone
Many users had reported that when they continued to use the microphone, it started to work after a while, so try out the following:
- Tap your AirPods to activate the microphone.
- Begin to talk and keep talking, and your AirPods should pick up your voice after a few seconds.
Check the Active Microphone Settings
If only one of the AirPods works, try this:
- Open “Settings.”
- Click the “Bluetooth” option, then on your AirPods info icon.
- Select the “Microphone” and enable the “Automatically Switch AirPods” option.
These steps should enable your AirPods to use the best microphone for both AirPods to work.
Check Your Firmware
Some users have claimed that firmware version “3A283” has been problematic for AirPods, and the problem was resolved by updating the firmware. With your AirPods connected to your computer, in their open case, try the following:
- Check your firmware to ensure it’s not: “3A283.”
- If your firmware is not up-to-date, try installing the latest version.
If the problem continues, try reaching out to Apple support.
Your AirPods Are Ready to Use
Once a connection has been established between your AirPods and Windows 11 computer, they should work seamlessly. Most connection problems are typically caused by outdated drivers, the latest version of Windows 11 not installed, or a conflicting service such as the wireless iAP. Running the “Bluetooth Troubleshooter” is generally an excellent place to start for finding and solving issues. In addition to ensuring that your computer is up-to-date.
Did you run into issues connecting your AirPods to a Windows 11 PC? How did you resolve it? Let us know in the comments section below.
Disclaimer: Some pages on this site may include an affiliate link. This does not effect our editorial in any way.


