Google-owned Waze is an intuitive and driver-friendly navigation app with millions of users. One of the unique characteristics of this navigation app is that users have the ability to warn of hazards on the road and communicate with other drivers.
Like any other application, even Waze will experience a bug or two from time to time. When that happens, one of the first actions should be to clear cache and data from the app.
The process will be different depending on whether you have an Android or iOS device. In this article, we’ll tell you how to clear cache and data on both OS and what types of problems could be eliminated.
How Clearing Cache on Waze
Clearing the cached files and data for an app is relatively rudimentary, and it’s a common first step to troubleshooting problems. Over time, an app naturally stores data and files that it really doesn’t need. Dumping this data can fix glitches and make the app run better. Also, clearing the cached files on Waze won’t erase any important information.
Some apps, like Snapchat, allow you to clear the cache from inside of the platform itself. Waze isn’t one of those. You’ll need to clear the app’s cache from your phone’s settings. Unfortunately, things are a bit more complicated for iOS users than Android users. But, no worries, we’ll cover both operating systems in this section.
How to Clear Waze Cache on Android
Android users can quickly and easily clear Waze’s cached files by following these steps:
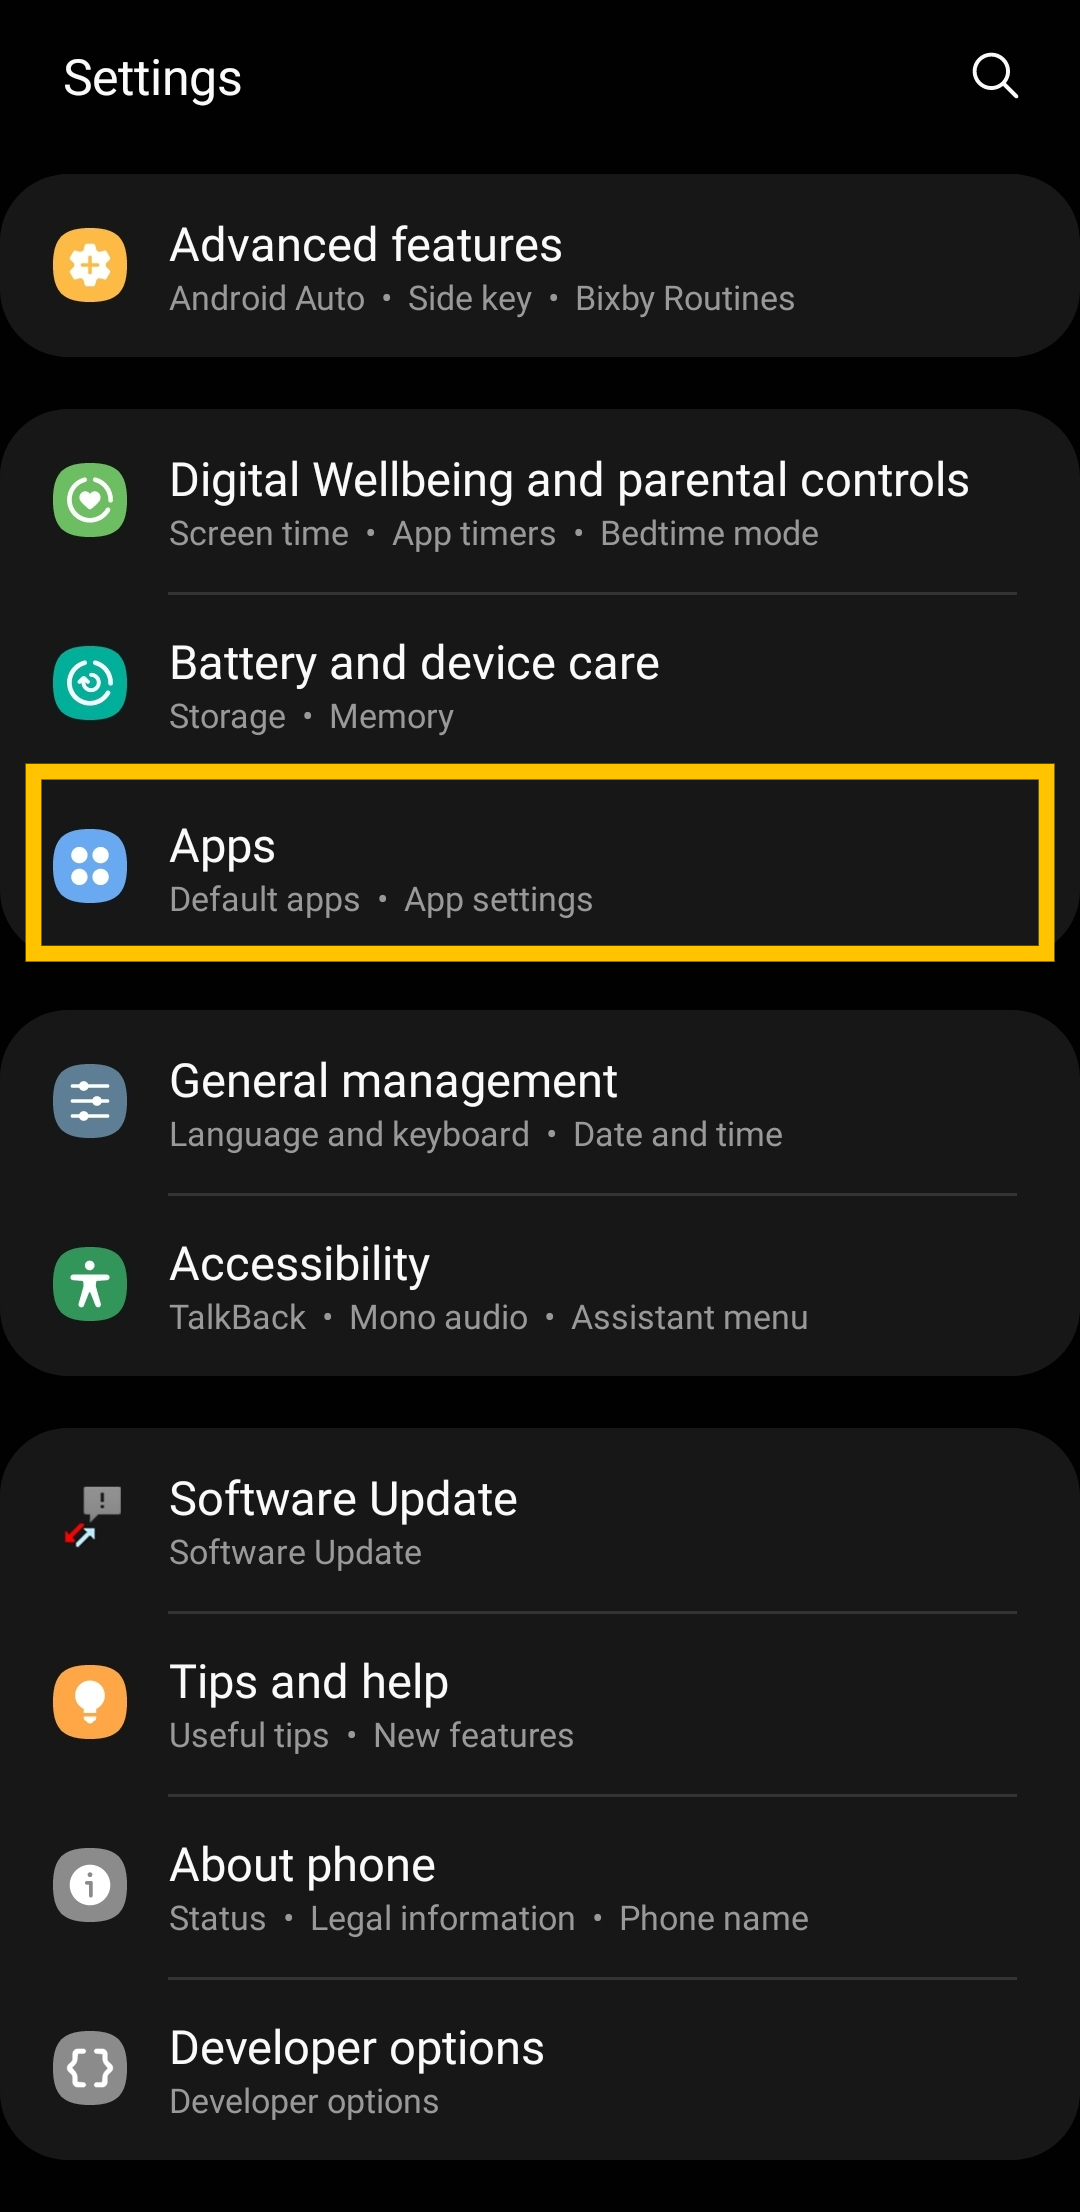
- Open the Settings on your Android device and tap on Apps.

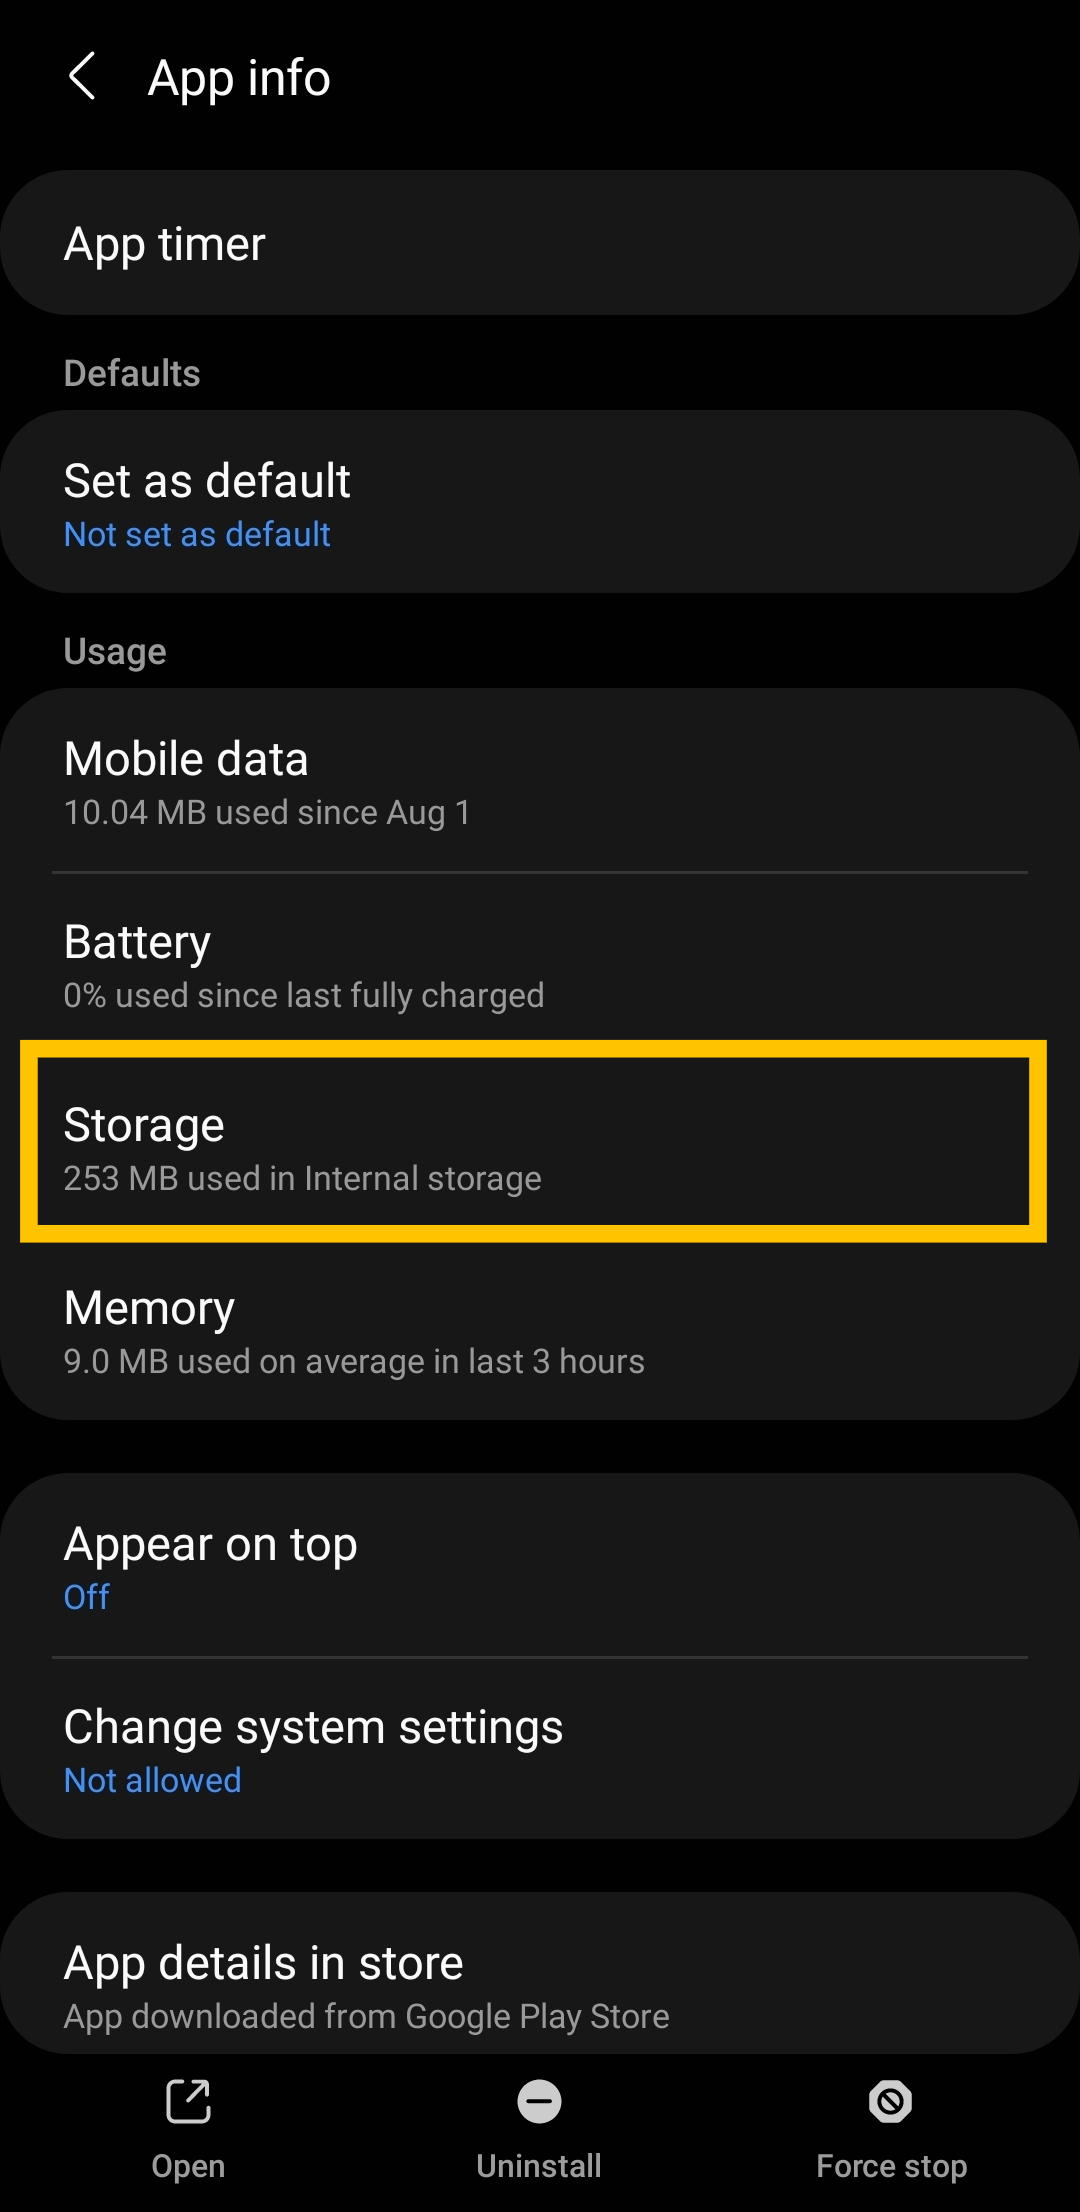
- Scroll through the list of apps and tap on Waze. Then, tap on Storage.

- Tap on Clear Cache.


After clearing the cache, reopen the app and see if the app is working properly.
How to Clear Waze Cache on iOS
As mentioned above briefly, Apple doesn’t give us the option to clear the cache simply. Instead, you can offload the app’s data. Essentially, this means you’re deleting the app and unnecessary data but keeping your login information and other important content. Similar to clearing the cache, you won’t lose anything you really need by offloading an app.
Here’s how to offload the Waze app on your iPhone:
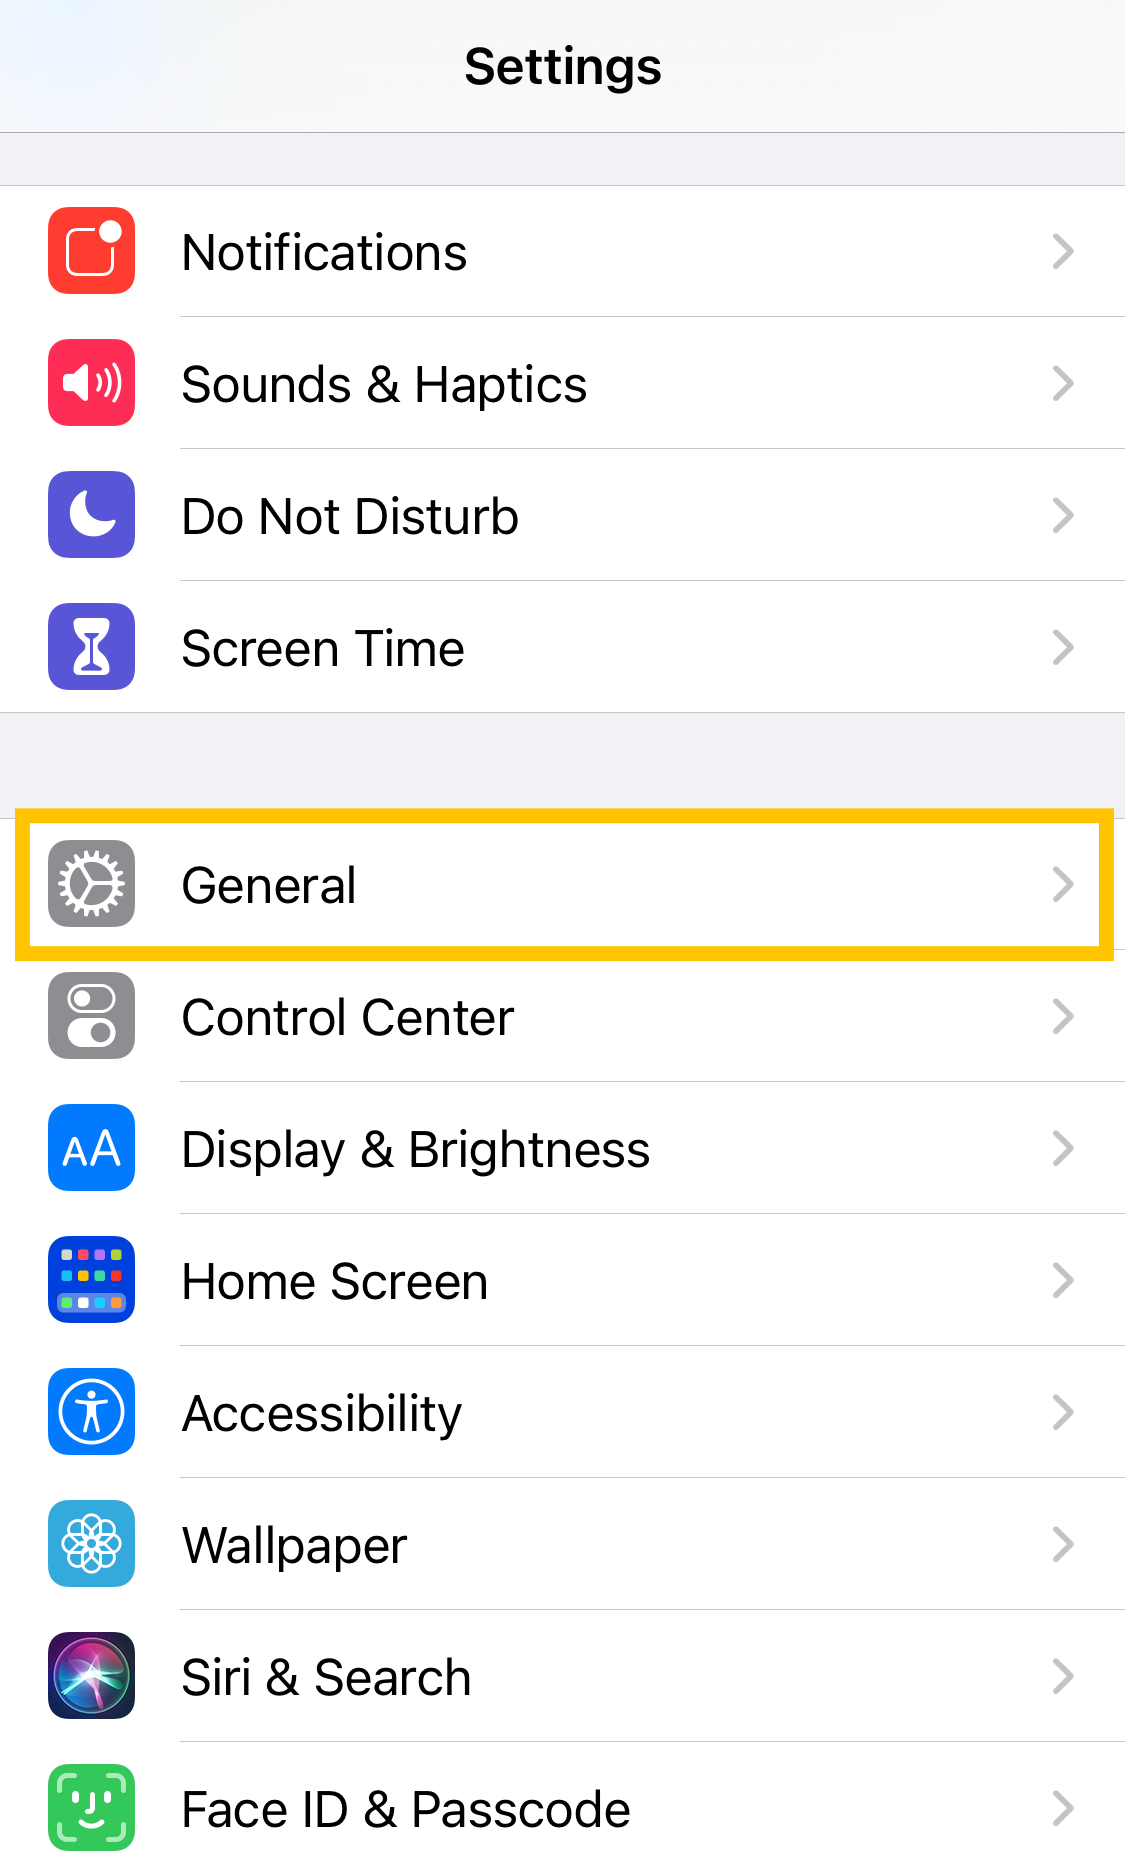
- Open the Settings on your iOS device and tap on General.
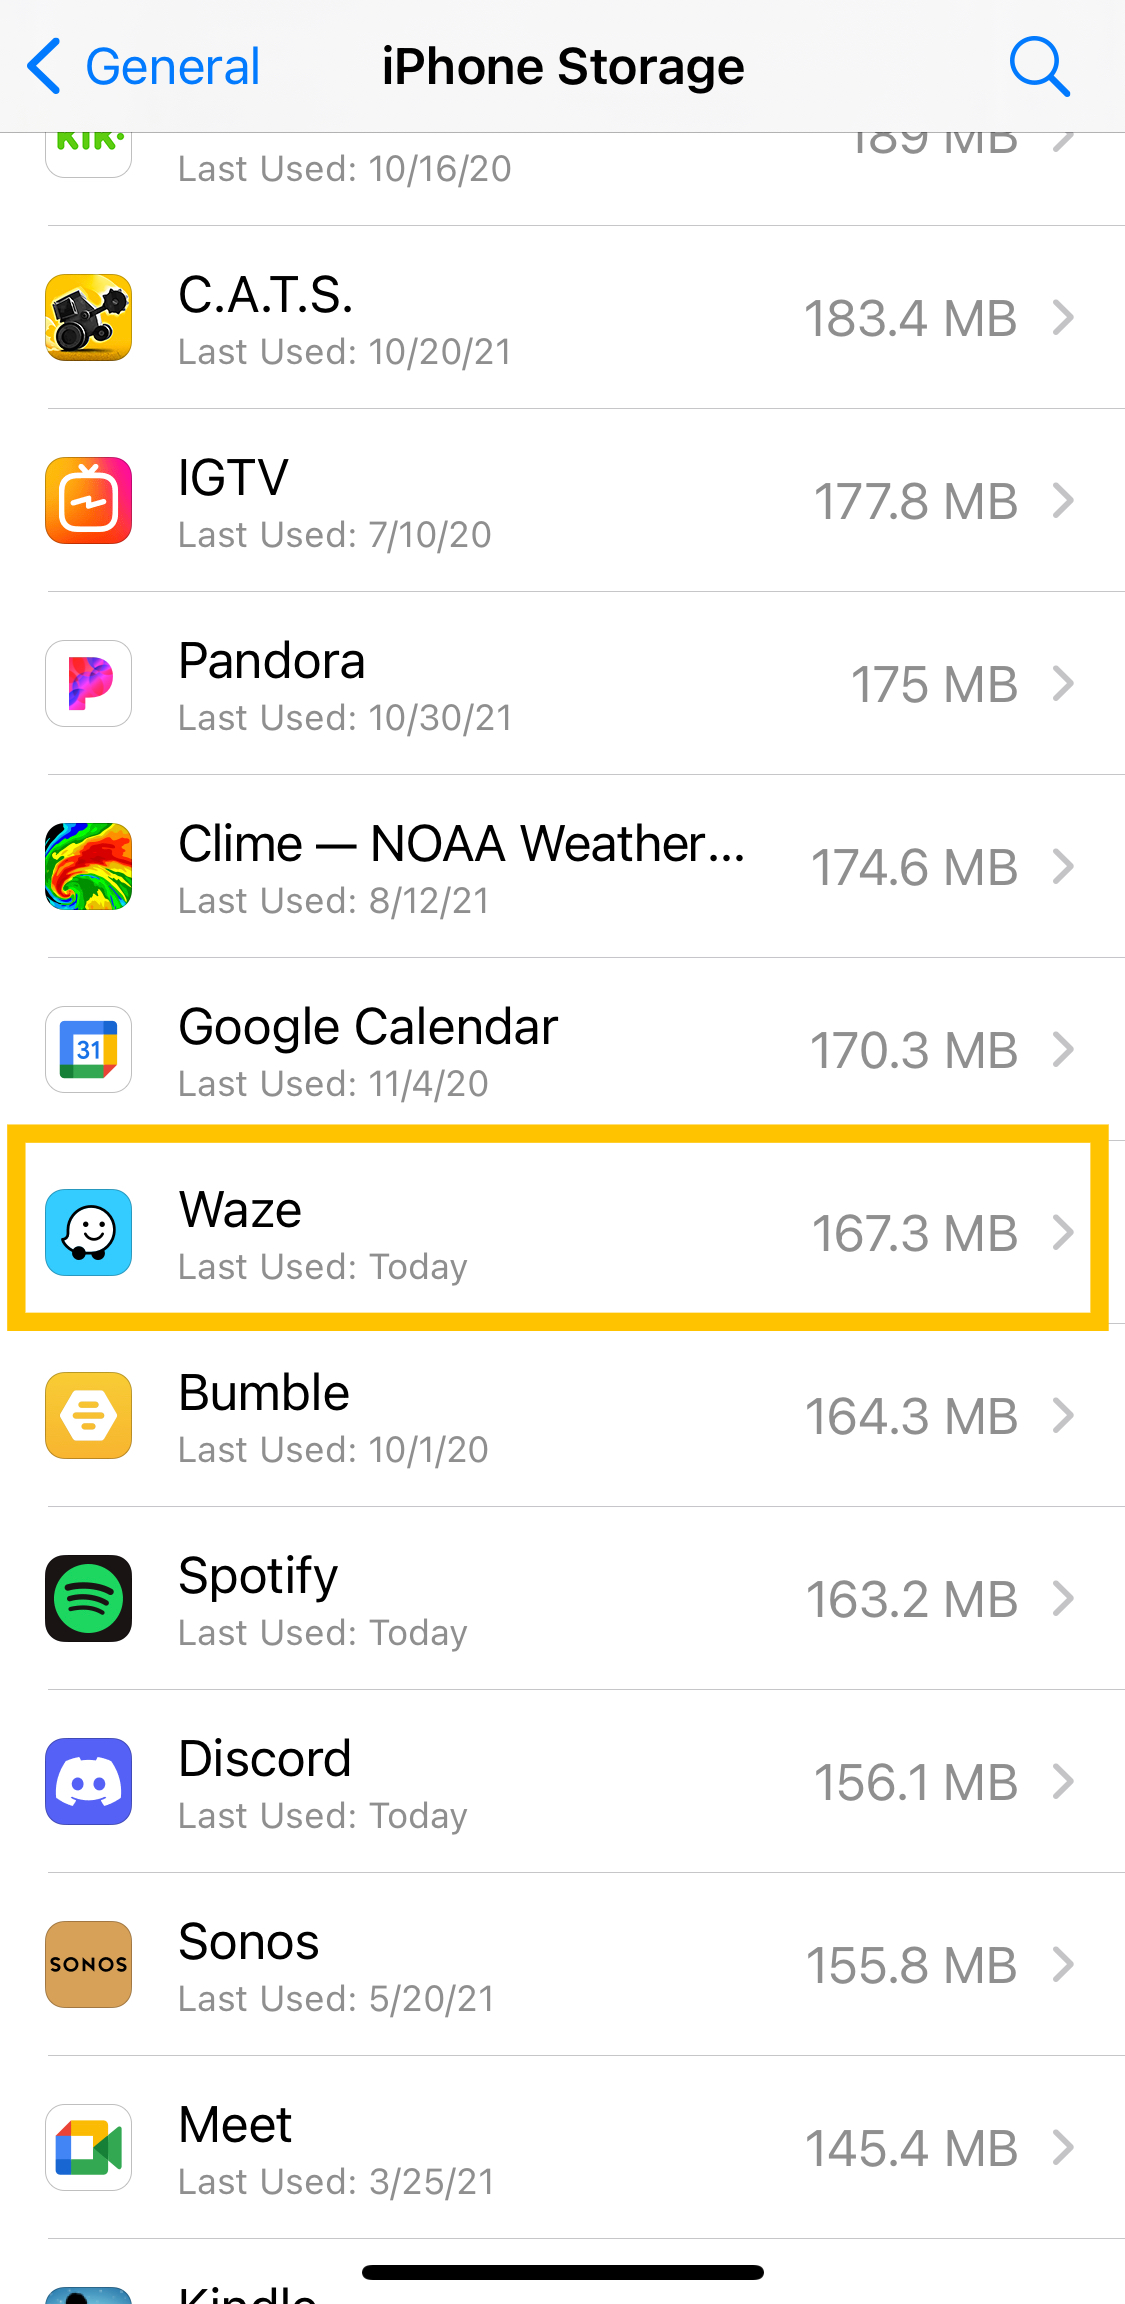
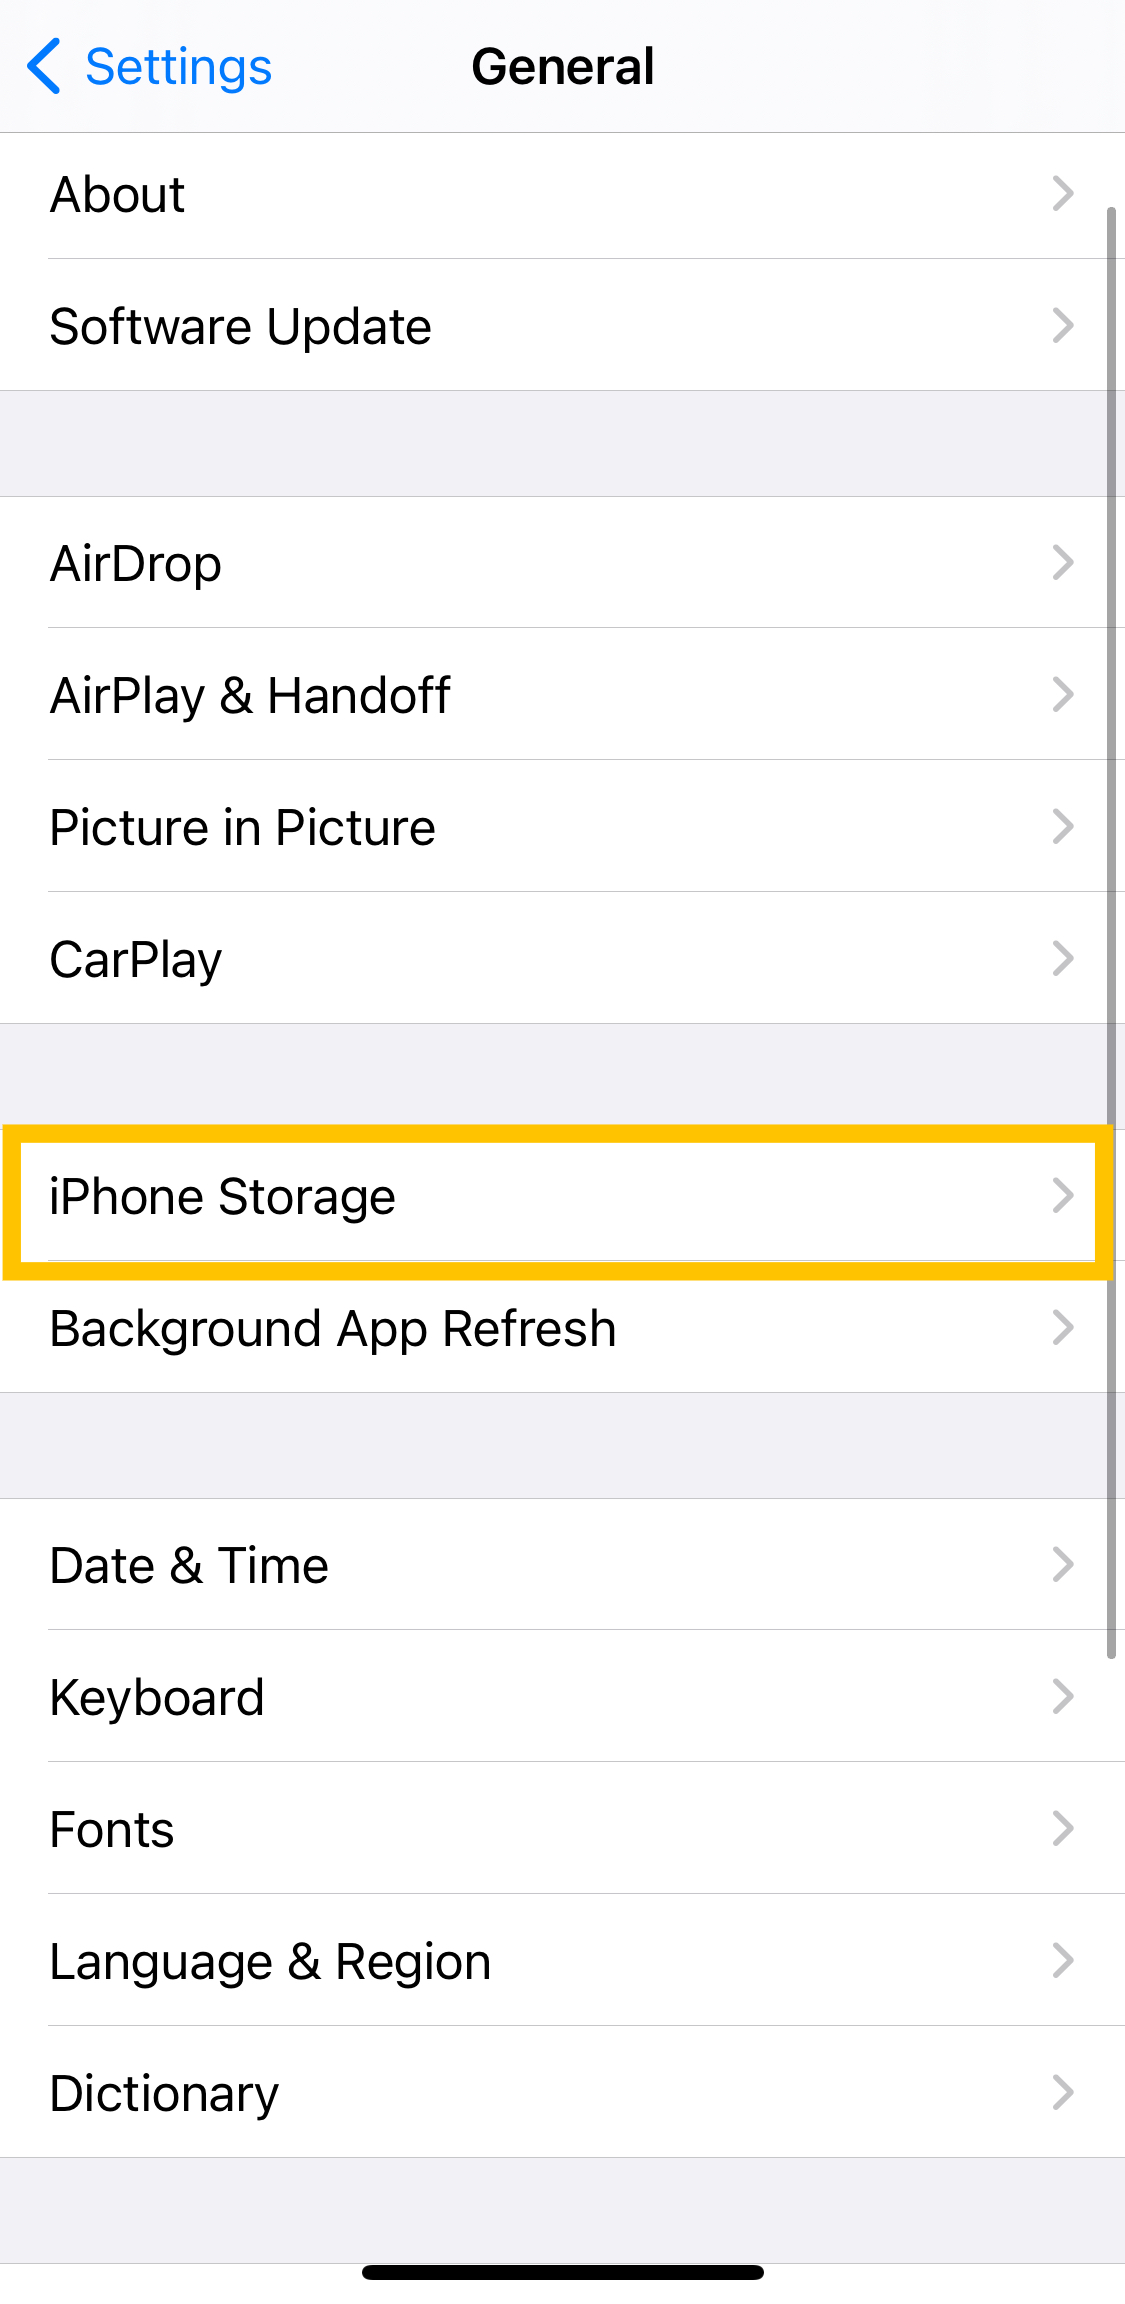
- Tap on iPhone Storage.
- Scroll through the list of apps and tap on Waze. Or, tap on the magnifying glass in the upper right-hand corner and type Waze to locate the app quickly.
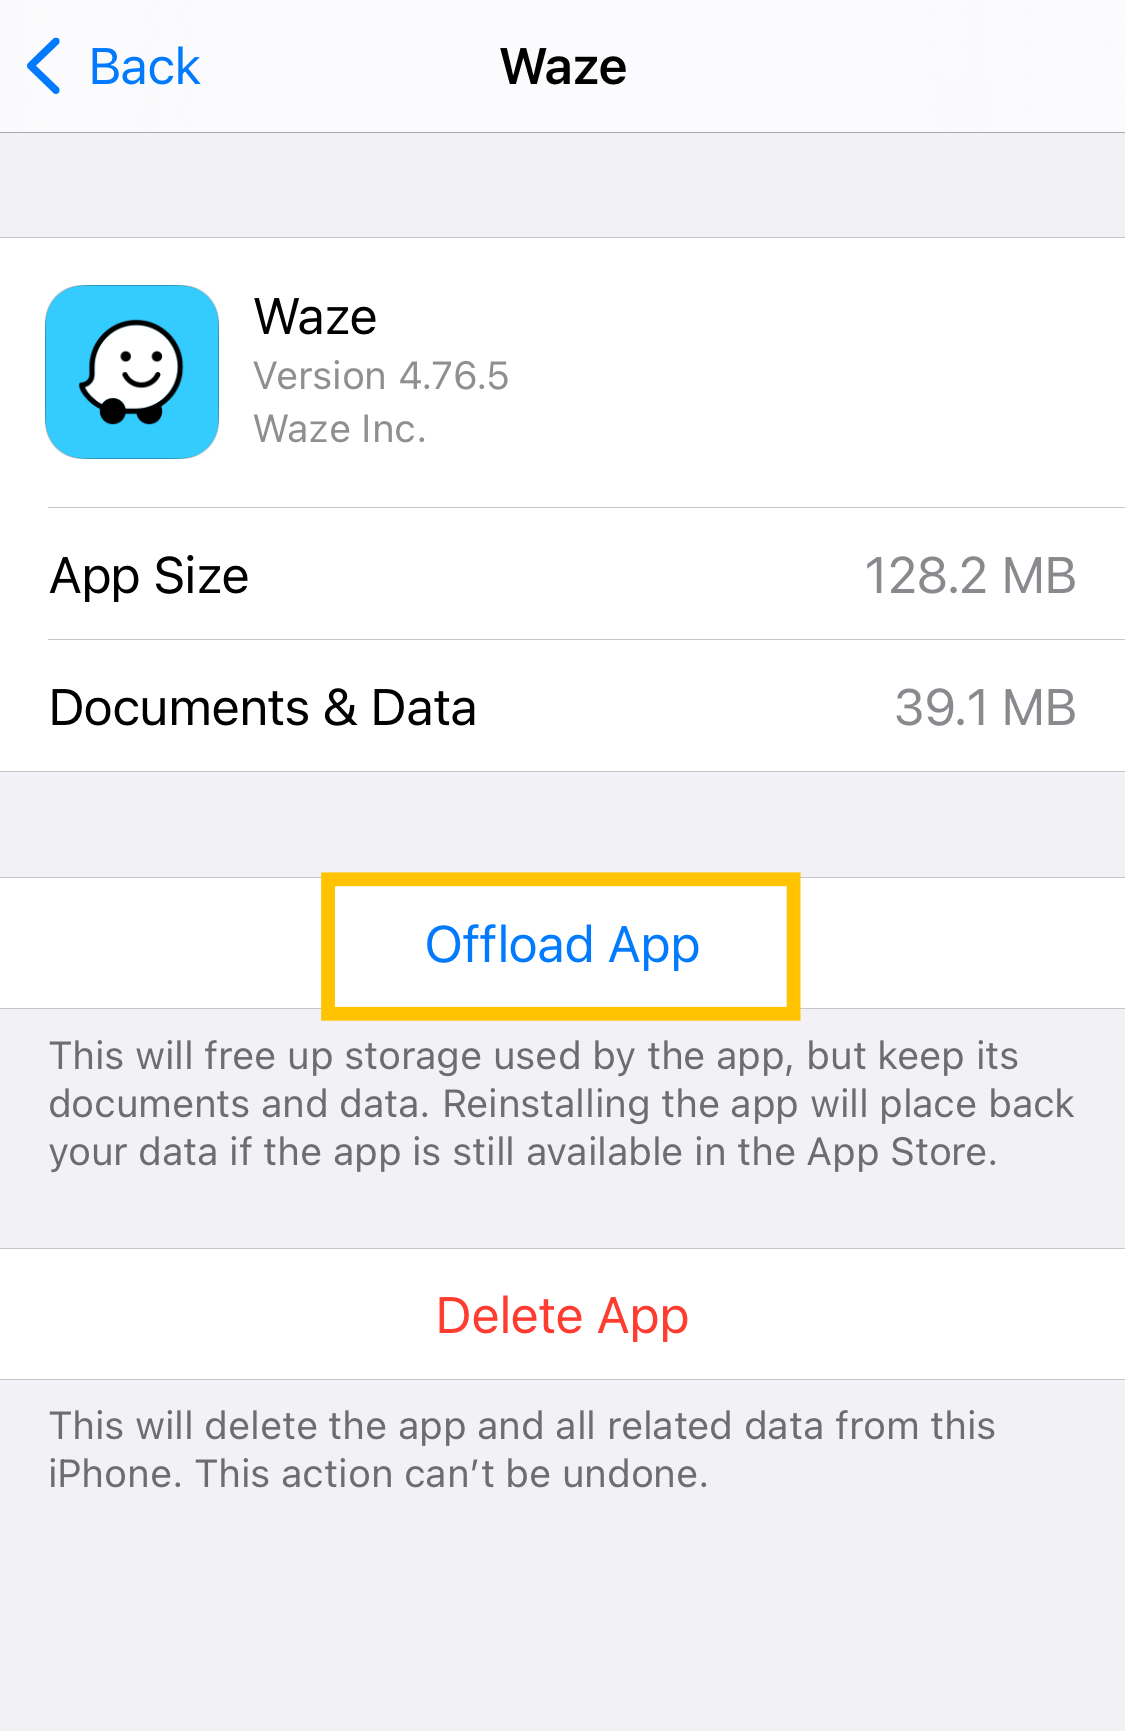
- Tap on Offload App. Then, confirm.


Now, go back to the Waze app on your iOS device and relaunch it. Check to ensure that any problems you were having are resolved.
How to Clear Waze Data
Perhaps you want to start fresh with the Waze app, or clearing the cache didn’t fix all of the app’s issues. If the problem is ongoing, you may want to clear the app’s data. Opposed to clearing the cache, clearing the app’s data will wipe away all of your login information and any important data you’ve saved in the app.
Like the instructions above, iOS users don’t have an option to clear app data. iOS users need to uninstall and reinstall the app. Things are a little more straightforward for Android users. We’ll break down the steps for both operating systems in this section.
Clear Waze Data on iOS
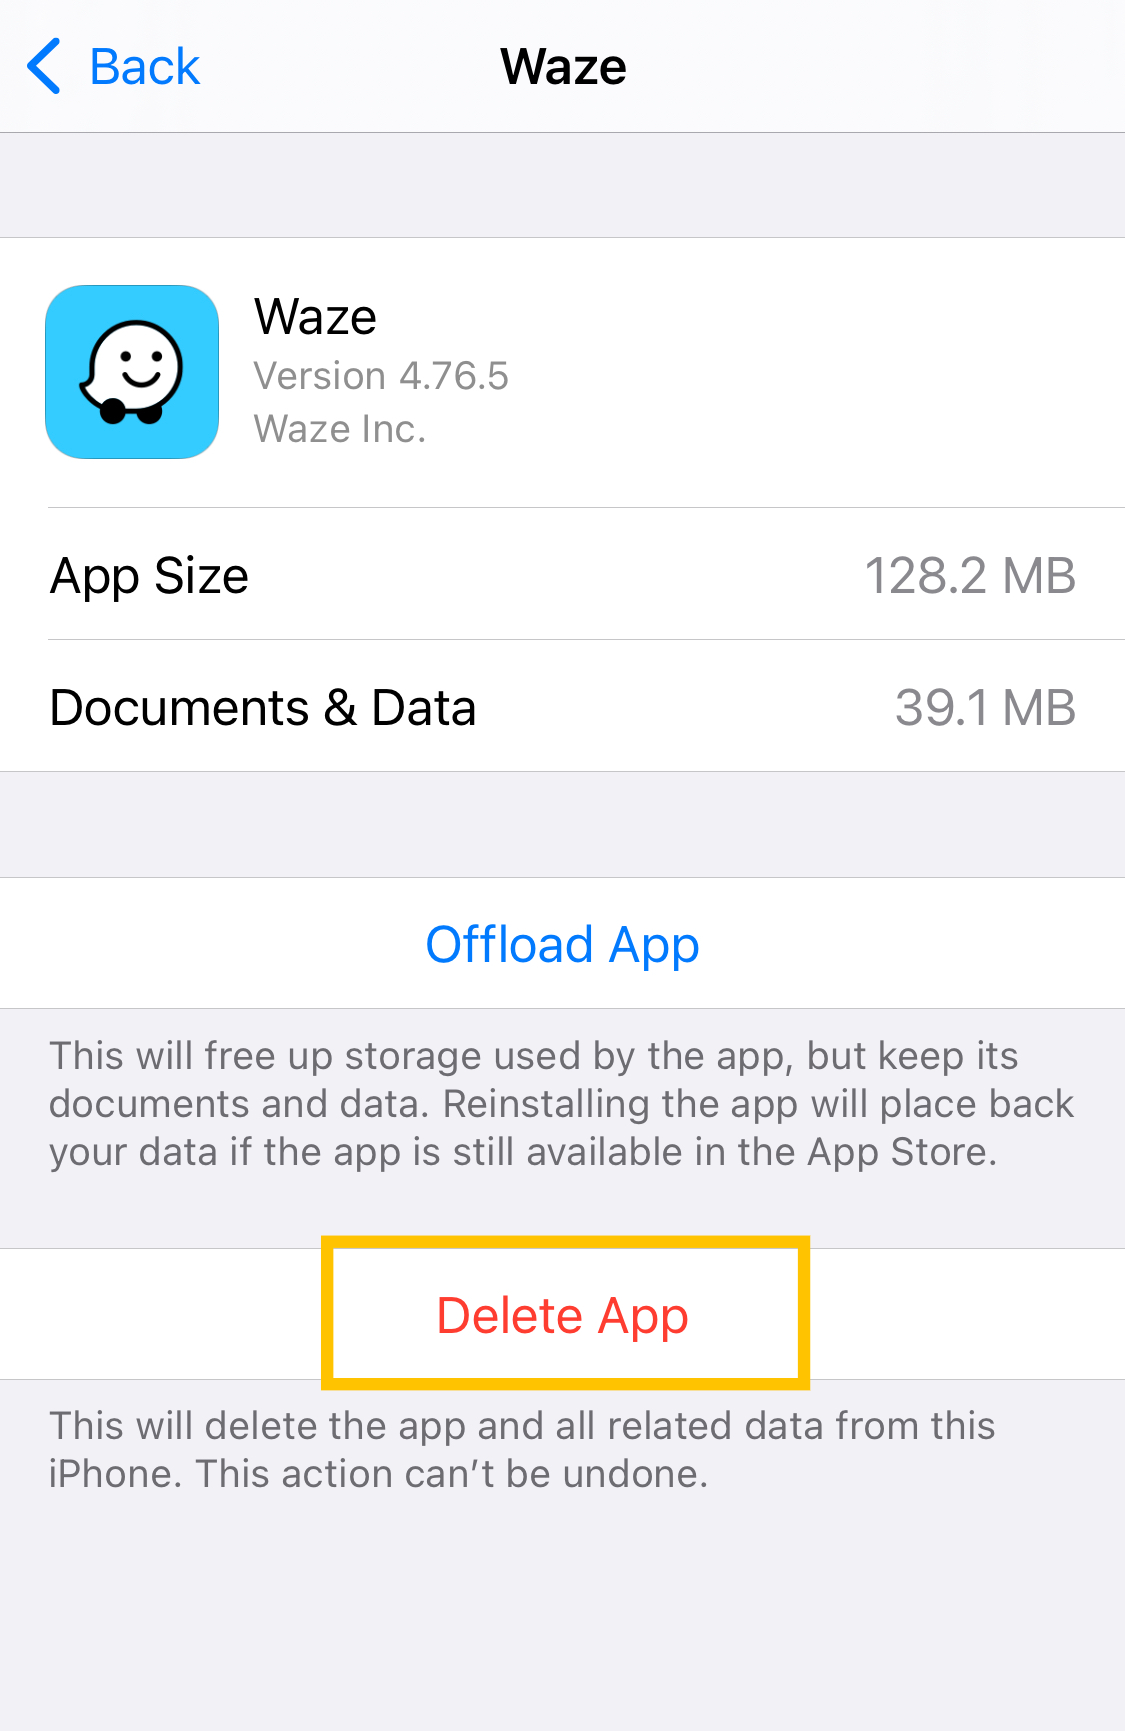
iOS users can easily uninstall the Waze app by long-pressing the app and tapping Delete App in the pop-up. Or, you can follow these steps:
- Open the Settings on your iPhone and tap on General.
- Tap on iPhone Storage.
- Search for the Waze app or scroll through the list and tap on it there.
- Tap Delete App and confirm.

Upon completing these steps, you can go to the App Store and reinstall the app.
Clear Waze Data on Android
Android users have a simple Clear Data option in the Settings. Here’s how to find it:
- Open the Settings on your Android device and tap on Apps.
- Scroll to the Waze app and tap on it. Then, tap on Storage.
- Tap on Clear Data.

Now, you can relaunch the Waze app from your device’s app drawer and sign in to your account.
Why You Need to Clear the Cache
Now that you know how to clear the data and cache for each operating system let’s take a closer look at when you might need to do this. Here are a few issues you could be experiencing with your Waze app where clearing cache, as well as data, can be helpful:
- Wireless connection issues.
- Waze Bluetooth issues.
- When the “No GPS-Showing Approximate Location” message appears.
- Issues with the sound on the Waze app.
- Traffic reports are not showing on Waze.

Clearing the cache can fix a plethora of issues and it’s a great first step since it doesn’t wipe anything useful.
Frequently Asked Questions
We’ve included some more answers to your questions about managing Waze data in this section.
How do I clear my navigation history on Waze?
If you’re trying to remove your search or navigation history, there’s no need to clear the cache, data, or uninstall the app. You can clear your navigation history from within the Waze app. Here’s how:
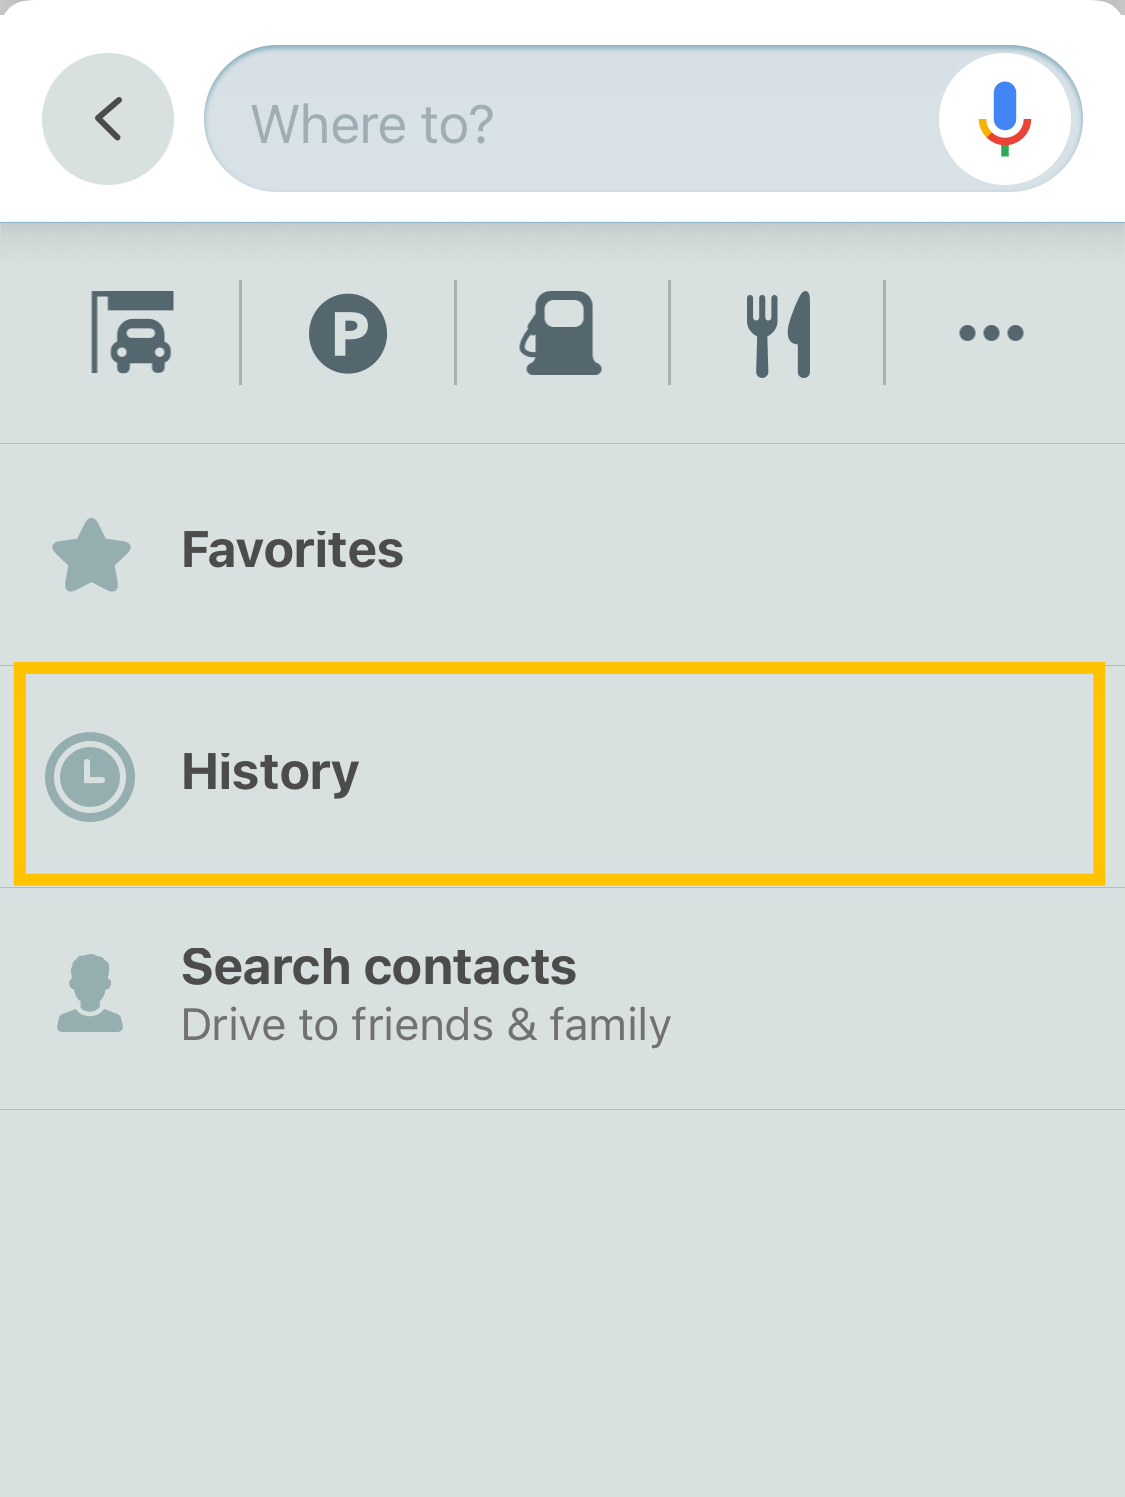
1. Open the Waze App and tap on Where to?
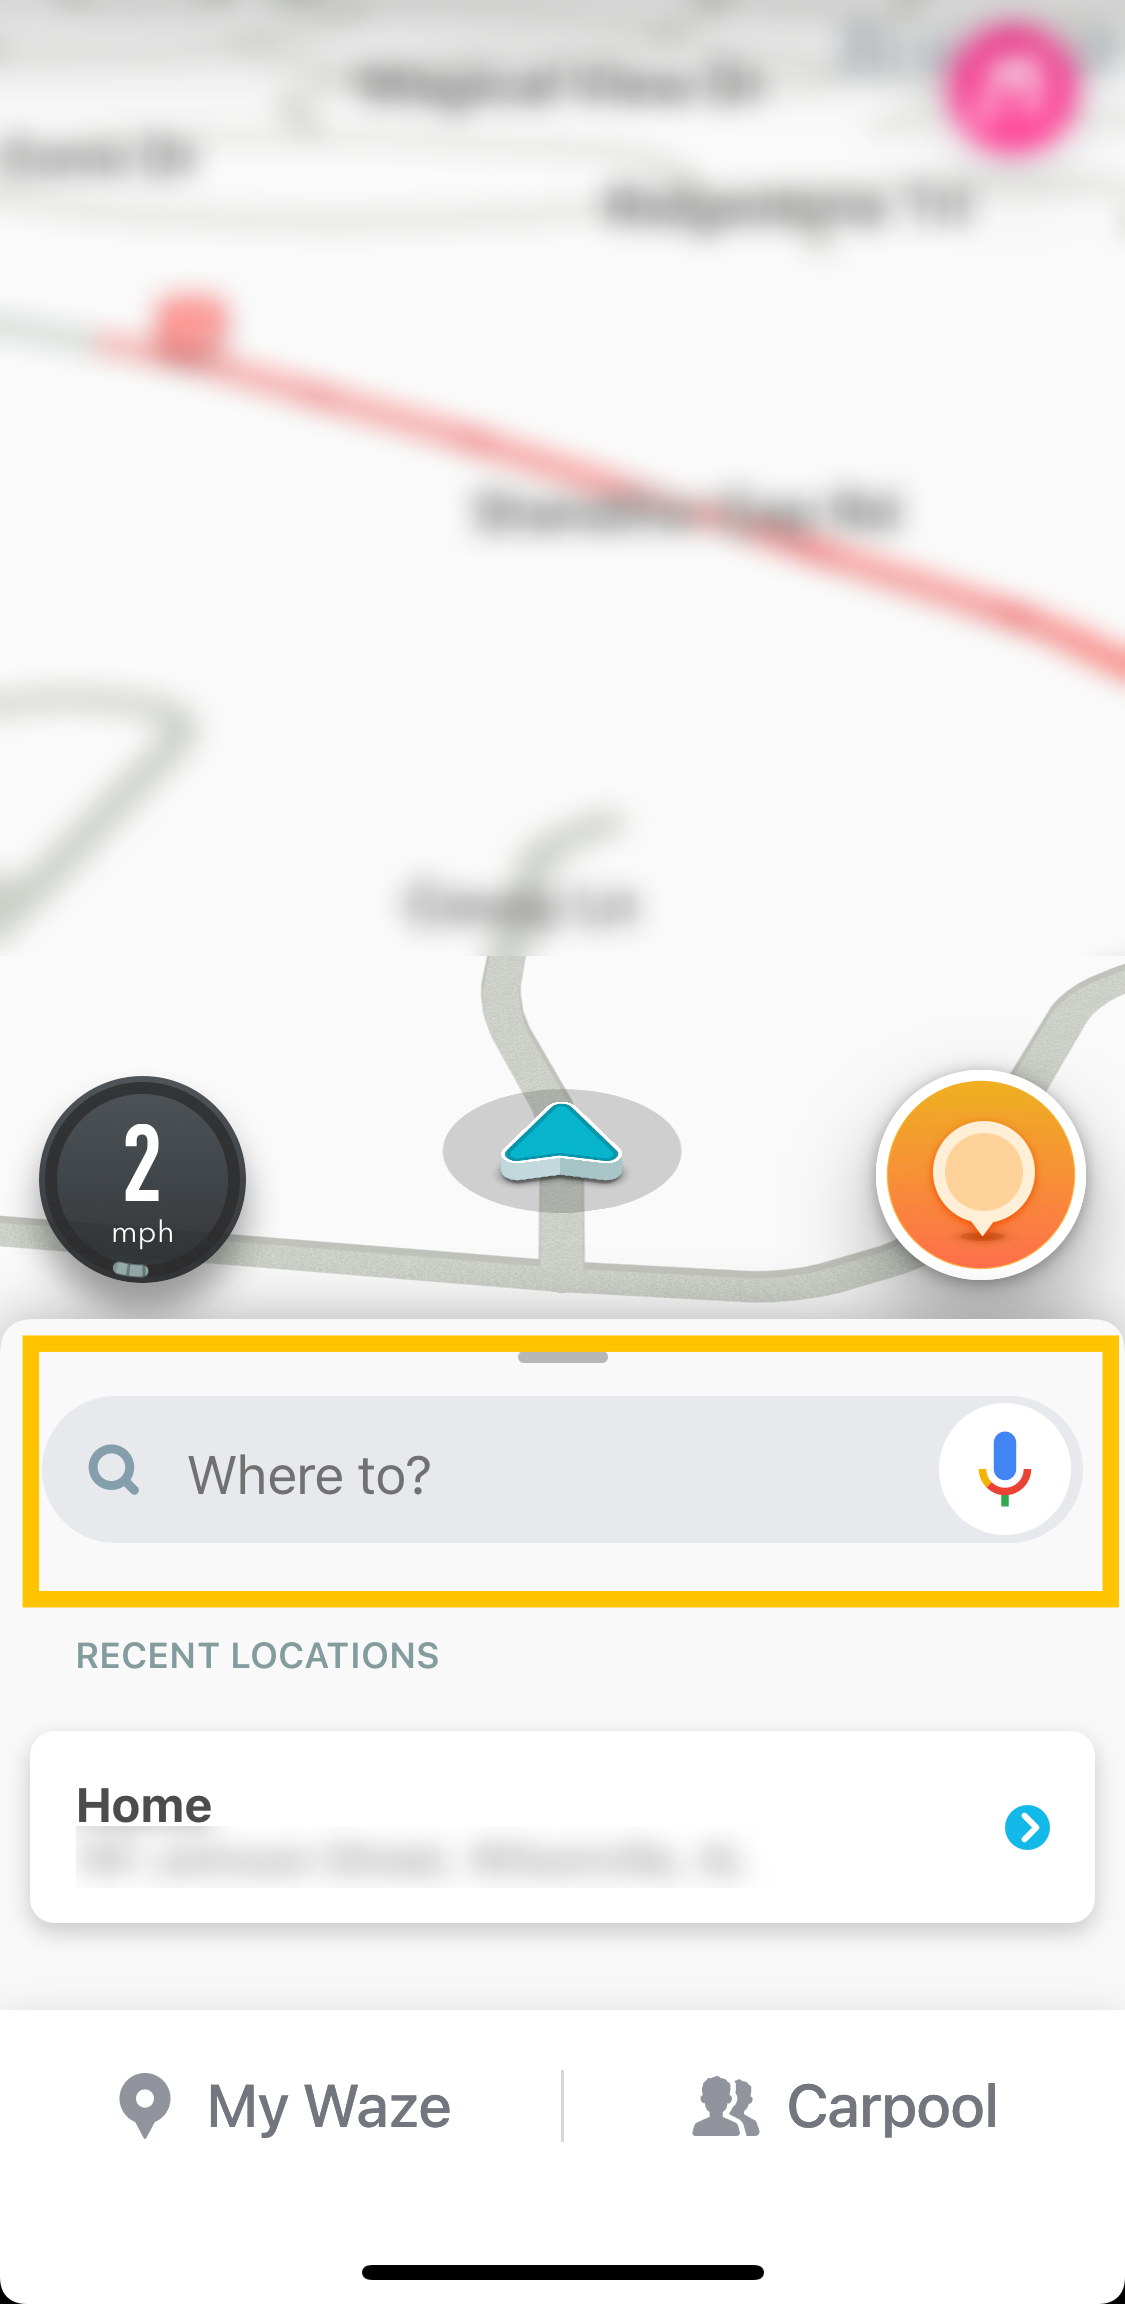
2. Tap on History.
3. Tap on the three dots to the right of the location you’d like to delete.
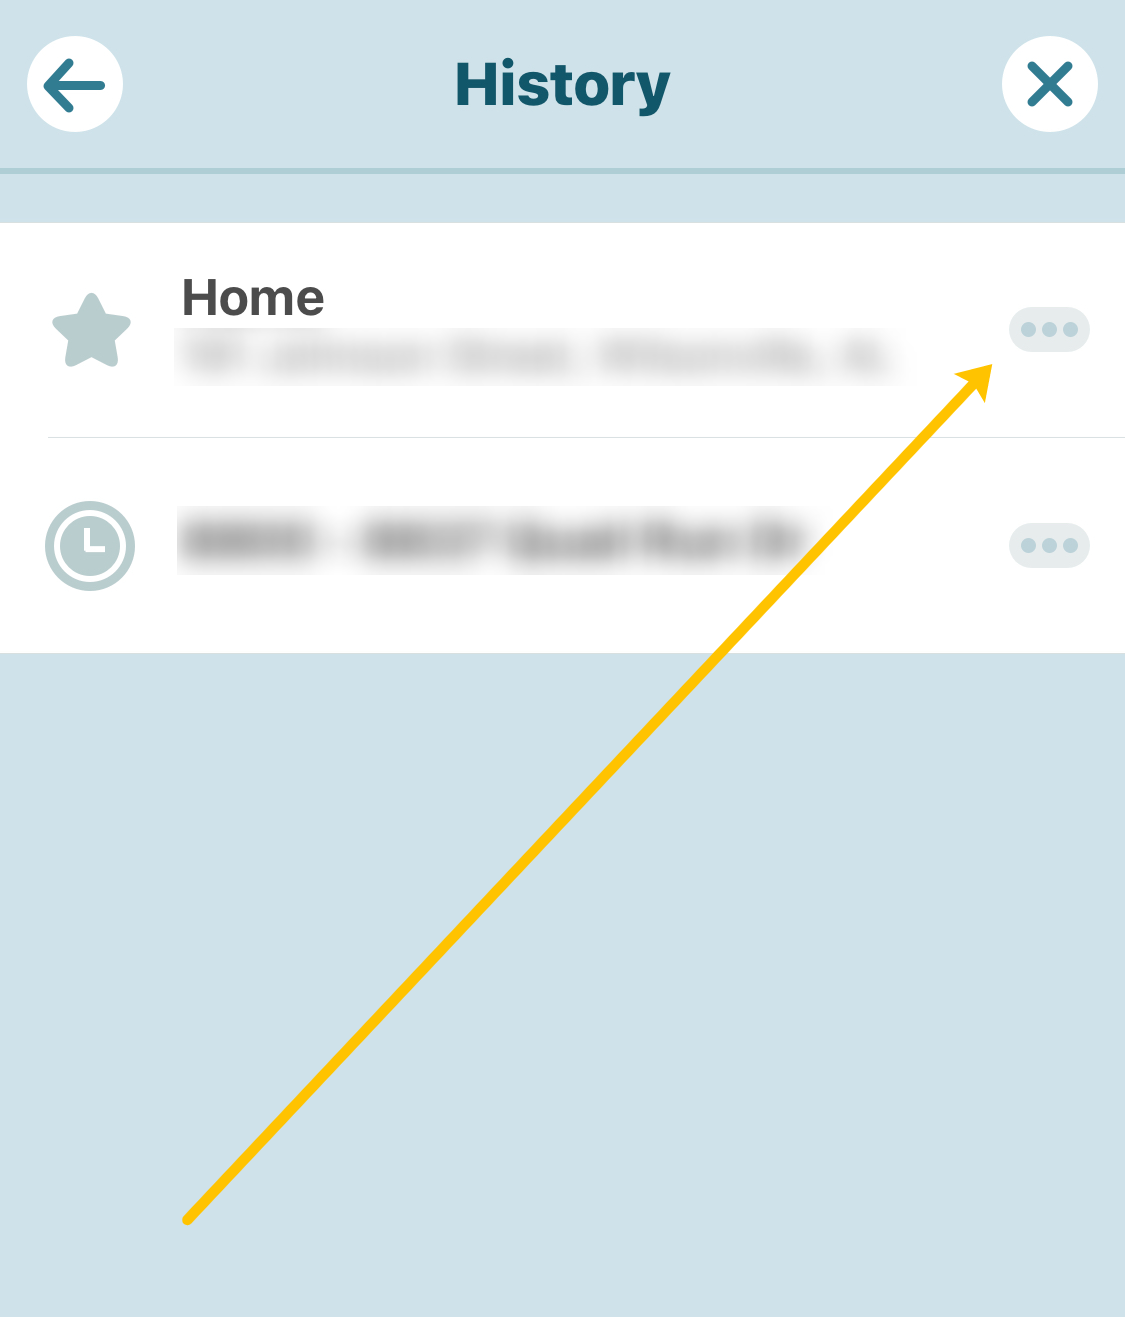
4. Tap the trash can icon that says Remove.

Do keep in mind you’ll need to follow these steps for each location.
Can I delete my Waze account?
Yes! If you want to start over completely you can delete your Waze account. You can delete your account by tapping on the Settings cog in Waze and tapping on Account and login. Scroll down the page and tap on the Delete account option. Then, follow the steps that appear on the screen.
Keep the Waze App Running Smoothly
To get the most out of any app, you need to ensure that it’s working correctly. This includes always having the latest update installed and occasionally clearing cache and data. The same applies to the Waze app. It’s better not to wait for a problem to arise before you act on it.
How often do you clear cache and data on Waze? Let us know in the comments section below.
Disclaimer: Some pages on this site may include an affiliate link. This does not effect our editorial in any way.