Device Links
If you’ve been working on Miro, you might be wondering how to upload an image. Fortunately, this is a relatively straightforward process. Miro allows you to upload different files to your workspace, letting you work on anything you upload with Miro’s tools.
In this article, we’ll cover all the ways you can upload an image on Miro.
How to Add an Image in Miro on a PC
There are quite a few ways to upload images in Miro using your PC. What’s more, each one is quick and simple to do. Here’s the full list of methods for uploading an image on Miro.
Drag and Drop
- Open Miro in your browser and click the “Plus” Icon to open a new board.

- Find the image you want to upload, then drag it into your Miro workspace.

Uploading an Image From Your PC
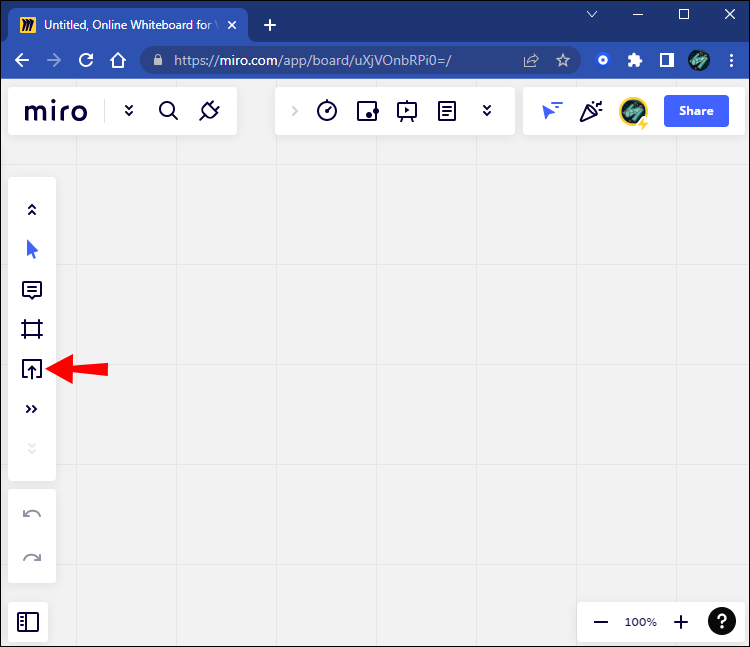
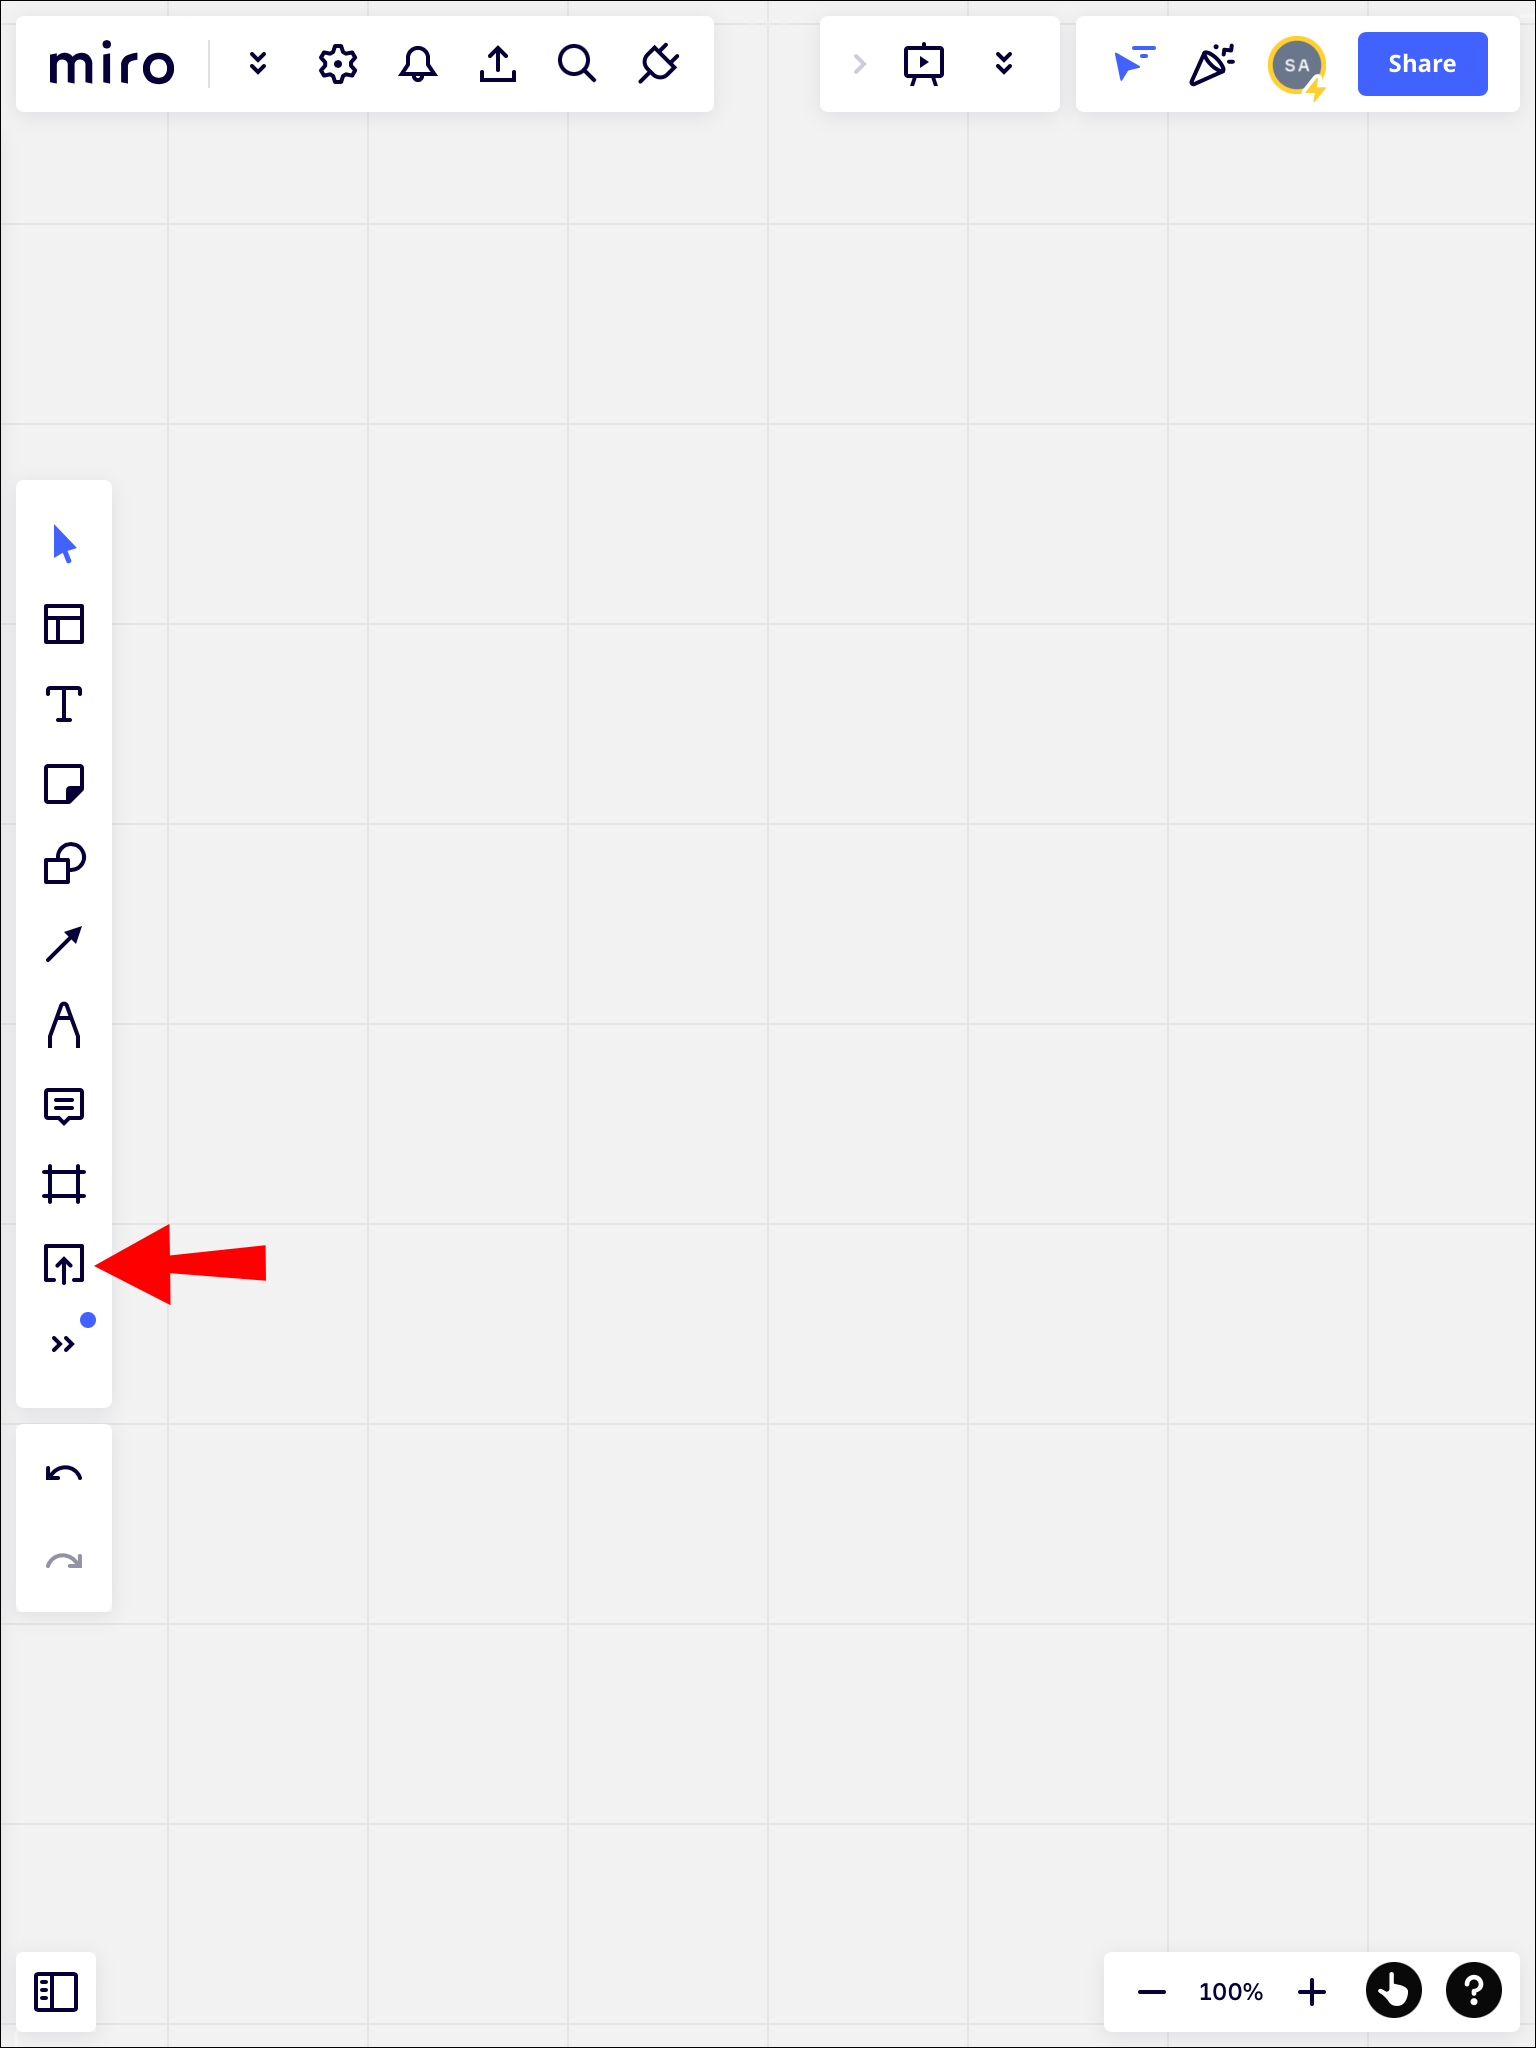
- On the creation toolbar, find the “Upload” button. If it doesn’t appear, click on the “>>” symbol, then drag “Upload” onto your toolbar.
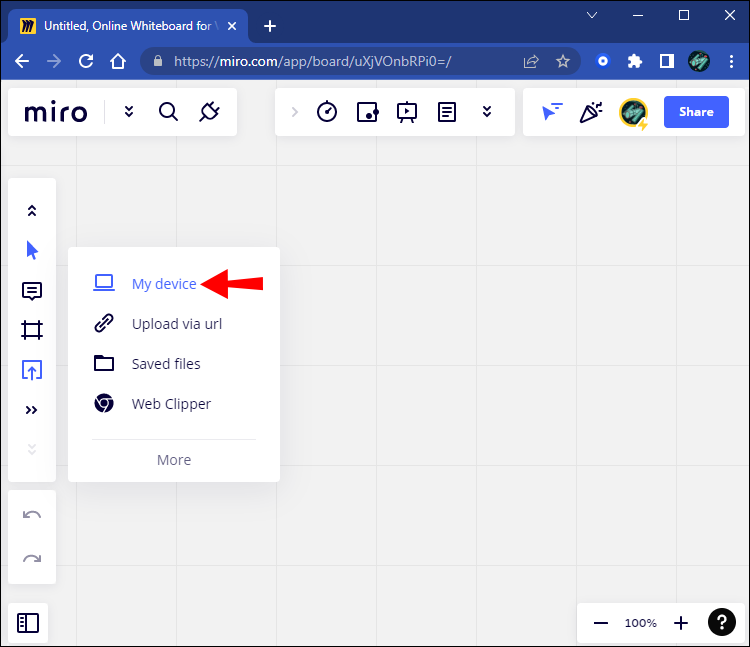
- After clicking on the Upload button, select “My Device.”
- A pop-up menu will appear. Select the image you want uploaded.
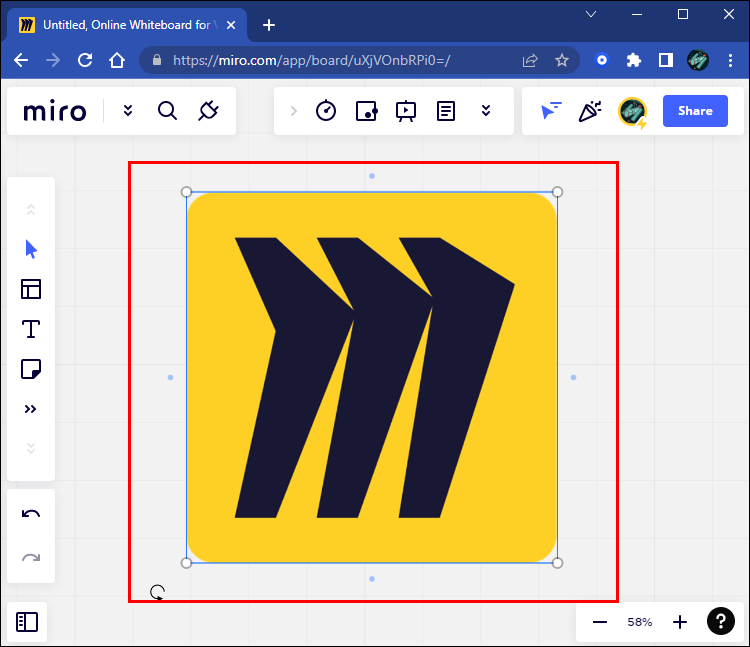
- Your image will appear on your workspace.

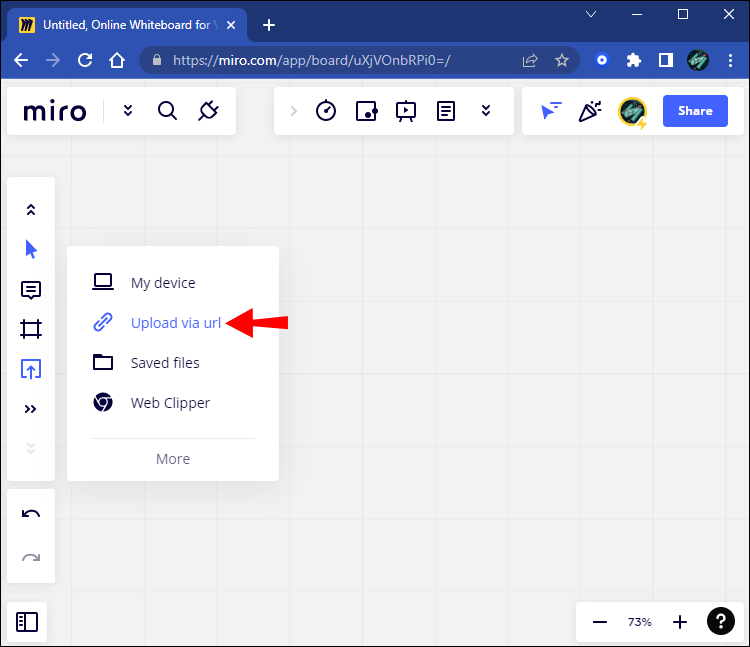
Uploading an Image With a URL
- Open the “Upload” menu on your side toolbar.
- Select “Upload via URL.”
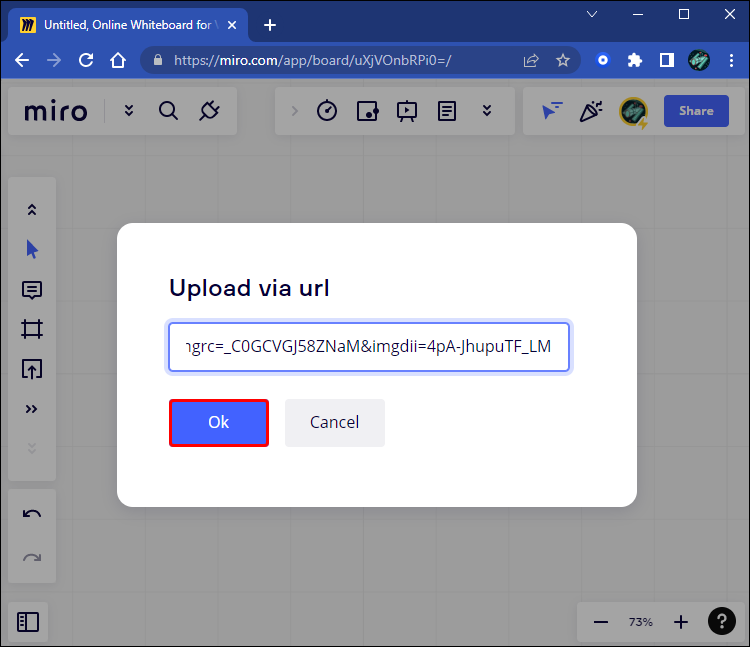
- Enter the full URL of the image you want.
- Click the “OK” button.
- Your image will appear on your workspace.

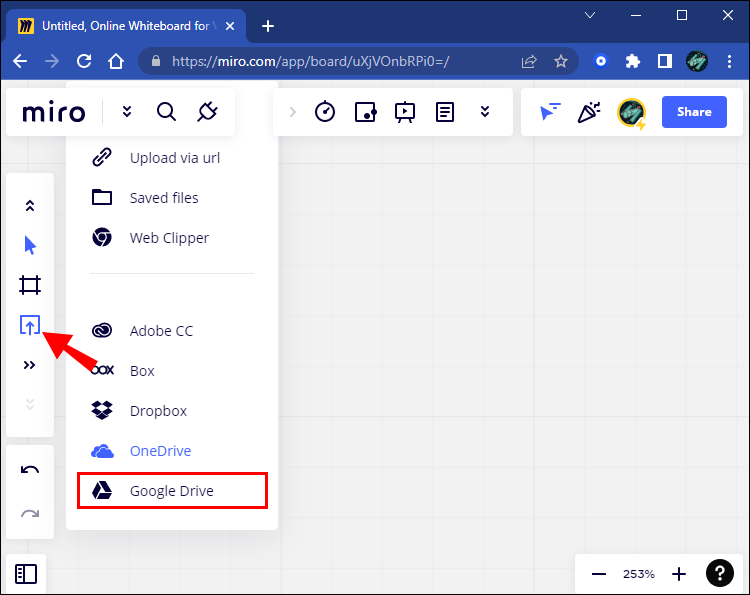
Uploading From a Cloud Service
Before you upload from services like Google Drive or Dropbox, you’ll need to install the plug-in for the service you want to use. To do so, follow these steps:
- On your toolbar, click the “>>” icon to access the search bar.
- Type in the cloud service you want to use.
- Click the “Add” button.
- Go to the “Upload” menu and select the cloud service.


How to Add an Image in Miro on an iPad
The Miro mobile app doesn’t offer as many ways to upload as it does on PC. In fact, there are only one way to upload on Miro’s mobile app. It is directly through the app itself.
Here’s how to upload images on an iPad using this method:
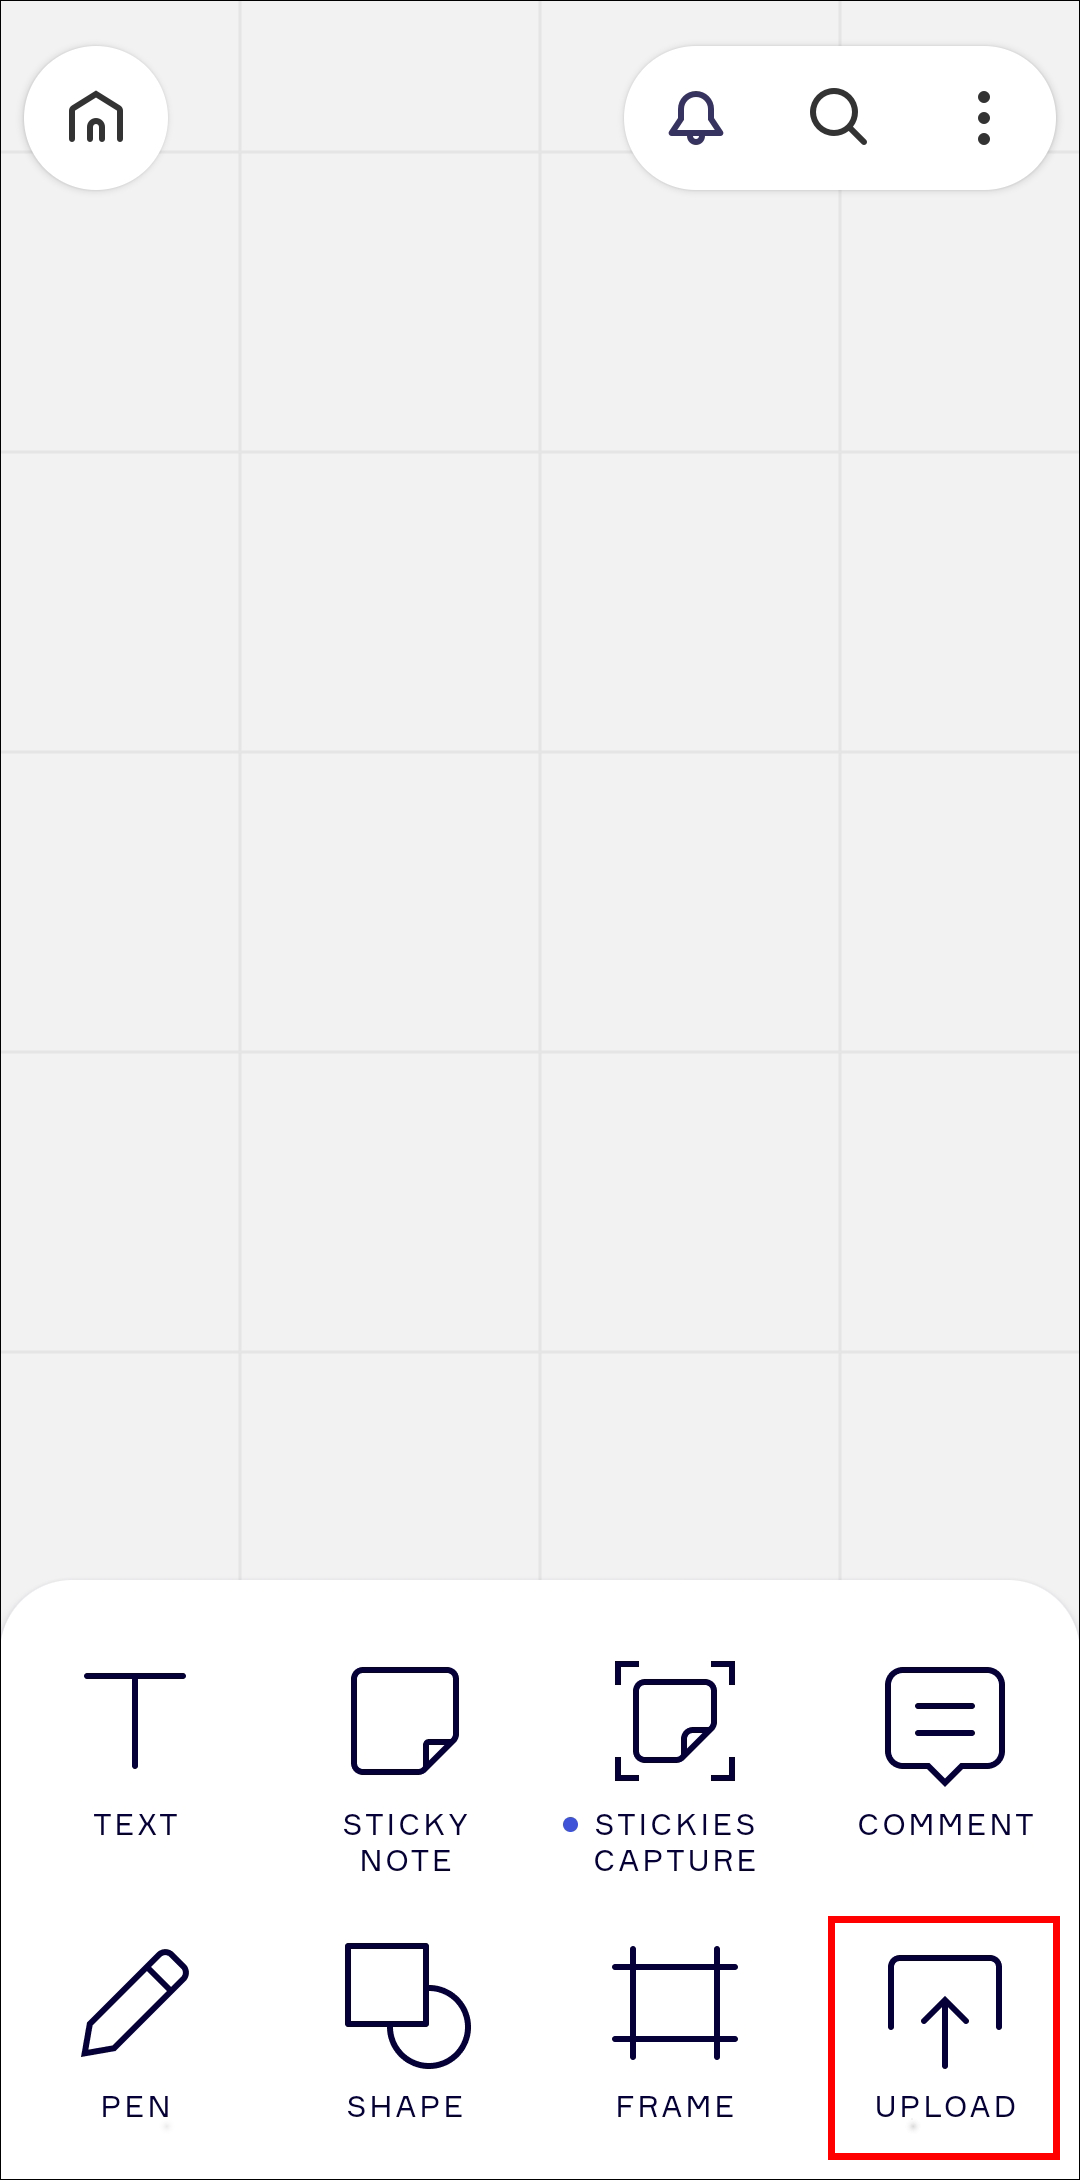
- Open the Miro app on your iPad.
- In the bottom left corner, tap the “Upload” icon. A menu will appear.
- Select “My Device.”
- You will be given the option to take a new photo, upload from photo library, or choose files. Select “Photo library.”
- Select the image and press “Add.”
- The image will now be automatically uploaded in your workspace.


How to Add an Image in Miro on an iPhone
Unlike the iPad, an iPhone doesn’t have access to multitasking mode. You are only able to upload directly from the mobile app. If you want to upload an image from your cloud service app, download the file to your phone first.
How to Add an Image in Miro on an Android Device
Like the iPhone, you can only upload images directly from your Android device using the mobile app. Here’s how to upload an image with the mobile app:
- In the bottom right corner, tap the “+” icon. A menu will appear.
- Select “upload”. You will be given the option to take a new photo, choose one from your gallery, or upload one you’ve copied on your clipboard.
- Your selected images will appear on your workspace.

Saving Your Uploaded Images to Your Library On Your PC
Once you’ve uploaded an image to Miro, you can save it to your library. This allows you to access the image without having to upload it to another workspace.
To save uploaded images to your Miro library, follow these steps:
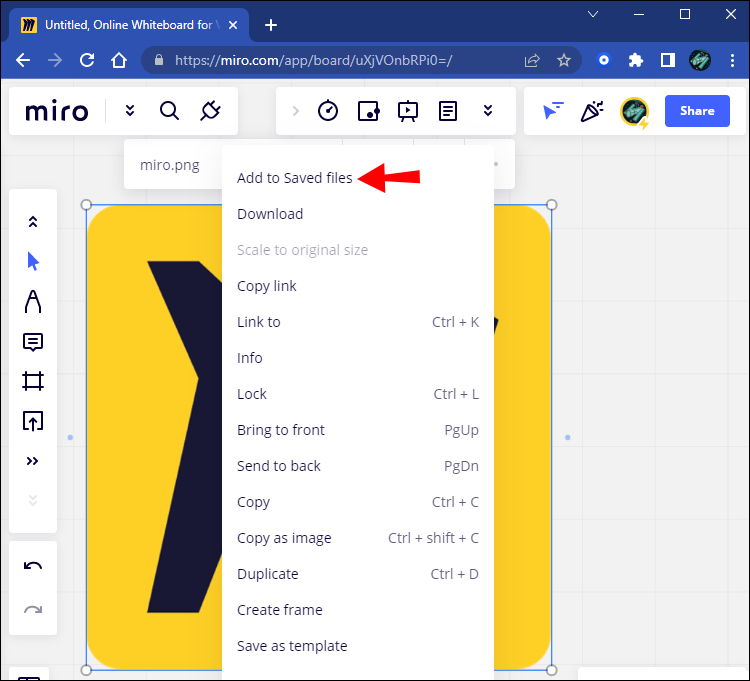
- Click on your uploaded image to select it.
- On the pop-up menu, select the “…” icon to open a dropdown menu.
- Select “Add to Saved Files” at the top of the menu.
- To access your saved files, go to the “Upload” menu and select “Saved Files.” You can access your saved image here.


If the option to save the image is greyed out or doesn’t appear, then you aren’t granted the necessary rights to perform the desired action. The reason being, you aren’t a member of the Miro board’s account. To gain access, ask the owner of the account to grant you rights.
Uploading Ease With Miro
Once you upload your images, you’ll be able to edit them using Miro’s workspace tools. Ultimately, uploading images is simple and stress-free, with multiple methods to perform the task. Even though mobile app users don’t have access to the same number of options, it does give you the option to upload.
Have you ever uploaded an image to Figma? Did you use the methods featured in this article? Let us know in the comments section below.
Disclaimer: Some pages on this site may include an affiliate link. This does not effect our editorial in any way.