Overlays are a great way to personalize your content. Many streamers use them to visually stimulate their viewers during intermissions or even before they start streaming. After all, having a colorful holding screen beats staring at a bland background.
OBS Studio lets you add a wide range of overlays, from still images to animated gifs. You can use a template or even design your own with the help of photo editing software and online tools. In this tutorial, we’ll explain how to add overlays to OBS and tell you where to get the best free versions available.
How to Add Overlay on OBS?
Typically, an overlay is a graphic used to engage the viewer while you’re setting up or taking a short break. It can also work as a holding screen that contains bits of information like “Starting Soon” or “Be Right Back.” Some Twitch streamers also use overlays to display data like the number of subscribers or viewer donations.
Most overlays are made with images or text files. However, there are some more advanced options like animated gifs or custom QR codes. You can play around with different types of overlays since you’re not limited to just one. It’s a fun way to stand out from the crowd and establish a recognizable aesthetic.
Thanks to the streamlined interface, adding overlays to OBS Studio is rather straightforward. You can add either professionally designed templates or custom-made graphics, depending on your taste. Let’s start with the steps to adding an image overlay:
- Launch OBS Studio and scroll down to the Scenes box. Click on the tiny + button in the bottom-left corner to create a new scene. Add a title in the small pop-up window and press OK.

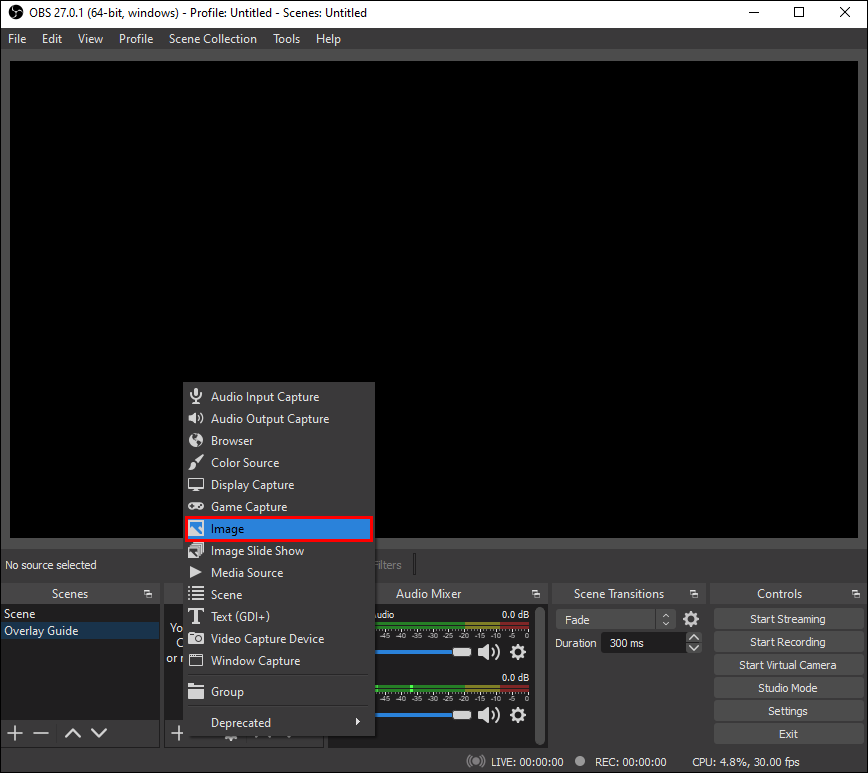
- Next, click on the + icon at the bottom of the Sources box. A pop-up menu will appear. Select Image from the list of options.

- A small pop-up box will appear. First, enter the title of the stream overlay in the corresponding field. Then, click OK.
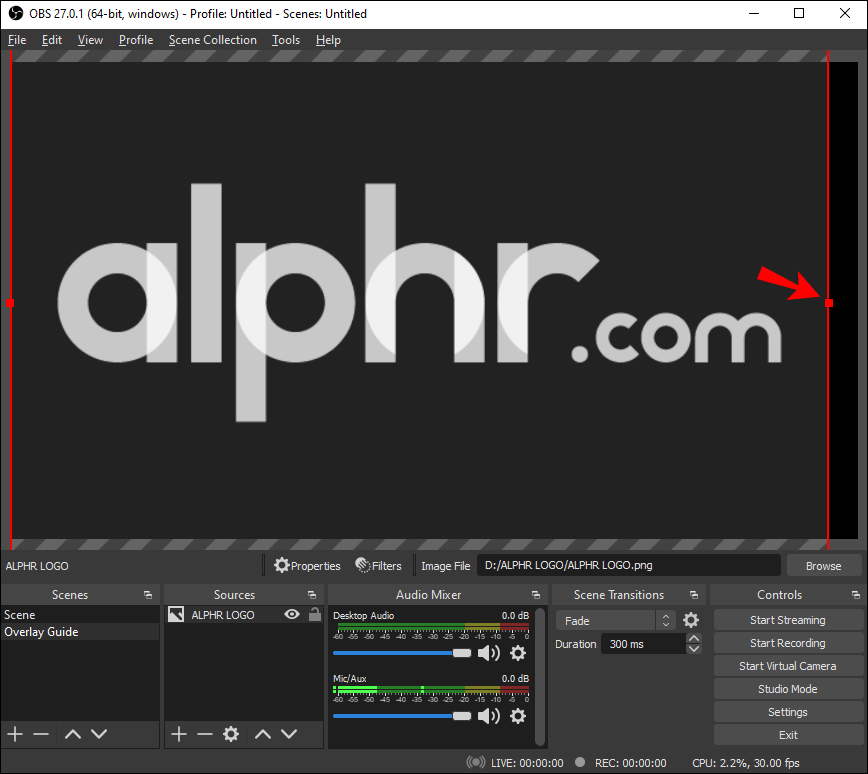
- In the new window, click the Browse button on the right-hand side to find the pre-selected image. You’ll see a preview of the stream overlay.
- If the image doesn’t fit the canvas, you can resize it with Alt Cropping. First, hover the cursor over the tiny red dots that outline the overlay. Next, left-click and press Alt (or Command for Mac users). Finally, drag the red dots to stretch the image.


Next, if you want to add a text overlay, there are two ways you can do it. Here’s the first method:
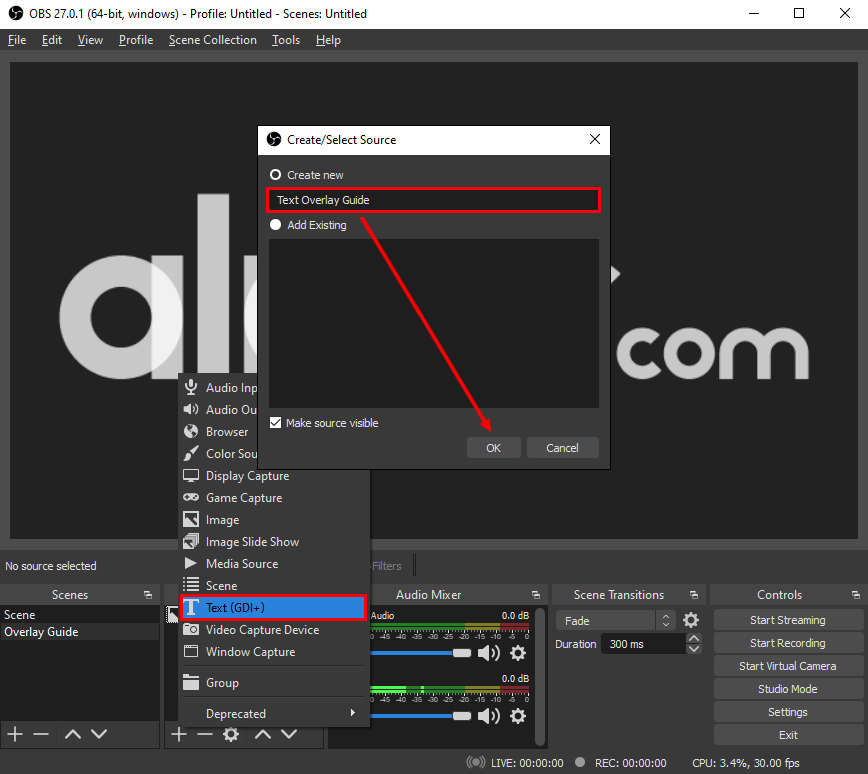
- Scroll down to the Sources box. Then, click on the little + icon in the bottom-left corner of the box.
- From the pop-up menu, select Text. Next, add a title to the overlay and hit OK.
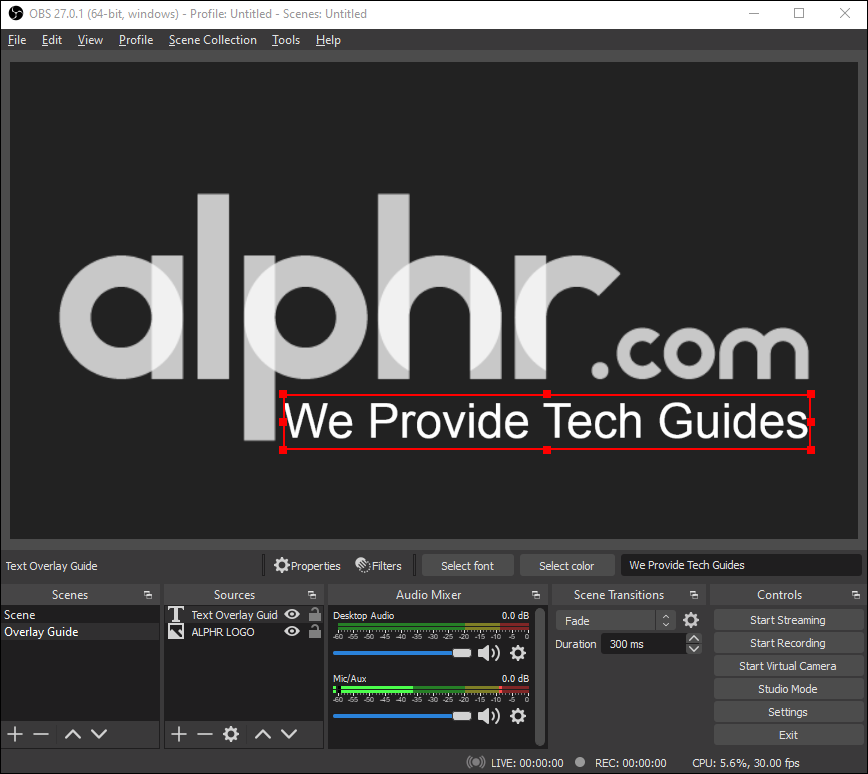
- A new window will appear. Write what you want the overlay to say in the box marked Text.
- Once you’re done, click OK.


The second method is to use a separate photo editing program to design a text file. You can then save it as a .png file and add it to OBS as an image by following the steps from the previous paragraph.
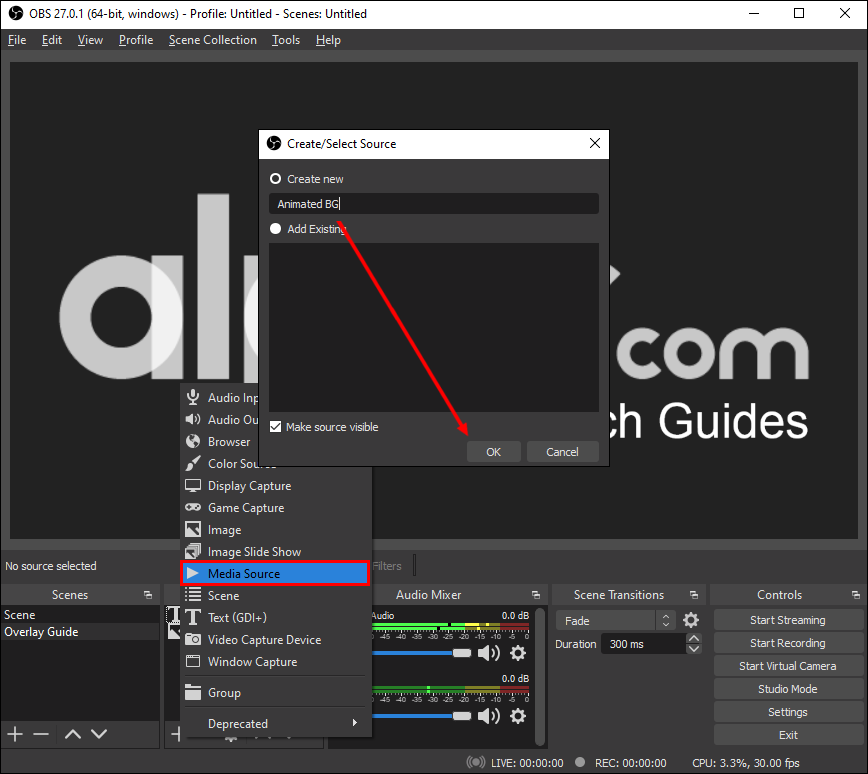
Finally, if you want to zhuzh it up, you can add gifs or animated logos to your stream. Here’s how to add video files as overlays on OBS:
- Scroll to the Sources box and open the pop-up menu by clicking on the + button.
- Select Media Source from the list of options. Enter the source title in the small pop-up box and hit OK.
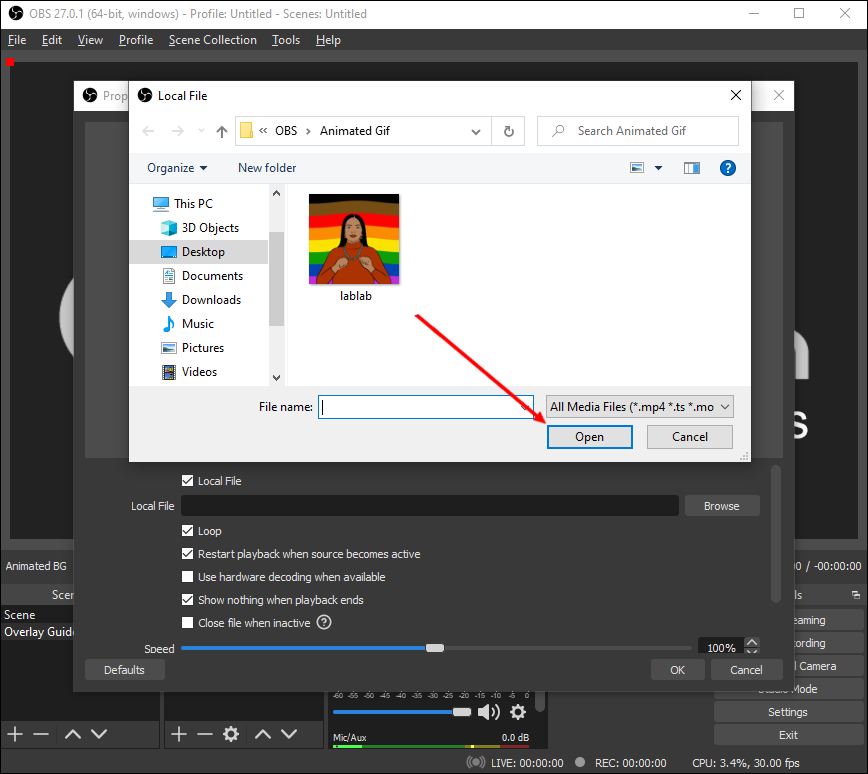
- A new window will appear. Click the Browse button on the right-hand side and locate the animated file on your computer. Select it with your cursor and hit Open.
- Under the preview window, make sure to check the box next to Loop. Otherwise, the overlay will disappear after the animation is completed.
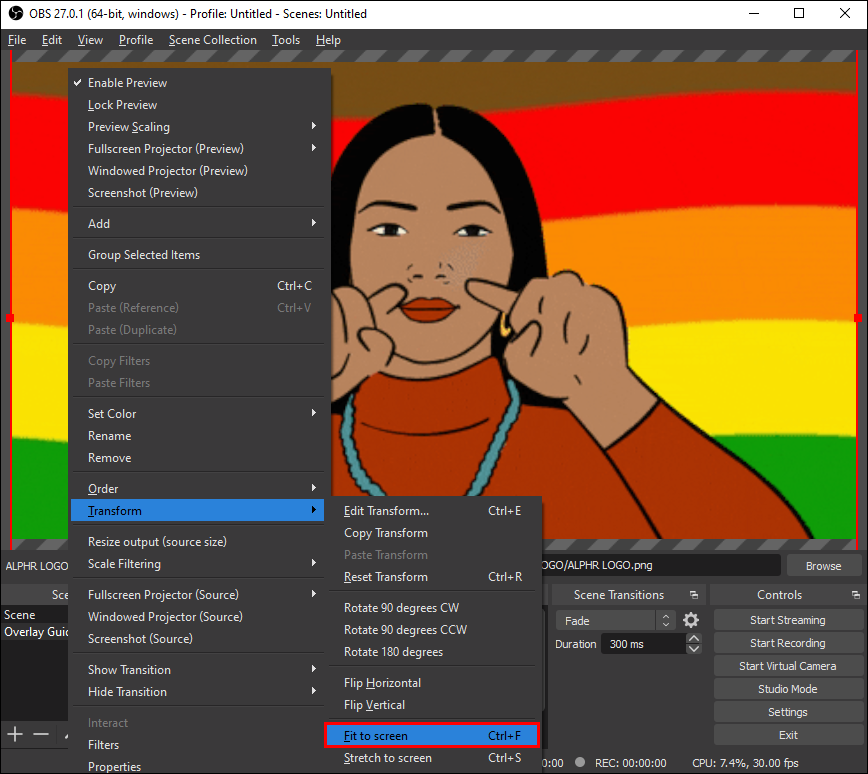
- Once you add the overlay, right-click on it to access a drop-down panel. From the list of options, select Transform and then Fit to Screen.

Additional FAQs
Why Use a Stream Overlay?
As mentioned, overlays are a great way to create a recognizable brand. Since there are so many types of graphics you can use, the design possibilities are endless. Furthermore, you’ll spare your viewers from staring at a white screen while you prep, reducing the number of sign-outs.
You can also use overlays to boost audience engagement. For example, many Twitch streamers add webcam overlays to their streams so that the viewers can see their spontaneous reactions. As a result, they’re more likely to interact with the content by sending emotes or commenting in group chats.
Finally, adding overlays is an effective way to convey real-time information to your viewers. If there’s a technical issue or you just desperately need a bathroom break, adding a “BRB” holding screen can help smooth things over.
Where Can I Get Free OBS Overlays?
There’s no shortage of online sources for top-notch free overlays. However, while it’s fun to create a unique aesthetic, it can also be overwhelming, especially for novice streamers. So it’s not a bad idea to look into some professionally designed templates just to get started. Here are some websites you can look into:
Some of the websites also include free tools that can help you create custom graphics.
However, if you’re not settling for basic designs, then premium overlays are the way to go. Sure, you’ll have to fork out some cash, but the templates are reasonably priced in most cases. In addition, having an intricate overlay in your stream might help you look more professional. So, here are a couple of websites where you can find top-notch designs:
· Own3DTv
Own3DTV is one of the more popular providers. Apart from paid overlay packages, you can also dig up some free templates. All you have to do is go to Own3D Pro and register an account. There’s a free plan available that lets you add the plugin to your OBS app.
How Do I Make My Own Stream Overlay?
Since overlays are mostly brand-related features, it makes sense to try and create one yourself. Then, you can get creative and come up with a design that’ll make you stand out from the ocean of other streamers.
If you’re skilled with Photoshop or other photo editing software, you can use it to design custom-made overlays for your stream. However, while you have complete creative freedom, there are a few things to keep in mind:
· Try not to add too much. Overlays should complement the stream, not steal the spotlight.
· Make sure the graphics are legible. There’s no point in adding overlays if the viewers can’t tell what’s depicted.
· Try to come up with a clear focal point. You don’t want your viewers to get distracted. Use the overlays to emphasize the most important aspect of the stream, i.e., the gameplay.
· Make sure the theme is cohesive. Too many clashing graphics can be visually unappealing. It’s better to have unified aesthetics, for example, a recognizable color palette.
· Don’t forget to include relevant information. Adding things like links to social media and channel goals can be a great call to action.
Of course, you don’t have to be a Photoshop wiz to create a personalized overlay. There’s a wide range of online tools you can use instead. We recommend Placeit, a free online generator for template design. It’s pretty easy to use, so you don’t have to have any experience with graphic design. Just follow these steps:
1. Open your browser and go to placeit.net.
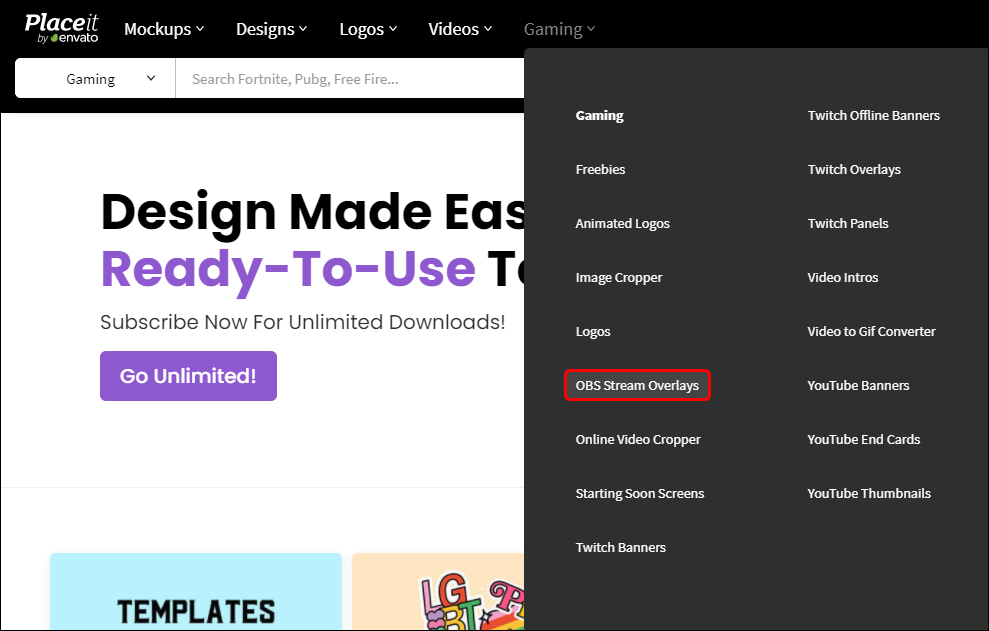
2. From the menu bar at the top of the page, click on the Gaming tab.
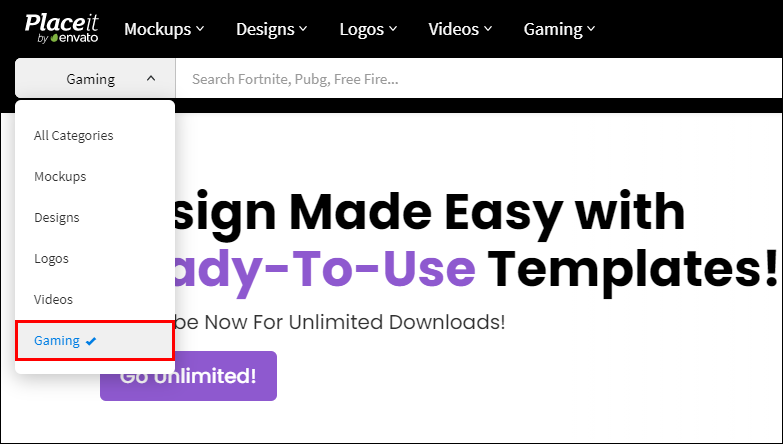
3. Click on the OBS Overlays tab in the toolbar below.
4. Scroll through the selection of templates. When you find the one you like, highlight it with your cursor.

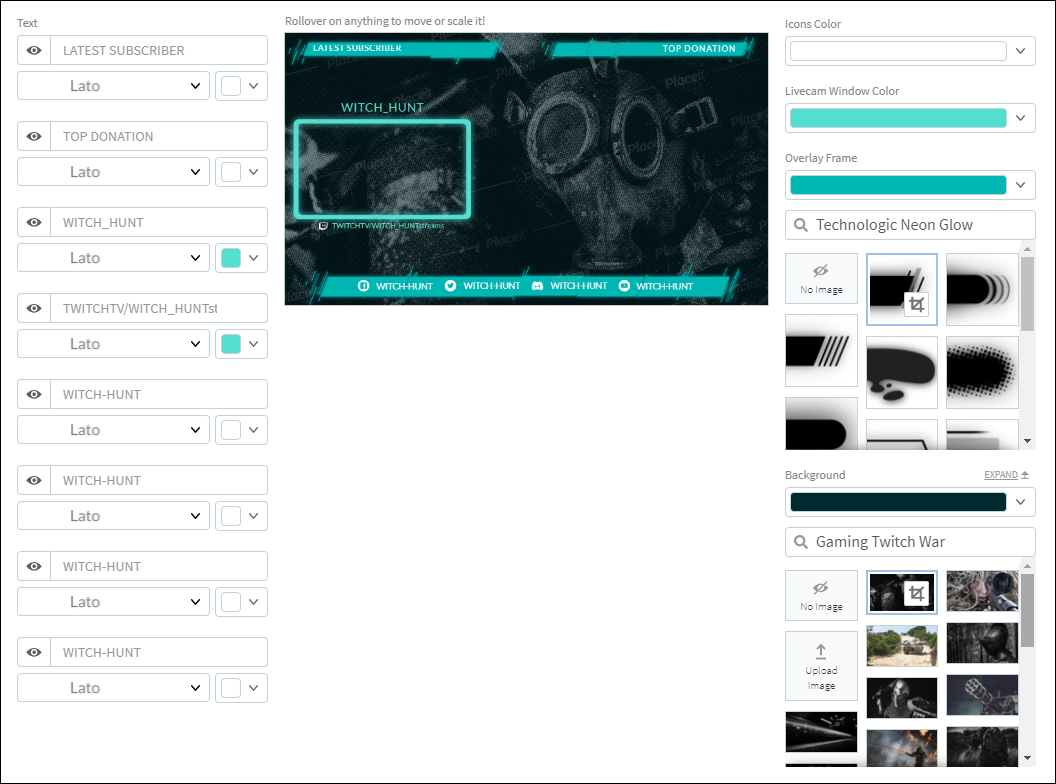
5. You’ll be redirected to a new window. There’s a wide range of free customizing tools in the panel on the right-hand side. For example, you can set the background, icon color, and webcam frame color to your liking.
For the background, you can either choose an existing image or a solid color.
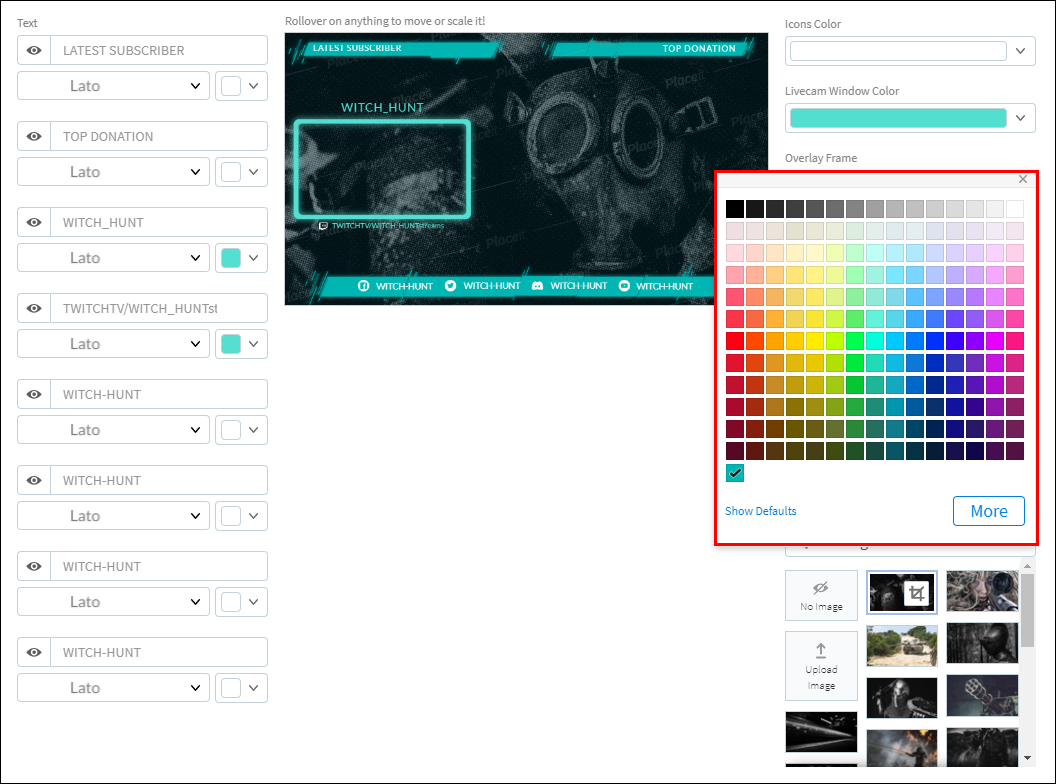
6. To choose a color palette, scroll to the bottom of the page. Then, in the lower-left corner, click on the Overlay Frame dialog box. A pop-up panel will appear with the color selection.
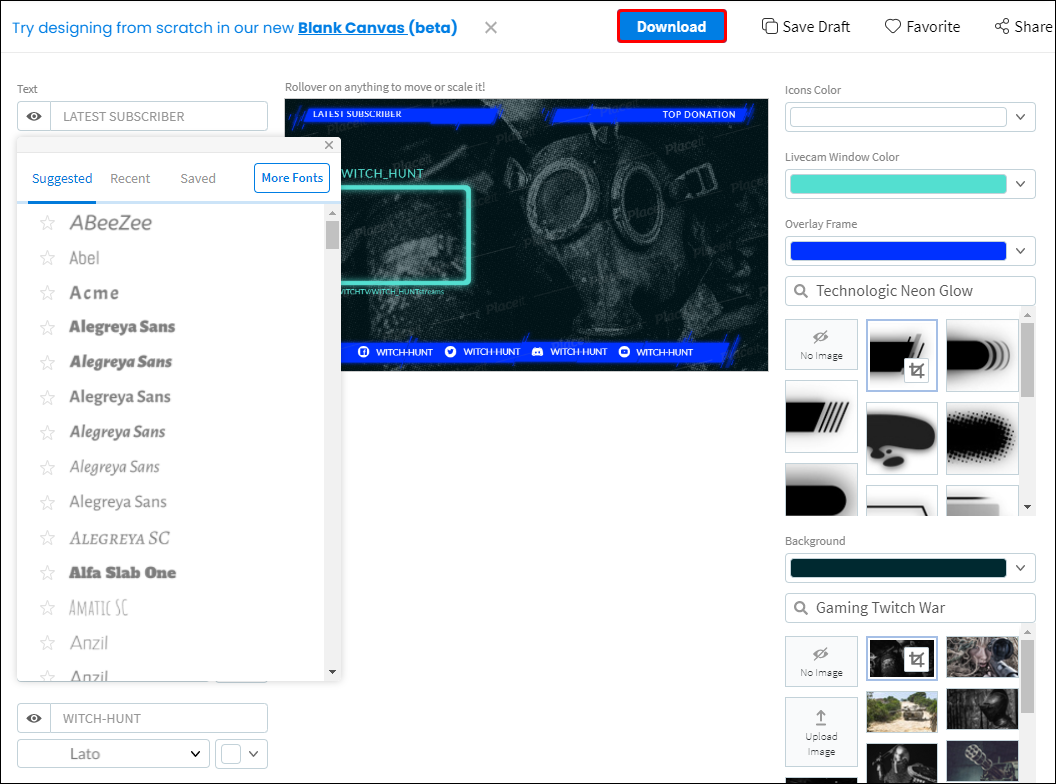
7. You can customize the text in the panel on the left-hand side. In addition, there’s a wide range of fonts available for each section of the overlay.

8. Use drag-and-drop to change the placement of each element.
9. Once you’re done, click the blue Download button at the top of the page.
Add Layers of Fun to Your Content
Overlays can make a world of difference when it comes to streaming. Not only do they solidify your brand, but they also serve as means of interacting with your viewers. You can share valuable pieces of information in real time and avoid possible miscommunication.
There’s a wide range of options for graphics, and you can add multiple overlays to a single stream session. Moreover, OBS Studio is incredibly user-friendly, allowing you to incorporate images, text, and even video files with ease. With so many choices, you can add layers of fun to your content and maybe attract a larger audience.
Do you create your overlays, or do you prefer using templates? What’s your experience with OBS Studio? Comment below and tell us if you have any tips for a great overlay design.
Disclaimer: Some pages on this site may include an affiliate link. This does not effect our editorial in any way.


