OBS Studio makes for a powerful screen and broadcasting tool. Apart from live streaming content, the open-source software can also seamlessly record computer screens and pick up audio. The user-friendly dashboard comes with a slew of customizing features for high-quality videos.
This tutorial will show you how to record both your screen and audio with OBS Studio and save the file on your hard drive. Since the software is compatible with multiple operating systems, we included step-by-step instructions for each one. Keep reading to learn more about the fantastic free tool and its various screen recording settings.
How to Record the Screen With OBS
Since it’s open-source software, OBS Studio is entirely free for download. As mentioned, the program is compatible with different operating systems, including Windows, Linux, and Mac. It’s an advanced tool that offers a wide range of customizing options. Also, OBS automatically saves the recorded files in a folder of your choice.
The only major downside is that the software doesn’t work with all devices. If you want to use OBS Studio for screen recording, you’re pretty much tied to your computer. As of now, there’s no mobile version available for either iOS or Android devices. However, there’s a way to bypass these limitations, but more on that later.
Below, you’ll find detailed instructions on how to record your computer screen with Windows 10, Linux, and Mac, so make sure to keep reading.
Recording the Screen with OBS on Windows 10
If your PC runs on Windows 8 (including 8.1) or 10, you’re good to go. You can download the appropriate software version from the official website. You’ll be asked to state whether you’ll be using OBS for broadcasting or screen recording during the installation process, so keep that in mind.
Once you’ve downloaded it to your computer, follow these steps for screen recording:
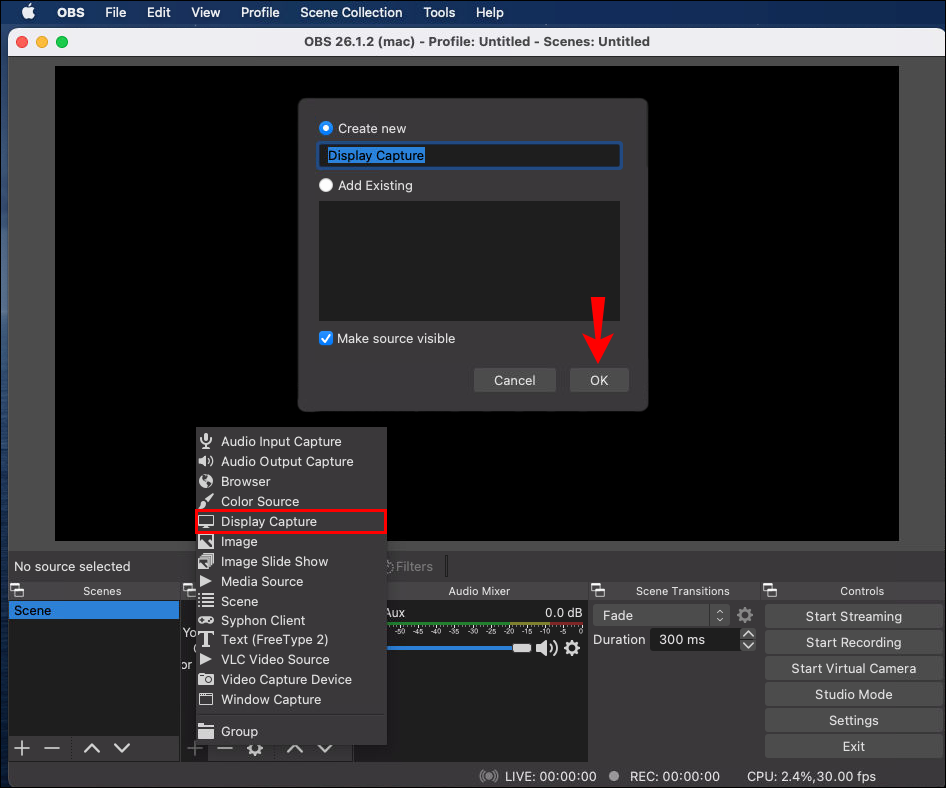
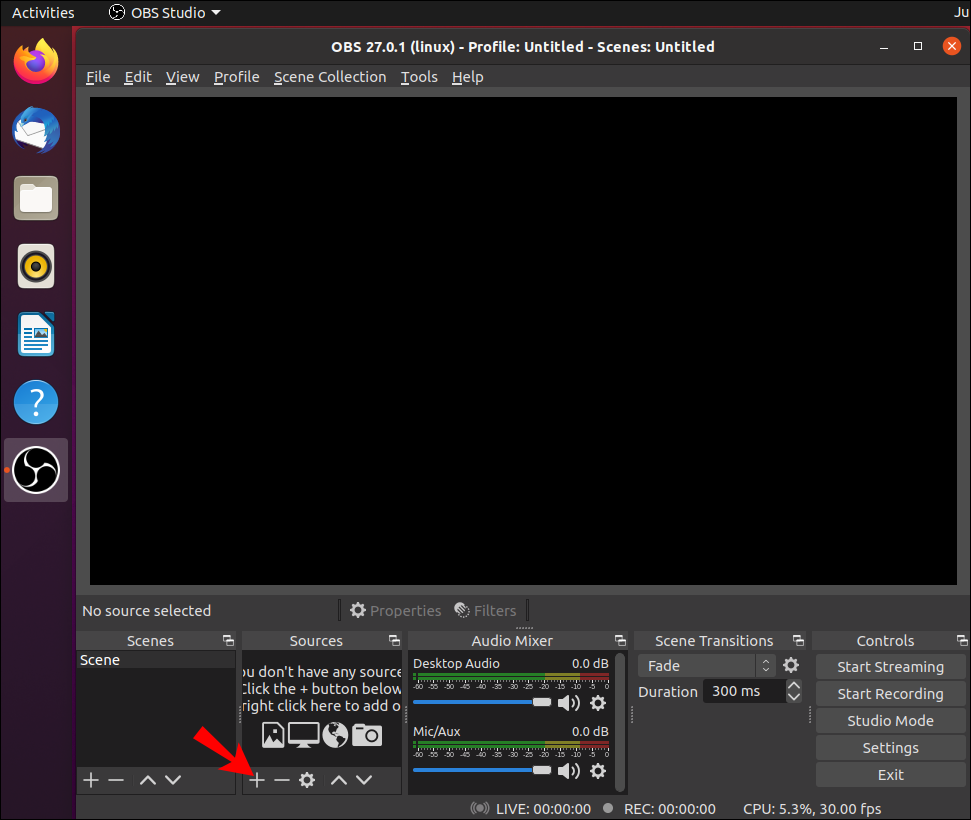
- Open OBS Studio. Typically, the software will automatically add a Scene after launching. If not, click on the + icon in the Scenes box at the screen’s bottom-left corner.

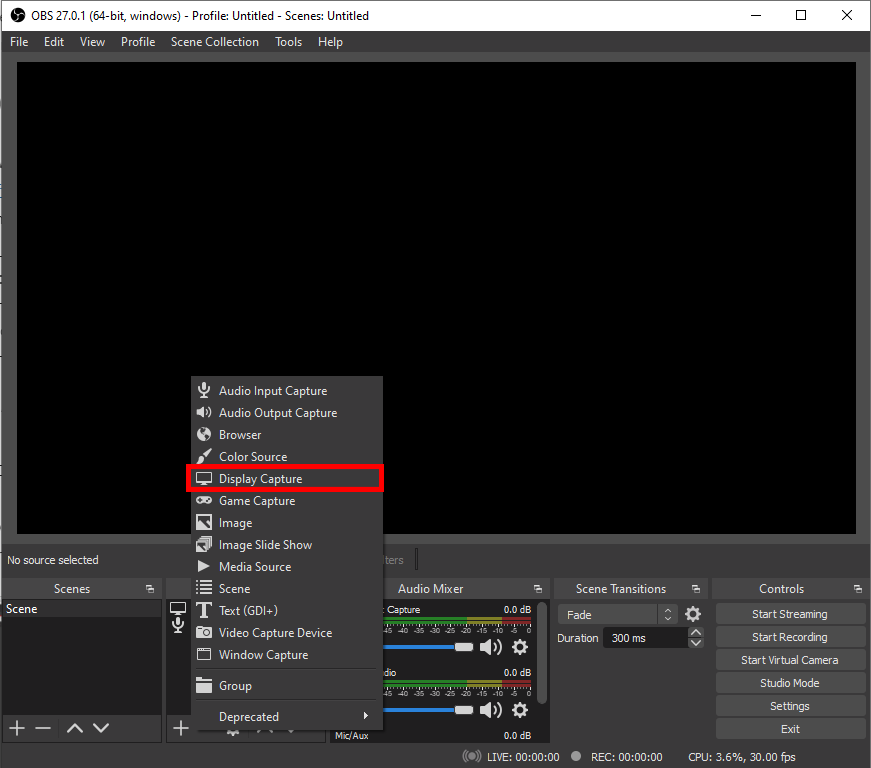
- Navigate to the Sources box right next to Scenes and click the + icon at the bottom of the panel.

- Now, select Display Capture from the options menu.
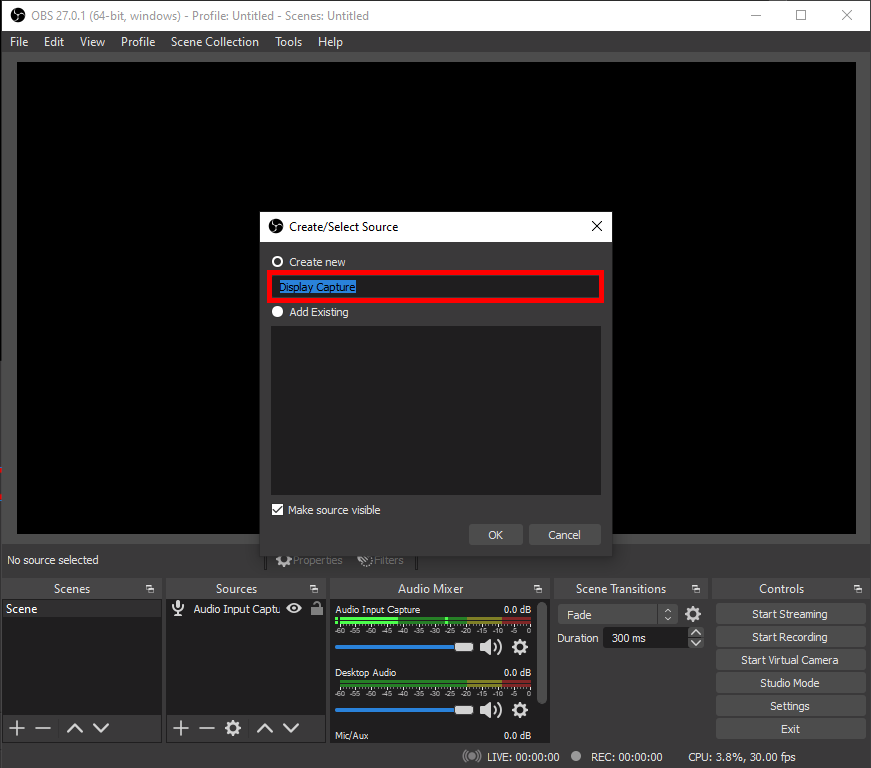
- A small pop-up window will appear, add a title and click OK.
- Another pop-up will appear. If you have multiple monitors, click on the little downward arrow to access a drop-down list. Pick the display you’d like to capture and hit OK.
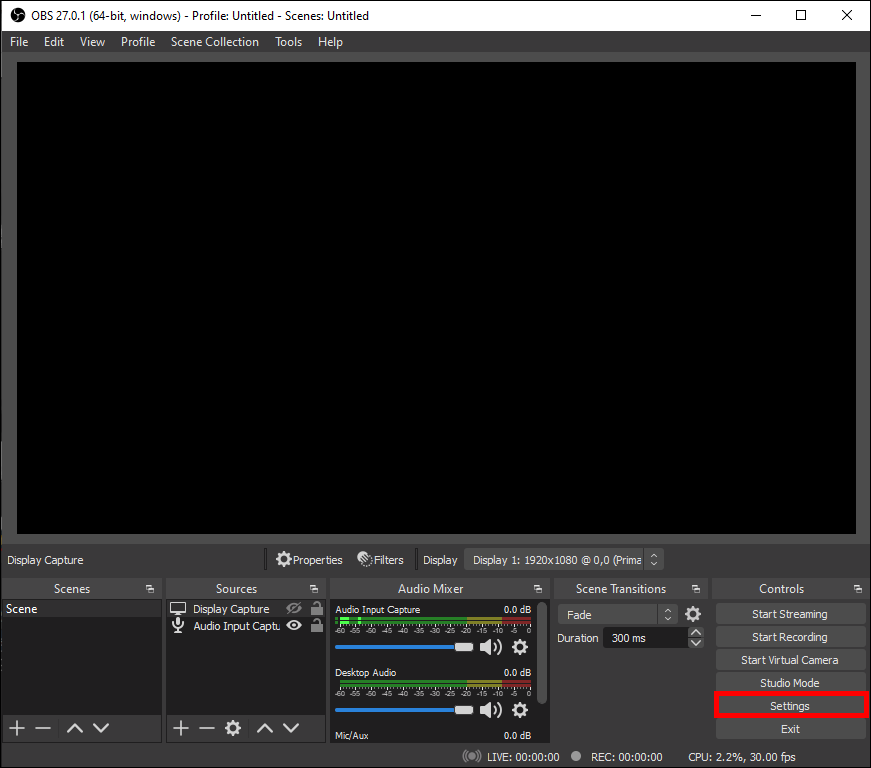
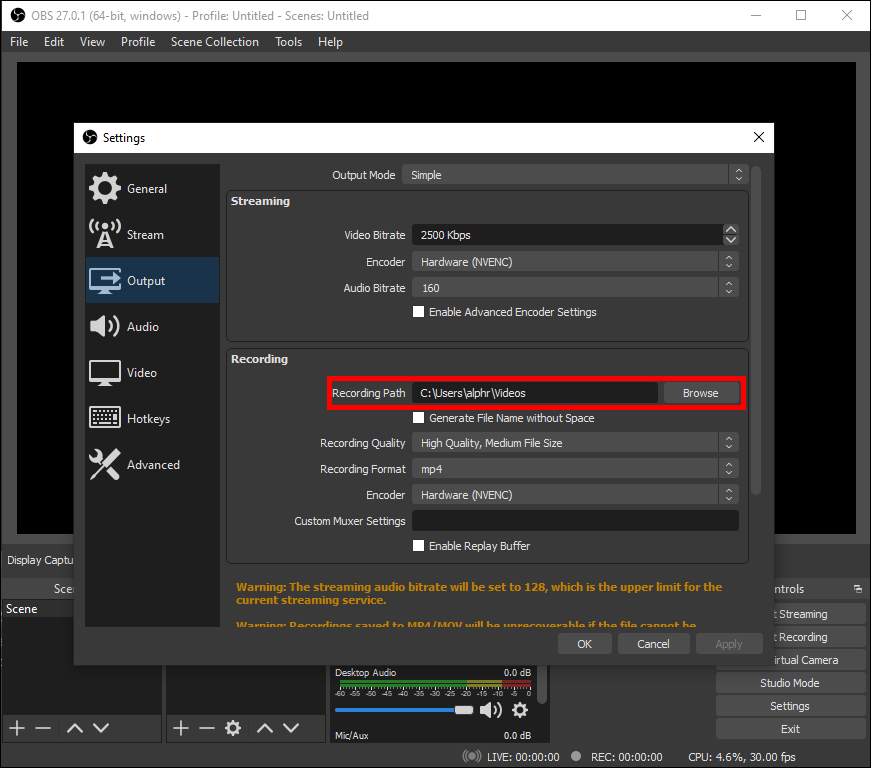
- Navigate to the bottom-right corner of the screen and click Settings.
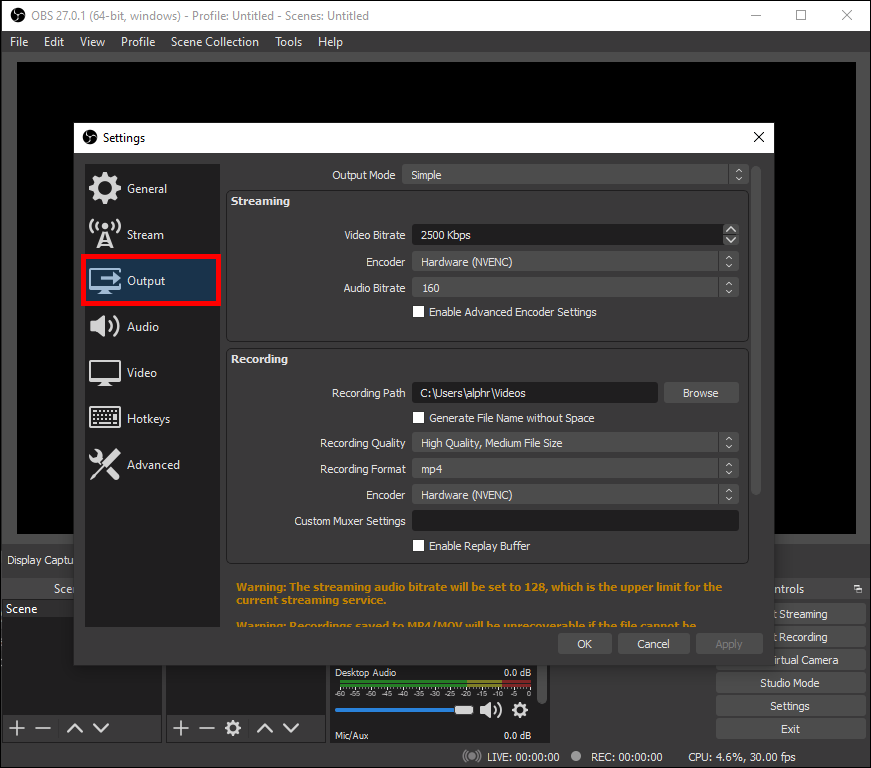
- A new window will appear—select Output from the sidebar on the left-hand side.
- Under Recording Path, choose a destination for your file.
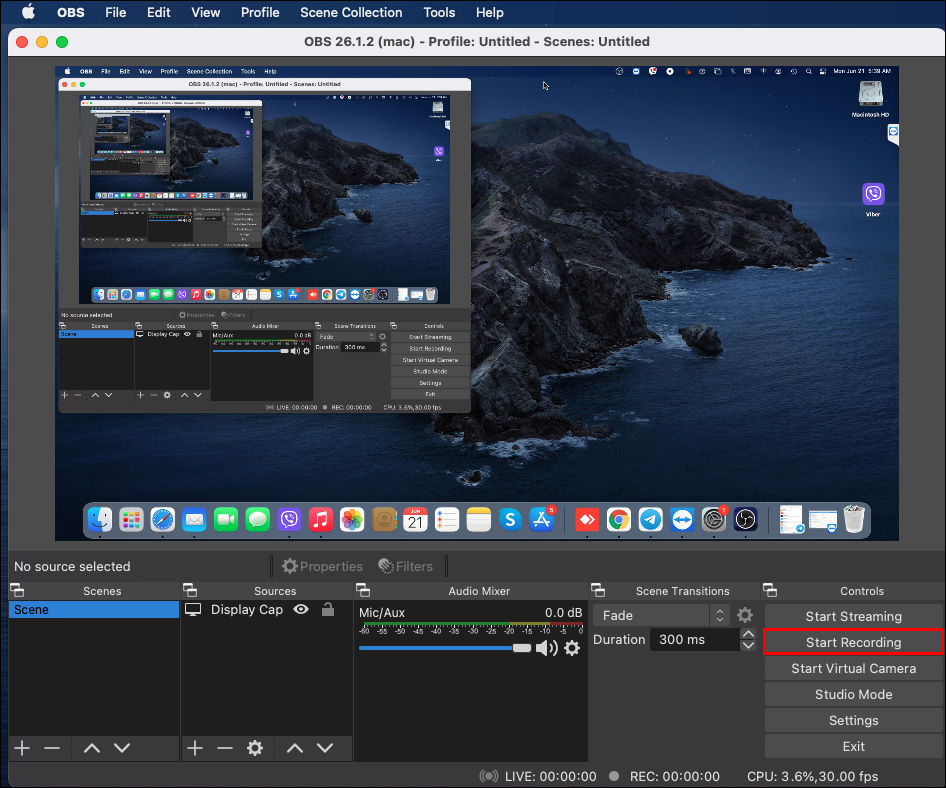
- Once you’re done, click the blue Start Recording button in the lower-right corner of the screen.


Recording the Screen with OBS on Linux
OBS Studio is compatible with PCs running on Ubuntu 18.05 or higher. However, keep in mind you’ll have to install the FFmpeg video filter first. You can use the following command to do so: sudo apt install FFmpeg. After that, you can get the official OBS version for Linux from the official website.
When it comes to screen recording, the steps are more or less identical, with one minor distinction. Here’s a quick breakdown:
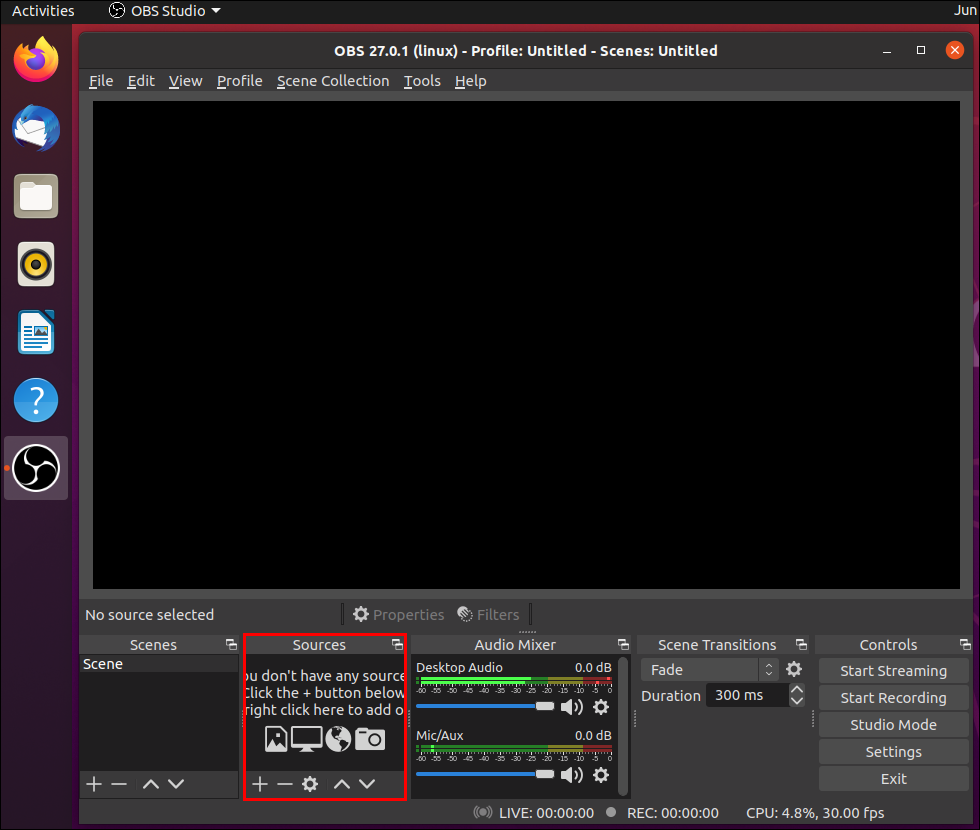
- Launch OBS and scroll down to the Sources box.
- Click the tiny plus button to access the options panel and select Screen Capture. The name of the feature is the main distinction between Linux and other OS.
- Click OK when prompted by pop-ups. In case you have more than one display, pick one for recording.
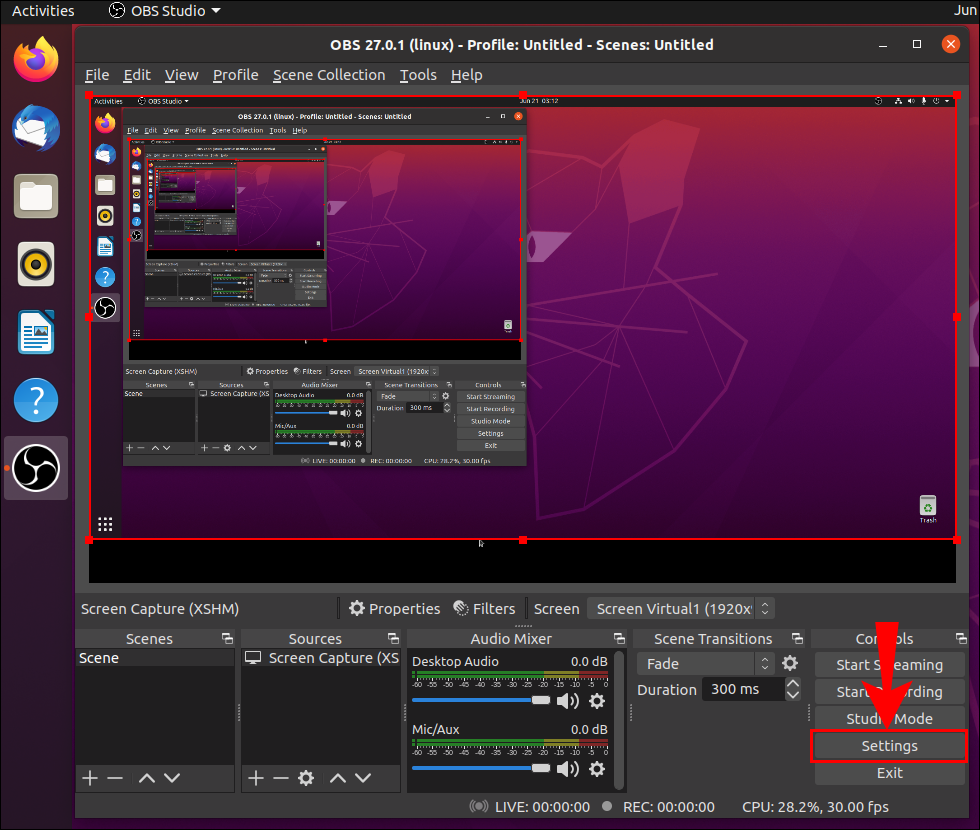
- Go to Settings and click on Output. Select Recording Path to determine where the file will be saved.
- Navigate to the bottom-right corner of the screen, and hit the Start Recording button.


Recording a Screen with OBS on Mac
The oldest version that supports OBS is macOS 10.13, so make sure your Mac meets the requirement before downloading the software. As for screen recording, you can follow the steps for Window 10 to a fault since they’re entirely identical. Here’s a quick recap:
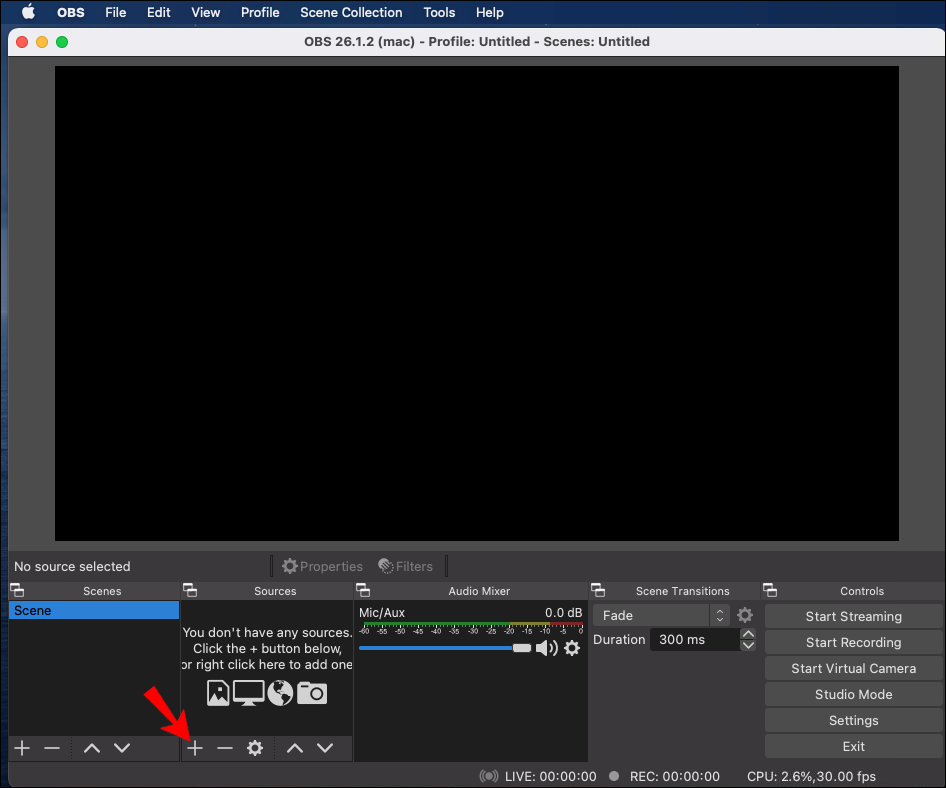
- To start, click the + icon in the Sources box.
- Select Display Capture from the options list, confirm with OK when asked.
- Go to Settings, click on Output, and then select Recording Path to determine where the file will be saved.
- Hit the blue Start Recording button at the lower-right corner of the screen.

Recording a Screen with OBS on an iPhone
Unfortunately, there’s no OBS mobile version currently available on the market. Most smartphones already have a built-in screen recording feature, eliminating the need for third-party software.
However, if you’re set on using OBS on your iPhone, there’s a way to work around the limitations. You can use a lightning connector to link the device to your computer and work from there. Here’s how to do it:
- Plug the iPhone into your Mac or PC by using a lightning cable.
- Launch OBS and scroll down to the Sources box.
- Click the little plus icon and select Video Capture Device.
- A pop-up window will appear. Check the little circle that says Create New and click OK.
- A new window will appear. Click on the little downward arrow next to Devices to access a drop-down list. Select your iPhone. If it’s not showing up, check whether it’s properly plugged in.
- Once the iPhone display appears on the screen, click the Start Recording button in the bottom-right corner.
Recording a Screen with OBS on Android
Very much the same rules apply to Android devices. Follow the steps from the previous section if you’re dead set on using OBS. However, keep in mind this method typically results in bottlenecks and glitches. Unless your model has a built-in screen recorder, try browsing the Google Play Store for a more compatible alternative.
Customizing Screen Recording With OBS
You can improve the quality of your file by playing around with different customization options. Let’s start with setting the screen capture parameters:
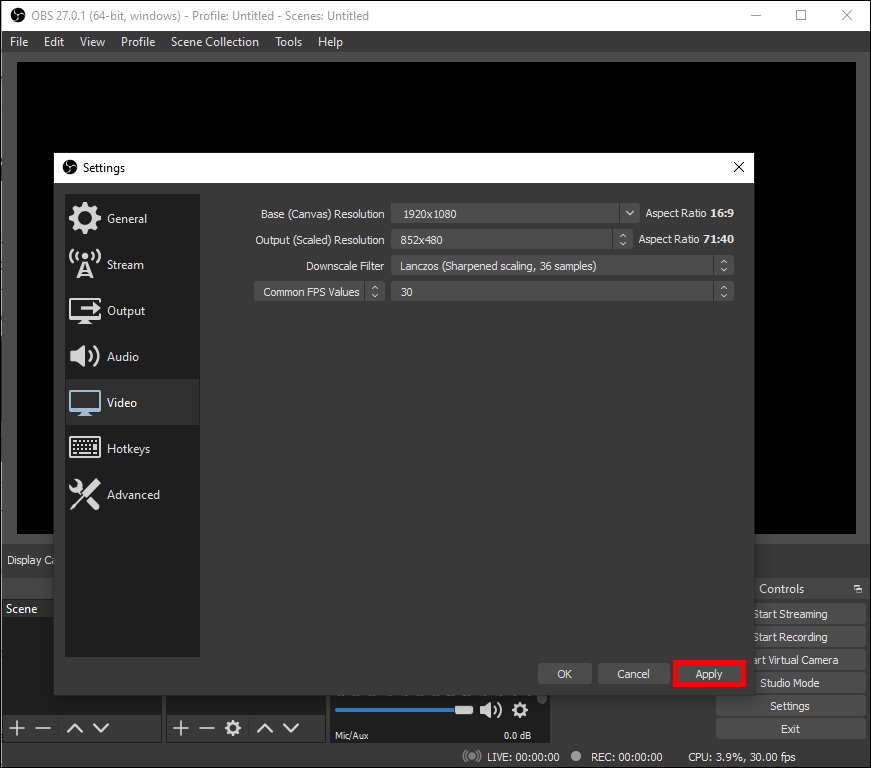
- Open OBS Studio and go to Settings.
- Select Video from the panel on the left-hand side. From there, you can change the resolution, FPS, Capture, and Output size of the recording.
- Adjust the settings according to your requirements. Click on the little downward arrow next to each one to access a list of options.
- Once you’re done, click Apply, then OK.


If you want your file to be in a specific format, here’s what to do:
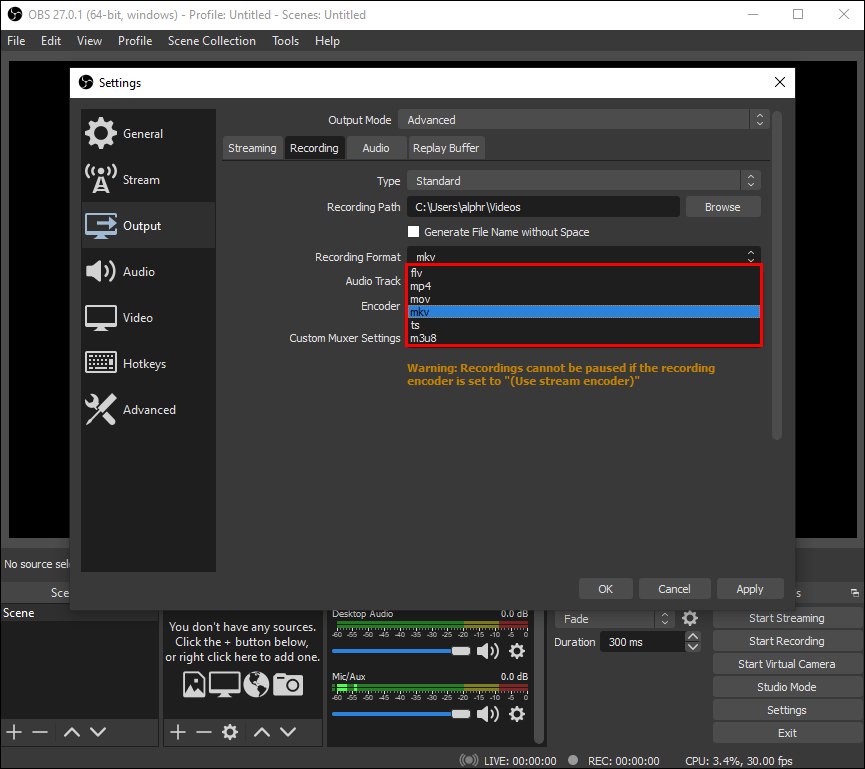
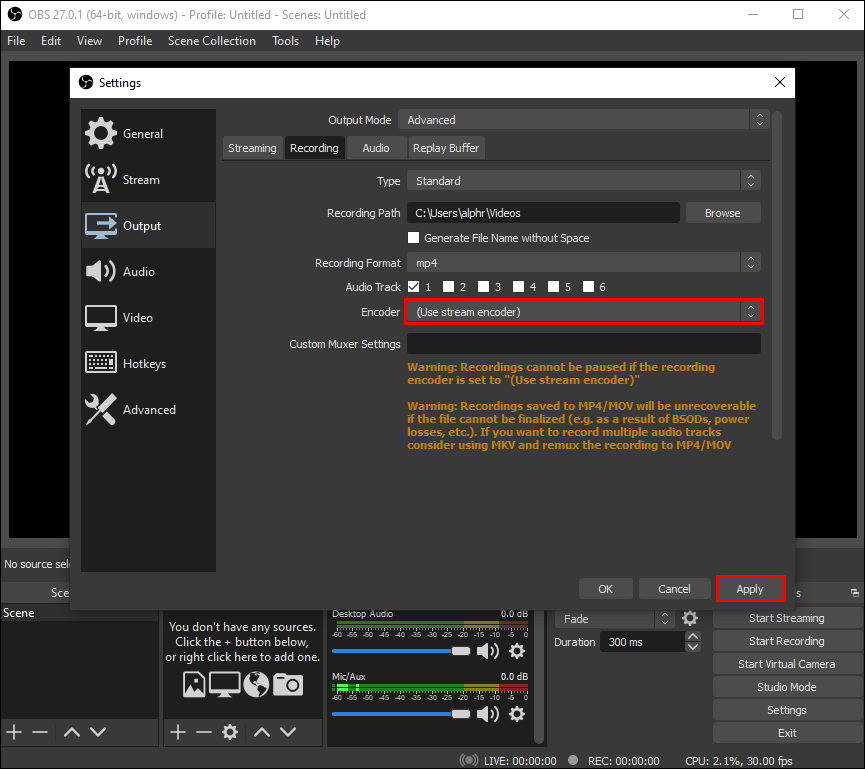
- Go to Settings and then click on Output.
- Click the little downward arrow next to Output Mode and choose Advanced.
- Under the Recording section, find the Recording Format dialog box. Click and scroll through the list of available formats.
- Double-check if the Use Stream Encoder is enabled and click Apply.


Of course, these changes mostly boil down to personal taste. OBS is a pretty intuitive software, so the default settings work just fine.
How to Record Screen and Audio With OBS
There are multiple options when it comes to capturing audio with OBS Studio. You’re free to switch between internal and external sources, and the steps are pretty much the same for Linux and Windows OS. In comparison, Mac users have a slight disadvantage since OBS can’t record audio without third-party assistance. Luckily, there’s a utility app that works great with the software.
Keep reading for a walk-through on recording both screen and audio with OBS on different operating systems.
Recording the Screen and Audio with OBS on Windows 10
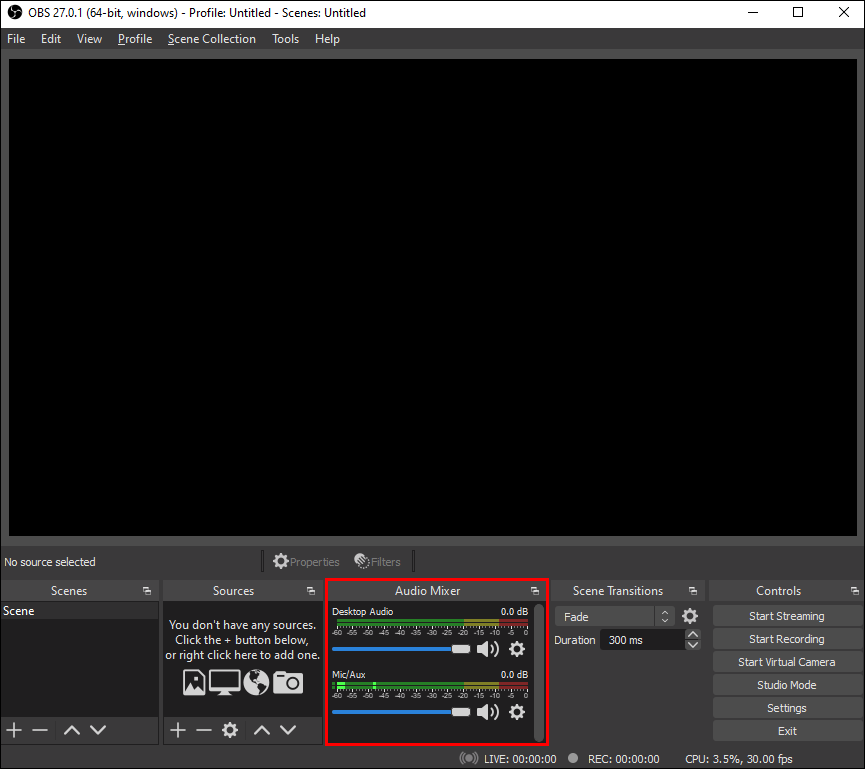
Before you start screen recording, you can set the audio source with the Audio Mixer feature. Here’s how to do it:
- Scroll to the bottom of the page and find the Mixer section.
- Click the little gear icon to open a drop-down list and then select Properties.
- Choose a preferred source (Desktop or Mic/Aux audio). OBS automatically enables both, so you can also leave it at that.
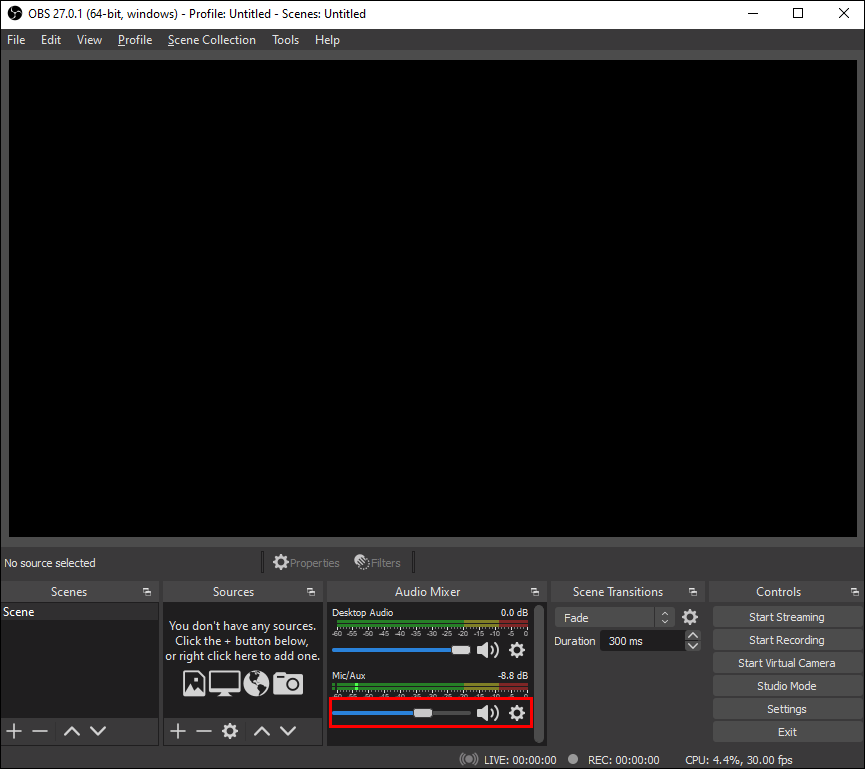
- To adjust the volume, toggle the slider next to your chosen audio source.
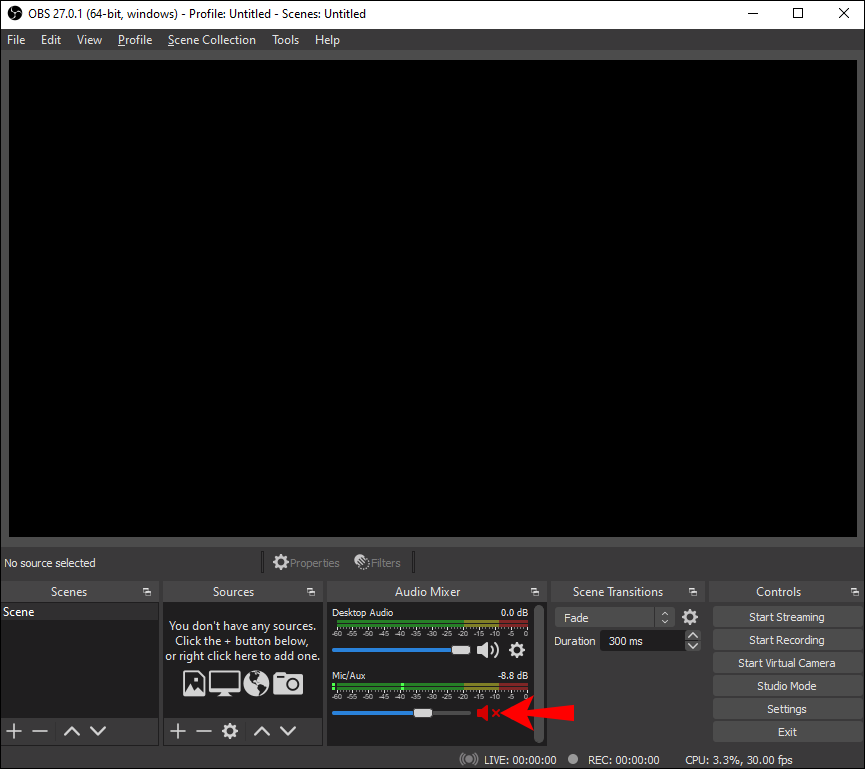
- If you want to mute the audio completely, click the little speaker icon next to the enabled source.


Recording the Screen and Audio with OBS on Linux
Follow the exact steps from the previous section to adjust the audio settings when screen recording. However, in case you only want to record the internal audio, here’s what you need to do:
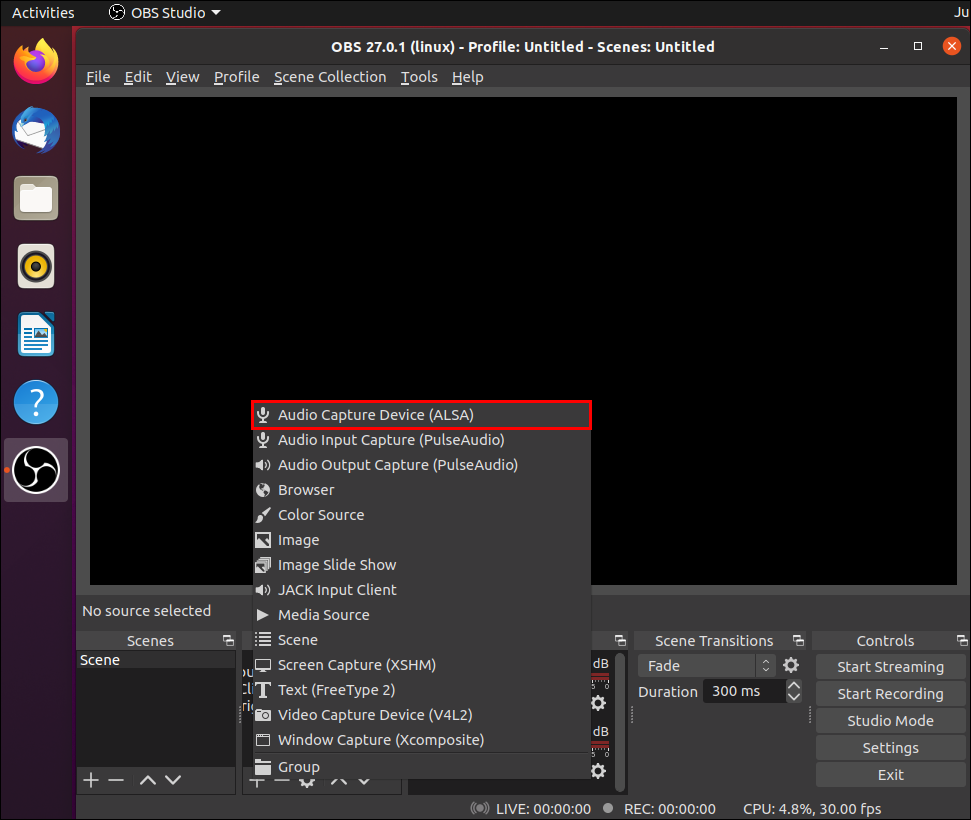
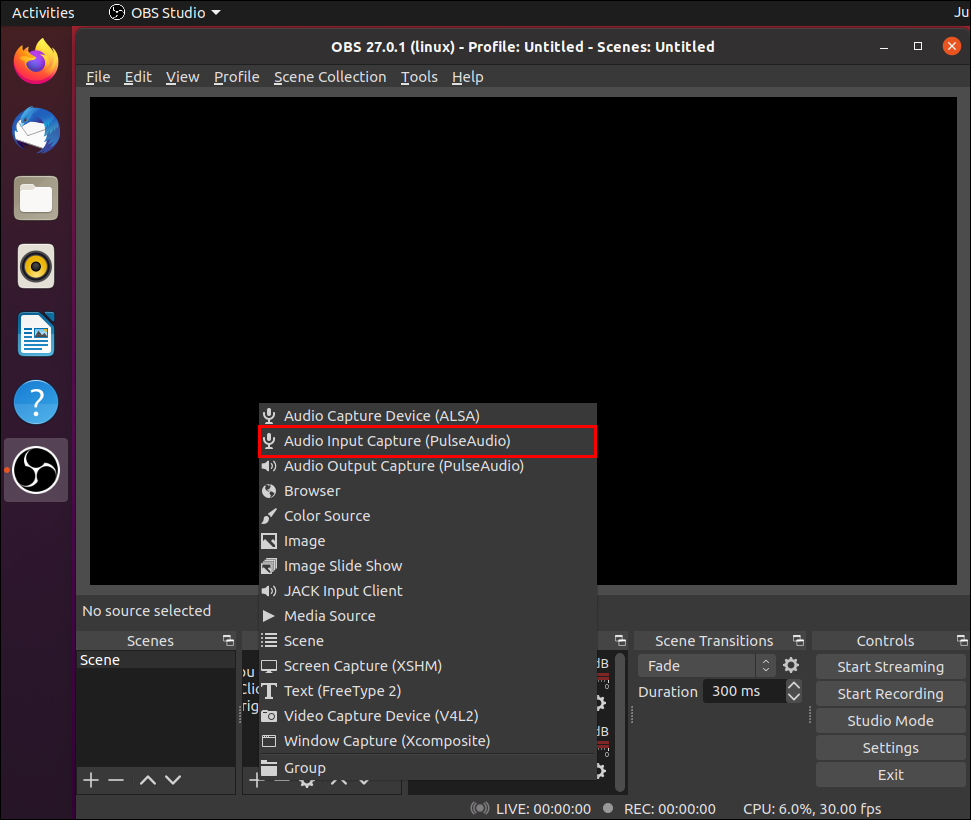
- Click on the little plus icon in the Sources box.
- Select Audio Output Capture from the drop-down list.
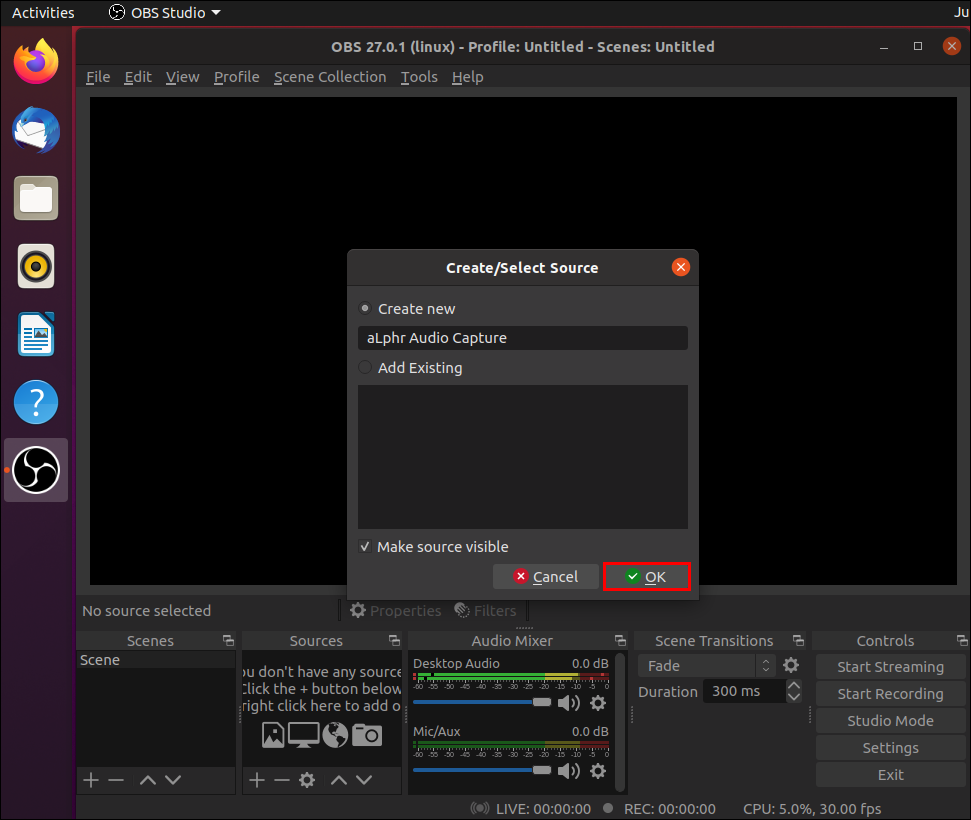
- Enter the title of the source in the little pop-up box and click OK.
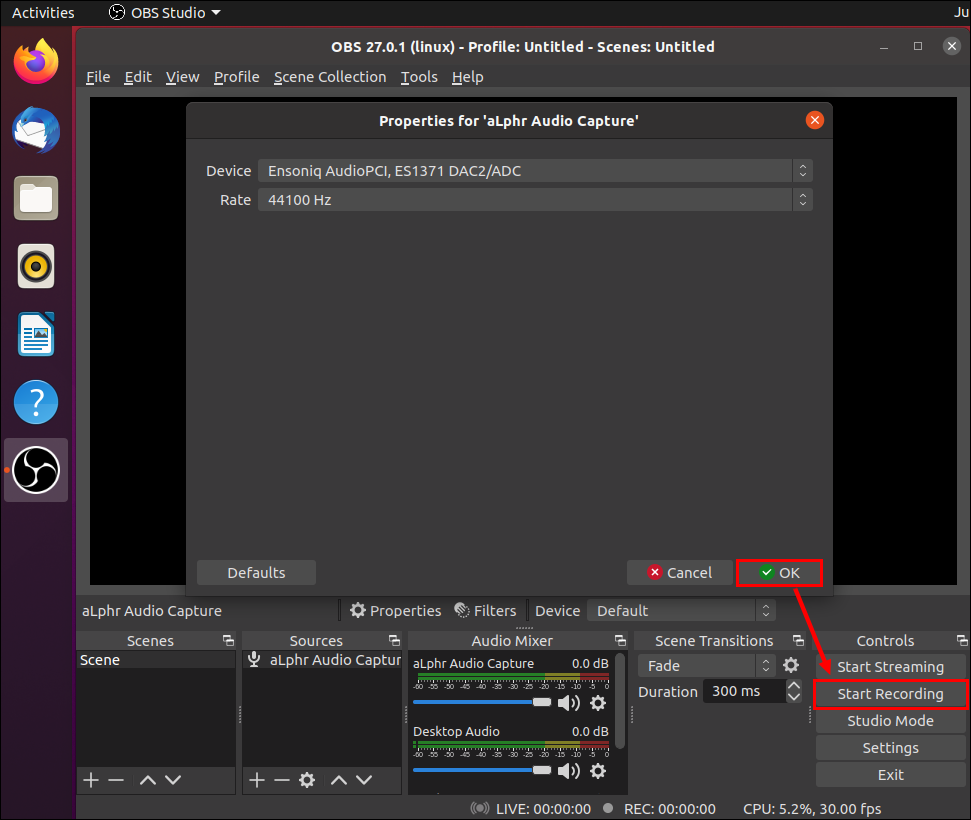
- Select the preferred output device and start recording.
And if you only want your mic to register, you should:
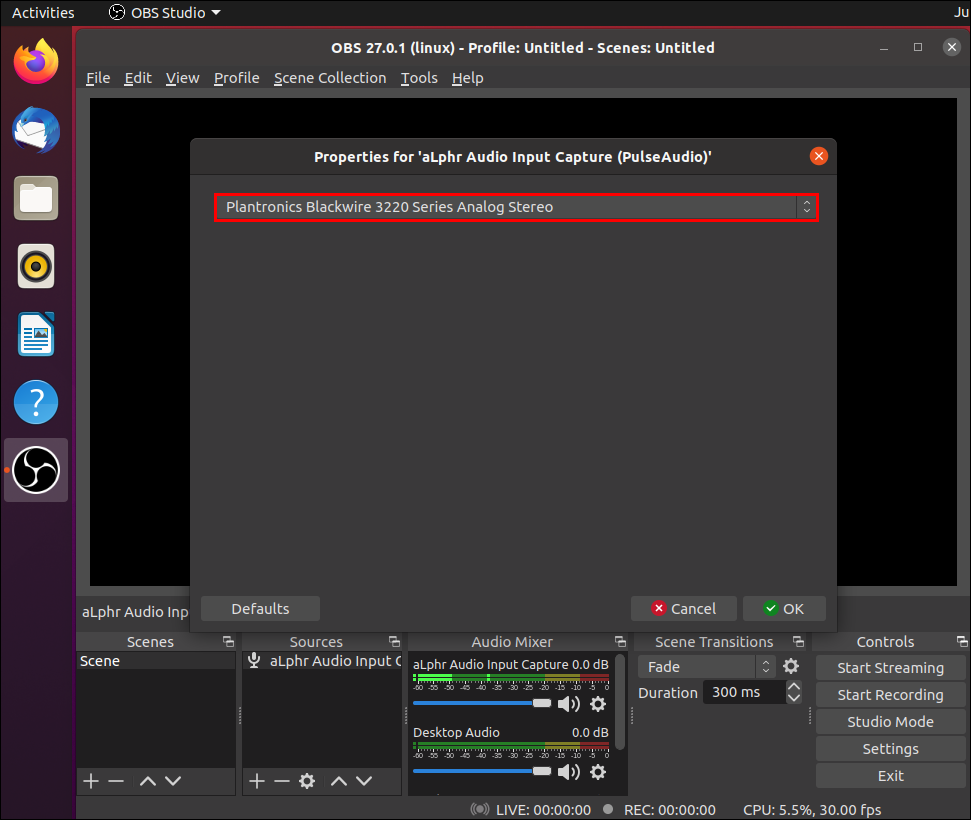
- Click to add a new Source and select Audio Input Capture.
- Check Create New in the small pop-up window.
- Select the microphone from the drop-down menu.
- Adjust the settings using Audio Mixer.


Mac
Mac users need a third-party app to record audio with OBS. We recommend using Blackhole since it works well with the software. You can download the VA driver from the Mac App Store for free.
After you’ve installed the app, here’s what you need to do:
- Open Apple MIDI Setup.
- Create a new output device that includes both your speaker and the Blackhole driver.
- Launch OBS and add the new device as the Audio Output Capture source.


iPhone and Android
Given that there’s no OBS mobile app for iOS or Android devices, it’s much more convenient to use pre-installed screen capture apps. Sure, there’s the lightning cable workaround, but it often produces lackluster results. If you want to simultaneously record the screen and audio, we suggest sticking to built-in features.
Just for the Record
With OBS, you can create high-quality screen recordings without much hassle. The software is pretty user-friendly and works well with different operating systems. There’s a wide range of customizing options that allow you to change the file format and video capture configurations as you please. You can also capture audio from multiple sources, albeit with the help of third-party apps in some cases.
The only downside to OBS Studio is that it’s incompatible with mobile devices. While you can use a lightning cable to link your phone to the software, it’s better to use the built-in features most models have nowadays.
Do you use OBS for screen capturing? Is there a different software you prefer? Comment below and tell us if there’s a better way to use OBS with mobile devices.
Disclaimer: Some pages on this site may include an affiliate link. This does not effect our editorial in any way.