Windows has many valuable features that make remote access easy for any user. One of which enables you to connect your desktop and manage your computer remotely from another location. Imagine yourself working on a project or task, and you need data stored on another computer working on Ubuntu. If the computers are in different offices, you could save time by creating a remote connection between them.
This guide will show you how to create and establish a remote desktop connection to Ubuntu from Windows.
How to Create a Remote Desktop Connection to Ubuntu From Windows
There are different ways to create a remote connection from Windows to a system running on Ubuntu:
- Virtual Network Computing (VNC)
- Remote third-party software
- Remote Desktop (RDP)
Before we explain these methods, let’s show you what to do if both systems are on a different network.
Getting Ready for the Remote Desktop Connection
Connecting a desktop from a Windows system to Ubuntu isn’t instant. You’ll need to make some preparations.
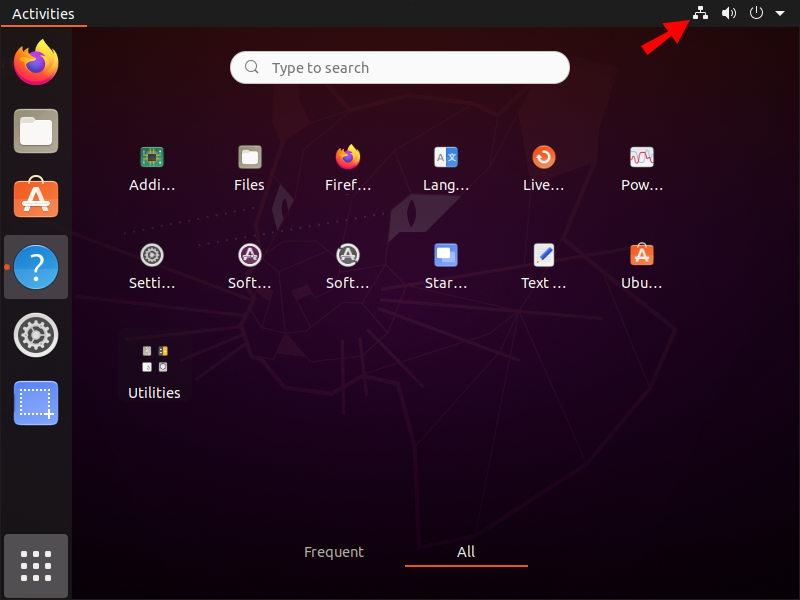
Find the IP Address of Your Ubuntu PC
You need to find Ubuntu’s IP address first. Then, establish a connection using the VNC or RDP options above is necessary. Here’s the easiest method to find the IP address:
- By locating the network connection icon in the panel upper right corner.
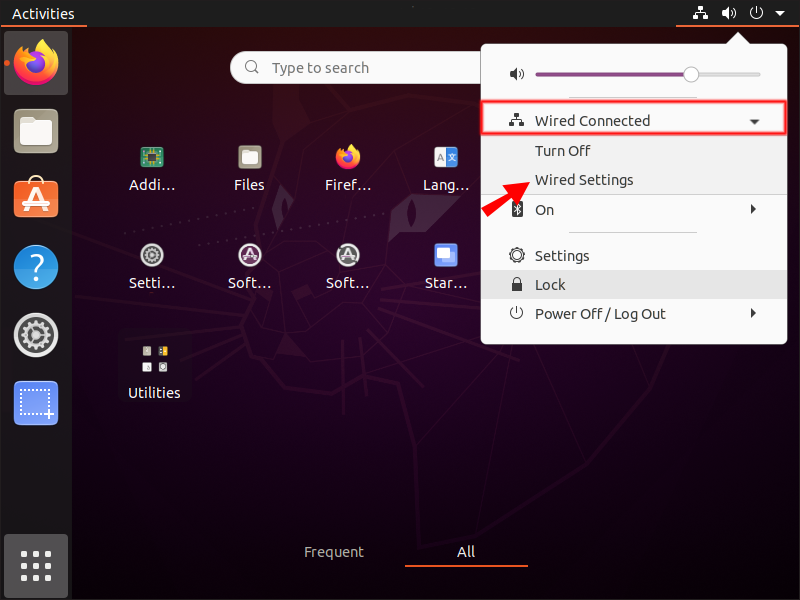
- Choose “Wired Connection” on the drop-down menu and select Wired Settings.

- Then, click on the Icon Gear Setting under the Wired option. The IP address should be displayed.

If the above method doesn’t work, you can also find the IP address by doing the following:
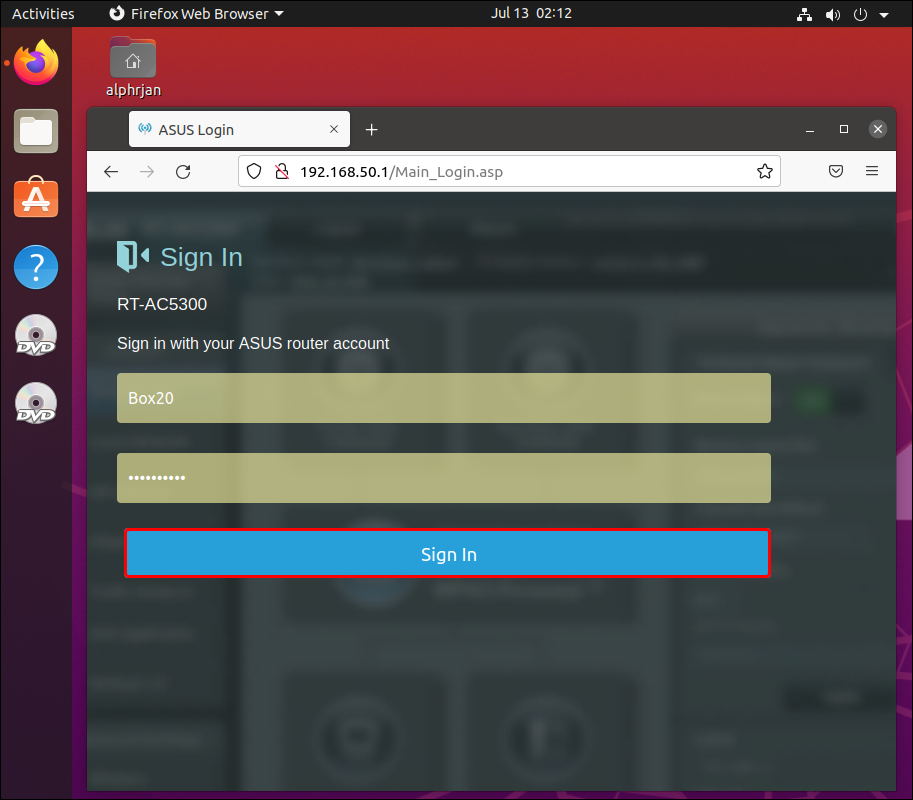
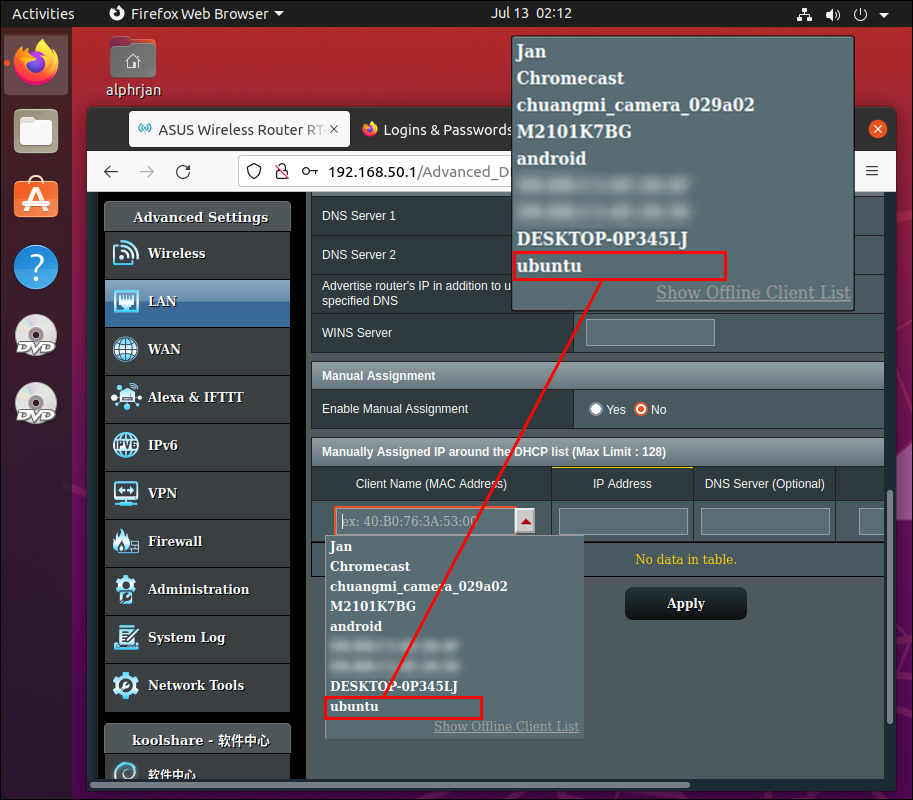
- Use your browser to connect to your router directly.
- Log in to the router’s admin console to see a list of connected devices. Your Ubuntu device name will be listed alongside its IP address.
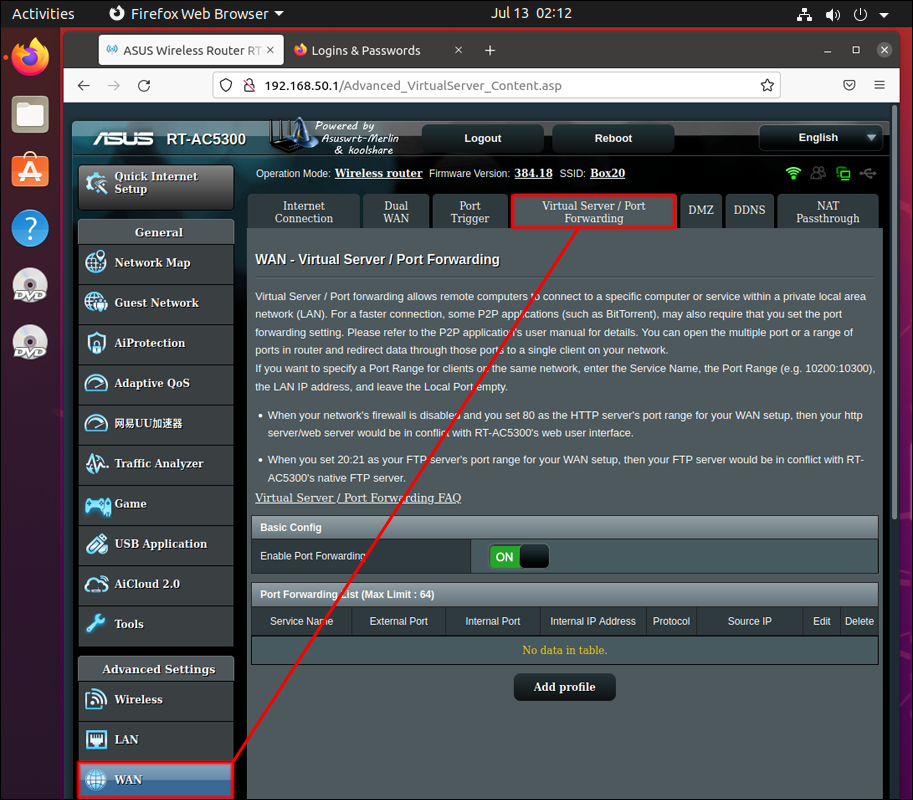
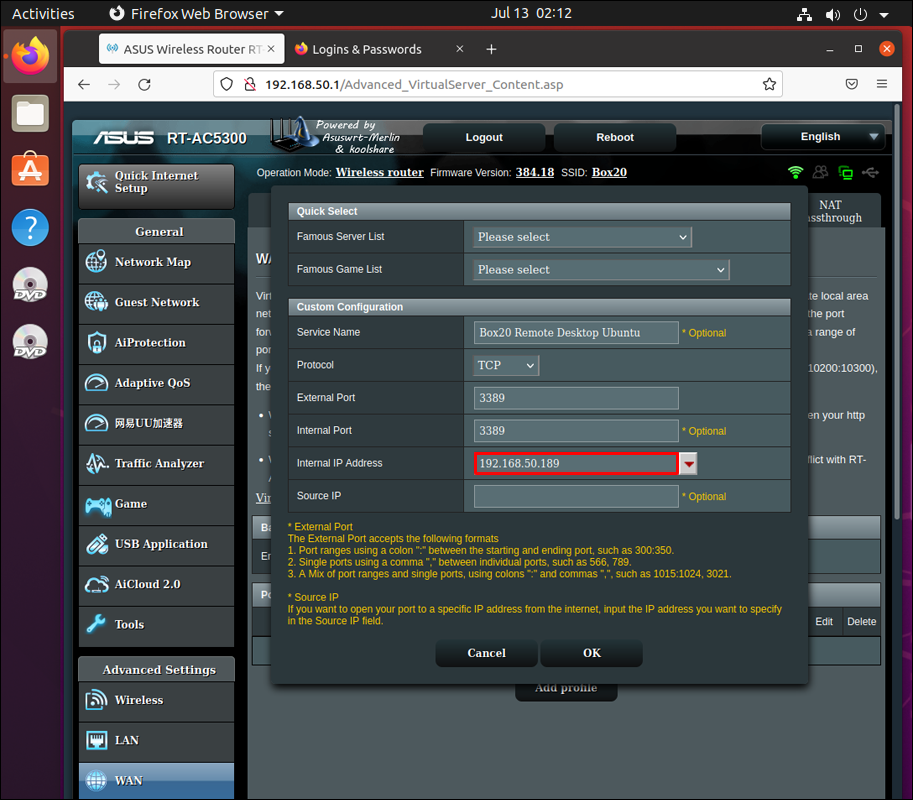
Enable Port Forwarding
The general steps to enable port forwarding on your router’s admin console are as follows:
- Check the router that connects to your Ubuntu PC to enable port forwarding.
- Locate the port forwarding settings.
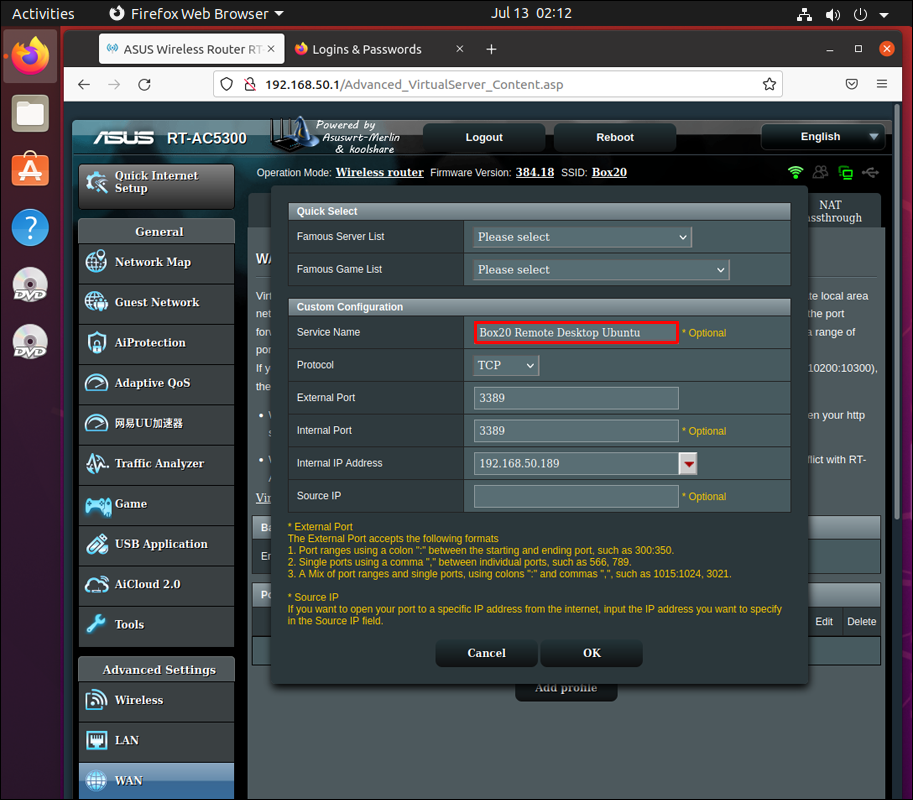
- Establish a new rule and label it “Remote Desktop.”
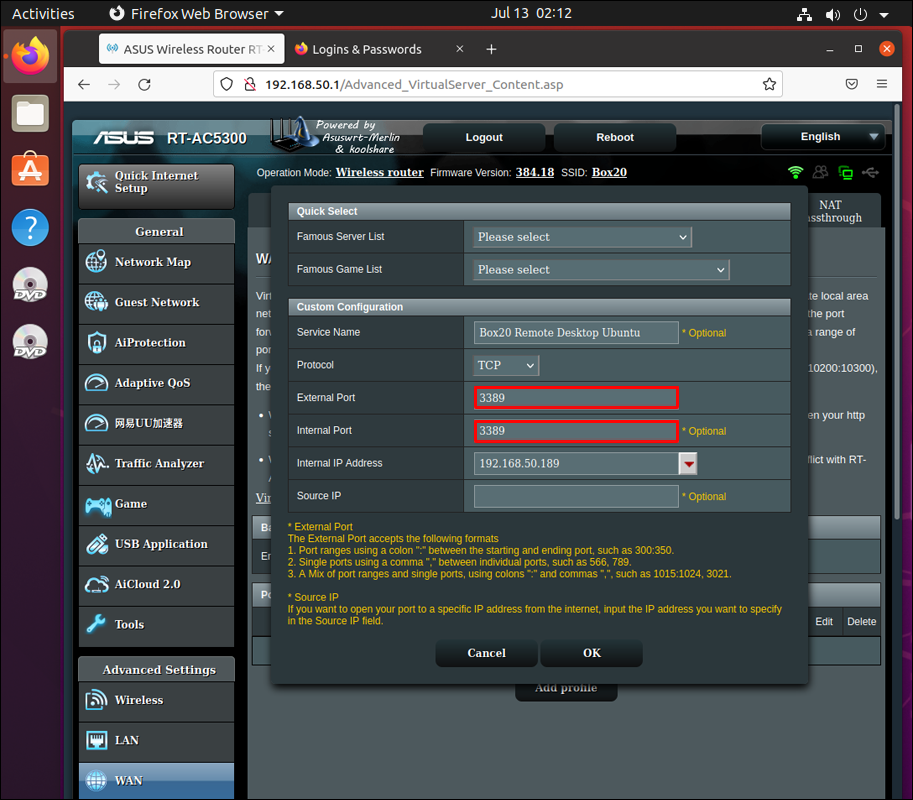
- Change both the external and internal port number to 3389.
- Input the IP address, then click “OK”.
Enable SSH Connection
This is the last step for preparing your Windows to Ubuntu connections. It’s easy to set up an SSH connection using the Windows in-built SSH function, which automatically gives access to the Ubuntu command line.
Here’s what you need to do:
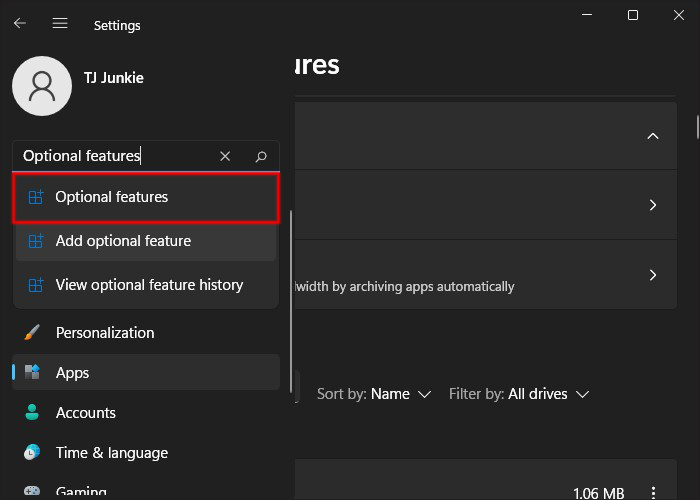
Open “Settings.”
- Go to “Apps & features.”
- Type on the search bar and open “Optional features.”
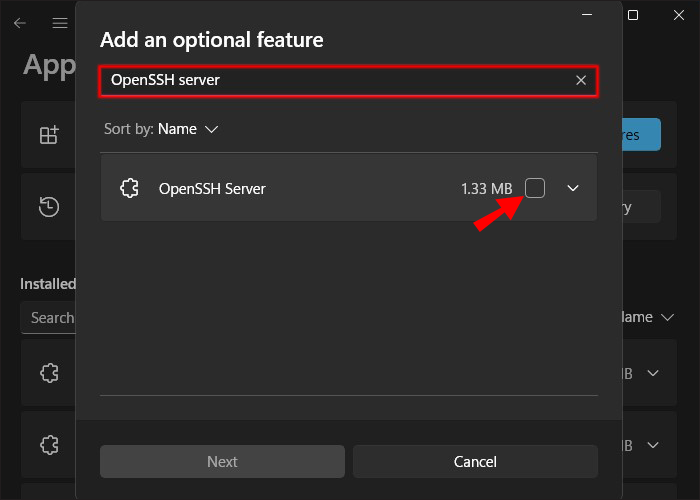
- Click on “View Features.” in the Add an Optional feature.
- Type “OpenSSH server” on the search bar, Check the “OpenSSH server” and hit “Next”.
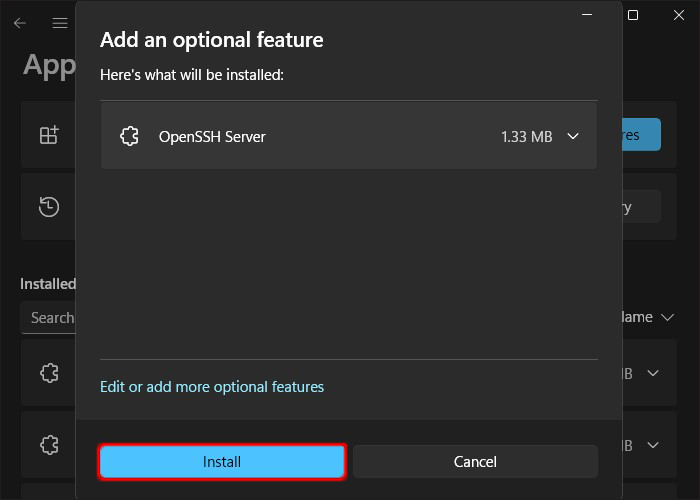
- Click “Install” then wait for a few seconds.
- Reboot your computer.

After this step, it’s easy to connect to the Ubuntu system by supplying an email address alongside the Ubuntu password and username.
If you followed these preparation steps, you can easily connect using any of the three methods below.
Connect to Ubuntu From a Windows PC Using Virtual Network Computing (VNC)
This option requires a server on the Ubuntu device and a client application on the Windows PC.
Check for updates on the remote PC. After that, install the TightVNC server component on your Windows.
You will get a prompt to set a password and a desktop number that usually begins with 1 will be displayed.

After establishing the tightVNC Server on Ubuntu, proceed to install the client on Windows. It’s available on the official website in 64-bit and 32-bit types, so ensure you choose the type that suits your PC. The tool is available in bundles.
So once installed, enter the Ubuntu IP address in the remote host section and the desktop number alongside the address. So you might have something like this:
162. 156.0.89:1
Enter your password, and you will gain remote desktop access immediately.
Connect to Ubuntu From a Windows PC Using Remote Third-Party Software
The other two methods are easy if you can access your router. But if you can’t or don’t intend to use your router for specific reasons, several third-party software options are designed for this purpose, although not all support Linux.
Here are a few suggestions that support Linux:

Team viewer is a popular remote desktop solution that requires minimal setup. Just connect the client and host your software and you’re good to go.

It’s easy to use your chrome browser for remote desktop access and grant another user permission to access or control your computer through the Chrome browser.
This software is compatible with the Linux/Windows/Mac operating system, and it only takes a few seconds to gain remote access. Fortunately, no machine makes it easy to share a remote desktop over any network, no matter the location.
Connect to Ubuntu From a Windows PC Using Remote Desktop Protocol (RDP)
This is the best option to connect a remote desktop to Ubuntu when both PCs are connected through your home network. Fortunately, you’re good to go with just the IP address from the Ubuntu device. Windows already has inbuilt software that permits this connection. For Ubuntu, however, you need the xrdp tool.
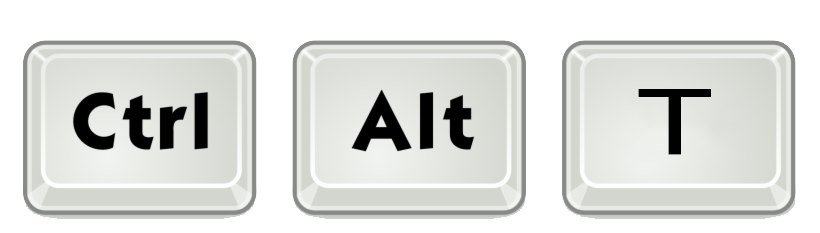
- Enter “Ctrl + Alt + T” to open a terminal window.
- Then, enter the following codes one after the other:
- sudo apt install xrdp
- sudo systemctl enable xrdp
- sudo apt install xrdp
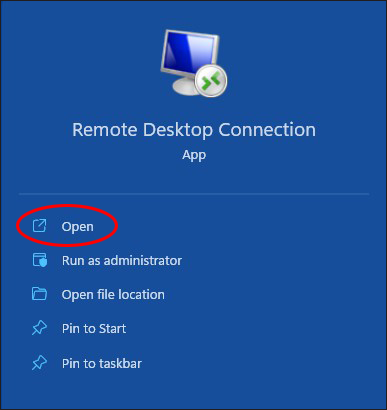
- Use the “Start Menu” function to run a remote desktop application on the Windows PC.
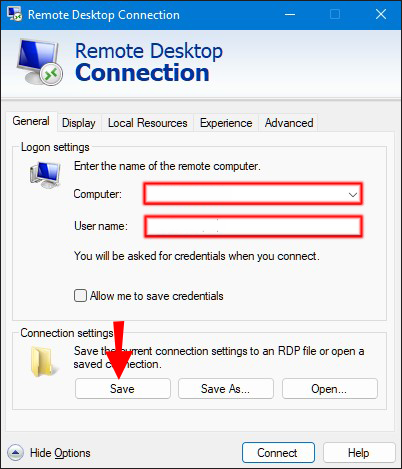
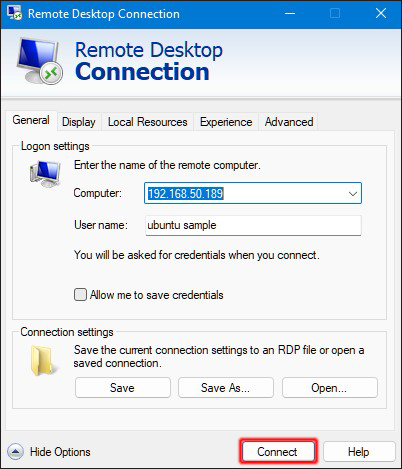
- When the app opens, type the IP address in the “Computer tab.” Next, click Options to add the username from the Ubuntu PC. You can save the settings for reuse later.
- After installation, click “Connect” and enter your Ubuntu password
- It will establish the connection automatically.


Now you have both keyboard and mouse access to your Ubuntu computer.
Remote Control in Reverse
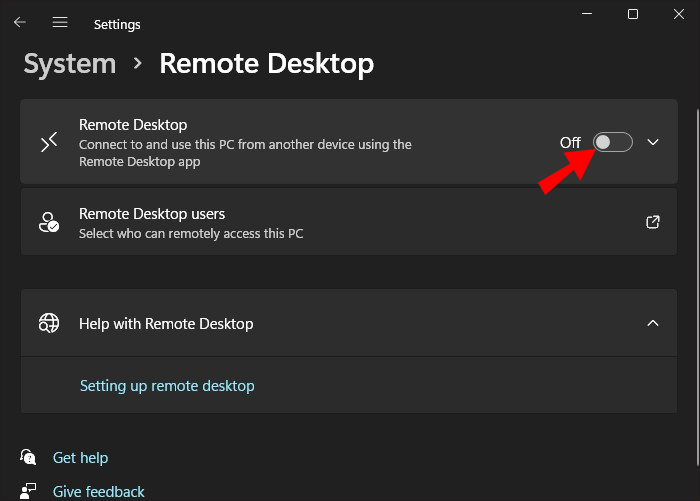
It may also interest you to know that you can also use your Ubuntu computer to connect to your Windows PC, if you enable the “Remote Desktop” feature.
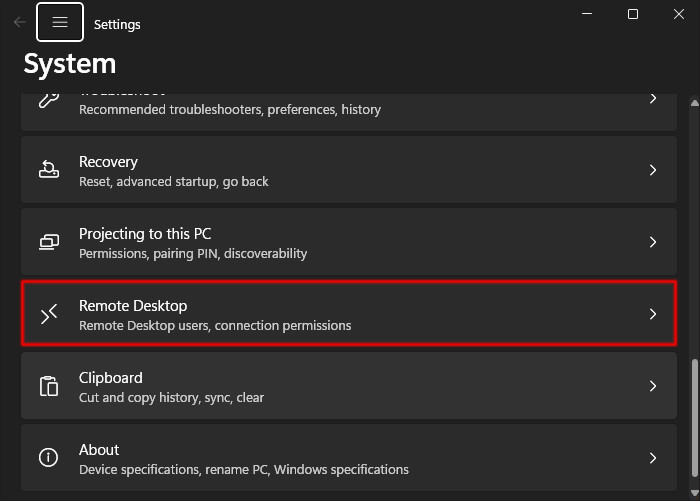
- Go to the “Settings” app using the “Windows Key” + “I” shortcut.
- Find and click on “Remote Desktop.”
- Toggle the “Enable Remote Desktop” feature to On.
- Confirm your selection.

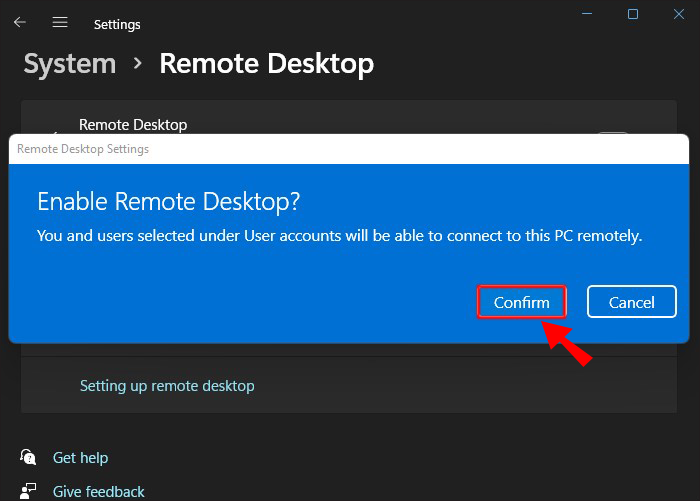
This will prepare your Windows PC to be controlled with a remote desktop client app, like Remmina, which is a built-in app in Ubuntu systems.
How to Find the Perfect Remote Desktop Solution to Connect to Ubuntu From a Windows PC
Now you know how to use the various tools for establishing a remote desktop connection to Ubuntu from Windows. Above, we discussed three main options: the RDP, VNC, and commercial third-party remote software. You can try each one to find the best method that suits your needs. Have you ever connected a remote desktop to Ubuntu from Windows? Did you use any of the methods outlined in the article? Let us know in the comment section below.
Disclaimer: Some pages on this site may include an affiliate link. This does not effect our editorial in any way.