If you use the website version of YouTube on your PC, you can easily turn the captions on and off. It also lets you adjust the font style to your liking and see the transcript whenever you want. Let’s take a look at how to do all this.
Enabling and Disabling the Closed Captions
Here’s everything you need to do to enable or disable closed captions on the YouTube website:
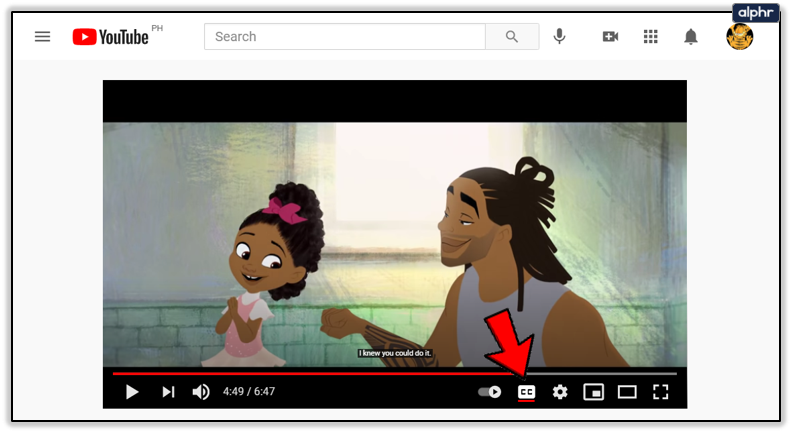
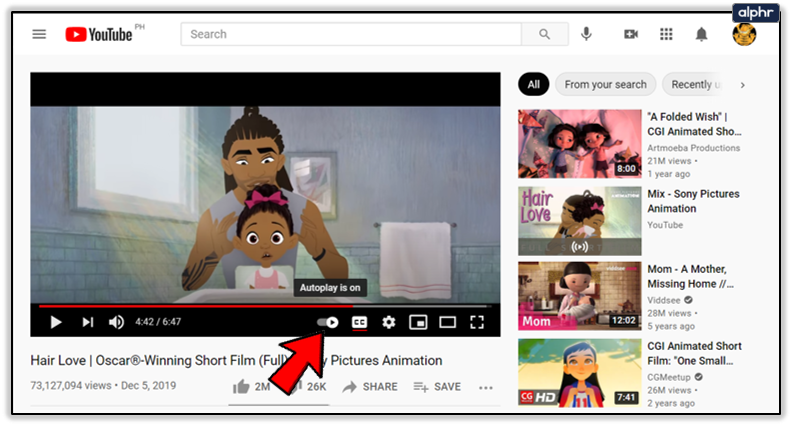
- Open the YouTube video you need to set the captions for and hover over it to see the video options. These are always visible when the video is paused.

- You can enable or disable closed captions by clicking the second button in the bottom-right corner of the video – this is the rectangular one with “CC” inside. Also, the option is underlined in red when it’s enabled, so you can’t miss it.

Additional Caption Settings
Did you know that you can easily access additional caption settings even when the video is playing? To do this:
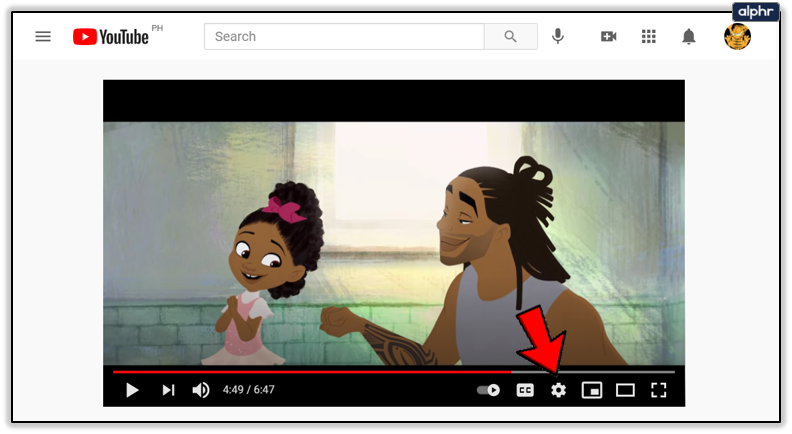
- Click on the gear button, the third in the bottom-right corner of the video.
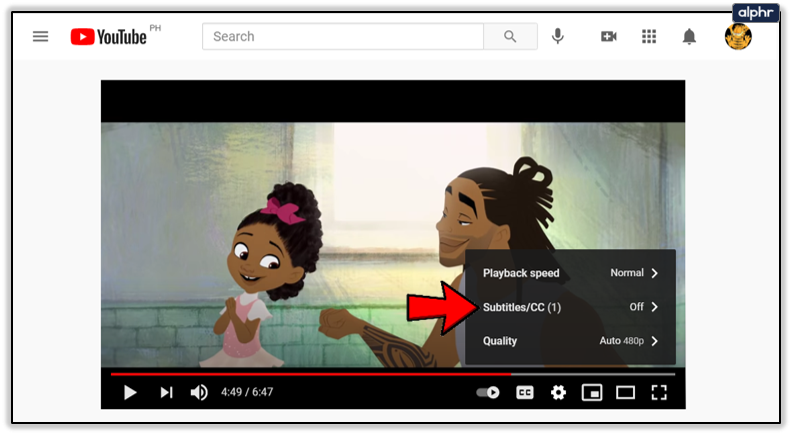
- Select “Subtitles/CC (1).”
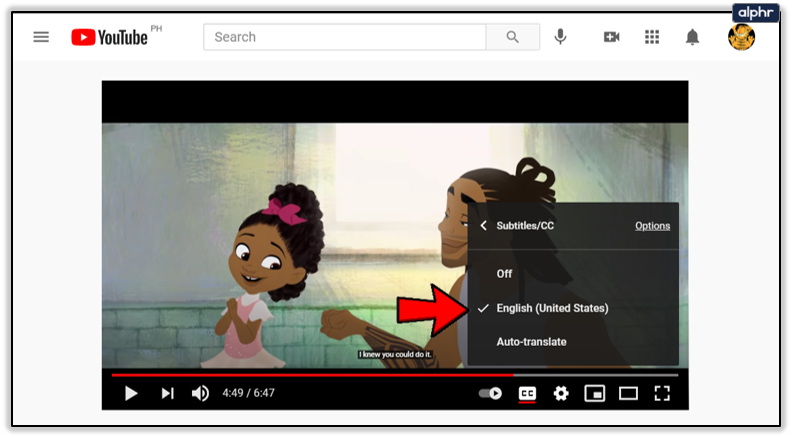
Note: The bracketed number immediately shows you how many subtitles are available for the given video. If you see “(1),” this likely means that there’s only the automatically generated subtitle. - When you select this option, YouTube will show you which subtitles are available. It also lets you disable closed captioning, as well as enable the automatically generated subtitles translated via Google Translate. When you choose the latter option, you’ll also get to choose the desired language. Finally, you can change the style of the captions by clicking the “Options” button.
The “Options” submenu lets you alter the following:
- “Font family” changes the subtitle font. Instead of font names, you only get to see the font styles. Here’s where you can choose between serif, sans serif, and cursive fonts, among others.
- “Font color” changes the color of the letters. Besides the default white, you get to choose between red, green, blue, cyan, magenta, yellow, and black. The same options are available for all the other color settings.
- “Font size” changes the letters’ size. The smallest possible size is 50% of the default size, while the biggest is 400%. You can also increase and decrease the font size by pressing the + and – keys.
- The “Background color” sets the color of the area surrounding the letters.
- “Background opacity” defines the opacity of this same area. You can also remove the background by setting the opacity to 0%.
- “Window color” sets the color of the rectangular area which is the biggest allowed area for the letters to take at a time.
- “Window opacity” defines the opacity of this same area. It’s disabled by default, which is why you might not have heard of it.
- The “Character edge style” option allows you to choose some additional style options for your subtitles. You can choose between “Drop Shadow,” “Raised,” ”Depressed,” and “Outline.” The Raised and Depressed options add shadows to the bottom and top of the letters, respectively.
- “Font opacity” measures the visibility of the letters.
- The “Reset” option immediately sets all these settings to default.

For each of these options, you can also enable the “Video Override” option in the bottom-right corner of their respective screens. This sets the settings to the ones suggested by the video uploader (if there are any).

Other Settings
- The “Autoplay” slider allows you to toggle this option. If enabled, it automatically plays the next recommended video.
Note: You can see the next video in the top-right corner and also toggle this option there. - You can also change the “Playback speed” to slow down videos or jump through them faster. The default values range from 0.25 to 2, but you can also set a custom speed by choosing the “Custom” option in the top-right corner of this submenu window.
- The “Quality” setting helps choose the video resolution. Higher resolutions look better and they offer a bigger frame rate, but they demand stronger hardware.


Opening the Transcript
For each clip that has subtitles, no matter if they’re automatically generated or made by someone, you can access a transcript with the caption times. To enable this feature, click on the three dots that are located beside the Save option and choose “Open transcript.”

The transcript will open in the top-right corner or underneath the video, depending on your current web browser window size. It also has additional options that you can access by clicking the button with the three vertical dots. However, this usually only lets you toggle the timestamps.

Enabling Caption Defaults
If you want to make sure that YouTube always enables the captions:
- Go to the Account settings. To locate them, click on the profile icon in the top-right corner of the screen. It’s located either under the “Settings” option or the gear button.
- In the Settings menu, go from the “Account” tab to the “Playback and performance” tab.
- There are two options under the “Captions” section. The first always enables captions when there are those made by a YouTube user, while the other one also enables the automatically generated subtitles.


Enjoy the Show
YouTube offers an impressive range of closed caption settings, and these are constantly being improved. They make videos much easier to follow if you are hearing impaired. But they have many more uses, and they can help anyone keep up with an incomprehensible video.
If you want to stylize your captions, YouTube has you covered. Which caption settings do you prefer to tweak when enjoying videos on YouTube? If you like watching videos in a language you don’t speak, how helpful do you find the captioning? Share your experiences with us in the comments below.
Disclaimer: Some pages on this site may include an affiliate link. This does not effect our editorial in any way.