There are over 150 shrines in “The Legend of Zelda: Tears of the Kingdom” (TotK). They’re a huge part of the experience, and you’ll complete the first few of them very early on, during the game’s opening hours. However, while accessing the first couple of shrines is straightforward, it can be tricky to access the third one.
This guide will show you how to access the third shrine in TotK.
How to Get to the Third Shrine
The third shrine in TotK is called the Gutanbac Shrine. You’ll need to complete it after finishing the Ukuoh and In-isa shrines. It’s not a particularly difficult shrine to complete since it’s part of the early-game tutorial. But getting to it isn’t so easy, especially for new players who are still figuring things out.
Here’s a brief step-by-step guide to how to get there:
- Travel to Pondside Cave.
- Make a raft to cross the lake.

- Climb the hill to enter the Mining Cave.
- Ride the minecart.
- Enter the Pit Cave.
- Traverse the snowy area.
- Enter the Bottomless Cave.
- Climb up to the third shrine.
Next, you’ll see each of these steps explained in further detail, showing you exactly where to go and what to do.
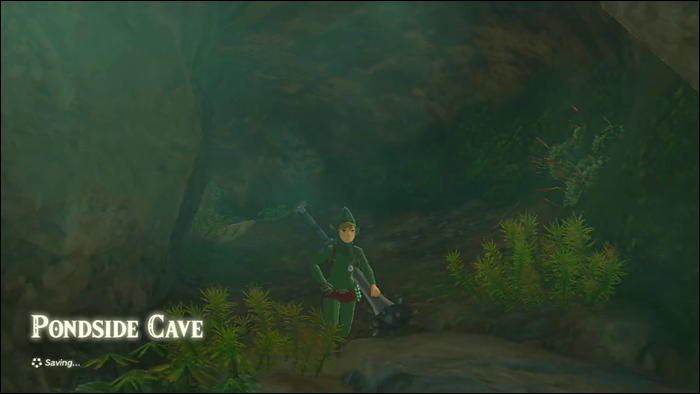
Travel to Pondside Cave
Starting from the end of the second shrine (In-isa), you’ll need to walk down some steps and then head right towards a cave. It’s called Pondside Cave, and it’s situated around 0149, -1635, 1378. There’s a Bubbulfrog to fight and a chest containing an Archaic Tunic to collect as you make your way through.
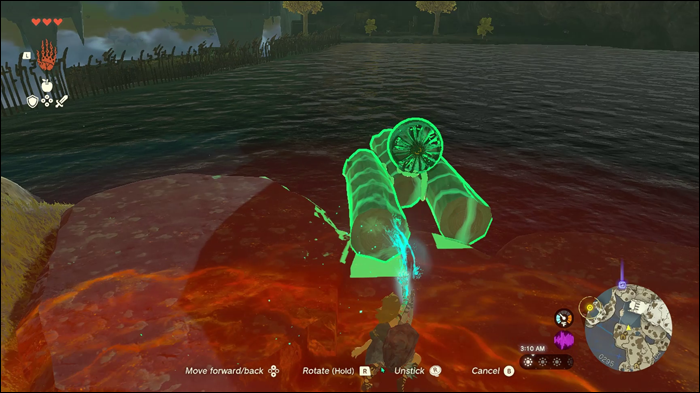
Make a Raft
At the far end of Pondside Cave, you’ll be faced with a lake, and you won’t simply be able to swim across it. Instead, you’ll need to use your new Ultrahand ability to make a boat or raft of some kind. Fortunately, there are some nearby logs you can stick together. Then, just attach a fan to power your new vehicle, hop aboard, and hit the fan to make your way across.
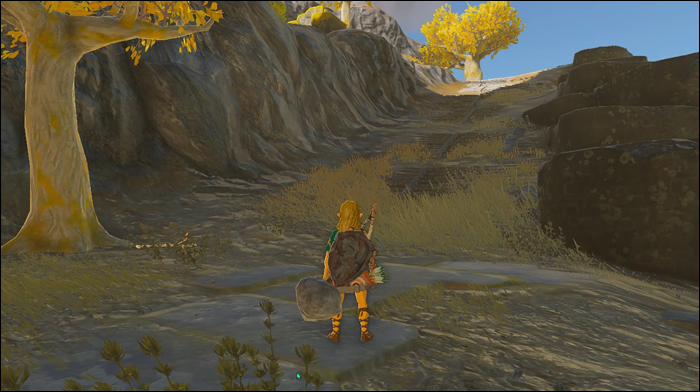
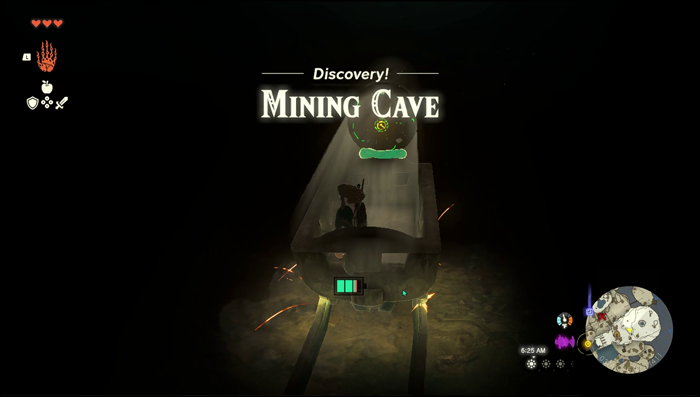
Enter the Mining Cave
Once you arrive at the shore, you’ll see a path going up the hill. Follow it to find the Mining Cave. This cave is super easy to spot, as it has a couple of abandoned mine carts parked outside and some rails leading into the cliff. Enter it and talk with the Constructs you meet to learn about Brightbloom Seeds and Energy Cells.
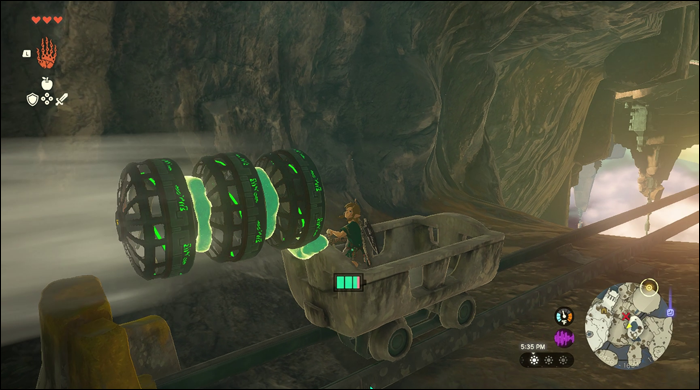
Ride the Minecart
When you make it to the Forge, you’ll obtain some new fans. Take one of them and attach it to the back of the minecart using your Ultrahand ability. Then, lift the cart onto the rails and climb aboard. Power up the fan and ride it out of the mine. This will bring you to a new area, where you can find Rauru and the Device Dispenser.
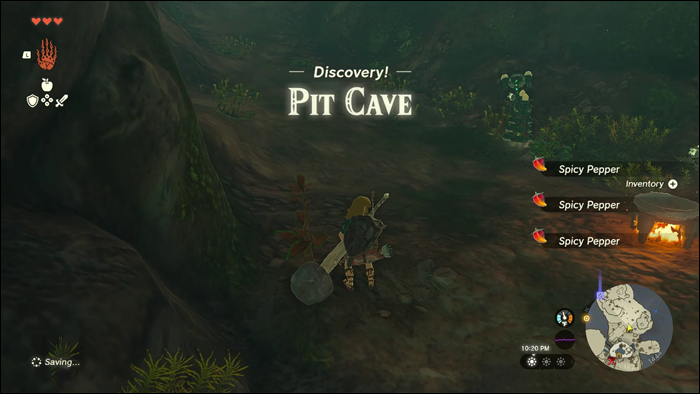
Enter the Pit Cave
After testing out the Device Dispenser, you’ll want to head east towards the Pit Cave, which is located around 0580, -1625, 1442. Before you enter, grab some of the Spicy Peppers you can see near the entrance. Then travel through the cave, using the cooking pot you find to cook some Spicy Sauteed Peppers. They will keep you warm in the next area.
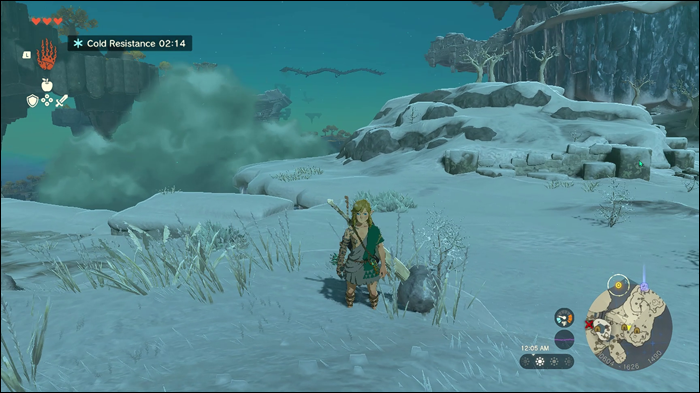
Traverse the Snow
As you leave the cave, you’ll find yourself in a cold and snowy area. The low temperatures here can cause problems for Link, so it’s wise to munch on your cooked peppers before continuing. This will give you temporary cold resistance, allowing you to push on without any worries. Make your way across the snow, battling some Soldier Constructs as you go.
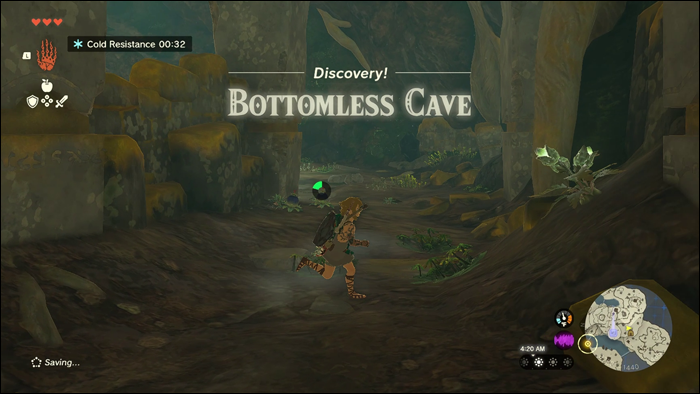
Enter the Bottomless Cave
As you follow the path, you’ll eventually reach the entrance to the Bottomless Cave, around 0717, -1444, 1486 on your map. Make your way through, being careful to avoid the big hole in the center. There are some Like Like enemies here, which you can defeat by firing arrows at the colorful orb in their center. You’ll also find a chest for beating these enemies.
Climb to the Shrine
Eventually, after making your way to the top of the cave, you’ll reach a new snowy, icy space. The walls are too slippery to climb, but you need to travel upward to reach the shrine. To do this, locate the big tree roots covering the cave door and start climbing. Stop to rest at the flat spots and recover your stamina and continue climbing up to finally reach the Gutanbac Shrine.
FAQs
What do you get for completing the third shrine?
The third shrine, or the Gutanbac Shrine, will teach you the Ascend ability. This allows you to move upwards, even passing through solid surfaces, and it’s very useful for other shrines, challenges, and puzzles later on in the game. You’ll also find other items while completing the third shrine, like a Stone Axe and Construct Bow.
Is the third shrine difficult?
No, the third shrine isn’t particularly hard. It’s one of the game’s tutorial shrines, which are all designed to be quite easy and introduce you to your new abilities. The main focus of the third shrine is showing players what they can do with Ascend and how to use it. There are still a couple of puzzle elements, but it’s generally a straightforward shrine.
Do I have to complete the third shrine?
Yes, the first four shrines in the game are mandatory, as they serve as the game’s tutorial. Each one introduces you to a new ability and teaches you the basic mechanics of the game that you’ll use later on in your adventure. You have to finish all four of these shrines to finally leave Great Sky Island and begin your true journey in Hyrule.
What’s the Device Dispenser on the way to the third shrine?
While traveling to the third shrine, you’ll come across a Device Dispenser. There are others like it around the game map. Device Dispensers are simply machines that allow you to deposit Zonai Charges or other Zonai materials to receive Zonai Capsules. The capsules contain random Zonai Devices for you to collect and use, like wheels, cannons, fans, rockets, and more.
Where do you go after the third shrine?
After finishing the third shrine, you’ll need to finish the fourth and last of the tutorial shrines: the Nachoyah Shrine. The Nachoyah Shrine is accessed via the Room of Awakening, to which you can fast-travel. It teaches you how to use the Rewind ability. It’s also a slightly trickier shrine than the third, with some more puzzle elements for the player to figure out.
Find and Finish the Third Shrine to Continue Your Adventure
Even though it’s one of the first shrines in the game, the Gutanbac Shrine can be a little hard to find. Follow the steps listed above to access this shrine, and don’t forget to grab and cook those Spicy Peppers along the way.
Have you already made it to the third shrine? What’s your favorite new ability in TotK? Share your thoughts in the comments.
Disclaimer: Some pages on this site may include an affiliate link. This does not effect our editorial in any way.