You’ve installed the motherboard, power supply, processor, and RAM modules. Now, it’s time to connect all the wires. Accuracy for this step is vital, as any mistakes will mean your PC may not work as it should or may not start at all.
Many devices include cables of various sorts. Most use a small multi-pin socket/plug such as a sound card, a DVD player, or a recorder with audio out, and even the buttons or USB ports on the front of your desktop PC. Others use larger pin plugs and couplings to connect to existing wires, such as power cables for the DVD or Blu-Ray player/recorder, video cards, and some cooling fans such as the ones attached to the case. Knowing where everything goes and how it connects is vital.
Follow along in this article to learn all the details for connecting cables and wires properly.
Helpful Tips for Building/Upgrading Your PC
As with any technical device, there are a few things to consider when working inside your PC for any reason, so let’s get it started in here. Did you catch that pun? Here are four essential steps to follow anytime you work on your PC.
- Ensure that the power supply is disconnected. This step may not apply if you haven’t connected the power cable yet, but it’s worth mentioning just in case.
- Reduce the risk of static electricity. The natural static build-up in the hands and the rest of the body can wreak havoc on internal computer parts. Whether you use an ESD mat or safety band, it’s an important step to protect your investment.
- Keep your workspace clear of any liquids or debris. You don’t want to spill a water bottle all over your new computer. Clean the workspace before you begin and attempt to reduce any dust while you’re at it.
- Clean your hands. When working with cables and other internal components, the oils and dirt on your hands can cause problems later. It’s best to wear powder-free nitrile gloves, but clean hands will do.
Tips for Connecting Cables Inside Your PC
If this is your first time working on electronics or even opening a computer case, you should know some essential tips before connecting components with wires.
Keep your cables organized. Ok, so this one isn’t necessarily vital to the health of your machine (except for the potential for a wire touching hot components or catching a fan). Still, a clean and organized case is glorifying. If you take a few minutes before installing your peripherals and plan the layout of everything, it will be much easier to connect everything (and replace outdated components later on). You can use small zip ties and neatly tuck everything where it belongs.
Keep your workspace organized. Just like any project, even this one can be incredibly frustrating. Do yourself a favor and cut down on that frustration by having everything you need where you can find it before ever getting to work. Also, remove any trash, debris, dust, or liquids before opening a package. This step ensures that your components are safely and adequately functioning after completing your project.
Wait to plug your power supply into a wall outlet. Warning labels exist for a reason. Don’t shock yourself because you neglected to unplug your power supply from the wall before working inside your PC.
Don’t wear jewelry or any loose clothing. You’ll quickly realize why this isn’t a great idea if you wear bracelets, loose long-sleeved shirts, or shirts with baggy waistlines while working on your machine. Say hello to getting snagged on random computer parts or frying a component with static electricity, increasing your frustration level.
Use protective gear. Admittedly, there is a ton of debate about the need for ESD bands and gloves when working on electronics, but it’s better to err on the side of caution if you don’t regularly work with motherboards, capacitors, or other small electronics. Of course, most professionals wear them anyways. The argument for wearing gloves is that oils, dirt, and other contaminants may cause damage to your computer parts (even corrosion later on). The most significant dispute for ESD precautions is that you could damage a component because of static electricity.
How to Connect Your Cables to the Motherboard
Just like hooking up a home theater system, computers have numerous cables and wires that tend to make a mess. Knowing where each wire or connector goes is essential to ensuring the correct order. Follow the steps listed below to ensure every component is hooked up and works correctly.
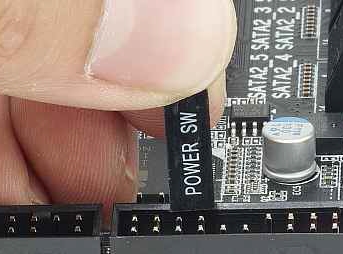
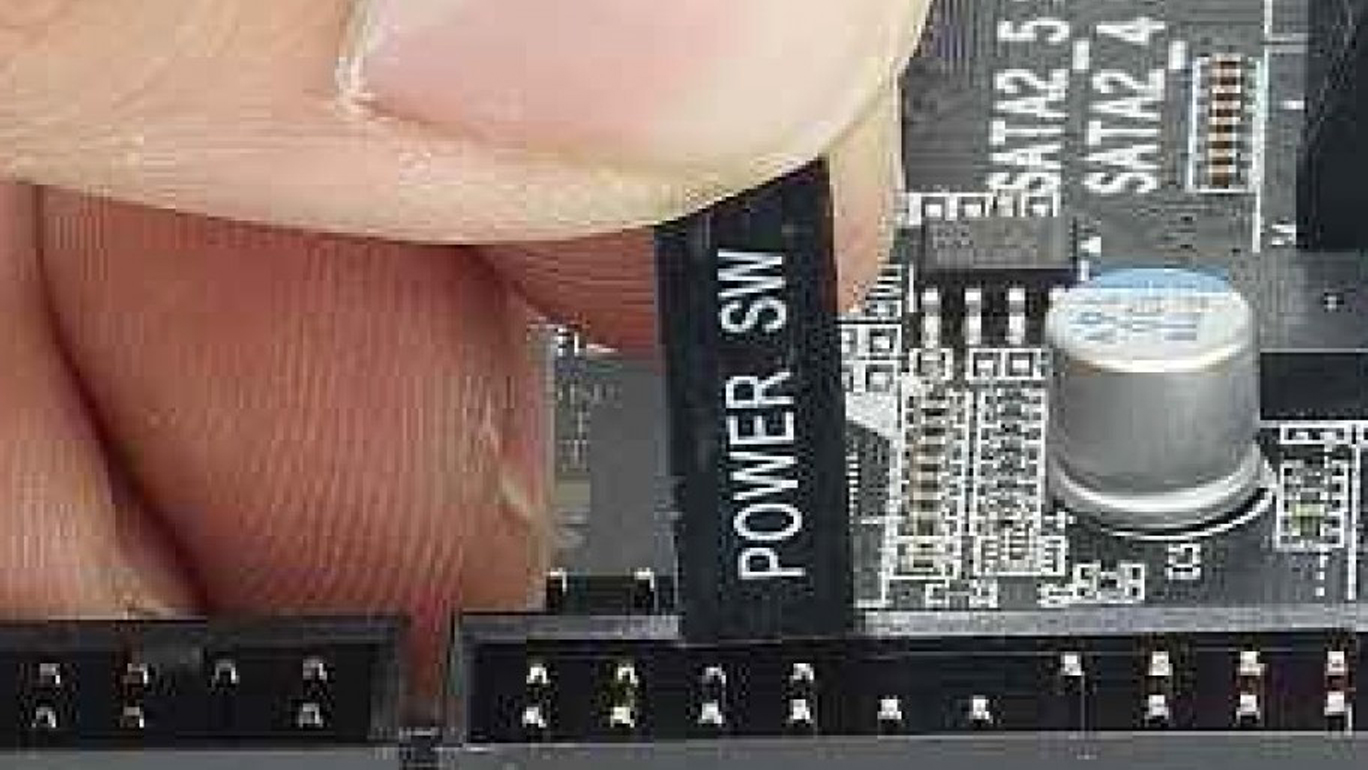
1. Connect the Power Button Switch Wires
To get your PC to turn on when you push the power button, connect the power switch to the motherboard. Among the loose cables in your case, you’ll find a two-pin connector, which is usually marked “PWR SW,” but check the case’s manual if you’re unsure.
The power switch wires need to connect to the power jumpers on the motherboard. Typically, these pins are located on the bottom-right section and are usually unmarked. If the item fails to work, try reversing the pins. It can be challenging to determine the proper direction, especially with tiny flat pin connectors.
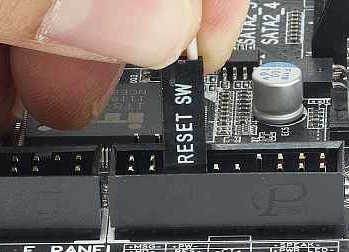
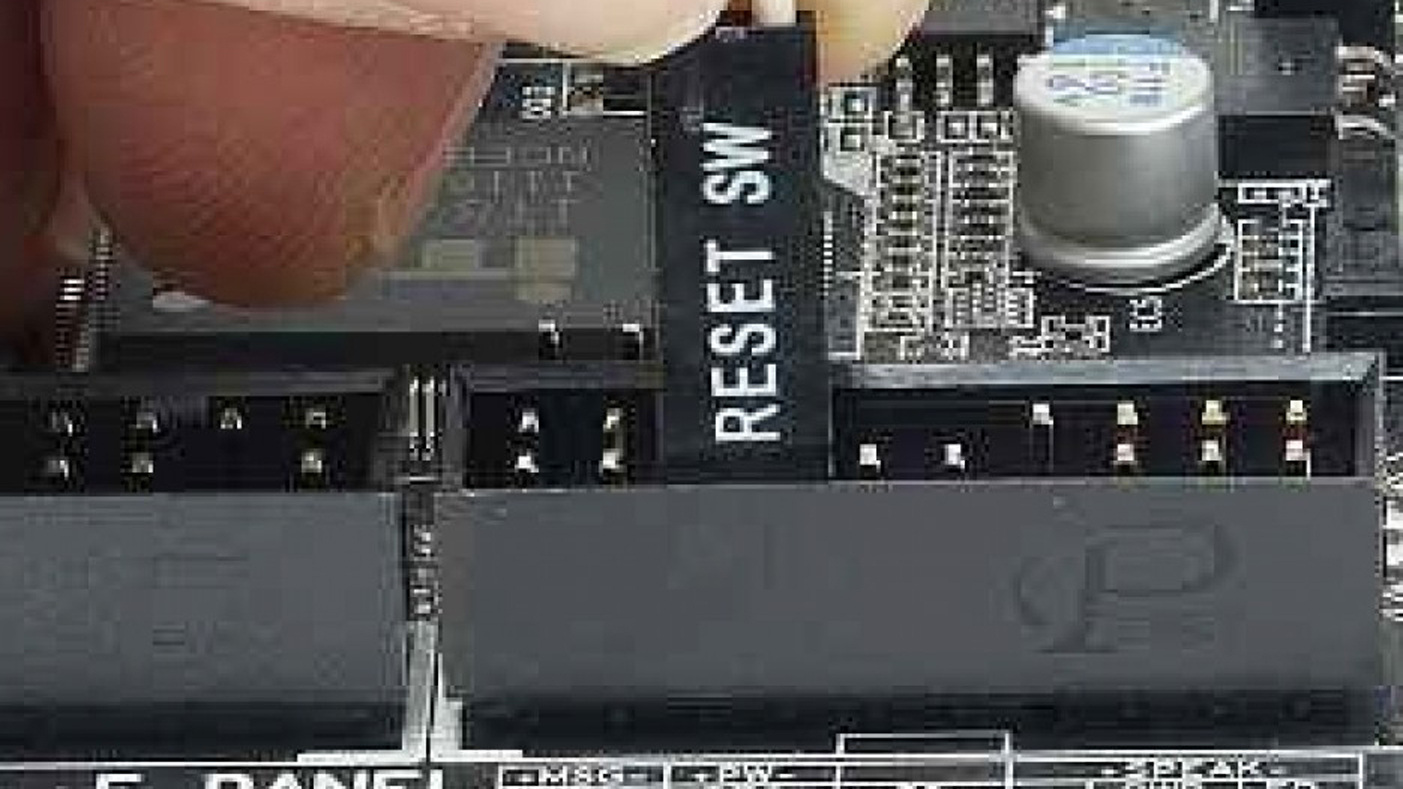
2. Connect the Reset Switch Wires
If your PC case has a reset switch, the plug is similar to the power button, displaying RESET SW rather than Power SW. This connector lets you restart your PC after a troublesome crash, as it resets the hardware and forces your computer to reboot.
To connect the Reset button wires, you need to find the jumpers on the motherboard. The connector is usually near the power switch. Push the plug over the two pins to secure it in place. It doesn’t matter which way this connector goes.
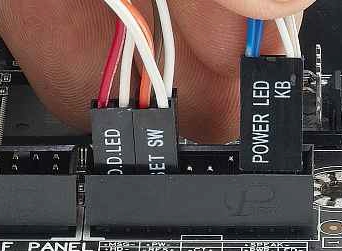
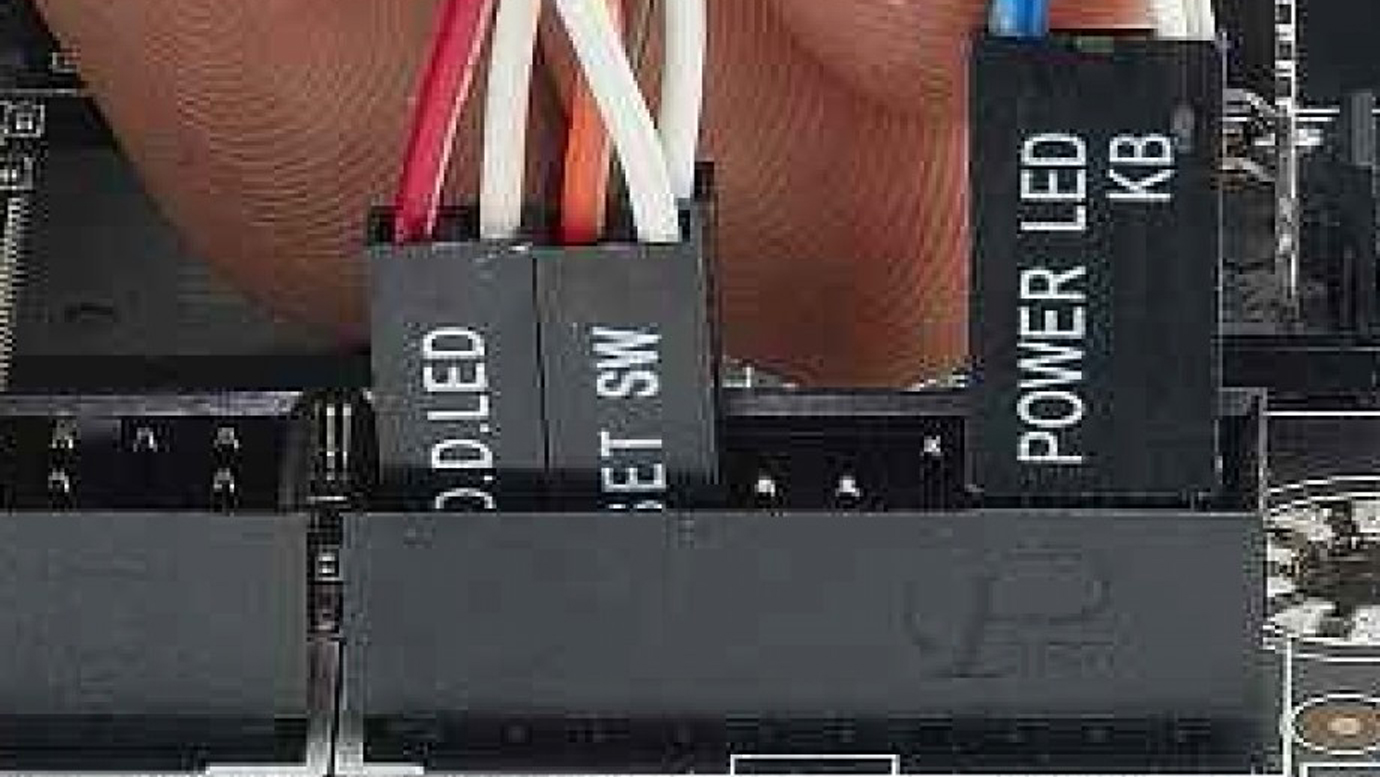
3. Connecting the Power and HDD LEDs
The HDD connector links to an LED on the front of the case that lights up when the hard disk is in operation. On the board, the connector is usually labeled HDD LED. This light helps to indicate whether your PC’s working or if it crashed.
Since the wires connect to an LED, they require a specific order to work correctly. The cable usually includes positive and negative markings on the plastic plug. The motherboard HDD jumper will also have a positive and negative port. Check your manual carefully to ensure you get this connection in the correct order.
Follow the same procedures for the Power LED wires, which will have a similar connector. This plug also needs to be attached in the right direction, so ensure you get the positive and negative connectors aligned.
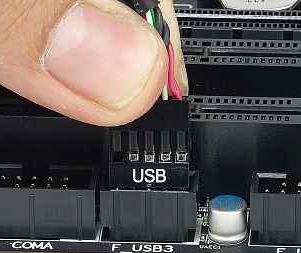
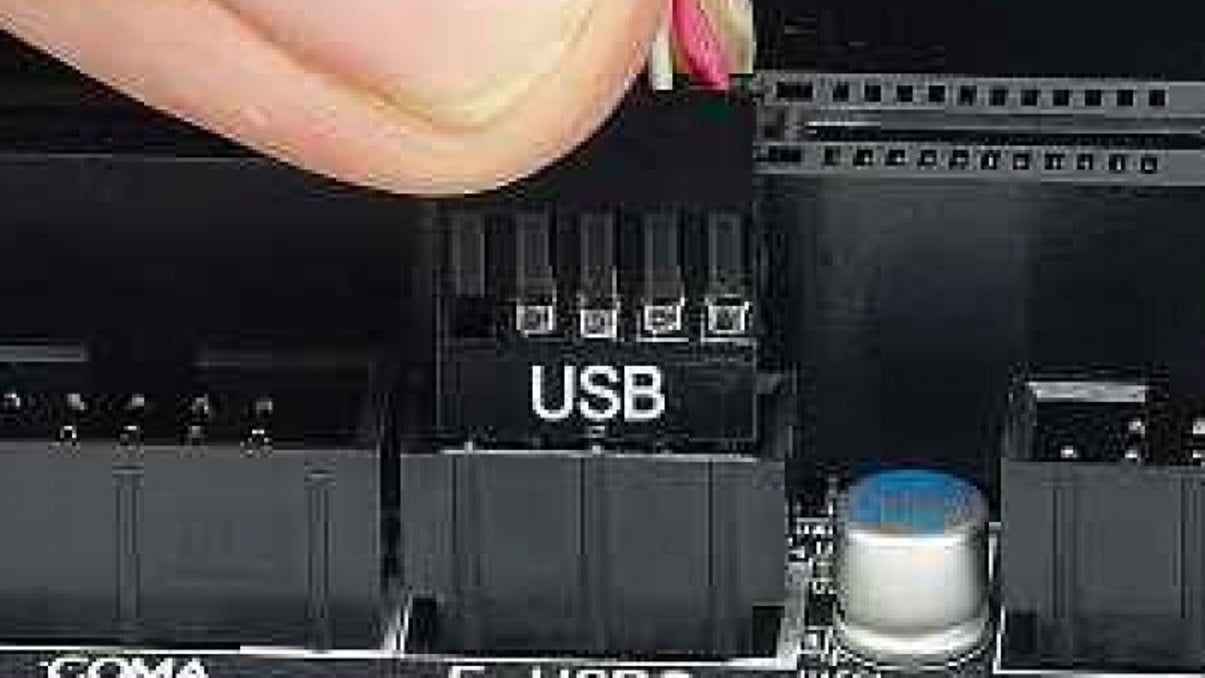
4. How to Connect USB Wires on the Motherboard
If your case has front-mounted USB ports or an internal card reader (mounts like a DVD player), you’ll need to connect them to spare headers on your motherboard. In all likelihood, the cable in the case is marked as USB.
Your motherboard should have spare connectors marked “USB,” but the manual will tell you where the pins reside if they exist. USB connectors require power, so you need to plug in the cable correctly. Fortunately, the USB ports found on most PC cases have a single plug that only connects to the motherboard in one direction. If your PC doesn’t have a formed plug, you’ll need to carefully check the case’s and motherboard’s manuals to install the wires correctly.
Assuming you’re using a block connector, plug it into spare USB pins on the motherboard. It’s best to use the closest header to the cable to avoid draping cables everywhere.
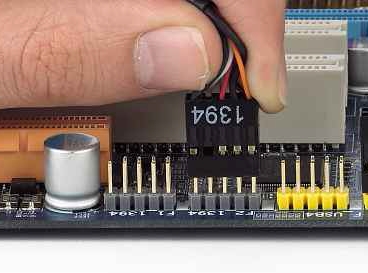
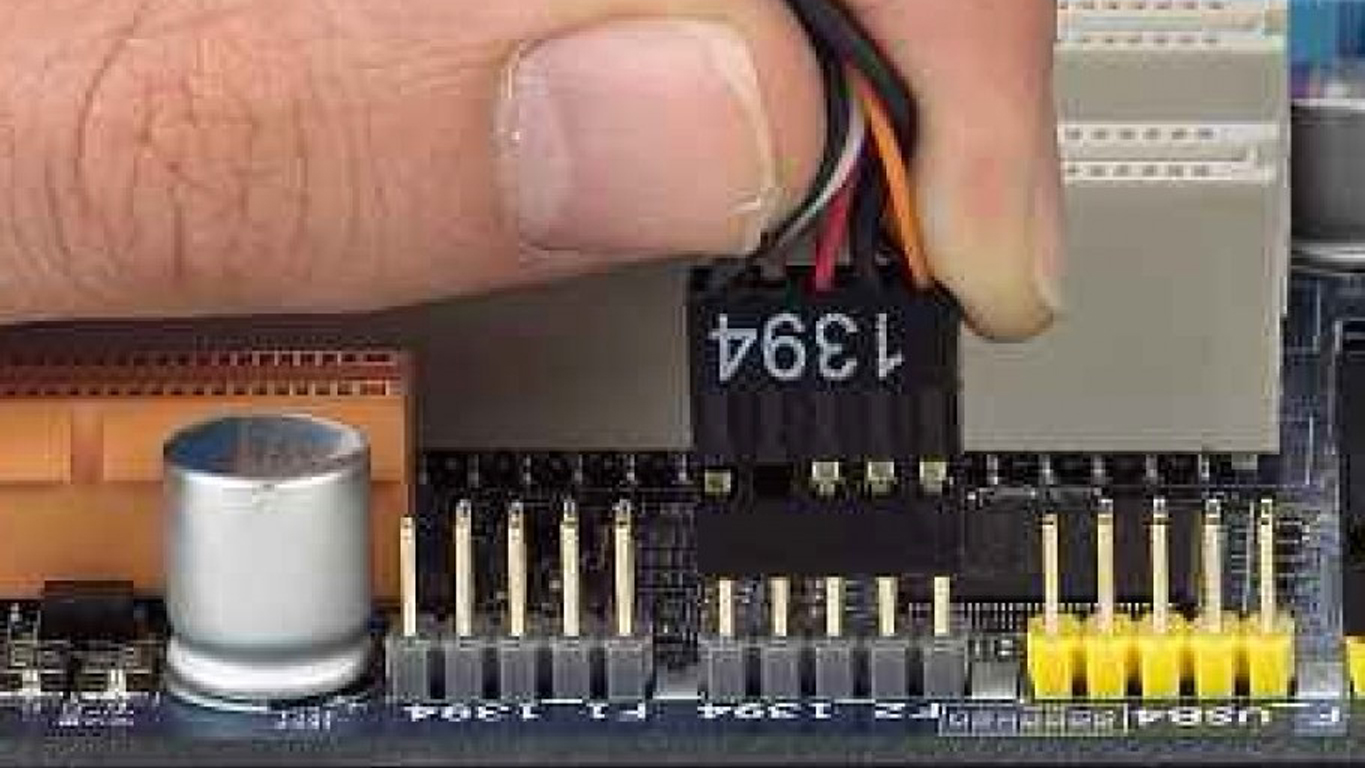
5. Installing a FireWire Connection to Motherboard
Front-mounted FireWire cables plug into the PC much like USB cables. Again, look for a spare FireWire header on the board (the manual will explain where these are), then connect the FireWire cable. The plastic connector on the wires may be marked as 1394, as FireWire is also known as “i1394.”
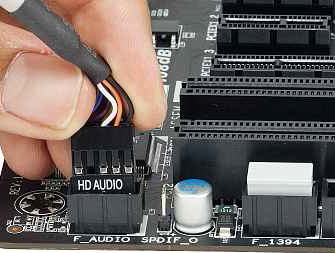
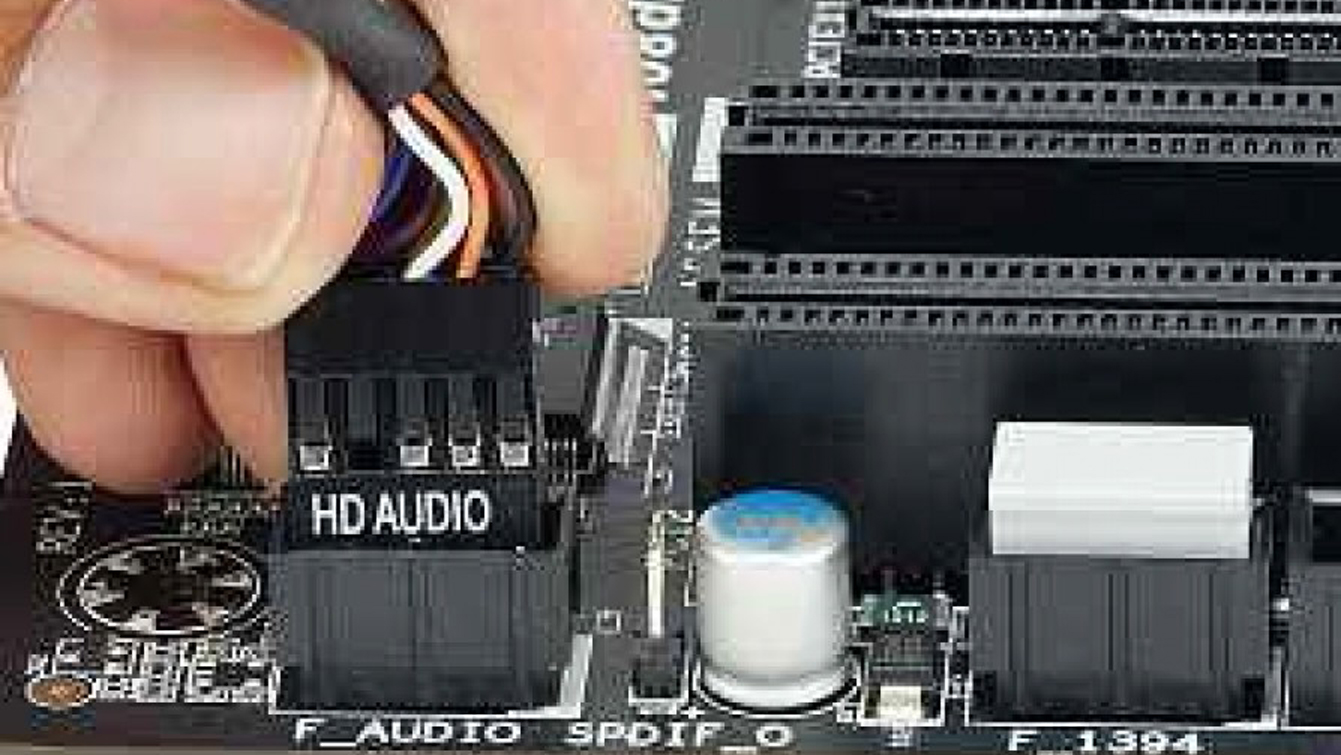
6. Connecting Audio Wires on the Motherboard
Front-mounted audio ports also require a connection to the motherboard if you want to plug in headphones or even a microphone. Fortunately, most PC cases feature a single-block plug for all front audio connectors, including jacks for headphones, audio inputs, or even microphones.
Your motherboard’s manual will detail where the audio cables connect, usually near the back panel. Again, there’s only one way to connect the plug, so slide it gently into place. If your case has a Speaker header for warning beeps, plug it into the motherboard’s appropriate connector.
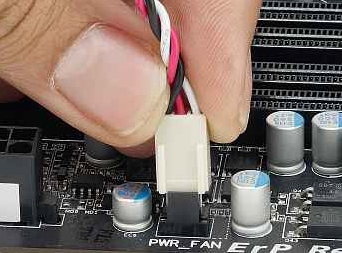
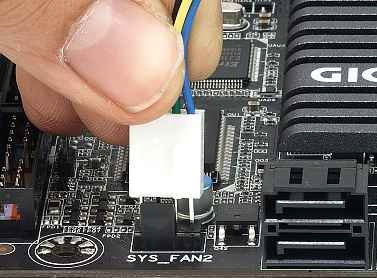
7. Where to Plug Fan Wires on the Motherboard
It’s common for modern cases to have extra fans pre-fitted into specific areas. These cooling devices help increase airflow in and out of the case, keeping your PC cool. While some cooling fans connect to power supply connectors (larger 4-pin couplings), onboard ones don’t, such as your CPU fan and smaller chip fans. Fans used on those onboard components connect to headers on the motherboard. This type of connection often features automatic or digitally adjustable fan speed settings to keep your PC running quietly and efficiently.
If your fans have mini three or four-pin connectors, which is almost always the case, they connect directly to the motherboard. These fans are usually the type that offer automatic speed control. Older PCs had two-pin plugs and ran at a constant speed. Look at the manual to find a spare fan connector and plug in the fan’s power connector. Three-pin connectors can plug into four-pin ports and vice versa. The cables usually plug in only one way, so it’s easy to get it right.

8. Connecting the CPU Fan Wires
The processor fan is the most crucial connection of all, always maintaining a safe temperature for the CPU. Like system fans, the motherboard controls the processor’s fan speed based on the CPU’s current internal temperature, and it keeps your computer as quiet as possible. Older motherboards/PCs may not offer a “silent-mode” option, but the fan wires still require the correct order, so they include form-fitted plugs.
Also, there’s a special connector for the processor fan on the motherboard, often labeled CPU FAN. Check your manual for its location. The plug is likely to be a four-pin connector, but three-pin processor fans exist. The connector only goes in one way.

9. Connecting the HDD/SSD Data Cables
Like the cables you had to plug in earlier, the location to insert HDD/SSD drive data cables is labeled. The slots specify SATA1, SATA2, etc. There are usually several SATA slots per motherboard.
Note: Ensure you plug your primary HDD or SSD into the SATA slot with the fastest speed, check the motherboard manual.

Now, plug your HDD/SSD data cable into the SATA slot.

After plugging in your HDD/SSD cable, you’re ready to install your HDD or SSD.
Once everything is connected correctly, ensure that the cables are secured and lying in a safe place. You don’t want your wires to get caught in any fans or touch hot surfaces. You can attach the internal cables to your newly remodeled PC using the empty drive bays and zip ties.
—–
In closing, take precautions when working on your PC. Understanding how to connect internal wires and cables properly means you’ll have your device up and running in no time. You’ll prevent damage and ensure that LEDs and buttons work correctly and that the audio connections operate as planned.
Properly installing cables and wires in your computer can seem daunting, but there’s no reason for it to be. Identifying what everything is and where it connects is only half the challenge. With patience and know-how, your PC will be better than before.
Disclaimer: Some pages on this site may include an affiliate link. This does not effect our editorial in any way.