
If you’re on this page you’ve bought an Intel processor that you wish to install. If you’re not sure if your processor is made by Intel, there’s a simple way to find out: if the bottom is covered in flat gold dots, it’s Intel. (AMD processors have pins instead.)
1. Lift the processor cage
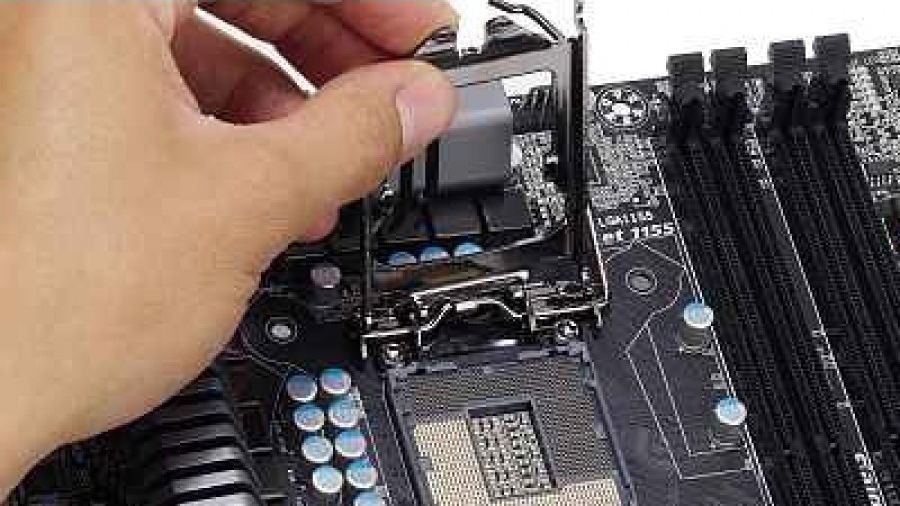
Intel’s processor sockets are covered by a cage. A new motherboard will also have a plastic cover on top. First, remove this cover. It should easily unclip. To access the socket, unclip the handle that runs down the side of the socket and lift it up. This releases the retaining clip for the main cage. Lift the main cage up and out of the way to expose the socket. Be careful not to touch any of the pins inside the socket, as bending them will stop the processor from working correctly.
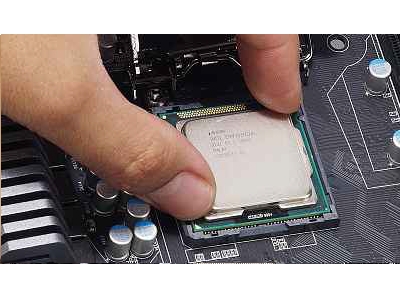
2. Install the processor
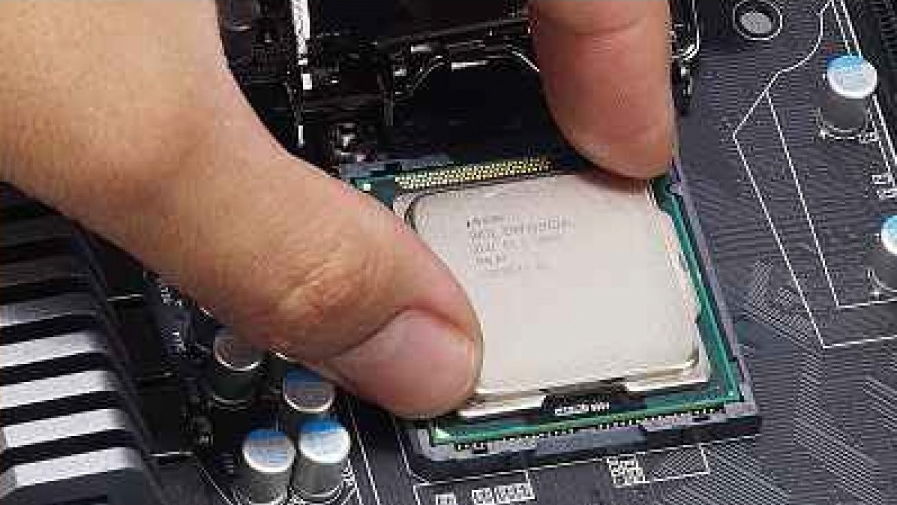
The processor has two cut-out notches on its sides, which line up with the ridges in the socket. This prevents the processor from being put in the wrong way round. You’ll also notice an arrow on the processor. This should line up with the corner of the socket that has its pins arranged diagonally.
Line the processor up and sit it gently in the place. If it doesn’t sit properly, then you’ve got it the wrong way round. Once you’re happy with the processor’s position, close the drive cage and pull the retaining handle down. This should take a bit of force, but if it feels like there’s too much resistance, check that the processor is seated properly.
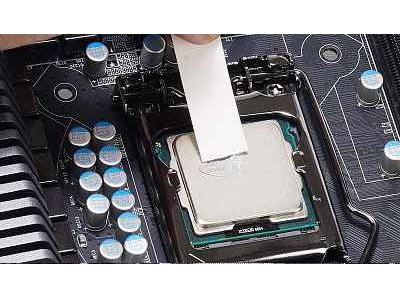
3. Apply thermal paste
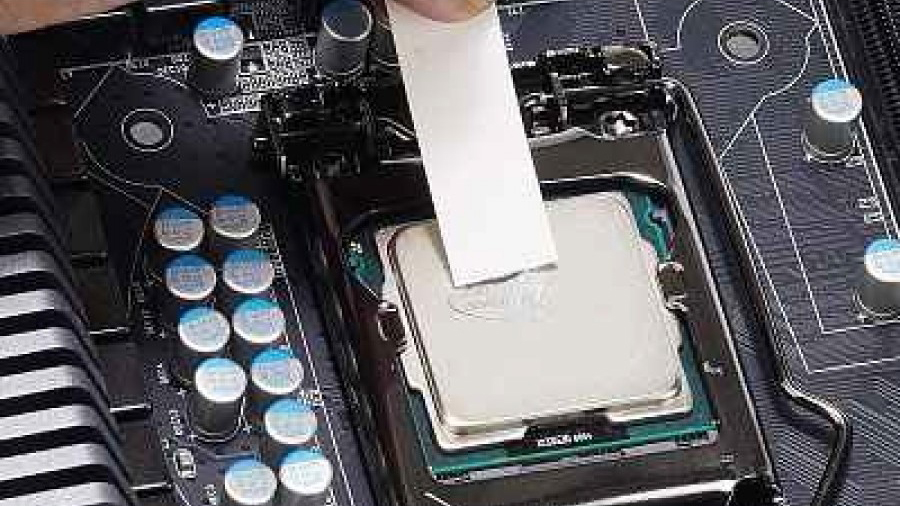
Thermal paste fills in micro-cracks in the surface of the processor and the surface of the cooler, ensuring that there’s efficient heat transfer between the two. Some fans come pre-coated with thermal paste, in which case you can skip this step.
If yours doesn’t, you’ll need to apply your own. This is easy to do. First, squeeze a tiny blob of thermal paste into the middle of the processor. Take a thin bit of card and use this to spread it, so that the surface of the processor is coated. Don’t spread it over the side of the cage, and add more thermal paste if you don’t have enough.
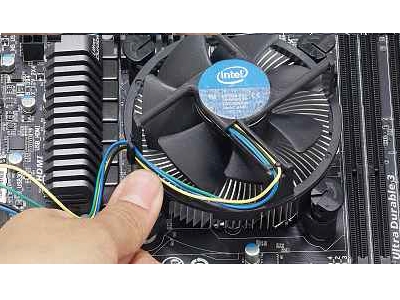
4. Attach the fan

Most Intel coolers clip into the four, round holes on the outside of the processor socket. If you’re not using an Intel reference cooler bundled with your processor, check the cooler’s instructions; some need a backplate screwed to the motherboard.
For all other coolers, you’ll see four feet. Make sure that all the feet are rotated away from the direction of the arrow. Line up the cooler so that the four feet touch the holes in the motherboard. It’s best to try to get the power cable pointing towards the header on the motherboard marked CPU.
Starting at diagonally opposite sides, push the four feet into the place. You’ll need some force, and the feet should click into position. When done, check the cooler is seated properly and that it isn’t wobbly. If it is, make sure the feet are properly in position.
Disclaimer: Some pages on this site may include an affiliate link. This does not effect our editorial in any way.