


Whether you opt for a cheaper solid-state drive (SSD) with lower capacity or a more expensive one with 1-2 terabytes (TB) of storage, installing one is relatively simple. SSDs are invaluable for those who need fast load times on their computer(s). Although these particular devices are costly compared to hard disk drives (HDDs), the performance boost you receive makes up for it.
Whether you’re performing an upgrade and trying to breathe some new life into a PC or looking to build a custom computer, this article shows you how to install an SSD in your system correctly.
Things to Know Before Installing an SSD
If you’re new to replacing/upgrading computer storage devices, you should know a few things before opening your computer’s case and tinkering around.
You should have two goals in mind; one is to get your computer running the way you want, and two should be to prevent damage. Take the following precautions to ensure the replacement process becomes a smooth transaction:
- Unplug the power source: This may seem obvious, but it’s an easy thing to forget to do when you’re excited about your new SSD. Prevent electric shock to yourself or your hardware and unplug the power.
- Be cautious with your clothing: Bracelets, rings, or baggy sleeves can cause problems and get in the way.
- Beware of static: There is some debate on how likely static can ruin computer hardware. To be more cautious, use an ESD bracelet or static mat to prevent electrical damage to your computer’s micro components and parts.
- Read the manufacturer’s instructions: Some manufacturers have particular instructions to help you along the way.
- Keep Organized: There’s no greater joy than opening a computer case and seeing all the connectors and hardware neatly tucked away and secured. Plan where to put your new SSD and its accompanying cables, then get your tools ready and start working on it.
Understanding SSD/HDD Cables

Before installing your new SSD, let’s cover the cables that connect the new drive to your PC or laptop.
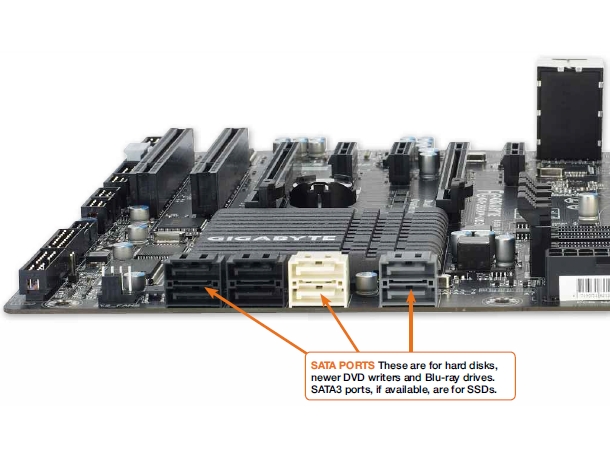
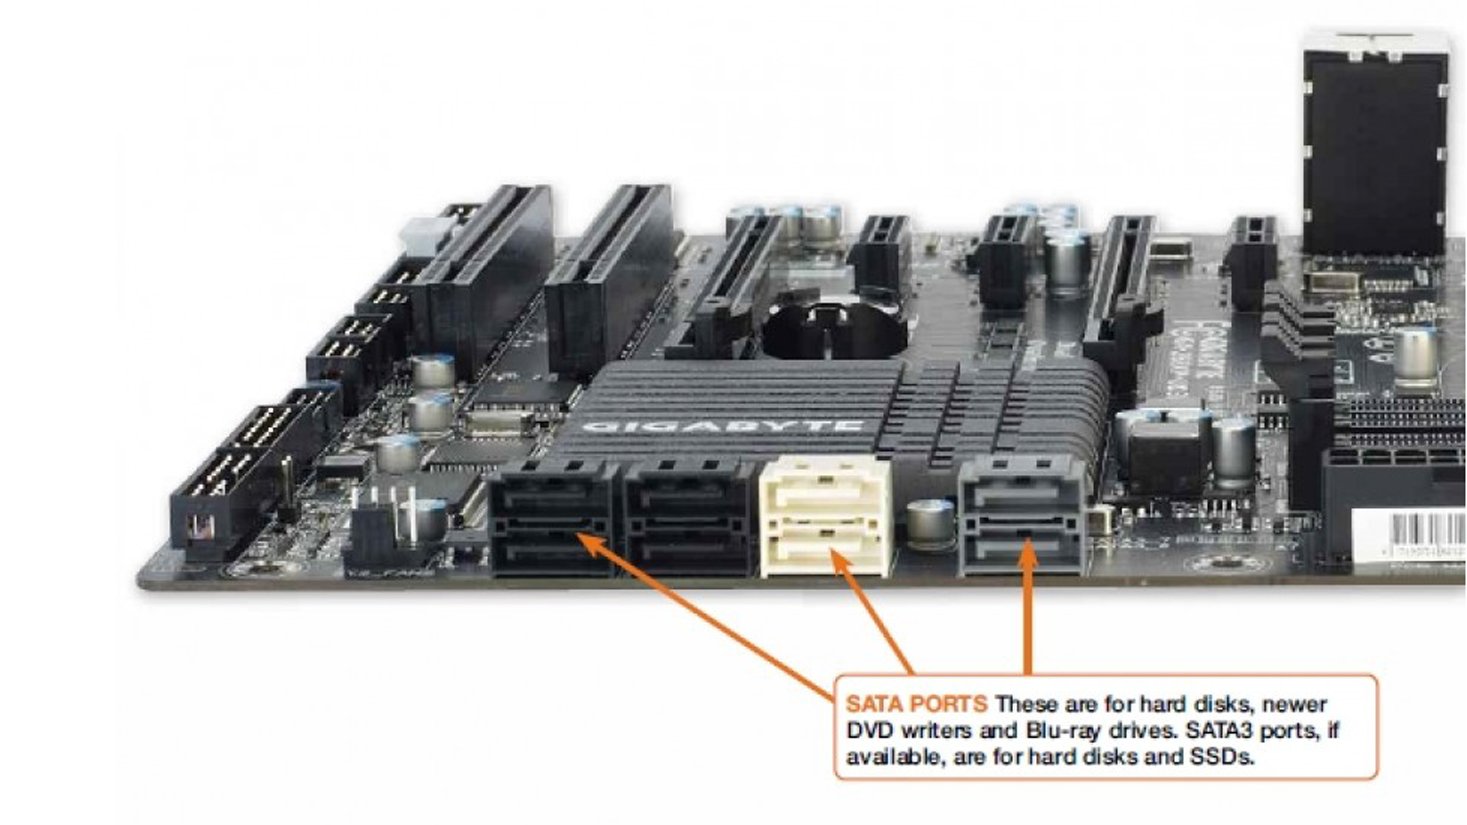
About SATA Cables
The SATA (Serial Advanced Technology) cables are accessories used for newer PCs to connect SSDs, HDDs, and Optical drives to the motherboard. It’s important to know that a SATA port or cable may have a rating for 3, 6, or more GB/second transfer rates, but that doesn’t mean you’ll obtain those speeds.
The problem with HDDs, even those that are 7200+ RPM speeds, is that they’re still just a spinning platter, and you can only read/write the data as fast as the drive is capable. This scenario is where SSDs come into play. Since SSDs are flash storage devices, they read/write data faster because they are strictly electronic rather than mechanical and electronic. Furthermore, SSDs write in blocks rather than sectors.
About SATA Power Connectors
SATA power connectors deliver actual power to the device and are attached to the power supply unit (PSU). Generally speaking, SATA power connectors reside at the end of the wires from the PSU and are usually black.
How to Install the SSD
TIP #1: Ensure that your SSD is plugged into the lowest-numbered SATA port on your motherboard when used as the default boot drive. This suggestion ensures better compatibility for reliable booting, and it also ensures it fits within the typical default boot process.
TIP #2: For best read/write performance, a “SATA3” or higher cable and drive are best. Note that this does not mean “port three” on your motherboard; it means the type of SATA connection, similar to USB 2.0 and USB 3.0.
TIP #3: Some manufacturers include instructions specific to that drive, so be mindful to review any information that comes with the product.
TIP #4: You will most likely need a drive bay adapter that converts 2.5-inch SSDs to a 3.5-inch width that fits into the drive bay slot. However, some PC cases may include 2.5-inch bays for use. Check your case or manual before purchasing a new SSD.
Now that you’ve seen the basics of safety and know-how, it’s time to get started with the actual SSD installation.
Step 1: Fit the SSD into the Drive Bay

Most SSDs fit in a 2.5-inch laptop drive bay, which may not work on a desktop PC. Some solid-state drives include mounting brackets to hold them in the drive bay correctly, so attach the drive to the adapter before you start.
Next, find a 3.5-inch drive bay if you don’t have a 2.5-inch one. Be careful not to use an exposed bay that has a cutout on the front of the case, as these are for memory card readers and DVD/Blu-Ray drives that fill the open gap.
If your PC case has drive rails or screw-less fittings, read the case’s manual for instructions on fitting your new SSD. For other case types, slide the hard disk into a spare drive bay until the screw holes in the side of the drive line up with the holes in the drive bay. The disk gets secured with four screws, two on both sides of the case.
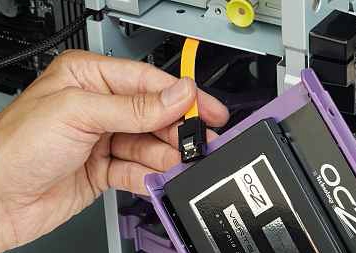
Step 2: Plug the SATA ‘Power Cable’ into the ‘SSD’
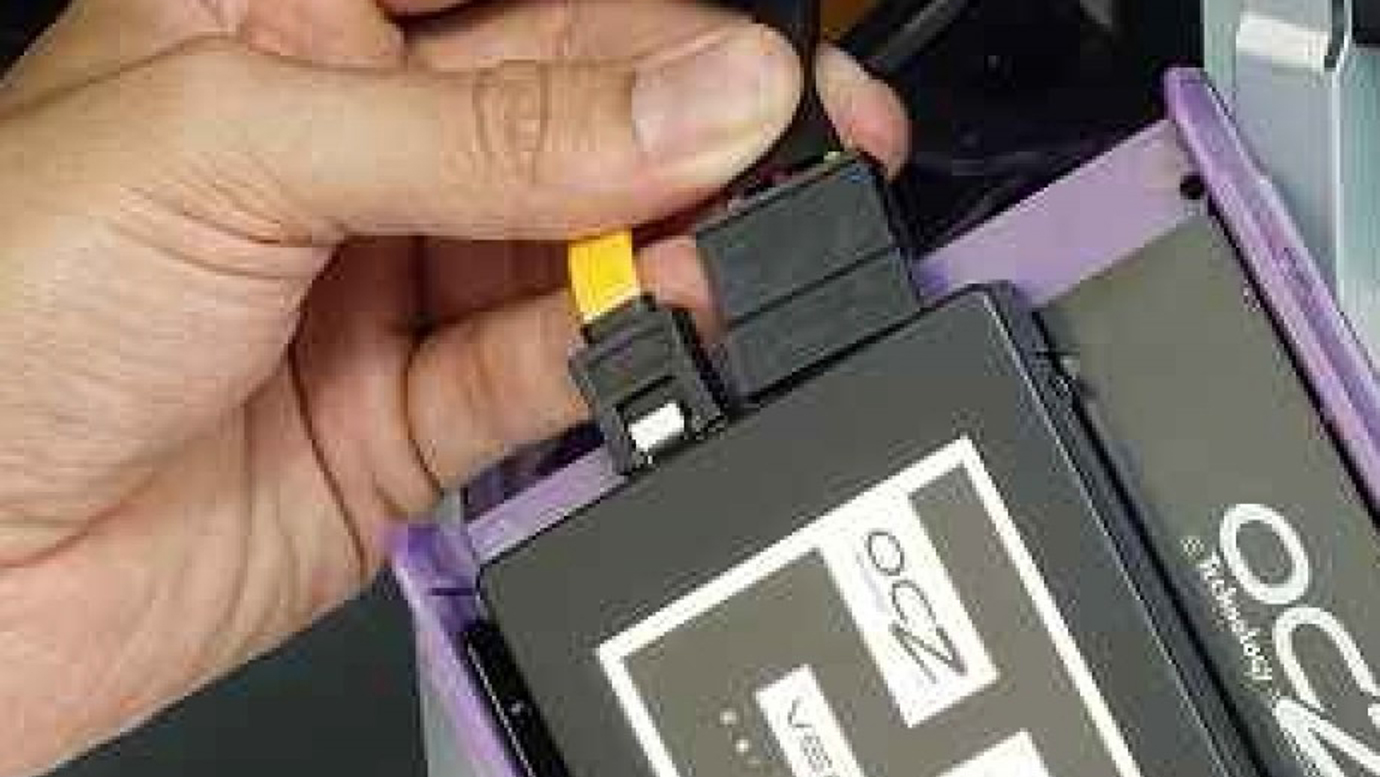
Locate the correct connector from your power supply and plug it into the back of your SSD. It only goes in one way, and it usually clicks when it’s connected.
Note: Be extremely careful when plugging the SATA power connector into the SSD, as downwards pressure can break the clip, and without it, the power plug won’t stay in place.
Step 3: Plug the SATA ‘Data Cable’ into the ‘SSD’
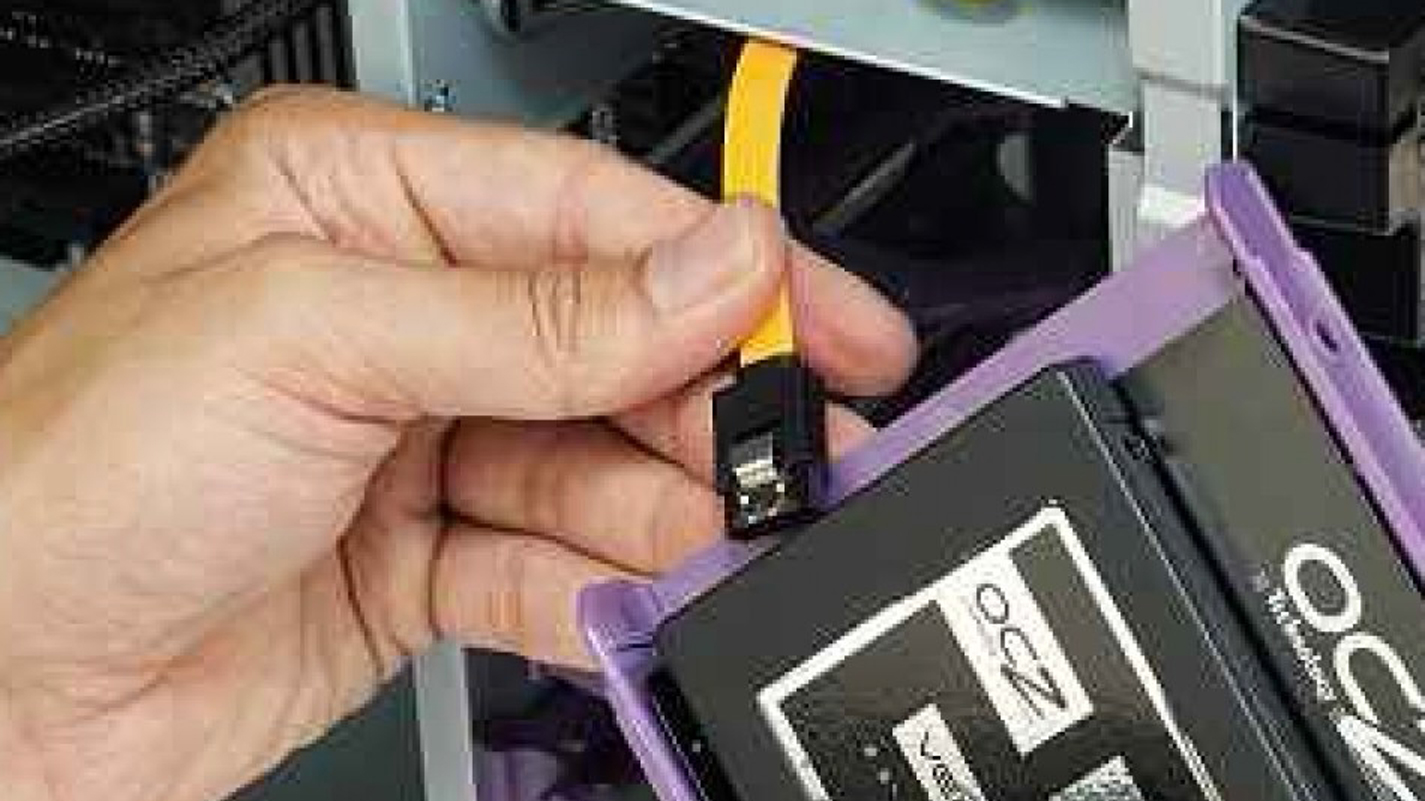
Unlike IDE, SATA uses a simple, thin connector to carry data. This cable is smaller than the SATA power cable. Motherboards usually ship with several SATA cables, so use one of them from the box when included. Insert the SATA data plug into the rear of the SSD gently. Like the motherboard’s SATA power jack, it will only plug in one way and click when it’s properly connected.
Once again, be careful when you plug the SATA cable connector into the socket, as downwards pressure can break the connector and prevent the SATA cable from plugging in.
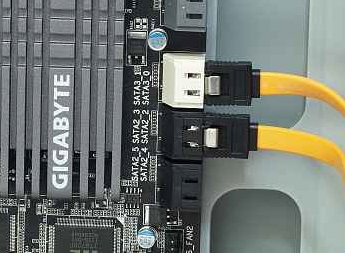
Step 4: Connect the SATA ‘Data Cable’ to the ‘Motherboard’
Find an available SATA port on your motherboard. The SATA connectors are usually located at the bottom-right of the board and should have numbers. The lower the SATA port number, the earlier that input is in the boot chain on your PC. For instance, “SATA1” or “SATA 1” usually becomes the first boot device, followed by “SATA2” or “SATA 2.”
If installing more than one drive, ensure that the “booting” drive gets plugged into the lowest-numbered port when possible. Check the motherboard’s manual to ensure that all the ports do the same thing. Some SATA ports often get reserved for Redundant Array of Independent Disks (RAID) setups.
When connecting the SATA cable to the motherboard, it will only plug in one way like on the drive. You should hear a click when the cable is connected correctly.
How to Transfer Data from the Old Drive to the New One
Whether you’re using the SSD in addition to your existing drive or made a complete swap, you’ll need to move your games and software over to the new one. Here are the options.
Method 1: Move Files from Drive to Drive in Windows
Windows makes moving files simple. Under ‘Settings’ and ‘My Computer,’ you will find a list of folders containing the files on your system.
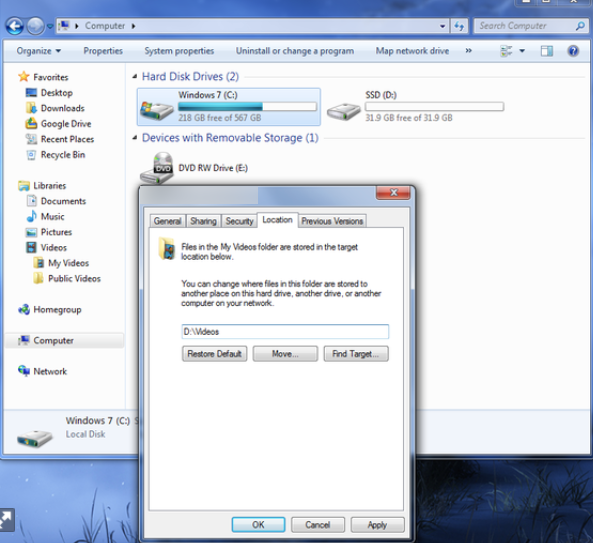
As explained above, once your SSD gets installed correctly, the new drive appears in Windows. You can access the properties of each folder and move them to the new SSD.
Method Two: Use Third-Party Software to Transfer Files
Several third-party programs offer disk cloning or disk copy functionality if you need to move your entire drive, including the Windows OS. Some SSDs come with the software already, but if not, you can search online for one that’ll help meet your specific needs.
How to Install Windows onto the SSD
One of the most valuable ways to utilize an SSD is installing your operating system on the solid-state drive. Doing so will drastically improve boot times and generally improve all other data read/write speeds.
Installing Windows onto a New Machine with an SSD
- The first step in installing Windows onto an SSD on a new machine is to ensure that the drive is large enough to hold the entire operating system. Typically, 120GB will be enough, and 250GB is plenty of space for all current operating systems.
- The next step is installing the drive, following the instructions in the previous section. If you plan on dual-booting (using both an SSD and an HDD,) it is wise to install only the SSD to avoid any mix-ups when installing your operating system.
- The next step is to insert the installation media of choice, usually a disc or a USB drive, and then power on the computer. Allow the operating system to install and update before turning the computer back off if you plan to install an HDD.
- Finally, boot your computer and press the key to enter the advanced settings boot (for most motherboards, this is an F key, such as F2 or F10.) Find the boot order screen, and ensure that the SSD with your newly installed Windows OS boots first.
Transferring Windows from an HDD to an SSD on an Existing Computer
- The first step to transferring Windows from an HDD to an SSD with an existing machine is to ensure that the drive is large enough to hold the entire operating system. Compare the HDD space to the new SSD.
- Connect the SSD to the computer.
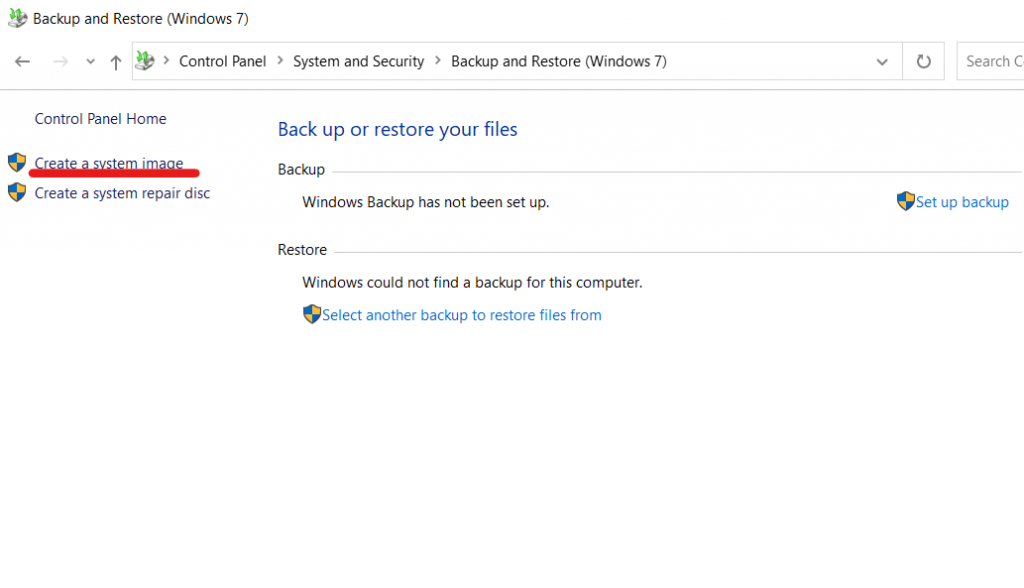
- The next step is to create a system image of your current machine. Navigate to the “Control Panel,” select “Backup and Restore,” then click on “Create a system image.”

- Then, you will select the partitions that you would like copied onto the system image. Ensure that you have chosen the Windows Drive (typically, this will be the “C” drive.) It should take 30 minutes to an hour to create the system image.
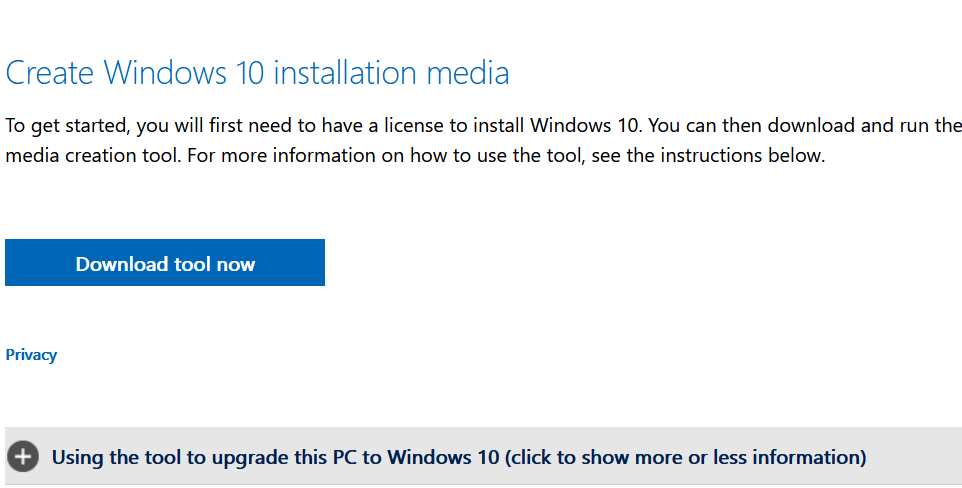
- The next step is installing a fresh Windows copy onto the SSD. This task uses the Windows Media Creation Tool (on Microsoft’s website) to create an installation media on another device. Select the SSD as the device where Windows will get installed.
- Replace your HDD with the new SSD and boot your computer. Enter the “advanced boot settings” and boot the system from the “SSD.” When setup is ready, enter the “Repair” option, select “Advanced Options,” and choose “System Image Recovery.”
- Click through the remaining setup instructions, and your computer will boot your operating system from the SSD.
As you can see, installing and setting up an SSD for your computer isn’t all that difficult. Just double-check your connections and remember to ground yourself before handling potentially sensitive electronics. Use caution when connecting any cables and determine your data restoration approach before starting the installation.
SSD Installation FAQs
Should I upgrade to an SSD?
Solid-State drives offer a lot of benefits for most users. It’s a brilliant upgrade from a faster startup to less power consumption in most devices. Some users may shy away from installing an SSD due to cost. Fortunately, the hardware has come down in price considerably.
Ultimately, installing an SSD weighs heavily on the users’ needs. Simply upgrading the hard drive does not turn any PC into a high-level gaming device. An upgraded graphics card is also needed. But, users will see a noticeable difference in their computer’s performance with an SSD.
What size SSD do I need to run Windows 11?
Windows states you’ll need at least 64GB of space on your hard drive to run Windows 11. But do keep in mind that you’ll need additional space to run apps, Windows updates, etc.
Disclaimer: Some pages on this site may include an affiliate link. This does not effect our editorial in any way.


