Drawing is a popular pastime among children of all ages. Now, with the power of modern technology, kids can take their sketches and scribblings to the next level, using AI to bring their characters and creations to life. It’s easy to do, with several platforms offering the ability to animate drawings with AI, and a fun way to help kids enjoy art even more.
The Best AI for Animating Drawings
There are multiple tools available for animating drawings with AI. They vary in price, usability, and features. Some are also simply better than others at producing lifelike and entertaining animations. So, it’s worth playing around with a few of the following platforms to find your favorites.
- Meta’s Animated Drawings
- Pika Labs
- Higgsfield
- Kling AI
- Runway ML
How to Animate Drawings With AI: A Step-by-Step Guide
Obviously, each of the above tools is different, with its own interface and workflows. So, the exact way of animating drawings with AI varies, depending on which AI platform you use. With that said, the core steps of the process are largely the same – you upload a drawing, let the AI scan it, make any necessary adjustments, and then define your animation style.
The steps below show how this all works on Animated Drawings, a free to use tool from Meta (the company behind Facebook and Instagram).
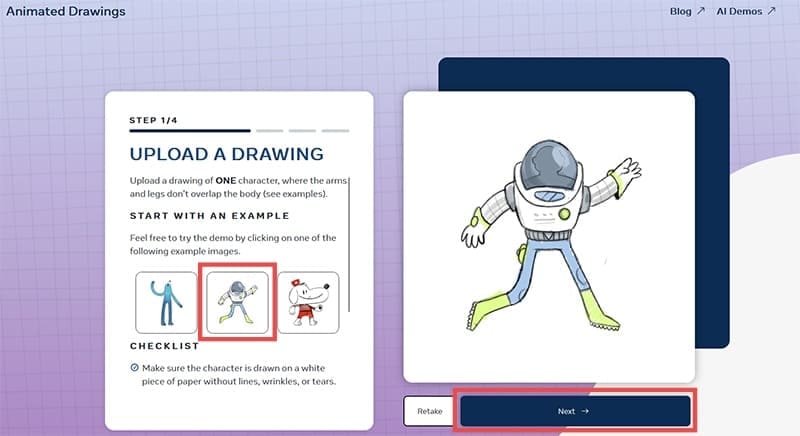
Step 1. Upload your drawing to the platform. For best results, the drawing should only include a single character with a humanoid structure and should be on a sheet of white paper, without any lines or wrinkles. The character’s arms and legs should also be clearly defined, without any overlaps.
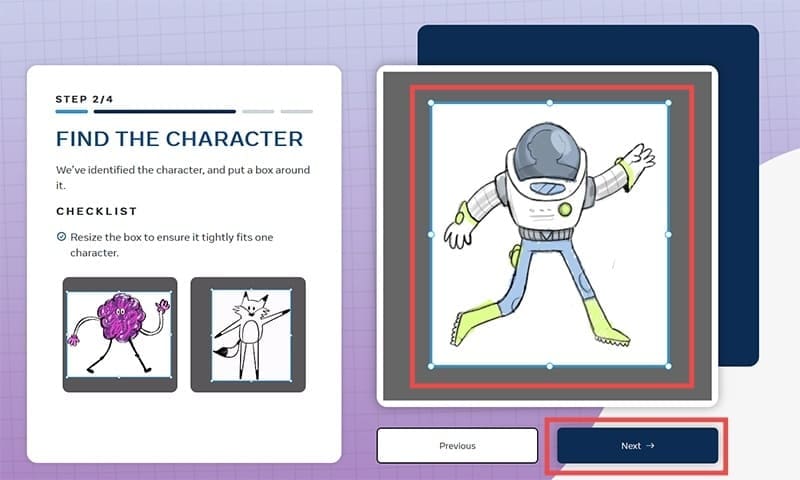
Step 2. Press the “Next” button and let the AI scan your picture. It should automatically place a box around your character, which you can resize or adjust if needed. Once the character is entirely within the box, click “Next” again.
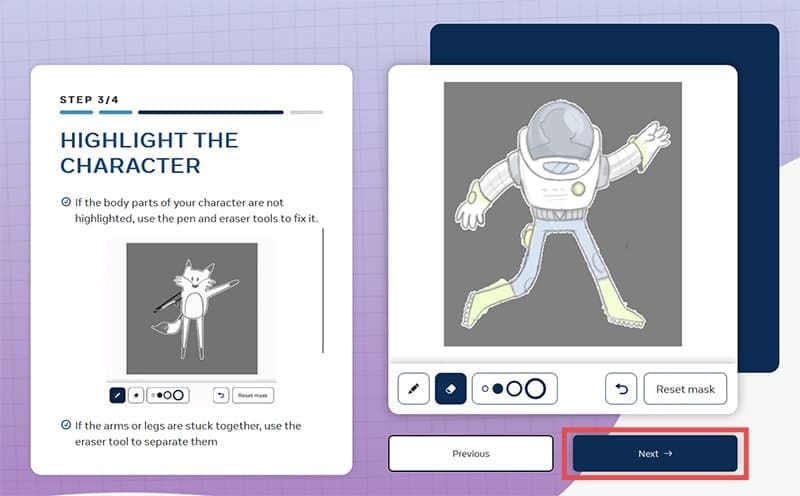
Step 3. The AI will again scan your character and separate it from the background. If it misses anything or gets any parts wrong, you can use the brush and eraser tools provided to make any necessary changes before hitting “Next” again.
Step 4. The AI will identify and mark your character’s joints. Again, if it makes any mistakes, you can manually fix them by clicking and dragging the joint points around.

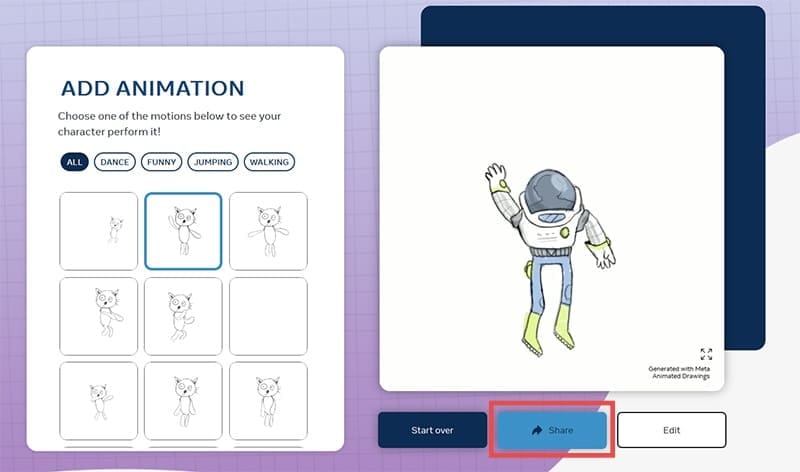
Step 5. Finally, you can choose whichever style of animation you want from the range provided, including waving, jumping around, and so on. You can click the “Share” button to share your animation online or download it to your device.
Related Posts
 How to Trace Family History on Google Earth Pro
 Four AI Tools to Transcribe WhatsApp Audio to Text
 Reasons Why Watchdog.chat Can Replace Your Discord Moderator
 Four Ways xAI Could Change the Way You Use AI
 MemeGen – How to Use This AI App to Create Memes in Discord
 How to Use KaptionAI to Transcribe WhatsApp Chats
 How to Learn Foreign Languages With AI
 How Do I Create a Template in ManyChat
 What All You Can Do With Google’s Nano Banana
Disclaimer: Some pages on this site may include an affiliate link. This does not effect our editorial in any way.