There are a couple of methods to round corners in Illustrator. It’s always good to pick the one that works best for you, as learning how to make the fine adjustments means fewer creative restrictions.
If you want to learn how to round corners in Illustrator, this article has got you covered. Read on for some great tips and tricks you can use on the platform.
Use Live Widgets to Round Corners
To get started, there are some panels you should know about. These are the transform panel, properties panel, and control bar. All of which can be accessed through the Window menu.
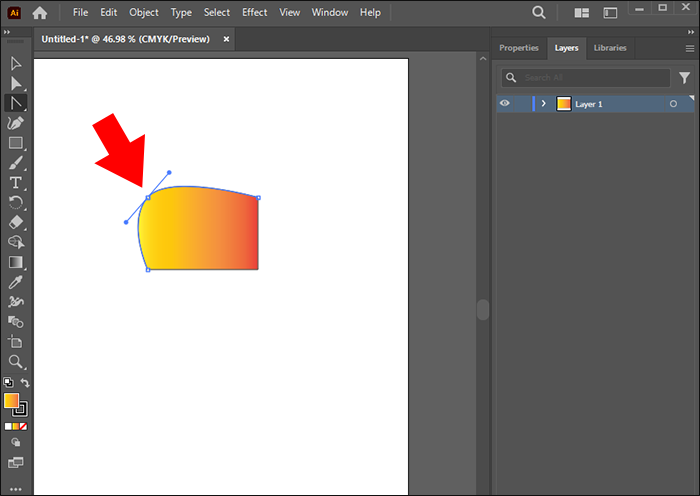
Assume you have an object that needs to be transformed to have rounded edges. Take a star, for example.
- Use the “Direct Selection tool” and pick the shape of your choice to access the “Live Corners Widget.”
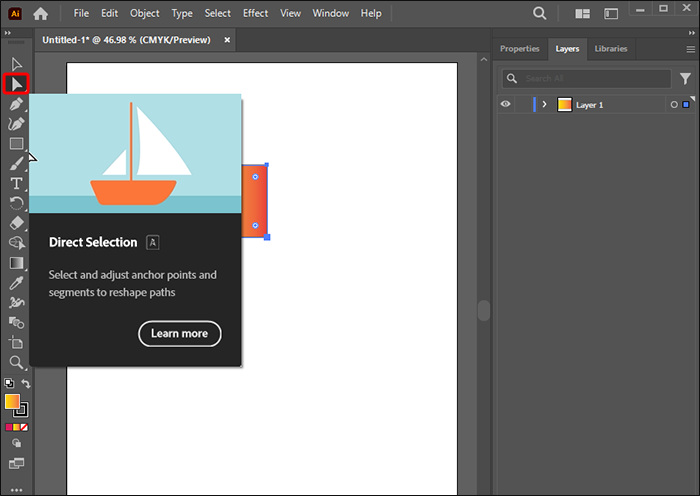
- These are the circular borders within the external and internal shape corners. Note that the widget has been in use on Illustrator CC for almost 10 years now.
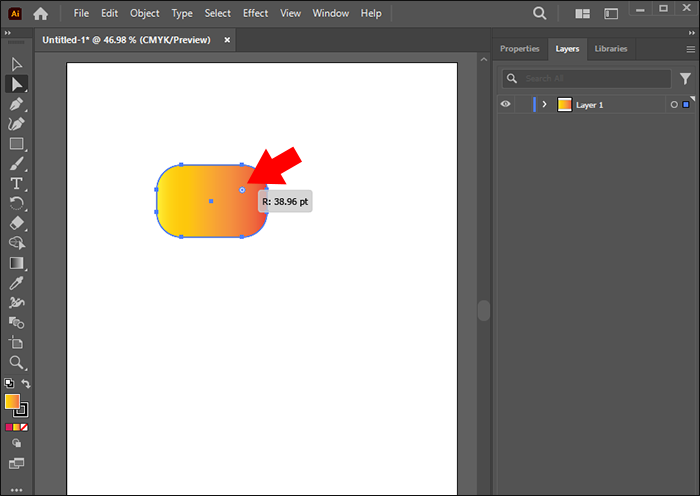
- Drag the nodes outwards or inwards, depending on whether you want to decrease or increase the curve.

- Drag the nodes as far as you want, but if the maximum curve is reached, the curvature turns red.
Once this is done, the star will have rounded edges.
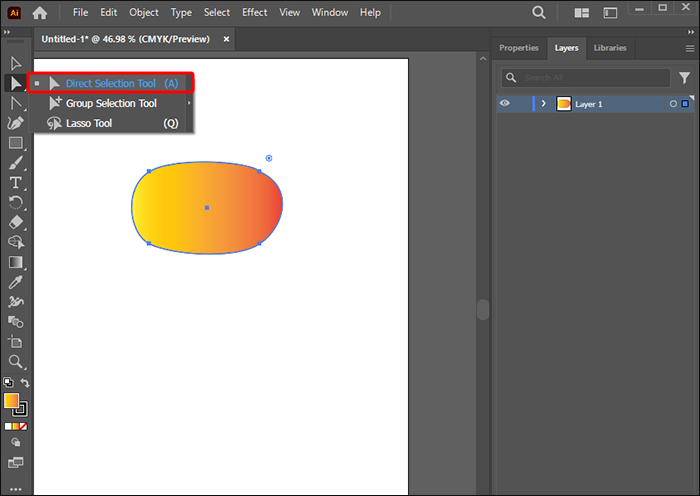
Utilize the Direct Selection Tool to Round a Single Corner
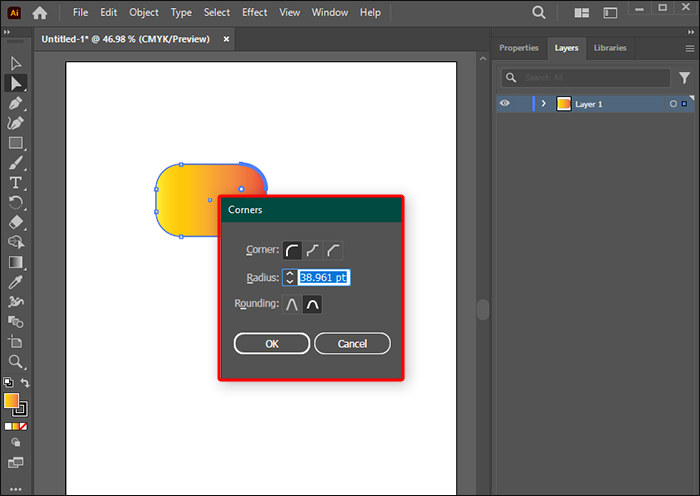
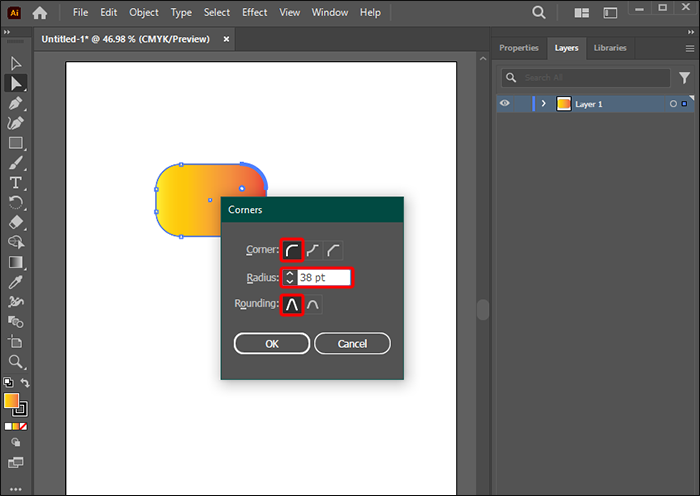
This option is good if you only need a rounded corner. For this, you need a “Direct Selection Tool.”
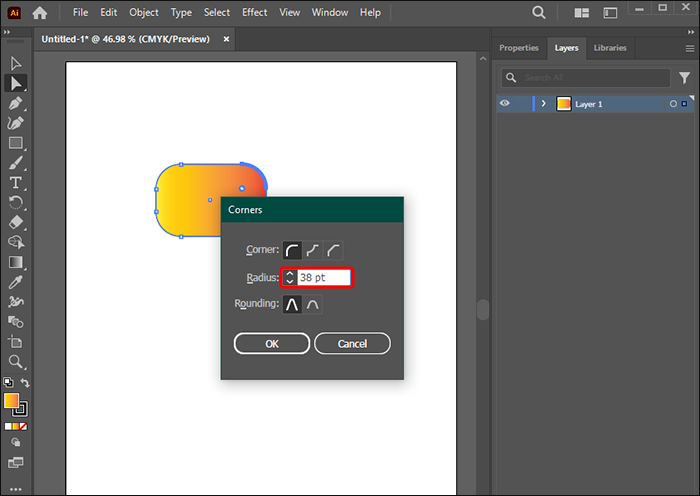
- Double-click one of the “Live Corners” widgets using the “Direct Selection Tool.” This opens a dialogue box that helps you edit the anchor point options.
- Choose the “Corner: Round” option and pick the “Rounding” style and “Radius” size.
Set the Corner Radius for Multiple or Single Anchor Points
It’s possible to round multiple corners in Illustrator. If there are two separate paths:
- Choose the “Direct Selection” tool and hold the “Shift” key to pick multiple nodes you want to round.
- Go to the “Corners” link in the “Control” bar and set the pt value of “Corner Radius” manually.
- Alternatively, click the “Live Corner” widgets and drag to achieve the desired roundness.
Note that you can use these methods to create rounded edges on multiple corners in Illustrator.
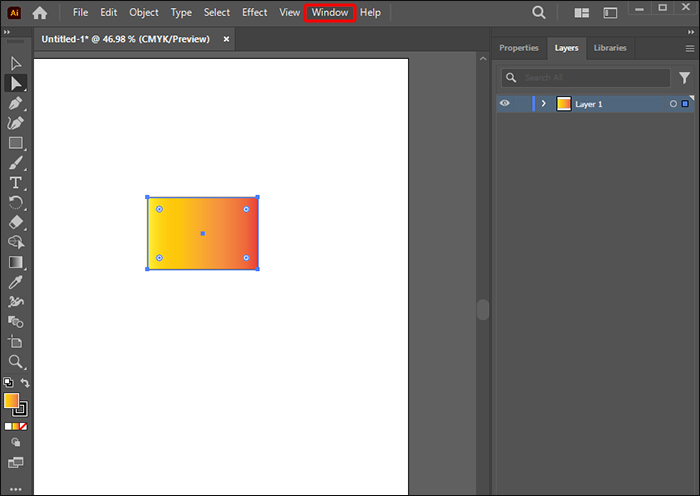
Use the Transform Panel to Edit the Radius
This is another technique worth learning if you want to round those edges in Illustrator.
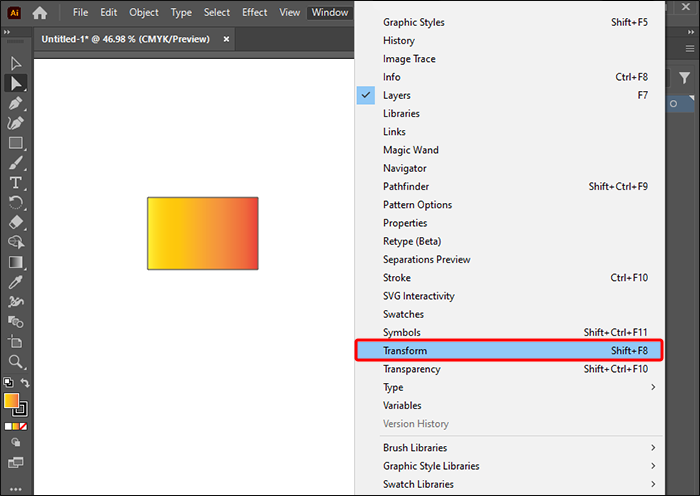
- Go to the “Transform” panel by selecting the “Window menu,”
- Select “Transform.” Here, manually set the radius of the corners by setting the values you want.
What to Do if There Is a Problem Rounding an Object or Path
There are instances where you may have an issue rounding a corner because the “Live Corner” doesn’t show. This is what you should do if that’s the case:
- Check the Illustrator version and ensure it isn’t earlier than the CC/17.1 version. The Live corners started with this version meaning earlier models don’t have the feature.
- Check and ensure the View>Show Cornet Widgets option is on.
- Confirm that the anchor point is indeed a corner. Use the “Direct Selection Tool” and go to the “Convert” section within the “Control” bar. Choose the “Convert selected anchor points to corner” icon.
- If it’s still not possible to round the corners, it could be that the object is too small. This can be resolved by scaling the particular object until the widgets become visible. Using this method may disrupt the object’s original size. However, it can be scaled back once the corner modifications are done successfully.
Other Methods Worth Mentioning
Other techniques can be used to round corners in Adobe Illustrator. This can work on edges and corners and shapes and paths. The Illustrator basic tools can be used in this case.
Utilize the Anchor Point Tool
There are instances when a shape or path is selected, displaying both smooth and sharp edges. On some corners, the “Live Corners” option may be missing. The sharp edges only show angles but no handles, and the smooth ones have anchor points with the handles.
If the smooth cornets are to be edited, they have to be converted to sharp anchor points.
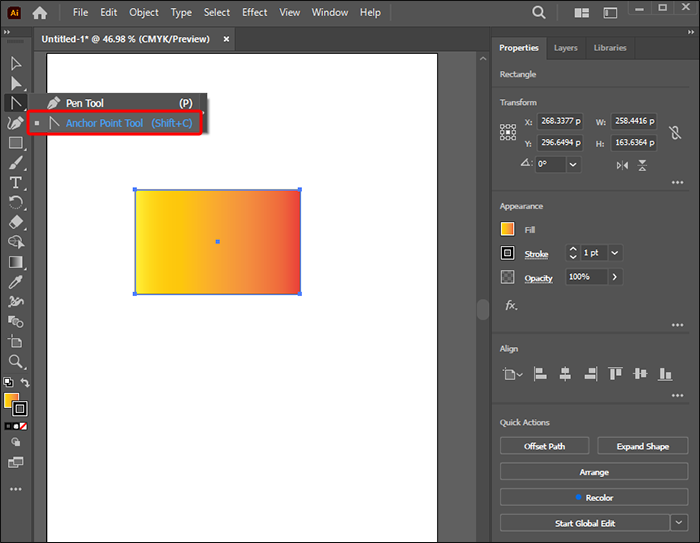
- Choose the “Shift-C” or the “Anchor Point Tool.”
- To convert edges, click an anchor point, drag it, and release. This drags the handles out.
- To convert smooth corners, select the anchor point and remove the handles. Adjust the curve using “Direct Selection” tool.
Use the Stylize Effect
The next thing to learn is to create rounded rectangles or any other shape that needs rounded edges in Illustrator.
- Select the shape you want to smoothen out.
- Select “Effect,” “Stylize,” and then Round Corners. This uniformly applies dynamic effect to the object appearance.
- Set the “Round Corners: Radius” value to define the rounded curve curvature.


Apply Round Corners to Images in Illustrator
In this method, you can round the edges of any photo image.
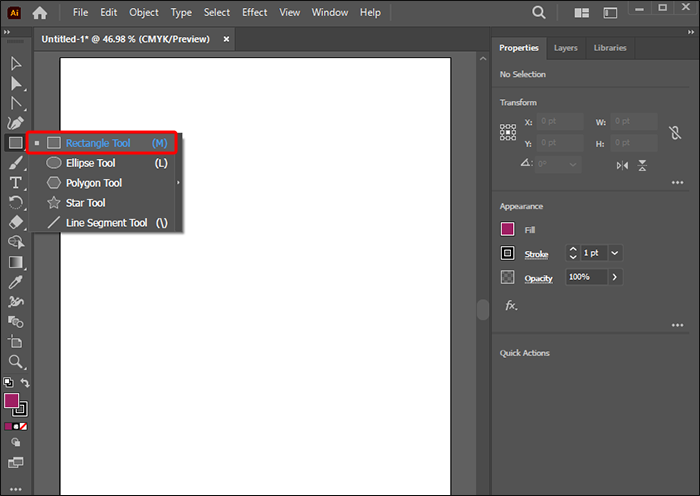
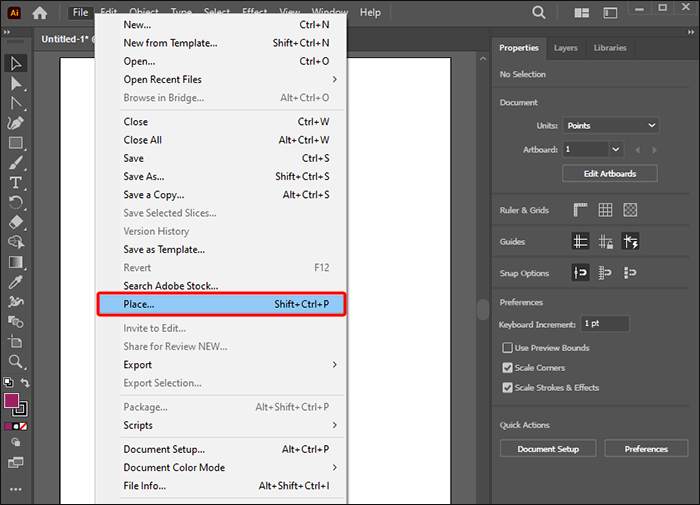
- Import an image to the artboard by selecting “File” followed by “Place.”
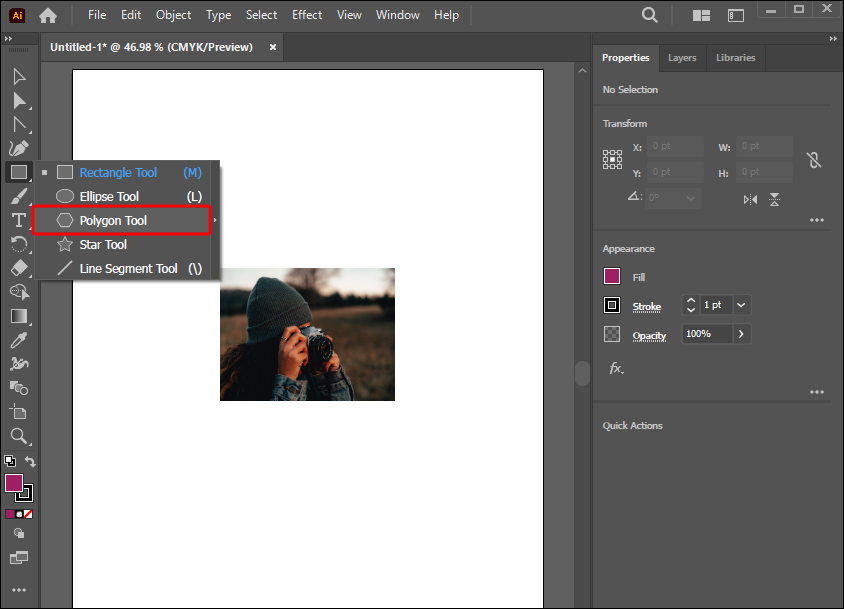
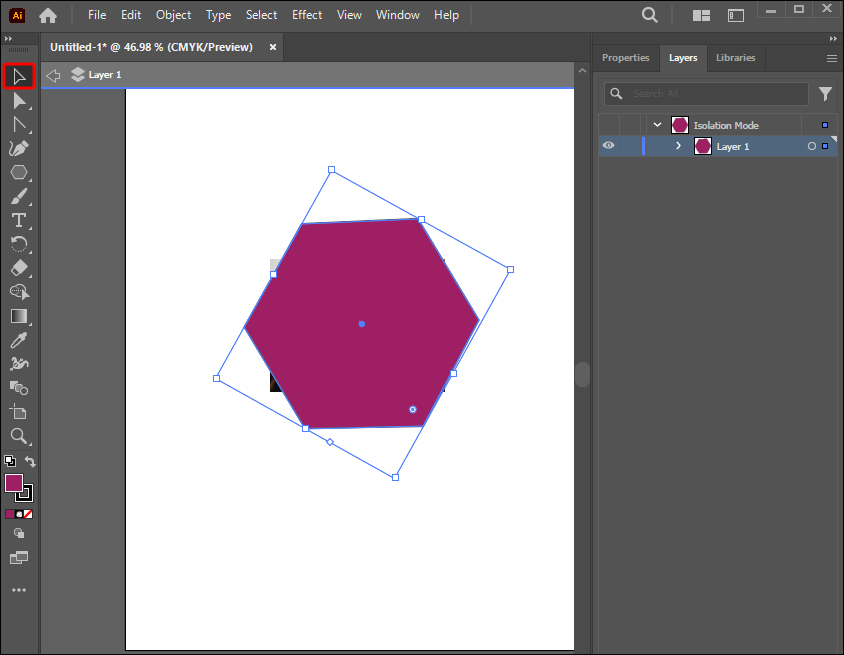
- Select the “Polygon Tool” under the “Rectangle Tool” within the Tools menu. Draw a hexagon over the selected image.
- Choose the photo and the hexagon using the “Selection tool.”
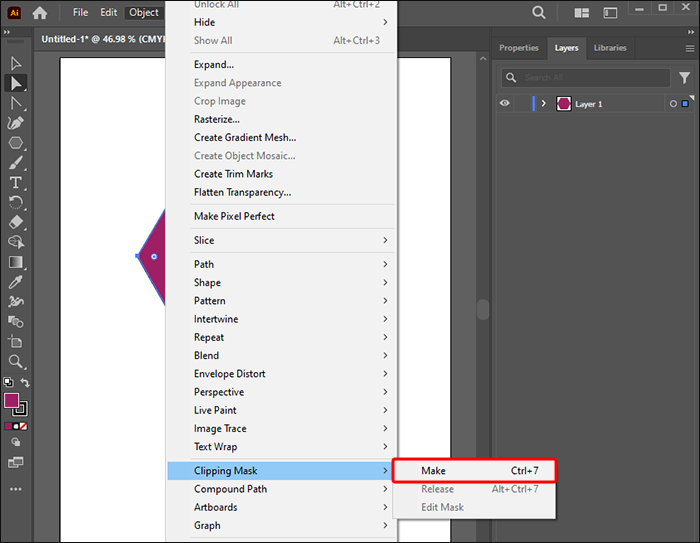
- Select “Object,” Clipping mask,” and then “Make” (Command-7). This way, you have a clipping set masking the photo.
- Select the “Direct Selection Tool” and hold “Shift.”
- Choose several “Live Corners” nodes from the bottom and top of the hexagon.

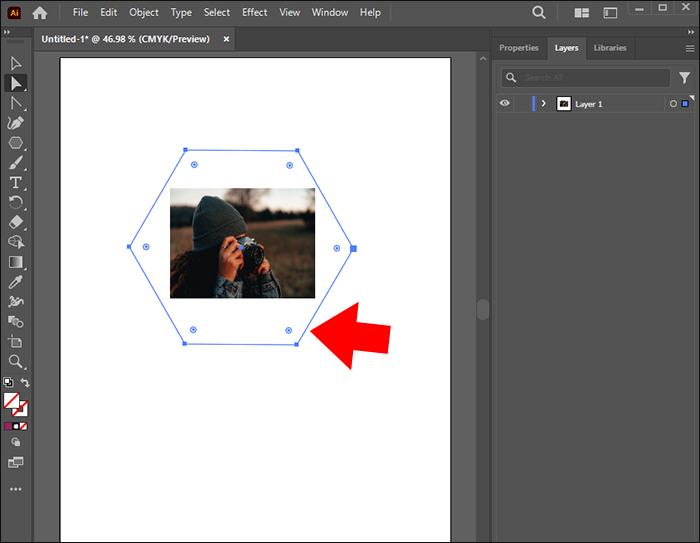
Note: As you round corners, be aware that the corners are only rounded at the selected anchor point. To make a perfect circle, ensure that that anchor point is at the exact center of the object.
Get Creative by Rounding Corners on Illustrator
Crafting designs that need granular alterations requires simple edits to the structure design, such as rounding corners. There are several methods to achieve this in Illustrator. And with this skill in our armory, you can get more productive using Adobe Illustrator.
Have you tried rounding objects in Illustrator? Which method do you prefer? Let us know in the comments section below.
Disclaimer: Some pages on this site may include an affiliate link. This does not effect our editorial in any way.


