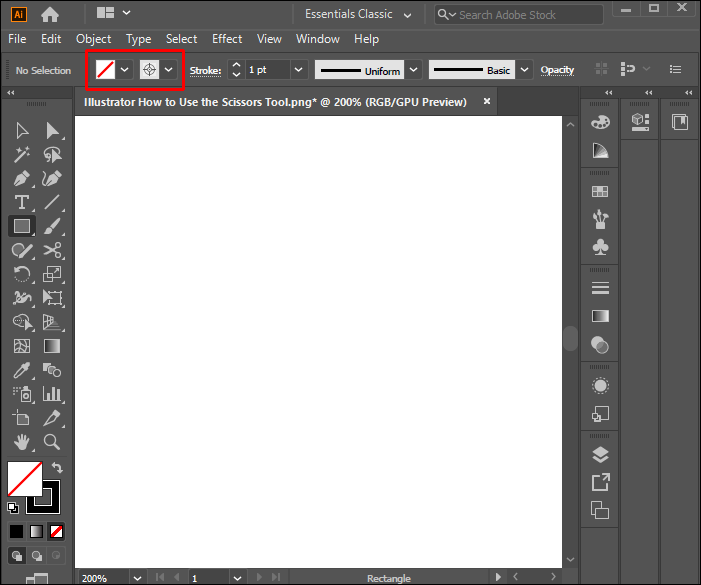
Illustrator is the go-to software for graphic designers, illustrators, and anyone who creates any type of visual content like books, brochures, magazines, infographics, and more. Artists who rely on this program can achieve just about any type of design imaginable.
But those who are just getting started may have difficulty tracking down some basic features, and for a good reason. Illustrator has a rather sharp learning curve, and it takes time to navigate through all it has to offer.
In particular, the Scissors tool is one of the features that seems hard to use at first but is actually a piece of cake to operate. If you’re confused about how to make the most of this feature, we’ve got you covered. You’ll find detailed step-by-step instructions below.
What Is the Scissors Tool in Illustrator?
The Scissors tool is a useful feature that allows graphic designers to split elements or paths on their canvas at a specific anchor point or along a segment.
When you cut a piece of paper using real-world scissors, you start from one point and end at another. These are called your starting and ending point. But instead of cutting the paper all the way with real scissors, Illustrator only requires you to define the two points that you wish to cut.
Whether you want to delete a path, split a shape to half, open a closed path, or split any object and shape, this tool can be of help.
Using the Scissors Tool in Illustrator
The Scissors tool can be accessed in two ways:
- Using the shortcut
- Using the left-hand side palette
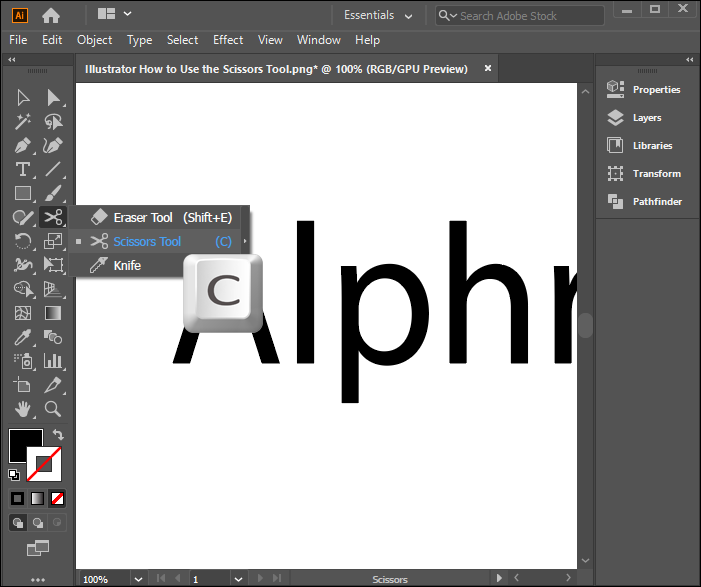
The shortcut for the Scissors tool in Illustrator is the “C” key. You can either press the “C” button on your keyboard or follow the steps below for activation:
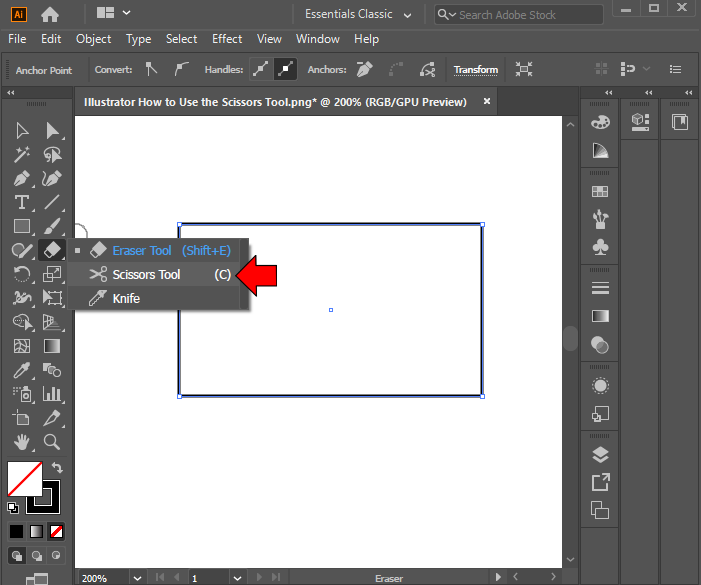
- Tap and hold the Eraser tool located towards the middle of the tool palette on your left-hand side.
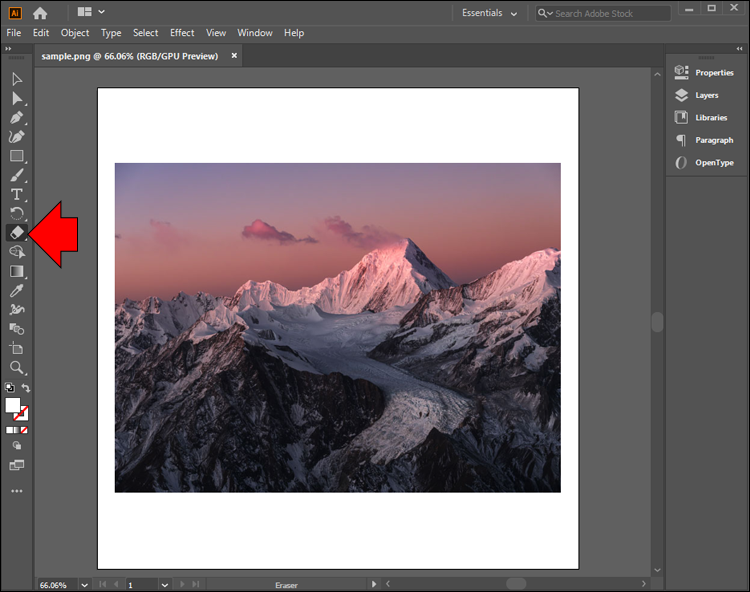
- Press the Scissor tool located inside the Eraser tool.


Cut Simple Objects With the Scissors Tool in Illustrator
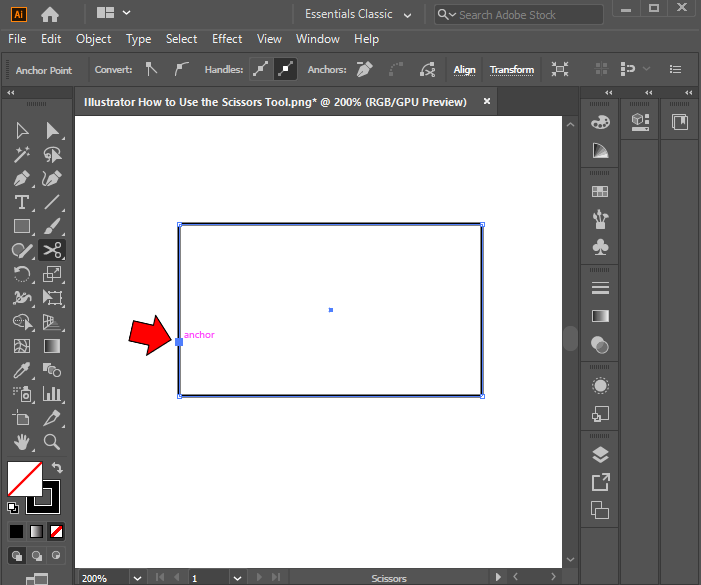
Cutting objects in Illustrator is fairly simple. Of course, the action gets more complicated the more complex the object. But once you’ve activated the Scissors tool in Illustrator using the steps above, the next step is to select the path you want to split.
- Click on the path point you wish to split on the object.
- Select the anchor point(s) or path(s) that appeared after splitting to tweak the object.


That’s it! Using the Scissors tool in Illustrator for cutting objects is a breeze.
The Example
Now let’s illustrate the instructions above with a basic example.
Imagine drawing a circle on your Illustrator canvas. When you use the Scissors tool to cut the circle, it will create two endpoints.
You can use the Direct Selection tool from the left-hand side menu (or the “A” shortcut key) to move points independently or lead a path to the next anchor point.
You can also join the cut path (half of the circle, for example) using the “Command” + “J” shortcut. For simple objects like a circle, the remaining surface will automatically be filled with color. For complex objects, this obviously won’t be the case.
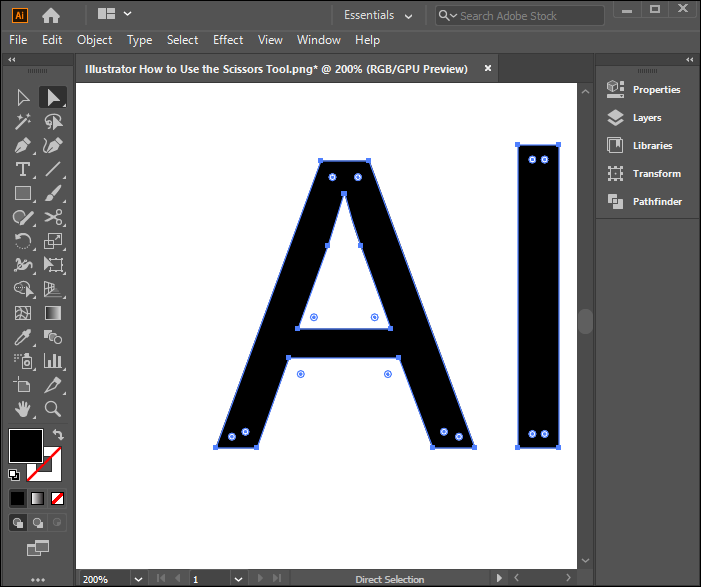
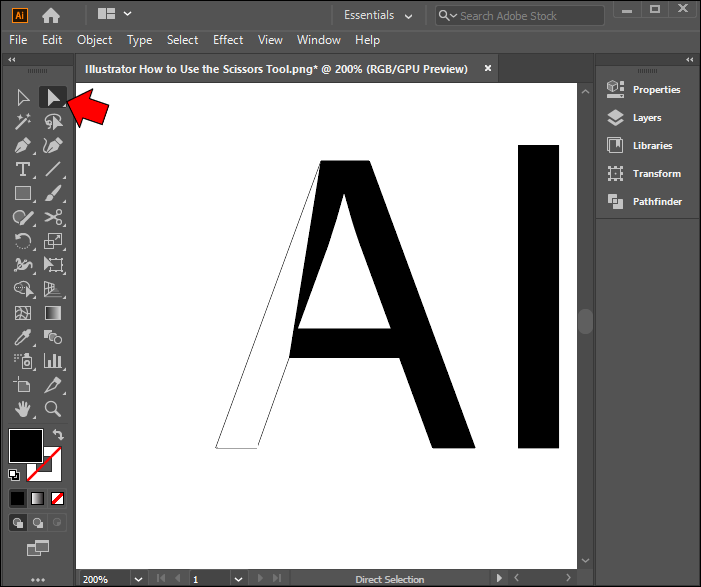
Cutting Text With the Scissors Tool in Illustrator
The Scissors tool in Illustrator only functions for anchor points and paths. If you try to apply it on live text, you’ll find that it doesn’t work. To make this possible, you need to outline the test beforehand. But this is by no means a complicated task to complete. In fact, cutting text using the Scissors tool in Illustrator isn’t much different from cutting objects.
There are a few steps you need to follow:
- Make sure the text on your canvas is outlined. You can do this by using the “Command” + “Shift” + “O” shortcut. Alternatively, you can go to “Type,” then “Create Outlines.” The text will now become anchor points that you’ll be able to use and edit.
- Activate the Scissors tool by hitting the “C” shortcut or opening it from the side palette window.
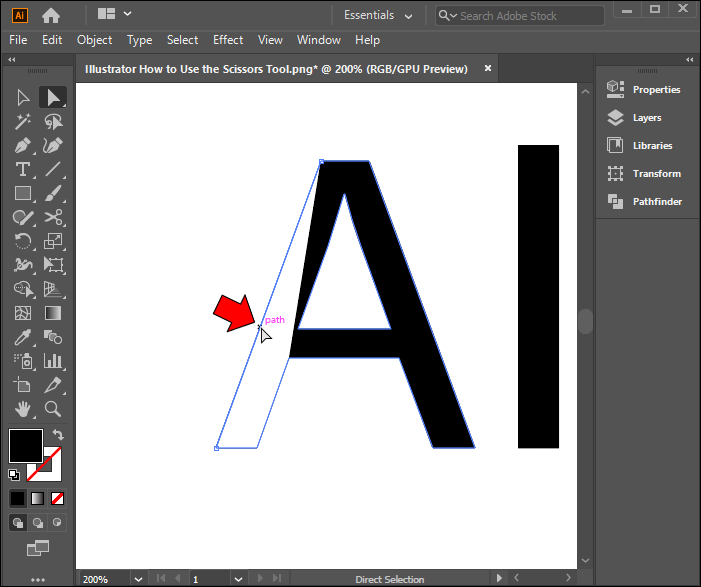
- Select a point on the text you wish to cut. Remember that you can now click on any point of the text since it’s outlined and has anchor points. Zoom in if you don’t see the anchor points properly.
- Draw a line to the next segment to determine the element that will get cut from the text. You have to make more than a single anchor point for the text to cut. To split the letter completely, add four anchor points.
- Play around with the tool until you get all the elements cut from the text.


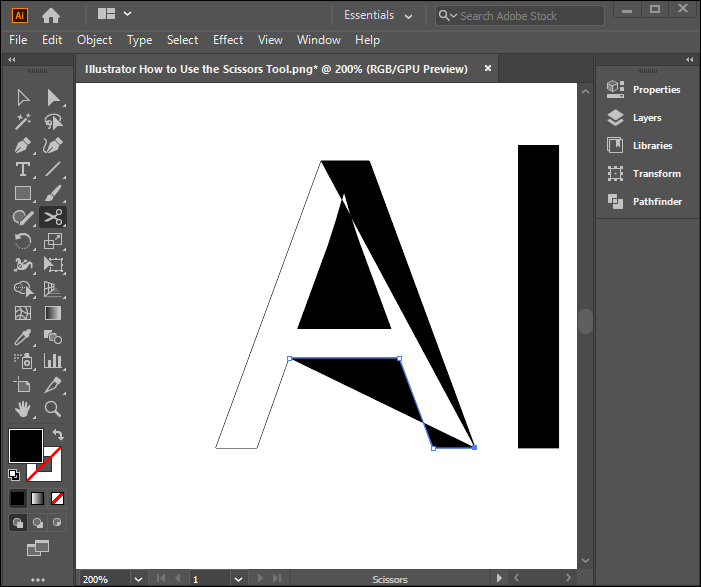
Note that if you tap the fill section of the letter, nothing happens. You must hit the anchor points or path in order to cut the text.
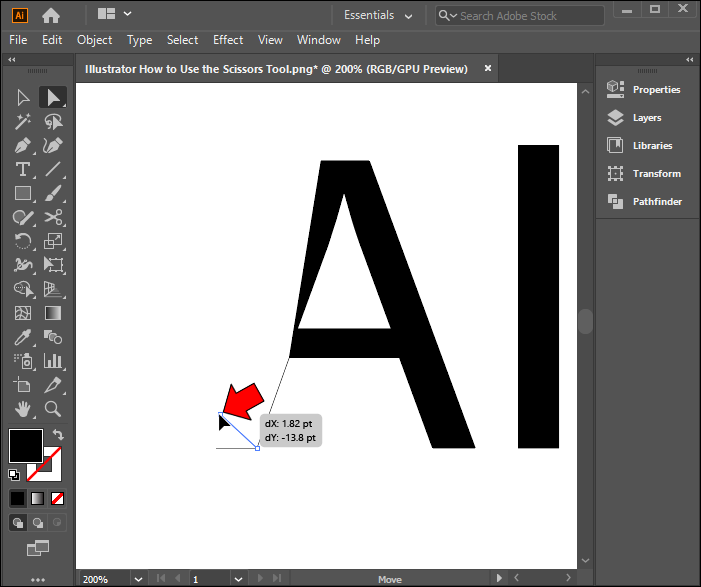
After cutting a letter, you’re likely to see a line between the four anchor points. You can use the “Direct Selection Tool” to remove it:
- Press “Direct Selection Tool” on your toolbar.
- Click on the line you wish to remove.
- Press the “Delete” key on your keyboard to remove it.
- Alternately, move your anchor points around to create the desired effect.

That’s it!
If you use the outline view (“Command” + “Y”), you can now see that the end points you cut from the text aren’t connected, but are actually open paths.
Exercise – Cut a Rectangle in Illustrator
Now that you’ve mastered how to use the Scissors tool in Illustrator, here’s a simple exercise you can try to test your skills. If you’ve never used the Scissors tool before, you want to start from simple objects like circles or rectangles and move to more complex designs later on.
In the exercise below, we’ll be cutting a rectangle.
- Open the Illustrator app on your device.
- Draw a rectangle on the canvas. You can use the rectangle tool for this.
- Make the “Fill” set to “None,” while the “Stroke” should be colored. You can use the color cubes towards the bottom of the toolbar for this.
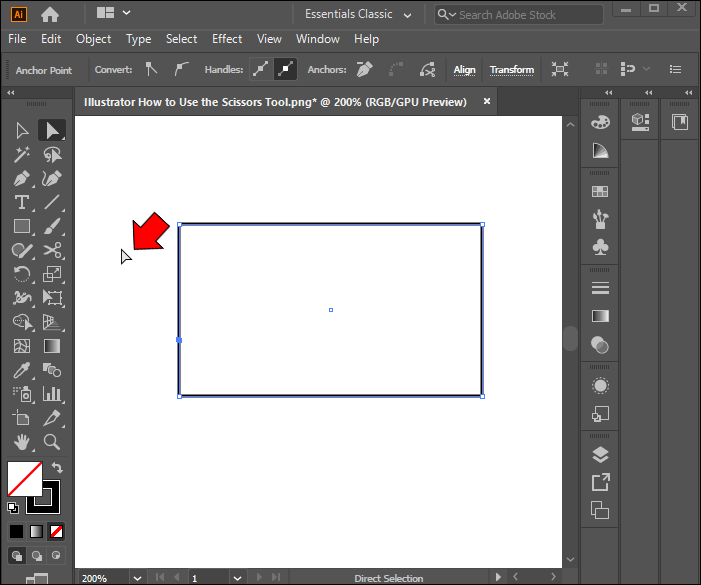
- Select the Scissors tool from the toolbar. Make sure to select the rectangle while doing so. In some Illustrator versions, the Scissors tool will be located inside the Eraser or Knife tool, so check those sections as well.
- Hit one rectangle point with the Scissors tool. You have now cut a path, and your rectangle doesn’t have a closed shape anymore.
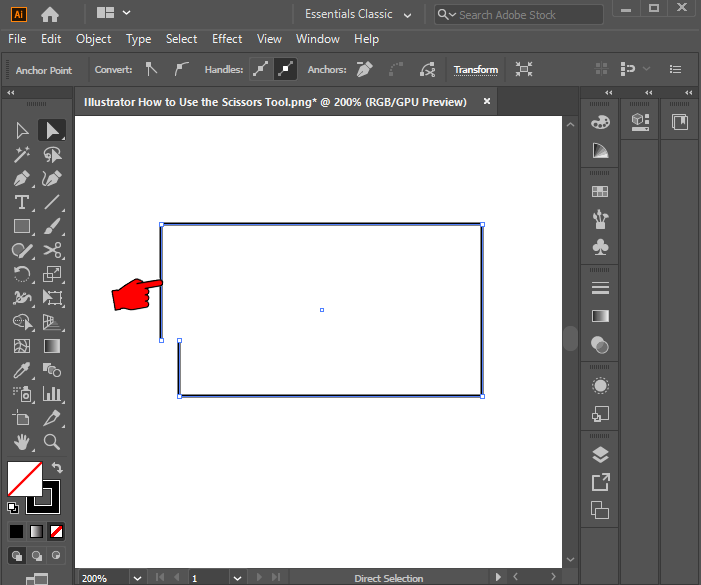
- Next, click on the White arrow tool.
- Select a blank area on the canvas just so you can deselect the rectangle.
- Hit the line segment near the cut and drag the line away.

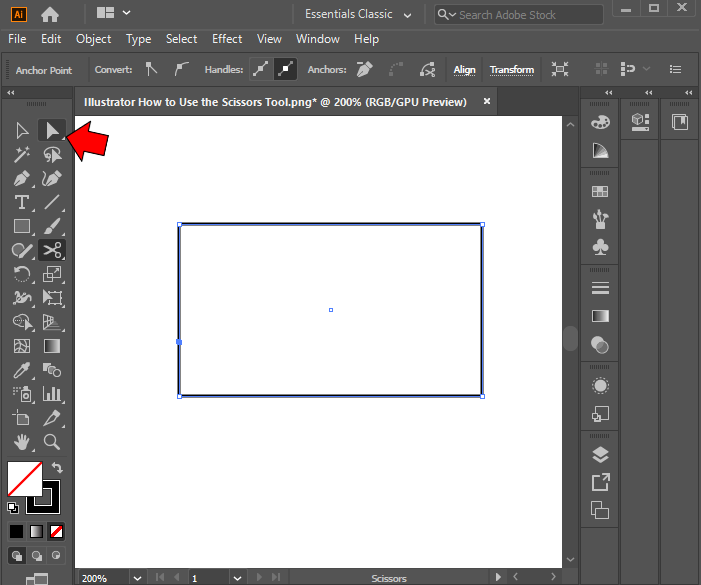
At this point, you’ll be able to see the path that you cut. You can now expand what you learned to cut other objects in Illustrator.
FAQ
How do I activate the scissors tool in Illustrator?
You can easily activate the Scissors tool in Illustrator by clicking on the Scissors icon located around the middle of your tool palette on the left-hand side of the screen. Alternatively, you can use the “C” shortcut to open the Scissors tool.
Why doesn’t Illustrator allow me to select the path I cut?
This can happen in the program when you cut an outlined text with the Scissors tools, then select that text using the Selection tool. Selecting a letter with this tool will select the whole letter, not its separated path. The solution here is to select the path with the Direction Selection Tool instead.
Mastering the Scissors Tool in the Illustrator
The Scissors tool may seem like a complicated feature at first. But this is only true until you get to practice cutting your own paths on simple objects. As you get used to the movement, you’ll find it easier to cut through more complex shapes, text, and other elements of your design.
Remember that you can always access the Scissors tool from the left-hand side tool palette or use the “C” shortcut on your keyboard. And make sure you set your canvas to “outlined” if you wish to cut the text.
Did the exercise in this article help you better understand how the Scissors tool works? Which complex objects are you going to cut next? Let us know in the comments section below.
Disclaimer: Some pages on this site may include an affiliate link. This does not effect our editorial in any way.


